All-On-4 Dental Implants Step By Step
If you have been living with loose dentures, failing teeth, or advanced bone loss, you have probably searched for a solution that feels natural again. You want to smile, eat, and laugh without thinking about your teeth. That is where the All-On-4 concept changes everything.
But let us be honest. The idea of implants can feel intimidating. Will it hurt? How long does it take? What happens if something goes wrong?
This guide walks you through the All-On-4 dental implants step by step. No fluff. No false promises. Just a clear, honest, and friendly roadmap from the first consultation to your final smile.
By the end, you will know exactly what to expect, how to prepare, and how to make the best decision for your health.
What Exactly Is All-On-4? A Simple Explanation
All-On-4 is not magic. It is smart engineering.
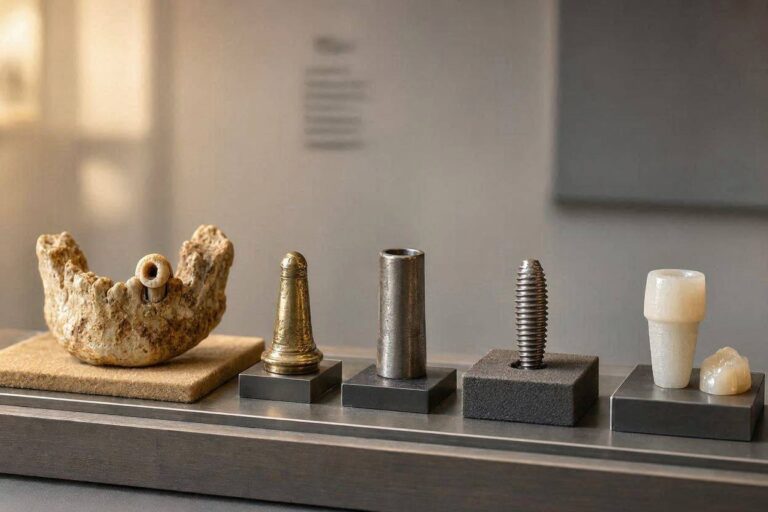
Instead of placing one implant per missing tooth, a dentist places only four titanium posts in your jawbone. Those four implants support an entire arch of new teeth — either upper, lower, or both.
The name says it all:
- All teeth on
- Four implants
The secret lies in the angles. The two back implants are tilted (usually 30 to 45 degrees). That tilt avoids important nerves and sinuses. It also makes use of the densest bone available, even if your jaw has shrunk over time.
Important note: All-On-4 is designed for people who are missing most or all of their teeth in one arch. It is not for single-tooth replacement.
Who Is A Realistic Candidate For All-On-4?
Not everyone qualifies. And that is okay.
You are likely a good candidate if you:
- Have significant tooth loss or failing teeth
- Wear dentures that slip or hurt
- Have been told you lack bone for traditional implants
- Do not smoke heavily (smoking affects healing)
- Are healthy enough for a minor surgical procedure
What about bone loss?
Traditional implants require a certain bone height. All-On-4 works with less bone because the tilted back implants anchor in the stronger front part of your jaw.
In many cases, bone grafting is not necessary. That is one reason the procedure is faster and more affordable than traditional full-mouth implants.
Less ideal candidates include:
- Uncontrolled diabetes
- Active gum disease (must be treated first)
- Heavy smokers who cannot quit temporarily
- People who grind their teeth severely without a solution
Your dentist will perform a full evaluation before saying yes.
Before The Procedure: What To Expect At Your Consultation
Your step-by-step journey begins long before surgery day.
Step 1: Initial conversation
You talk about your complaints. Pain? Loose teeth? Denture sores? The dentist listens.
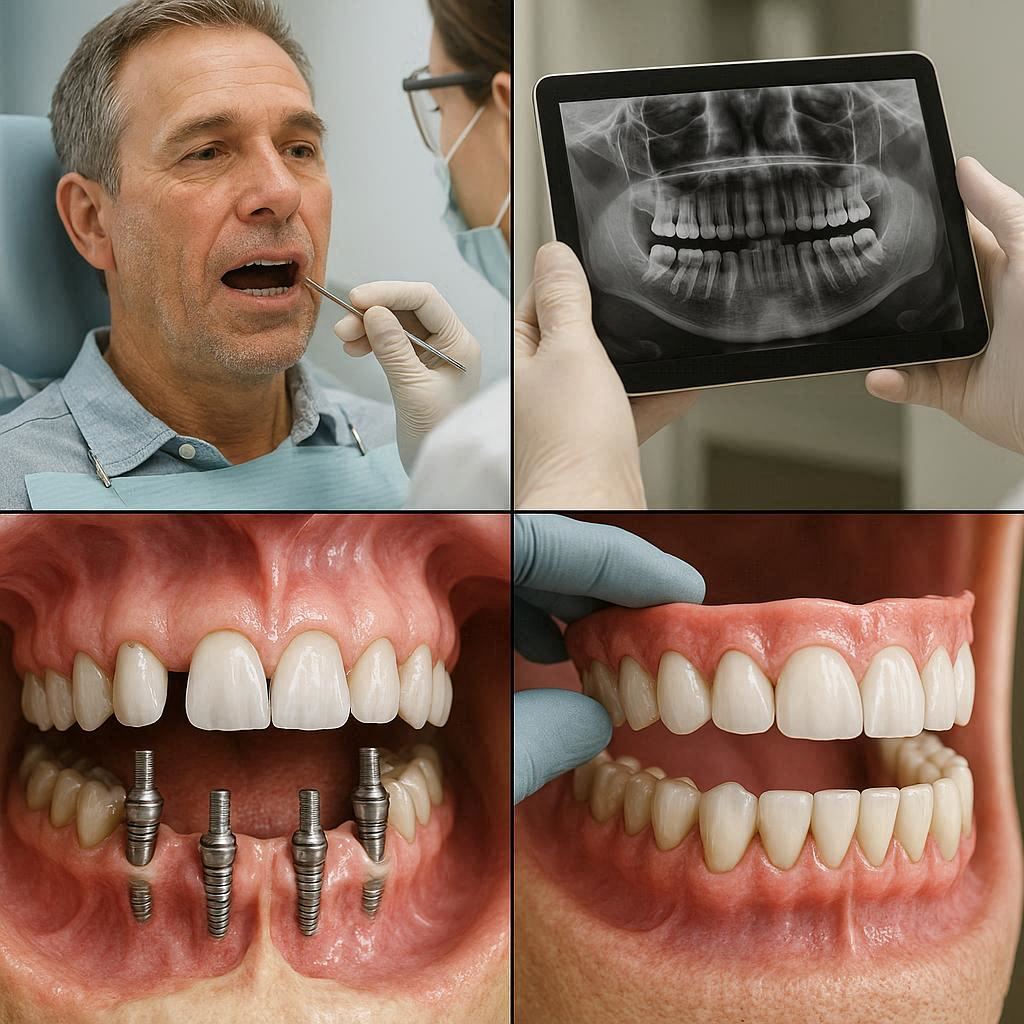
Step 2: 3D imaging (CBCT scan)
This is critical. A Cone Beam CT scan creates a 3D map of your jaw, nerves, sinuses, and bone density. No guessing.
Step 3: Treatment planning
Using special software, the dentist plans exactly where each implant goes. They also design your temporary teeth in advance.
Step 4: Discussing costs and timing
You receive a written treatment plan. It includes:
- Number of appointments
- Type of final teeth (acrylic, zirconia, or hybrid)
- Total estimated cost
- Warranty information
Step 5: Pre-surgical preparation
- Blood work if needed
- Antibiotic prescription (usually taken one hour before surgery)
- Arranging a driver for surgery day
Reader tip: Ask your dentist to show you before-and-after photos of their own All-On-4 patients. Not stock photos. Real cases.
The Complete All-On-4 Dental Implants Step By Step Surgical Process
Let us walk through surgery day. Most patients describe it as much easier than they feared.
Step 1: Anesthesia and sedation
You are not fully unconscious unless you choose general anesthesia. Most people receive:
- Local numbing (like at a filling, but stronger)
- IV sedation (you are awake but relaxed and remember very little)
You feel pressure but not pain.
Step 2: Removing remaining teeth (if any)
If you still have failing teeth, the dentist extracts them. This is quick. The area is already numb.
Step 3: Placing the four implants
The dentist follows the digital plan precisely.
- Two front implants go straight down
- Two back implants tilt backward at an angle
Each implant is screwed into the bone. The whole process takes about 2 to 3 hours per arch.
Step 4: Attaching the temporary bridge
This is the moment you first have teeth again.
The dentist attaches a temporary acrylic bridge to the four implants. It is fixed. You cannot remove it yourself.
The temporary teeth:
- Look natural but not perfect
- Allow you to eat soft foods immediately
- Protect the healing implants
- Help train your jaw muscles
Step 5: Closing and post-op instructions
You leave with:
- A list of medications (antibiotics, pain relievers, mouth rinse)
- Ice packs for swelling
- A soft food diet guide
- A follow-up appointment in 24 to 48 hours
The Healing Phase: What Happens Between Surgery And Final Teeth
This is where patience matters.
The implants need time to fuse with your jawbone. That process is called osseointegration. It takes 4 to 6 months.
Week 1 after surgery
- Swelling peaks around day 2 or 3
- Stick to cold soft foods: smoothies, yogurt, pudding, cold soup
- No spitting, no straws, no smoking
- Sleep with your head elevated
Weeks 2 to 6
- Swelling goes down
- You return to work and normal activities
- You eat mashed potatoes, scrambled eggs, pasta, soft fish
- You clean around the implants with special brushes
Months 2 to 4
- The implants are integrating quietly
- Your temporary teeth may feel slightly loose (do not panic — your dentist checks them)
- You avoid hard, crunchy, or sticky foods
Month 5 to 6
- Final impressions taken
- Your permanent teeth are fabricated
- You discuss shape, color, and material
Important: If you feel pain, see bleeding, or notice an implant feels very mobile, call your dentist immediately. That is rare, but real complications can happen.
Getting Your Permanent Teeth: The Final Step
After 6 months, you return for the last phase.
Step 1: Remove temporary bridge
The dentist unscrews your temporary teeth. It is painless and takes minutes.
Step 2: Take final impressions
Precise digital or physical impressions ensure your final teeth fit perfectly.
Step 3: Try-in appointment
You see and feel a wax or plastic model of your new teeth. You can request changes to:
- Tooth shape (rounder or squarer)
- Shade (natural white or brighter)
- Gum color (if using a hybrid denture)
Step 4: Fabrication (2 to 4 weeks)
Your permanent bridge is made in a dental lab. Common materials:
| Material | Pros | Cons |
|---|---|---|
| Acrylic with reinforcement | Affordable, easy to repair | Less durable, may stain |
| Zirconia | Extremely strong, natural look | More expensive, harder to adjust |
| Hybrid (titanium bar + acrylic/gum) | Very strong, excellent fit | Highest cost |
Step 5: Final delivery
Your permanent teeth are screwed onto the implants. The screws are torqued precisely, and the access holes are filled with soft composite.
You walk out with a smile that fits, feels, and functions like natural teeth.
What Can You Eat After All-On-4? Realistic Expectations
This is one of the most common questions.
First 6 months (healing phase)
- Yes: Soft foods, eggs, fish, pasta, rice, cooked vegetables, bananas
- No: Steak, nuts, popcorn, hard bread, ice, sticky candy, whole apples
After final teeth are placed
Most patients eat 90% of normal foods. You can enjoy:
- Steak (cut into smaller pieces)
- Raw carrots and apples (bite carefully)
- Corn on the cob (some patients slice it off)
- Pizza, sandwiches, salads
What remains difficult or risky:
- Hard candies
- Bones (chicken wings, rib bones)
- Pits (olives, cherries)
- Very sticky caramels or toffee
Realistic note: All-On-4 does not give you superhuman teeth. It gives you stable, functional teeth. Treat them well, and they last decades.
All-On-4 Vs. Traditional Implants Vs. Dentures
A quick comparison helps you see why so many people choose All-On-4.
| Feature | All-On-4 | Traditional Full Implants | Removable Dentures |
|---|---|---|---|
| Number of implants | 4 per arch | 6 to 10 per arch | 0 |
| Bone grafting needed | Rarely | Often | No |
| Surgery time | 2-3 hours | 4-8 hours (multiple visits) | None |
| Temporary teeth fixed? | Yes (same day) | No (wait months) | Yes (removable) |
| Stability while eating | Excellent | Excellent | Poor to fair |
| Speech interference | None | None | Frequent |
| Cost (per arch) | $15,000–$30,000 | $30,000–$50,000+ | $1,000–$5,000 |
| Lifespan (with care) | 20+ years | 20+ years | 3–7 years |
The main trade-off:
All-On-4 is more expensive than dentures but far cheaper and faster than one implant per tooth.
Real Costs: What You Will Actually Pay (No Surprises)
Pricing varies widely. Here is a realistic breakdown for the United States and similar markets.
Low-cost providers (dental schools, some clinics)
- $12,000 to $18,000 per arch
- Usually acrylic final teeth
- Longer appointment times
Average private practice
- $18,000 to $25,000 per arch
- Hybrid or basic zirconia
- Includes surgical guide and two-year warranty
High-end specialists (prosthodontists, oral surgeons)
- $25,000 to $35,000+ per arch
- Premium zirconia
- Five to ten-year warranty
- Digital workflow and in-house lab
What is typically included?
- CBCT scan
- Sedation
- Extractions
- Four implants per arch
- Temporary bridge
- Final bridge
- Follow-up visits for one year
What is usually extra?
- Bone grafting (rare but can be $1,000–$3,000)
- Sinus lift (if needed, $1,500–$3,000)
- Permanent soft reline
- Replacement of lost or broken teeth due to accidents
Money-saving tip: Dental tourism (Mexico, Costa Rica, Colombia) can offer All-On-4 for $8,000–$12,000 per arch. Research the provider thoroughly. Read recent reviews.
Risks And Complications: An Honest Look
Every surgery has risks. Realistic patients accept them.
Common (manageable)
- Swelling and bruising (normal)
- Sore gums for a week
- Temporary numbness in lip or chin (resolves in weeks)
Less common (1% to 5%)
- Implant fails to integrate (rarely, one implant fails — often replaced)
- Infection around an implant (treated with antibiotics)
- Temporary bridge cracks (repaired the same day)
Rare but serious
- Nerve injury causing permanent numbness (very rare with 3D planning)
- Sinus perforation (usually heals on its own)
- Severe allergic reaction to sedation or metal (extremely rare)
The good news:
All-On-4 has a published long-term success rate of over 95% for the implants. The teeth themselves may need repair or replacement after 10 to 15 years of normal wear.
Daily Cleaning And Maintenance: How To Make It Last
This is not “set it and forget it.” You must clean your All-On-4 teeth daily, just like natural teeth.
Daily routine (5 minutes)
- Superfloss or implant floss – Thread it under the bridge to clean between implants.
- Water flosser – Use a low setting to flush food from under the bridge.
- Soft brush – Clean the bridge like regular teeth.
- Small interproximal brush – Reach the curved areas near the gums.
What to avoid
- Abrasive toothpaste (no baking soda or charcoal)
- Metal scrapers
- Whitening products containing peroxide (can damage acrylic)
Professional maintenance (every 6 to 12 months)
- Your dentist removes the bridge (yes, it is unscrewed)
- Deep cleaning of implants and abutments
- Checking torque on screws
- Polishing the bridge
Reader warning: Neglected All-On-4 implants can develop peri-implantitis (bone loss around implants). That is preventable with good hygiene.
Pros And Cons At A Glance
Pros
- Same-day fixed teeth
- No denture adhesives
- No slipping or clicking
- Preserves jawbone
- Typically no bone grafting
- High patient satisfaction
Cons
- Expensive upfront
- Requires surgery
- Permanent (you cannot go back to natural teeth)
- Difficult to repair or replace if traveling far from your dentist
- Not for everyone
Frequently Asked Questions (FAQ)
How painful is the procedure?
Most patients rate discomfort 3 to 5 out of 10 during recovery. Surgery itself is painless due to sedation and local anesthesia.
Can I get All-On-4 for both upper and lower jaws?
Yes. That is called full-mouth All-On-4. It requires two separate surgical visits or one longer session.
How long does the final bridge last?
Acrylic: 5–10 years. Zirconia: 15–20+ years with good care. The implants themselves can last a lifetime.
Will I look different after surgery?
Your smile improves. Your lip support may increase slightly. Dramatic facial changes are rare unless you had no teeth for years.
Can I sleep with my All-On-4 teeth?
Yes. They are fixed. You never remove them.
What happens if an implant fails?
Your dentist can often place another implant in a different position without removing the bridge.
Is the procedure covered by insurance?
Rarely. Some dental plans pay a small portion (e.g., $1,000–$3,000). Medical insurance does not cover it unless related to accident or cancer.
Additional Resource
For a deeper look into scientific studies on All-On-4 success rates and long-term outcomes, visit the National Library of Medicine database and search “All-On-4 long-term survival.”
🔗 Suggested link: PubMed.gov – All-On-4 studies (use search term: All-On-4 dental implants)
Conclusion
All-On-4 dental implants offer a fixed, natural-feeling solution for people with failing teeth or no teeth. The step-by-step process includes a consultation, 3D planning, same-day surgery with temporary teeth, a 4-to-6 month healing phase, and final delivery of permanent teeth. While the cost is significant and the recovery requires patience, most patients say the freedom from dentures and the ability to eat normally again is life-changing.
Disclaimer:
This article is for informational purposes only and does not constitute medical or dental advice. Always consult with a licensed dental professional to determine if All-On-4 is right for your specific health condition. Results and costs vary by individual case and provider.