Are Oreos Safe For Braces?
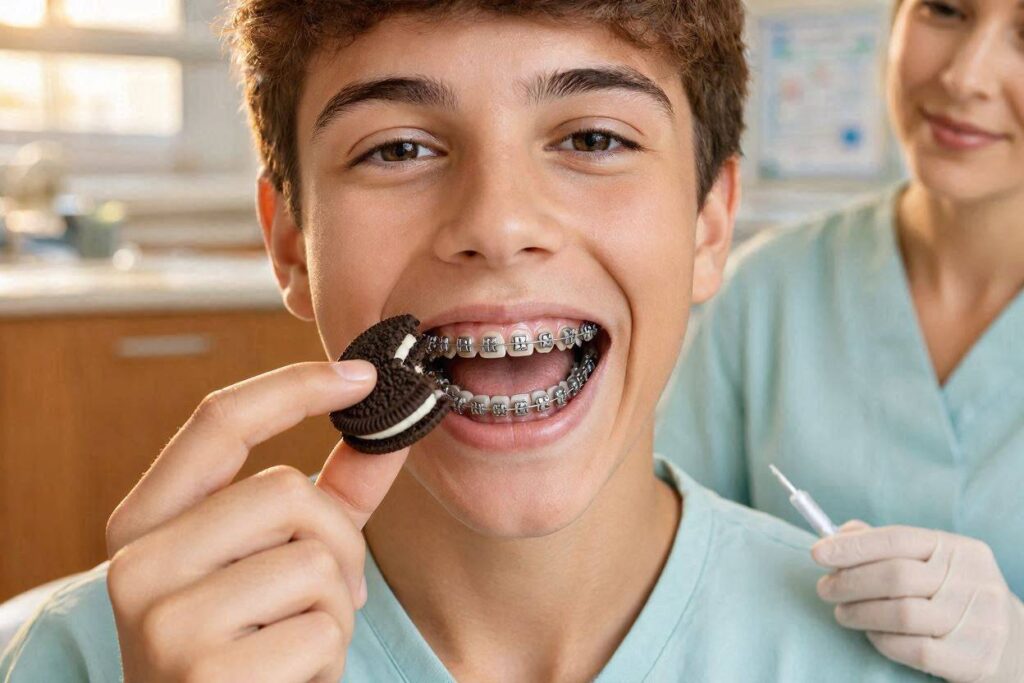
The orthodontist rattles off the forbidden foods list at the bonding appointment: popcorn, nuts, hard candy, gum, ice, chips. The patient, still reeling from the pressure of the new brackets against their cheeks, nods dutifully. Then they go home, open the pantry, and stare at a package of Oreos. The cookie is soft—isn’t it? It twists apart. The cream melts in your mouth. Surely, this gentle, beloved sandwich cookie cannot be in the same category as a jawbreaker or a popcorn kernel. The logic is seductive, and millions of braces-wearers have followed it straight into a broken bracket.
The question “Are Oreos safe for braces?” splits down the middle between orthodontic dogma and practical reality. The strict, liability-conscious answer from most orthodontists is no—Oreos are a hard, crunchy cookie that generates a concentrated bite force capable of shearing brackets from enamel. The nuanced, real-world answer is that an Oreo eaten carefully, with specific technique, by a patient who accepts the risk of bracket failure, can often be consumed without incident, but it is never officially “safe.” This article dissects the mechanical forces that an Oreo exerts on orthodontic hardware, the specific bracket failure modes it triggers, the technique modifications that reduce risk, the official stance of orthodontic practices, and the bracket-safe alternatives that satisfy the cookie craving without the emergency visit.
The Mechanical Reality: Why Crunchy Defeats Brackets
Orthodontic brackets are bonded to the facial surface of teeth with a resin composite cement. This bond is designed to withstand the normal, physiological forces of chewing soft foods—roughly 20 to 50 Newtons of force distributed over multiple teeth. It is not designed to withstand a concentrated, high-magnitude shearing force applied to a single bracket by a hard, brittle food that fractures suddenly under load.
An Oreo cookie, despite its creme filling, is a brittle, dry, baked wafer. When you bite into an Oreo, the cookie does not yield gently like a piece of bread. It resists, then snaps. That snap is a sudden release of energy. The force required to fracture the cookie is transmitted directly through the tooth to the bracket base. The bracket is essentially a small ceramic or metal wing bonded to the enamel with a very thin layer of adhesive. It is strong in tension and compression but vulnerable to sudden shear—a glancing, sideways blow from a hard object. The edge of a fracturing Oreo wafer can act like a chisel, catching the tie-wing of a bracket and popping it off the tooth.
The risk is highest on the anterior teeth—the incisors and canines—which are the teeth used for biting into the cookie. The lower incisors, with their small bracket bases and limited bonding surface area, are particularly vulnerable. The same patient who carefully chews an Oreo with their molars, avoiding a direct anterior bite, dramatically reduces the risk. The hazard is not the mastication of the softened, saliva-moistened cookie bolus; it is the initial, dry, brittle fracture of the intact wafer against the incisal edges and brackets.
The Twist-Apart Technique: Risk Reduction Through Disassembly
Every braces-wearer who has successfully navigated the Oreo question knows the technique: twist the cookie apart, scrape the creme off with your teeth or a finger, and then deal with the two black wafers. The twisting action eliminates the initial brittle fracture event—the two halves come apart with a gentle rotational force, not a crushing bite. The creme is soft, smooth, and poses zero mechanical risk.
The remaining wafers are still brittle. The safest approach is to break them into small pieces by hand and place the pieces directly onto the posterior teeth, bypassing the anterior bracket zone entirely. The molars, with their larger, stronger brackets and bands, are better equipped to handle the crunchy fracture of a small cookie fragment. Alternatively, the wafers can be allowed to soften in the mouth’s humidity—saliva will hydrate and soften the cookie over 20–30 seconds if the patient is patient. A softened wafer crumbles rather than snaps, and crumbling forces are dramatically lower than fracture forces.
Some patients dip the Oreo in milk. This is the ultimate risk-reduction strategy. A fully milk-saturated Oreo is a soft, collapsing sponge. It dissolves under the tongue. It requires near-zero bite force. The orthodontic risk of a milk-soaked Oreo approximates that of a slice of white bread. The catch is that the milk must be cold—hot milk creates a temperature differential that can temporarily soften the adhesive and increase the risk of bracket debonding, though this is a theoretical concern more than a frequently documented clinical event.
The Orthodontic Office Stance: Zero Tolerance
If you ask your orthodontist, “Can I eat Oreos with braces?” the answer you will receive, in almost every practice, is a firm, unqualified “No.” This is not because the orthodontist is mean, unaware of the milk-dipping workaround, or trying to deprive you of joy. It is because the orthodontist operates in a risk-management framework. They have treated thousands of patients, and they have seen the Monday morning emergency visits from teenagers who ate an entire sleeve of dry Oreos while watching Netflix on Sunday night. The broken brackets, the bent wires, the demoralized patient who now has a 3-week delay in their treatment progress—these are real, recurrent clinical events. The orthodontist’s prohibition is a population-level public health measure, not a case-by-case risk assessment tailored to your specific cookie consumption technique.
The prohibition also serves a legal function. If the orthodontist says “Oreos are fine if you soak them in milk and chew with your back teeth,” and the patient hears “Oreos are fine,” eats a dry Oreo, and breaks a bracket, the orthodontist may be perceived as having authorized the behavior. The categorical prohibition is a liability shield. It is the same reason microwave dinners instruct you to “remove food from packaging” before heating—the company knows that a small percentage of people will fail to apply common sense, and the warning covers the entire population.
The patient who understands this can make an informed, autonomous decision. You are an adult, or the parent of a child in braces. You know the risks. You know the technique modifications. You accept that if a bracket breaks, you will own the consequences: the emergency visit, the delay in treatment, the potential additional fee for bracket replacement (some orthodontists charge for broken brackets beyond a certain number; others include a certain number of breakages in the global fee). The orthodontist’s prohibition is advice, not law. You are free to disregard it, and if you do so with technique and caution, the odds of an adverse event are low.
The Bracket Debonding Cascade: Why One Broken Bracket Matters
A broken bracket is not an isolated event. It triggers a cascade of clinical and biological consequences that extend the total treatment time. The patient who casually accepts a broken bracket as “no big deal” misunderstands the mechanics of treatment.
When a bracket debonds, the wire is no longer engaged with that tooth. The tooth is free-floating while all other teeth continue to be actively moved by the archwire. Within days, the unbracketed tooth will begin to relapse—the periodontal ligament’s elastic memory will pull it back toward its original position. The adjacent teeth, still under archwire control, will continue moving toward their planned positions. The net effect is a localized malalignment that was not part of the treatment plan.
When the patient returns for the emergency appointment, the orthodontist must often remove the entire archwire, clean the residual adhesive from the debonded bracket base and the tooth surface, rebond the bracket, and then re-engage a new wire. If the tooth has drifted, the new wire may not fit passively; the tooth must be “picked up” again, which can require a smaller, more flexible wire and a re-progression through the wire sequence. What was a 15-minute emergency visit can translate to a 2-month setback in the finishing stage. The patient who habitually breaks brackets through dietary indiscretion is extending their own sentence in braces, sometimes by many months.
Comparative Table: Orthodontic Risk by Food Category
| Food Category | Examples | Risk Level | Failure Mode | Safe Modification |
|---|---|---|---|---|
| Soft, Non-Sticky | Yogurt, mashed potatoes, scrambled eggs. | Negligible. | N/A. | N/A. |
| Soft, Sticky | Caramel, taffy, gummi bears. | Very High. | Pulls brackets and wires; distorts archwires. | Avoid entirely. |
| Hard, Brittle | Hard pretzels, nuts, ice, tortilla chips. | Very High. | Shears brackets; fractures ceramic brackets. | Avoid entirely; no safe modification for ice or hard candy. |
| Crunchy, Dissolvable | Oreos, graham crackers, thin wafer cookies. | Moderate. | Bracket shear from dry bite; safe when milk-softened. | Soak in milk; break into small posterior pieces; avoid anterior bite. |
| Chewy, Tough | Bagels, pizza crust, steak, jerky. | Moderate. | Bracket torque from tearing; wire distortion. | Cut into small pieces; chew with posterior teeth; avoid tearing with anterior brackets. |
| Stringy, Fibrous | Celery, mango, fibrous meats. | Low-Moderate. | Traps between bracket and archwire; difficult to clean. | Cut into small dice; floss immediately after eating. |
The Ceramic Bracket Distinction: A Fragility Warning
A critical clinical distinction must be made between metal brackets and ceramic (clear) brackets. Metal brackets are made of stainless steel; they are ductile, they bend under excessive load, and they absorb energy through deformation before fracturing. Ceramic brackets are made of polycrystalline or monocrystalline alumina; they are hard but brittle. They do not bend. They shatter.
A hard, crunchy food that would simply pop a metal bracket off the tooth—a clean adhesive failure—can fracture a ceramic bracket into sharp, jagged pieces. A fractured ceramic bracket is a more serious complication than a debonded metal bracket. The sharp edges can lacerate the cheek and tongue. The remaining ceramic fragment still bonded to the tooth is difficult to remove without damaging the enamel. The entire bracket must be drilled off, a procedure that generates heat and ceramic dust and carries a risk of enamel fracture or thermal pulp damage. The patient with ceramic brackets has an even narrower margin of error with crunchy foods. The “twist-apart, dip-in-milk” technique reduces but does not eliminate the risk of ceramic bracket fracture, because the biting force on a softened cookie is low, but the unexpected encounter with a hard fragment within an incompletely softened Oreo can still shatter a brittle bracket. Patients with ceramic braces who choose to eat Oreos are accepting a higher-stakes gamble.
The Cost Consequence: Who Pays for the Broken Bracket?
Orthodontic practices have varying policies on broken bracket fees. Some comprehensive treatment contracts include a certain number of broken brackets—often 2–3—in the global fee, reflecting the reality that accidents happen. Beyond that allowance, the practice charges a per-event fee, which can range from $25 to $75 per bracket for metal replacement, and $50 to $100 for ceramic. These fees cover the bracket cost, the adhesive, the chair time, and the schedule disruption.
The patient who eats Oreos carelessly and breaks brackets repeatedly is not just delaying treatment; they are incurring unplanned expenses. A sleeve of Oreos costs $4. The orthodontic emergency visit to repair the bracket damage that results from that sleeve costs $50–$100 and a morning of missed school or work. The cost-benefit analysis of the cookie is starkly unfavorable. The responsible patient internalizes this calculus and either abstains entirely or applies the technique modifications with meticulous discipline.
The “Week Before Adjustment” Syndrome
A poorly recognized risk factor for bracket damage is the timing within the orthodontic adjustment cycle. Brackets are most vulnerable in the days immediately after an archwire change, when the wire is active and applying heavy forces to the teeth. The teeth are sore, the periodontal ligament is inflamed, and the patient naturally gravitates toward soft foods. Brackets are least vulnerable in the week before an adjustment, when the archwire has expressed most of its force and is relatively passive.
However, the “week before” is also when the patient has become complacent and fatigued with dietary restrictions. The Oreo craving strikes. The patient, feeling no soreness, assumes the braces are invincible. The brackets are indeed under less orthodontic force, but they are still vulnerable to shear from a hard food. The timing of the dietary indiscretion is less important than the technique used. The compliant, cautious patient who eats a milk-soaked Oreo in week three of a six-week adjustment cycle is probably safe. The impulsive patient who bites into a dry Oreo with their incisors in week one is courting disaster, regardless of where they are in the cycle.
Important Note: The “Nothing Stuck” Deception
After eating an Oreo, the patient may look in the mirror and see no obvious debris. The black cookie crumbs have blended with the dark spaces between teeth. This visual deception leads to inadequate cleaning. The fine, sugary particulate from the wafer settles around the bracket bases and under the archwire. If not removed by thorough brushing and flossing, this sugary residue fuels bacterial acid production, leading to the dreaded white spot lesions—permanent decalcification scars that become visible when the braces are removed. The Oreo itself may not break the bracket, but the inadequate hygiene following its consumption can permanently scar the enamel. The patient who indulges in an Oreo must follow it with immediate, meticulous oral hygiene, including interproximal brushing around each bracket.
Conclusion
Oreos, in their dry, crunchy state, pose a moderate risk of shearing orthodontic brackets from the teeth, particularly the vulnerable anterior brackets, making them officially prohibited by orthodontic practices operating on a zero-tolerance risk-management policy. The risk can be substantially reduced—though never eliminated—by twisting the cookie apart, scraping the soft creme, soaking the wafers thoroughly in cold milk until they collapse into a soft sponge, and chewing only with the posterior molars while avoiding any anterior bite. Patients with ceramic brackets or a history of multiple bracket failures face higher stakes and should avoid Oreos entirely, recognizing that the short-lived pleasure of a cookie does not justify the treatment delay, the emergency visit, and the potential fee of a bracket replacement.
FAQ
Q: Are Double Stuf Oreos safer than regular Oreos for braces?
A: Marginally. The higher creme-to-wafer ratio means the cookie has more soft material and slightly less brittle mass. However, the wafer is the same brittle material in both products, and the Double Stuf wafer is only marginally thinner. The risk reduction is negligible. The same milk-soaking and posterior-chewing precautions apply. Do not interpret the extra creme as a license to bite into a dry Double Stuf Oreo with your front teeth.
Q: Can I eat the Oreo creme and throw away the wafers?
A: Yes. The creme is a soft, viscous sugar-fat paste that poses absolutely no mechanical risk to brackets or wires. If you can extract the creme cleanly—either by twisting off one wafer and licking the creme, or by scraping it off with a finger—you are consuming a bracket-safe substance. The wastefulness of discarding the wafers is a separate ethical question from orthodontic safety. From a purely mechanical standpoint, creme-only consumption is completely safe.
Q: What should I do immediately if an Oreo breaks a bracket?
A: First, do not panic. Examine the bracket. If it is still attached to the wire and sliding loosely, it can often be temporarily stabilized with a small piece of orthodontic wax to prevent it from rotating and irritating the cheek. If the bracket has come off completely and is loose in your mouth, remove it carefully and save it in a small bag or container—do not swallow it. Call your orthodontist’s office immediately. They will schedule an emergency repair appointment. Do not wait until your next routine adjustment. An unbraced tooth drifts rapidly, and the wire may be sharp or unstable. In the meantime, eat soft foods and avoid putting pressure on the affected tooth.
Additional Resource
For the full, official list of orthodontic dietary restrictions, bracket care instructions, and emergency management protocols, visit the American Association of Orthodontists patient information library at www.aaoinfo.org.
Meta Description
Are Oreos safe for braces? The mechanical truth about bracket shear, the milk-dipping workaround, ceramic bracket fragility, and the cost of a broken bracket. A complete, honest guide to snacking responsibly with orthodontic hardware.
Disclaimer
This article provides general information about dietary risks during orthodontic treatment and does not override the specific instructions provided by your treating orthodontist. Bracket materials, bonding adhesives, and individual treatment mechanics vary. Always follow your orthodontist’s dietary restrictions explicitly. If you choose to consume foods on the restricted list, you accept full responsibility for any resulting bracket damage, treatment delays, and associated emergency visit fees.
continue
Are Approved Braces Eligible For HSA?
The Complete Tax Guide to Using Health Savings Accounts for Orthodontic Treatment
The intersection of tax law and orthodontics is a landscape of opportunity and trapdoors. A Health Savings Account (HSA) is one of the most powerful wealth-building and healthcare-funding tools available to American consumers, offering a triple tax advantage: contributions are tax-deductible, growth is tax-free, and withdrawals for qualified medical expenses are tax-free. The question is whether the gleaming metal brackets or clear aligner trays on your teeth qualify as a “qualified medical expense” under the Internal Revenue Code. The answer, for the vast majority of orthodontic cases, is yes—but that yes is conditional, documentation-dependent, and frequently misunderstood by patients, dental offices, and sometimes even HSA administrators.
The phrase “approved braces” is not a formal IRS designation. The IRS does not maintain a list of approved orthodontic appliances. What matters is not the specific brand of bracket or aligner, but the medical necessity of the treatment. If braces are treating a diagnosed medical condition—malocclusion, jaw misalignment, impacted teeth, speech impairment—they are a qualified medical expense. If they are purely cosmetic, they are not. The line is drawn in the same place as the insurance medical necessity determination discussed in a previous article, but the tax stakes are different. Using HSA funds for non-qualified expenses triggers income tax on the withdrawal plus a 20% penalty. This article provides the definitive tax treatment of orthodontics under HSA rules, the documentation required to survive an IRS audit, the specific timing rules for when expenses are incurred, the interaction with dental insurance, and the strategic use of HSAs as long-term tax-advantaged investment vehicles for planned orthodontic expenses.
The Statutory Foundation: IRC Section 213(d)
The legal basis for using HSA funds for braces rests on Internal Revenue Code Section 213(d), which defines “medical care” as amounts paid for “the diagnosis, cure, mitigation, treatment, or prevention of disease, or for the purpose of affecting any structure or function of the body.” Dental expenses are explicitly included in this definition. IRS Publication 502, “Medical and Dental Expenses,” further clarifies that “medical and dental expenses” include payments for the “diagnosis, prevention, and treatment of dental disease” and for “treatment affecting any structure or function of the mouth.”
Orthodontic treatment—braces, Invisalign, retainers, expanders, headgear—is a treatment affecting the structure and function of the mouth. Malocclusion is not merely a cosmetic concern; it is a structural abnormality that impairs the function of mastication, can cause speech impediments, contributes to abnormal tooth wear, increases caries risk due to difficulty cleaning crowded teeth, and can lead to temporomandibular joint pathology. When an orthodontist diagnoses a malocclusion and recommends braces, the treatment is for a recognized medical condition, and the expenses are qualified HSA expenditures.
The purely cosmetic case—a patient with perfectly functional occlusion who wants to close a tiny, barely perceptible gap between the maxillary central incisors solely for aesthetic reasons—is theoretically not a qualified expense. In practice, this is a narrow, almost hypothetical exclusion. Most patients seeking orthodontics have some degree of functional malocclusion, and an orthodontist can document it. The IRS does not audit HSA dental expenses with any frequency, and the burden of proof is on the taxpayer only if audited.
The Letter of Medical Necessity: Your Audit Shield
The single most important document for any HSA-funded orthodontic treatment is the Letter of Medical Necessity (LMN). This is a signed, dated letter from the treating orthodontist or dentist on practice letterhead that states the diagnosis, the recommended treatment, and the medical reason for the treatment. It should explicitly use language that maps to the IRS definition: the treatment is for the “diagnosis, mitigation, or treatment” of a diagnosed condition.
A well-constructed LMN for orthodontics might read: “Patient [Name] has been diagnosed with a Class II malocclusion with an 8-millimeter overjet, severe mandibular anterior crowding, and associated masticatory dysfunction. The recommended treatment is comprehensive orthodontic therapy with fixed appliances for an estimated duration of 24 months. This treatment is medically necessary to correct the malocclusion, restore proper masticatory function, and prevent future dental pathology including abnormal enamel wear, periodontal disease secondary to crowding, and temporomandibular joint dysfunction.” This letter is the golden ticket. It converts a potentially ambiguous cosmetic expense into a clearly documented medical expense.
The patient should request this letter before treatment begins or during the treatment phase. It should be saved with tax records for the year in which HSA distributions were taken to pay for the treatment. In the event of an IRS inquiry, this letter, combined with the treatment contract and receipts, provides a complete and defensible evidentiary packet.
What Expenses Are Specifically Eligible?
The qualified expense umbrella covers a broad range of orthodontic and orthodontic-adjacent services. This includes:
- The initial orthodontic examination and diagnostic records (panoramic X-ray, cephalometric analysis, intraoral scans or impressions).
- The orthodontic appliances themselves: metal brackets, ceramic brackets, self-ligating brackets, Invisalign aligners, Spark aligners, lingual braces, palatal expanders, space maintainers, headgear, facemasks, Herbst appliances, twin block appliances.
- The placement and adjustment visits over the course of treatment.
- Emergency visits for broken brackets, poking wires, or lost aligners.
- The removal of braces at the end of treatment.
- Post-treatment retainers (Hawley retainers, clear Essix-style retainers, fixed bonded lingual retainers) and retention follow-up visits.
- Orthodontic wax, floss threaders, interdental brushes, and Waterpiks if they are specifically for use with braces and recommended by the orthodontist. General toothpaste and toothbrushes are not eligible, but specialized orthodontic hygiene aids with a letter of medical necessity may be defensible.
Expenses that are purely cosmetic and not medically necessary—such as tooth whitening performed after braces removal—are not eligible. Teeth whitening is explicitly classified as a cosmetic procedure by the IRS and is never an HSA-qualified expense, regardless of whether it is performed after orthodontic treatment.
The Timing Rule: When the Expense is “Incurred”
A critical, frequently botched HSA rule is the timing of the expense. For tax purposes, a medical expense is considered “incurred” in the year the service is provided, not in the year the payment is made. This creates a specific challenge for orthodontic treatment, which spans multiple calendar years and is often paid through an initial down payment followed by monthly installments.
If a patient signs a $6,000 orthodontic contract in November, pays $1,500 down, and begins treatment with monthly payments of $200 over the next 24 months, the HSA distributions must match the tax year in which the payments are actually made. The down payment and any monthly payments made in Year 1 are eligible for HSA reimbursement in Year 1. The monthly payments made in Year 2 are eligible in Year 2. The monthly payments made in Year 3 are eligible in Year 3. The patient cannot withdraw the entire $6,000 from the HSA in Year 1 to pay for future years’ treatment, because the expense has not yet been incurred. Doing so would be a non-qualified distribution subject to tax and penalty.
Some practices offer a pre-payment discount for paying the full treatment fee upfront. If the patient pays $6,000 in full in Year 1, the entire $6,000 is incurred in Year 1 and is eligible for HSA reimbursement in Year 1, even though the treatment spans Year 2 and Year 3. The key is the timing of the payment—if it leaves the patient’s account in Year 1 for services provided over a multi-year period under a single contract, it is a Year 1 expense. The patient should verify this with a tax professional, but the general rule is that prepayment under a binding contract fixes the expense in the year of payment.
The Reimbursement Delay Strategy: The HSA as a Retirement Account
One of the most powerful and underutilized features of an HSA is the indefinite reimbursement window. There is no time limit on when you can reimburse yourself from an HSA for a qualified medical expense, as long as the expense was incurred after the HSA was established. You can pay for your child’s braces out of pocket in 2024, keep the receipt, and reimburse yourself from the HSA in 2034, ten years later.
This allows the HSA to function as a stealth retirement account. The funds left in the HSA continue to grow tax-free. If invested in a diversified portfolio of low-cost index funds, the $6,000 left in the HSA in 2024 could grow to $12,000 or more over a decade. The patient then reimburses themselves the $6,000 in 2034, tax-free, and the remaining $6,000 of growth remains in the HSA for future medical expenses or, after age 65, can be withdrawn for any purpose (subject to ordinary income tax but no penalty, similar to a traditional IRA).
This strategy requires diligent recordkeeping. The receipt, the LMN, and the treatment contract must be saved for the duration between the expense and the reimbursement. A digital folder with scanned copies, backed up to a cloud service, is prudent. The patient should not rely on the orthodontist’s office to retain records for a decade.
The FSA Distinction: Use-It-or-Lose-It vs. HSA
A Flexible Spending Account (FSA) is governed by different rules. FSAs generally have a “use-it-or-lose-it” provision, requiring the funds to be spent within the plan year or a grace period. Some plans allow a limited carryover (up to $640 in 2024, indexed for inflation). Orthodontic treatment financed with an FSA must be carefully timed to align the payments with the plan year.
Because orthodontic treatment is a predictable, planned expense that spans multiple years, it is an ideal use for FSA funds, but the patient must plan the reimbursement year by year. The FSA administrator may require a Letter of Medical Necessity and an itemized treatment plan detailing the expected monthly payments. The patient submits the monthly payment receipts for reimbursement in the year the payment is made. Unlike an HSA, there is no indefinite carryforward; the FSA window is rigid.
The Dependent Rules: Braces for Children
Orthodontic expenses for a qualifying dependent—typically a child under age 19, or under 24 if a full-time student—are eligible for HSA reimbursement, even if the dependent is not covered under the HSA holder’s health insurance plan. The key is that the dependent must qualify as a dependent on the HSA holder’s tax return.
This is a significant benefit for parents. A parent with an HSA can use their HSA funds to pay for their child’s braces, tax-free, even if the child is on a separate dental insurance plan or the other parent’s medical plan. The expense is attributed to the HSA holder as long as the child is their tax dependent. Divorced parents with multiple HSAs must coordinate, but generally, the parent who claims the child as a dependent and pays the orthodontic bill is the one who can take the HSA distribution.
The Insurance Coordination Problem
The interaction between dental insurance and HSA reimbursement is a frequent source of confusion. The basic rule is that HSA funds can only be used for unreimbursed medical expenses—the portion of the orthodontic bill that insurance does not cover. If the dental insurance pays $1,500 of a $6,000 treatment, the HSA can only reimburse the remaining $4,500. The patient cannot “double-dip” by using HSA funds for the $1,500 that insurance covered and pocketing the insurance reimbursement. The insurance reimbursement reduces the qualified expense dollar-for-dollar.
However, the patient does not have to wait for insurance to process the claim before using the HSA. The patient can pay the orthodontist the full $6,000 upfront from the HSA and then, when insurance reimburses $1,500, redeposit that $1,500 into the HSA as a “mistaken distribution” repayment. Alternatively, and far more cleanly, the patient can pay the $4,500 out-of-pocket portion from the HSA and the $1,500 insurance portion from personal funds, avoiding any commingling.
Comparative Table: HSA vs. FSA vs. Dental Insurance for Orthodontics
| Feature | HSA | FSA | Dental Insurance |
|---|---|---|---|
| Tax Benefit | Triple tax-advantaged. | Pre-tax contributions; no tax-free growth. | Employer-subsidized; premiums pre-tax. |
| Orthodontic Eligibility | Yes, with LMN. | Yes, with LMN. | If plan includes ortho benefit; usually limited lifetime max. |
| Lifetime Ortho Max | No limit (all expenses eligible). | No limit (up to annual contribution max). | Typically $1,000–$3,000 lifetime. |
| Timing | Reimburse in year incurred; indefinite carryforward. | Reimburse in plan year; use-it-or-lose-it. | Claims processed per plan rules. |
| Portability | Fully portable; funds roll over indefinitely. | Tied to employer; lost if you leave. | Tied to employer; COBRA may extend. |
| Receipt Requirements | Required for audit defense. | Required for reimbursement. | Managed by provider. |
| Best Strategy | Pay out-of-pocket; reimburse years later tax-free. | Align payments with plan year; submit monthly. | Maximize benefit; use HSA/FSA for remainder. |
The Direct Debit from HSA: The Easiest Path
Many HSA custodians now issue debit cards that can be used directly at the point of service. Swiping the HSA debit card at the orthodontist’s front desk for the monthly payment is the simplest method. The card processes the payment from the HSA funds. The patient keeps the receipt and the LMN. At tax time, the HSA custodian issues Form 1099-SA reporting the total distributions for the year. The taxpayer reports these distributions on Form 8889 with their tax return and attests that they were used for qualified medical expenses. The receipts are not filed with the return but retained for audit defense.
The risk of the debit card approach is administrative. If the HSA custodian later audits the account and determines the expense was not qualified (unlikely with a proper LMN, but possible), the distribution becomes taxable income with a penalty. The patient relying on the debit card should maintain a folder—physical or digital—with every receipt, the LMN, and the insurance Explanation of Benefits, organized by tax year. This is not burdensome; it is a few minutes of scanning and filing after each payment.
The Strategy for Maximum Wealth: Pay Cash, Invest HSA
For the financially sophisticated patient who can afford to pay for braces out of pocket, the optimal strategy is to pay the orthodontic bill with after-tax cash, leave the HSA funds fully invested in growth assets, and save every orthodontic receipt. The receipts are the “ticket” to withdraw tax-free money from the HSA at any future date, even decades later, after the invested HSA has compounded significantly. This converts the orthodontic expense into a long-term tax-free withdrawal right that can be exercised when the money is needed for retirement, healthcare, or any purpose after age 65. This strategy requires liquidity—you must have the cash to pay the orthodontist while leaving the HSA untouched—but for those who can execute it, it is the most financially efficient use of the HSA vehicle.
Important Note: The “Established Before” Rule
The HSA must have been established before the orthodontic expense is incurred for the expense to be eligible for reimbursement. If you open an HSA on June 1, 2026, only orthodontic payments made on or after June 1, 2026 are eligible. The $2,000 you paid in March 2026 for the braces down payment, before the HSA existed, is not retroactively eligible. If you are planning orthodontic treatment and do not yet have an HSA, open one before the initial consultation and payment.
Conclusion
Orthodontic braces and clear aligners are eligible for tax-free HSA reimbursement when supported by a Letter of Medical Necessity documenting the treatment as addressing a diagnosed malocclusion with functional impairment, not purely cosmetic alignment. The HSA can cover the full spectrum of orthodontic expenses—diagnostic records, appliances, adjustments, emergency visits, and retainers—with the critical timing rule that reimbursement must match the tax year in which the payment is made, not the year of service. Savvy patients can leverage the HSA’s indefinite reimbursement window to pay for braces out-of-pocket while allowing HSA investments to compound tax-free for years or decades, then reimburse themselves in retirement with tax-free withdrawals.
FAQ
Q: Can I use my HSA for Invisalign the same way I use it for metal braces?
A: Yes. Invisalign is an orthodontic appliance that treats malocclusion, and it is eligible for HSA reimbursement under the same rules as traditional braces. The IRS does not differentiate between fixed appliances and clear aligners. You need the same Letter of Medical Necessity and receipts. The lab fee, the aligner trays, the attachments, and the refinement trays are all qualified expenses.
Q: What happens if I use my HSA debit card for braces and I’m audited by the IRS?
A: The IRS does not audit HSA expenses as a matter of routine. Audits are rare and typically triggered by large, unusual distributions relative to the HSA balance. If audited, you will need to produce the Letter of Medical Necessity, the orthodontic treatment contract, and receipts or bank statements showing the payments matched the distributions. If you have these three documents, the audit will be resolved in your favor. If you do not, the distribution will be reclassified as taxable income with a 20% penalty. The audit risk is low, but the recordkeeping burden is your responsibility.
Q: Can I use HSA funds to pay for my spouse’s braces if my spouse is not on my health insurance plan?
A: Yes. A qualifying medical expense includes expenses for the HSA holder, the holder’s spouse, and any qualifying dependents. Your spouse’s health insurance coverage is irrelevant. As long as the spouse is your legal spouse and you are the HSA holder, you can use your HSA funds tax-free for their orthodontic treatment. The same documentation rules apply: LMN in the spouse’s name, receipts, and treatment contract.
Additional Resource
For the authoritative IRS guidance on HSA-qualified medical expenses and dental treatment, including the text of Publication 502 and the relevant sections of IRC 213(d), visit www.irs.gov and search “Publication 502 Medical and Dental Expenses.”