How To Care For New Dental Implants
You have just completed your dental implant journey. The surgery is behind you, the healing period has passed, and the final crown gleams in your smile. You look in the mirror and see a tooth that looks and feels natural. Now comes the most important phase of all: the decades of care that will determine whether your implant lasts a lifetime or fails prematurely.
Caring for dental implants is not complicated, but it is specific. Implants require a different maintenance approach than natural teeth in some respects, and understanding these differences is the key to long-term success. This guide will walk you through every aspect of implant care, from the immediate post-surgical period through daily hygiene, professional maintenance, and lifestyle considerations. By the end, you will have a complete, practical, and realistic roadmap for protecting your investment.
The good news is that implant care is straightforward once you know what to do. The disciplined application of a few simple habits can keep your implant healthy for the rest of your life.
The First 48 Hours: Immediate Post-Surgical Care
The care you provide in the first two days after implant surgery sets the stage for healing. This period requires specific attention to protect the surgical site.
Managing Bleeding and Clot Formation
A blood clot forms in the surgical site and is essential for healing. Protect this clot. Bite gently on the gauze placed by your dentist, maintaining pressure for the recommended time, usually 30 to 60 minutes. Replace the gauze if it becomes soaked, but do not change it unnecessarily.
Avoid spitting, rinsing vigorously, or drinking through a straw for the first 24 hours. The suction created by these actions can dislodge the clot, leading to a painful condition called dry socket. While dry socket is more common after tooth extraction than after implant placement, the principle of clot protection applies.
If minor bleeding persists, bite on a moistened tea bag wrapped in gauze. The tannic acid in tea helps promote clotting. If bleeding is heavy, continuous, or does not respond to pressure, contact your dentist immediately.
Pain Management and Swelling Control
Take prescribed or over-the-counter pain medication as directed, ideally before the local anesthetic wears off completely. Staying ahead of the pain is easier than catching up once it becomes severe.
Apply an ice pack to the outside of your face over the surgical site. Use the ice pack for 20 minutes on and 20 minutes off during the first 24 to 48 hours. The cold reduces swelling, minimizes bruising, and provides pain relief. After 48 hours, switch to warm, moist heat if swelling persists.
Swelling typically peaks around the second or third day after surgery and then begins to subside. Some bruising may appear on the skin over the surgical site, particularly if bone grafting was performed. This is normal and will resolve over a week to ten days.
Diet and Activity Restrictions
Stick to cool, soft foods for the first 24 to 48 hours. Yogurt, smoothies, applesauce, mashed potatoes, and lukewarm soup are good choices. Avoid hot foods and beverages, which can increase bleeding and swelling. Avoid crunchy, chewy, or spicy foods that could irritate the surgical site.
Stay hydrated with water. Avoid alcohol for at least 48 hours and for as long as you are taking prescription pain medication. Alcohol interferes with healing and can interact dangerously with pain medications.
Limit physical activity for the first 48 hours. Avoid bending, lifting, and strenuous exercise. Elevated heart rate and blood pressure can increase bleeding and swelling. Rest with your head elevated on pillows, even while sleeping, to reduce swelling.
The First Weeks: The Healing Period
After the initial 48 hours, the focus shifts from acute post-surgical care to supporting the longer healing process.
Oral Hygiene Around the Surgical Site
For the first week, do not brush the surgical site directly. Brush your other teeth normally with a soft-bristled toothbrush, being careful to avoid the implant area. Your dentist may prescribe an antimicrobial mouth rinse, typically chlorhexidine. Use it as directed, usually twice daily, to control bacteria around the healing site.
After the first week, you can begin gentle cleaning around the implant site. If a healing abutment is protruding through the gum, use a very soft toothbrush to gently clean the exposed surface. Do not floss around the implant until your dentist gives you clearance.
If sutures were placed, they may dissolve on their own or require removal at a follow-up appointment. Do not pull on sutures or attempt to remove them yourself.
Diet Progression
As healing progresses, you can gradually return to a more normal diet. Continue to avoid chewing on the implant side until your dentist tells you it is safe. When you do begin eating on the implant side, start with soft foods and progress slowly to harder textures.
Avoid hard, crunchy foods like nuts, hard candies, ice, and popcorn kernels for several weeks. These can transmit excessive force to the healing implant or become lodged in the surgical site.
Follow-Up Appointments
Attend all scheduled post-operative appointments. Your dentist will check the healing progress, remove sutures if necessary, and address any concerns. These visits are not optional. Problems caught early are easy to correct. Problems ignored can lead to implant failure.
Daily Oral Hygiene for Implants: The Long-Term Routine
Once the implant is fully integrated and the final crown is in place, your daily hygiene routine becomes the most important factor in long-term success.
Brushing Around the Implant
Brush at least twice daily with a soft-bristled toothbrush. Manual and electric toothbrushes are both effective. The key is technique, not the tool. Use gentle pressure and small circular motions. Pay particular attention to the area where the implant crown meets the gum. This junction is where plaque accumulates and where peri-implant disease begins.
Use a non-abrasive toothpaste. Abrasive toothpastes, particularly those marketed for whitening or tartar control, can scratch the surface of the implant crown and abutment. Scratches create microscopic niches for bacteria. Choose a low-abrasion toothpaste, or ask your dentist for a recommendation.
Interdental Cleaning: Flossing and Alternatives
Flossing around an implant requires a different technique than flossing around a natural tooth. The attachment of the gum to the implant is less robust, and aggressive flossing can damage the soft tissue seal.
Use implant-specific floss or dental tape. These products are designed to clean effectively without traumatizing the peri-implant tissues. Gently slide the floss between the implant crown and the adjacent tooth, curving it around the implant and moving it up and down. Do not snap the floss through the contact, as this can injure the gum.
Interdental brushes, small brushes designed to clean between teeth, are excellent for implants. Use a brush sized appropriately for the space. Gently insert the brush between the implant and the adjacent tooth and move it in and out several times. Do not force a brush that is too large.
Water Flossers for Implant Care
A water flosser is a valuable tool for implant hygiene, particularly for patients with multiple implants, implant-supported bridges, or full-arch prostheses. The pulsating water removes plaque and food debris from areas that brushes and floss cannot reach.
Use a water flosser with a non-metal tip. Some water flossers offer specialized tips designed for implants. Set the pressure to a comfortable level and aim the stream at the junction where the implant crown meets the gum. Trace the gum line around the implant, pausing between the teeth.
The water flosser is particularly useful for cleaning under implant-supported bridges and around full-arch hybrid prostheses. It accesses the space beneath the prosthesis that would otherwise be impossible to clean.
Special Considerations for Full-Arch Implant Restorations
Patients with fixed full-arch prostheses, such as All-on-Four restorations, face unique hygiene challenges. The prosthesis is a single unit that replaces the entire arch and contacts the gum tissue along its base. Food and bacteria can accumulate in the space between the prosthesis and the gum.
In addition to brushing the prosthesis and the gum tissue around it, use a water flosser with a non-metal tip to flush the space beneath the prosthesis daily. Super floss, a type of floss with a stiff end, can be threaded under the prosthesis and used to clean the underside. Some patients find that a rubber-tipped gum stimulator helps clean along the prosthesis margin.
Your dentist or hygienist should demonstrate the specific techniques for your particular restoration. Do not leave the office without a clear understanding of how to clean what you cannot see.
Professional Maintenance: The Role of the Dental Hygienist
Home care is essential, but it is not sufficient on its own. Professional maintenance is a non-negotiable part of implant care.
The Implant Maintenance Appointment
Your implant maintenance appointment is different from a routine dental cleaning. The hygienist must use instruments that will not scratch the implant or abutment surface. Metal scalers and ultrasonic tips can damage titanium and zirconia, leaving scratches that harbor bacteria.
Titanium scalers, carbon fiber scalers, and specialized plastic instruments are used to clean implant surfaces without scratching them. The hygienist will carefully debride the area around the implant, removing plaque and calculus without damaging the restoration.
The hygienist will also probe around the implant to measure the depth of the gum cuff and check for bleeding. Gentle probing is safe around implants and provides essential information about the health of the peri-implant tissues. An increase in probing depth over time or bleeding on probing may indicate developing peri-implantitis.
Recall Intervals
Most implant patients should have professional maintenance every three to six months. The specific interval depends on your risk factors. Patients with a history of periodontal disease, smokers, and those with full-arch restorations may need more frequent visits.
Your recall interval is not set in stone. Your dentist or hygienist will adjust it based on the condition of your implant at each visit. If your home care is excellent and your tissues are healthy, you may extend the interval. If inflammation or plaque accumulation is present, you may need to come in more frequently.
Radiographic Monitoring
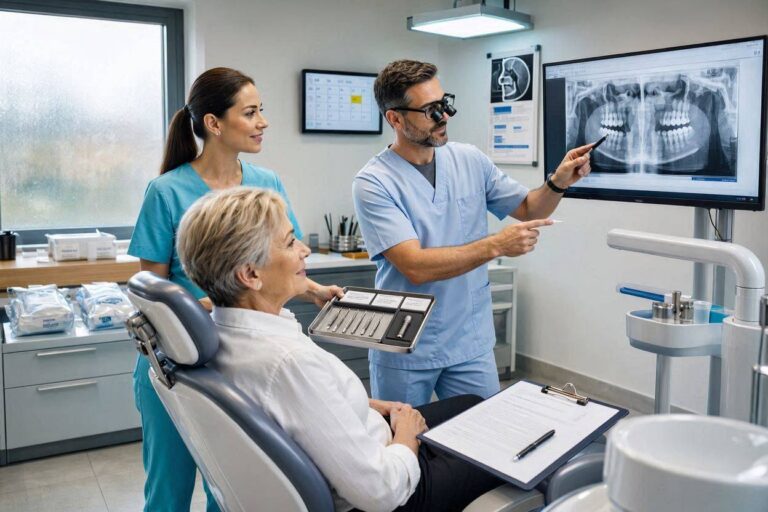
Periodic X-rays are essential for monitoring the bone around your implant. Your dentist will take a periapical radiograph at the time of crown placement, and then typically at one year, and then at regular intervals thereafter.
The X-ray shows the bone level around the implant. Stable bone levels over time indicate a healthy implant. Progressive bone loss indicates a problem, often peri-implantitis, that requires intervention. Early detection of bone loss through routine radiographs allows treatment before the implant is compromised.
Lifestyle Factors That Affect Implant Longevity
Your daily habits and lifestyle choices have a direct impact on the health and longevity of your implants.
Smoking and Implant Health
Smoking is one of the most significant risk factors for implant failure and peri-implantitis. Nicotine constricts blood vessels, reducing blood flow to the gums and bone. The heat and chemicals in tobacco smoke irritate the oral tissues. Smokers have higher rates of implant failure, bone loss, and gum problems.
If you smoke, quitting is the single best thing you can do for your implants. If you cannot or will not quit, reducing the number of cigarettes and maintaining meticulous oral hygiene and frequent professional cleanings can mitigate some of the risk.
Alcohol Consumption
Moderate alcohol consumption is not a direct threat to implants, but excessive alcohol use can impair oral hygiene, contribute to dry mouth, and increase the risk of oral cancer. Alcohol in moderation, combined with good oral care, is generally acceptable for implant patients.
Diet and Chewing Habits
Your implant-supported crown is strong, but it is not indestructible. Avoid using your teeth as tools to open packages, crack nuts, or hold objects. Avoid chewing on ice, hard candies, bones, and other extremely hard foods that could fracture the crown or damage the abutment screw.
If you grind or clench your teeth at night, a condition called bruxism, tell your dentist. A night guard can protect your implant and your natural teeth from the excessive forces generated during grinding. The night guard should be custom-fabricated to fit your implant restoration properly.
Overall Health Management
Conditions that affect your immune system, such as poorly controlled diabetes, can increase the risk of peri-implant disease. Managing your overall health through regular medical care, a balanced diet, and a healthy lifestyle supports your oral health as well.
Recognizing and Responding to Problems
Knowing the warning signs of implant problems allows you to seek help before a minor issue becomes a major one.
Signs of Healthy Peri-Implant Tissue
Healthy gum tissue around an implant is pink, firm, and does not bleed when brushed or flossed. There should be no swelling, redness, pus, or bad taste. The implant should feel solid, with no movement. These are the signs you want to see and maintain.
Warning Signs That Require Attention
Bleeding when brushing or flossing around the implant is a sign of inflammation. Redness, swelling, or tenderness of the gum indicates a problem. Pus or a bad taste suggests infection. Any movement of the implant or the crown is a serious concern. Changes in how the implant feels when you bite could indicate a loose abutment screw or a failing implant.
If you notice any of these signs, contact your dentist promptly. Do not wait for your next scheduled appointment. Early intervention for peri-implant mucositis, inflammation of the soft tissue without bone loss, can prevent progression to peri-implantitis, which involves bone loss and is more difficult to treat.
What to Do If You Have a Concern
Call your implant dentist. Describe your symptoms clearly. The office will advise you whether you need to be seen urgently or whether the concern can wait. Do not self-diagnose or attempt to treat the problem yourself. Delaying professional evaluation of a potential implant problem can lead to implant loss.
Travel and Emergency Preparedness
If you travel frequently or live in a different area from your implant dentist, plan for the possibility of implant problems.
Carry Your Implant Information
Know the brand and type of implant system you have. Your dentist can provide a card with this information. If a component fractures or loosens while you are traveling, a local dentist will need to know the implant system to order compatible parts.
Finding Emergency Care While Traveling
If you experience an implant emergency while away from home, contact your implant dentist first. They may be able to advise you by phone and coordinate care with a local colleague. If you cannot reach your dentist, seek care at a dental office that advertises implant services. Oral surgeons and prosthodontists are most likely to have experience with implant complications.
Conclusion
Caring for new dental implants involves protecting the surgical site during the initial healing period, adopting a meticulous daily hygiene routine that includes gentle brushing, interdental cleaning with implant-safe tools, and water flossing, attending professional maintenance visits every three to six months with a hygienist trained in implant care, and managing lifestyle factors such as smoking, diet, and bruxism. The reward for this disciplined care is an implant that can last a lifetime, functioning comfortably and looking natural for decades.
Frequently Asked Questions
Can I use regular floss around my implant?
Yes, but be gentle. Do not snap the floss through the contact. Use a sawing motion to ease the floss between the teeth, then curve it around the implant and slide it up and down. Implant-specific floss is designed to be gentler on the peri-implant soft tissue.
How often do I need to see the hygienist after getting an implant?
Most implant patients benefit from professional maintenance every three to six months. Your dentist will recommend an interval based on your oral hygiene, risk factors, and the condition of the implant at each visit.
What kind of toothbrush should I use for my implant?
A soft-bristled toothbrush, manual or electric, is appropriate. Avoid medium or hard bristles, which can traumatize the gum tissue. Use gentle pressure and small circular motions.
Can I use mouthwash with alcohol around my implant?
Alcohol-containing mouthwashes can dry the oral tissues and may contribute to irritation. An alcohol-free antimicrobial or fluoride rinse is preferable. Ask your dentist for a recommendation.
What should I do if my implant crown feels loose?
Contact your dentist immediately. A loose crown may indicate a loose abutment screw, which is a minor problem that can be tightened, or a failing implant, which is a serious problem. Do not ignore a loose crown.
Additional Resource:
For more information on implant maintenance and peri-implant health, visit the American College of Prosthodontists at https://www.gotoapro.org.