Dental Office Operatory Design: A Complete Guide
The operatory is the heart of your dental practice. It is where the clinical work happens, where patients form their strongest impressions, and where your team spends most of their working hours. A poorly designed operatory leads to inefficiency, discomfort, and even clinical errors. A well-designed operatory improves workflow, reduces fatigue, and enhances patient care.
Many practice owners focus on the waiting room and reception area. These spaces matter, but the operatory deserves equal attention. It is the room where patients sit in the chair, where procedures are performed, and where your team’s productivity is determined. Every detail, from the position of the dental light to the placement of the instrument cabinet, affects the quality of care you deliver.
This guide covers everything you need to know about dental office operatory design. You will learn about layout principles, equipment placement, ergonomics, lighting, infection control, and practical tips. By the end, you will have a clear plan to design an operatory that works beautifully for both patients and staff.
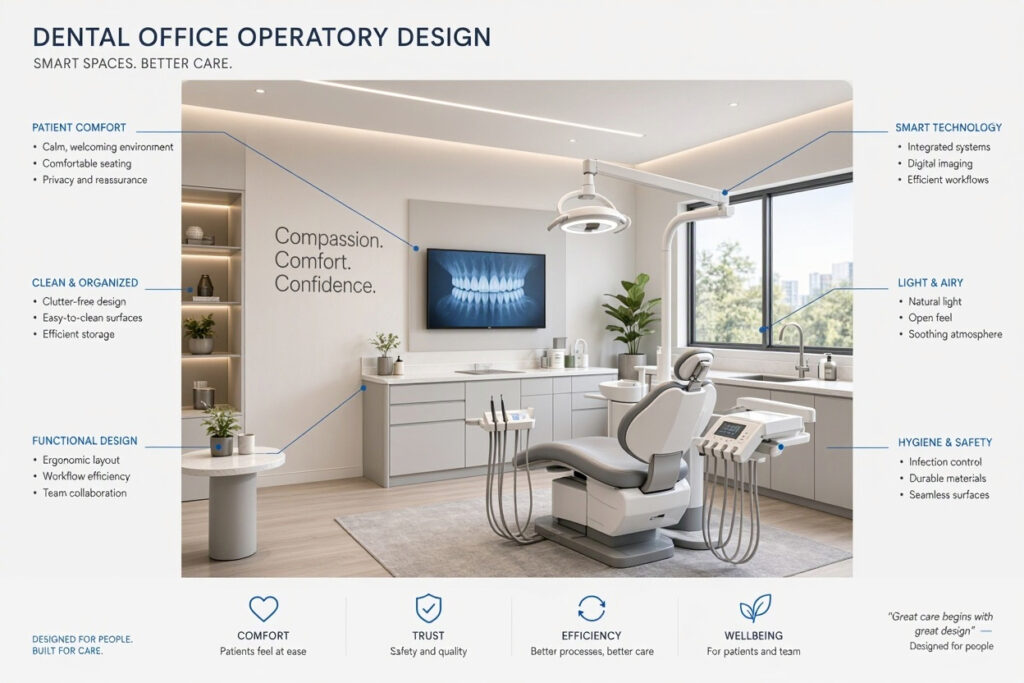
Why Operatory Design Matters
The operatory is more than a room with a dental chair. It is a workspace that shapes every aspect of your clinical day. Here is why its design deserves careful thought.
- It Improves Efficiency: A well-organized operatory reduces wasted movement and saves time between patients. Your team works faster and more smoothly.
- It Enhances Patient Comfort: A calm, clean, and thoughtfully designed space reduces anxiety. Patients feel more at ease and more confident in your care.
- It Supports Staff Health: Poor ergonomics lead to back pain, neck strain, and fatigue. Good design protects your team’s long-term health.
- It Ensures Infection Control: Operatory design directly affects your ability to clean and disinfect between patients. Surfaces, layout, and materials all play a role.
- It Impacts Clinical Outcomes: Good lighting, proper equipment placement, and a clear workspace help you perform procedures accurately and safely.
- It Reflects Your Brand: The operatory is part of your practice’s visual identity. A clean, modern design reinforces professionalism and trust.
“The operatory is where your brand promise meets reality. Patients can forgive a plain waiting room, but they will not forgive a chaotic or uncomfortable treatment room. Design it with intention.” — Dr. Amanda Reid, Dental Office Design Specialist
Core Principles of Operatory Design
Before you choose equipment or paint colors, understand the core principles that guide every successful operatory design.
1. Workflow Efficiency
Every item in the operatory should be within easy reach. Your team should not have to walk across the room to grab a common instrument. Design the space around the procedure, not the other way around.
2. Ergonomics
Dentists and hygienists spend hours in awkward positions. The operatory should support neutral posture. Adjustable stools, properly positioned equipment, and adequate space reduce strain and fatigue.
3. Patient Comfort
The patient chair is the center of the operatory. Everything else should be arranged around it. Consider the patient’s line of sight, comfort, and sense of safety.
4. Infection Control
Surfaces must be easy to clean and disinfect. Minimize clutter and choose materials that resist bacteria. Design the layout so that clean and dirty zones are clearly separated.
5. Flexibility
Your operatory should adapt to different procedures and different clinicians. Modular furniture, adjustable equipment, and flexible lighting allow you to handle a wide range of cases.
6. Privacy and Acoustics
Patients deserve privacy. Soundproofing, solid doors, and thoughtful layout reduce noise and protect confidentiality.
| Principle | Goal | Key Design Choices |
|---|---|---|
| Workflow | Reduce wasted movement | Central equipment placement, organized cabinets |
| Ergonomics | Protect staff health | Adjustable stools, proper equipment height |
| Comfort | Reduce patient anxiety | Comfortable chair, calming decor, good lighting |
| Infection Control | Prevent cross-contamination | Easy-clean surfaces, clear zones |
| Flexibility | Adapt to different procedures | Modular furniture, adjustable lighting |
| Privacy | Protect confidentiality | Solid doors, acoustic panels |
Note for Readers: Design your operatory with input from your team. Hygienists, assistants, and dentists all use the space differently. Their feedback is invaluable.
Operatory Layout: Getting the Basics Right
The layout of your operatory determines how smoothly your team works. Here are the key considerations.
Room Size
A standard dental operatory should be at least 10 feet by 12 feet. This allows room for the dental chair, equipment, cabinets, and movement around the patient. Larger operatories are needed for surgical procedures or for training purposes.
The Three Zones
Divide your operatory into three functional zones.
- The Patient Zone: The dental chair and the area immediately around it. This is where the patient sits and where most procedures happen.
- The Clinician Zone: The area where the dentist and assistant work. This includes the delivery system, instrument trays, and stools.
- The Support Zone: Cabinets, sinks, waste disposal, and storage. This area supports the procedure without cluttering the clinical space.
The “12 O’Clock” Position
Most dental equipment is designed around the 12 o’clock position. The dentist sits at the head of the patient (12 o’clock), the assistant sits to the side (3 o’clock or 9 o’clock depending on the procedure), and the equipment is positioned for easy access.
Delivery System Placement
The dental delivery system (the unit that holds handpieces, suction, and controls) should be positioned so that both the dentist and assistant can reach it without twisting or stretching. Side delivery systems are popular because they keep the equipment out of the patient’s line of sight.
| Layout Element | Recommendation | Why |
|---|---|---|
| Room Size | Minimum 10 x 12 feet | Space for equipment and movement |
| Patient Zone | Centered in room | Focus of all activity |
| Clinician Zone | Around the chair | Efficient access to instruments |
| Support Zone | Along walls | Keeps clinical area clear |
| Delivery System | Side or rear delivery | Reduces clutter, improves access |
Pro Tip: Draw your operatory layout on graph paper before you buy anything. Use cutouts to represent the chair, cabinets, and equipment. This helps you visualize the space and avoid costly mistakes.
Equipment Placement for Efficiency
The right equipment in the right place makes your team faster and more comfortable. Here is a guide to placing the most important items.
Dental Chair
The chair is the center of the operatory. Place it so that the patient’s head is accessible from all sides. Ensure there is enough space behind the chair for the dentist to sit comfortably.
Dental Light
The light should be mounted above the chair and adjustable in all directions. It should not create glare in the patient’s eyes. Modern LED lights are energy-efficient and provide excellent illumination.
Delivery System
Position the delivery system within arm’s reach of both the dentist and assistant. It should not block the patient’s view or the clinician’s movement.
Instrument Cabinet
Place the instrument cabinet near the delivery system. Drawers should open smoothly and be organized by procedure. Frequently used items should be at waist height.
Suction and Saliva Ejector
These should be part of the delivery system or mounted nearby. Ensure the tubing is long enough to reach the patient’s mouth without stretching.
Sink and Handwashing Station
Place the sink near the entrance to the operatory. It should be easily accessible for handwashing before and after procedures. Hands-free faucets are ideal for infection control.
Waste Disposal
Place trash and biohazard containers near the sink and the clinician zone. They should be easy to access without leaving the patient’s side.
“The best operatories feel effortless. Everything is exactly where you need it, when you need it. That does not happen by accident. It happens through careful planning and observation of how your team actually works.” — Mark Reynolds, Dental Office Designer
Ergonomics: Protecting Your Team
Dentistry is physically demanding. Poor ergonomics lead to chronic pain and career-ending injuries. Design your operatory to support your team’s health.
Seating
Invest in high-quality, adjustable dental stools with good back support. The stool should allow the clinician to sit with feet flat on the floor and thighs parallel to the ground. Armrests reduce shoulder strain.
Equipment Height
Position the delivery system and instrument trays at a height that allows the clinician to work with elbows close to the body. Avoid reaching up or down.
Patient Positioning
The dental chair should be adjustable so that the patient’s head is at a comfortable working height for the clinician. For most procedures, the patient should be reclined with the head slightly higher than the feet.
Lighting
Position the dental light so that it illuminates the working area without causing shadows. Adjust the light frequently during procedures to maintain a clear view.
Magnification
Use loupes or a dental microscope to improve visibility and reduce the need to lean forward. This protects the neck and back.
| Ergonomic Factor | Recommendation | Benefit |
|---|---|---|
| Seating | Adjustable stool with back support | Reduces back and neck strain |
| Equipment Height | Elbows close to body | Reduces shoulder fatigue |
| Patient Position | Adjustable chair height | Comfortable working posture |
| Lighting | Adjustable, glare-free | Reduces eye strain |
| Magnification | Loupes or microscope | Improves posture and precision |
Important Note: Encourage your team to take breaks and stretch between patients. Even the best ergonomic design cannot compensate for hours of continuous work without rest.
Lighting in the Operatory
Lighting is critical in the operatory. It affects clinical accuracy, patient comfort, and staff fatigue.
Types of Operatory Lighting
- Dental Operatory Light: The primary light source for procedures. It should be adjustable, bright, and glare-free. LED lights are the modern standard.
- Ambient Lighting: General room lighting. Should be soft and dimmable. Warm white (3500K-4000K) works well.
- Task Lighting: Additional lighting for specific tasks, such as charting or mixing materials. Adjustable desk lamps or under-cabinet lights work well.
- Natural Light: Windows provide natural light and reduce reliance on artificial lighting. However, control glare with blinds or shades.
Lighting Tips
- Use high CRI lights: A CRI of 90 or higher ensures accurate color rendering for shade matching and tissue examination.
- Control glare: Use diffusers and position lights carefully to avoid shining in the patient’s eyes.
- Layer your lighting: Combine ambient, task, and operatory lighting for a balanced, flexible environment.
- Install dimmers: Allow your team to adjust light levels for different procedures and times of day.
Note for Readers: Test your lighting before finalizing your operatory design. Colors and brightness can look different in a showroom versus your actual space.
Infection Control Through Design
Infection control is not just a matter of protocols. It is built into the design of your operatory. Here is how to design for cleanliness.
1. Choose Easy-to-Clean Surfaces
Use non-porous materials for floors, walls, and countertops. Avoid textured surfaces that trap dirt and bacteria. Stainless steel, solid surface countertops, and seamless flooring are excellent choices.
2. Minimize Clutter
The more items in your operatory, the more surfaces you need to clean. Keep supplies in closed cabinets. Remove unnecessary decorations. A clean, minimal space is easier to disinfect.
3. Create Clean and Dirty Zones
Designate specific areas for clean supplies and contaminated instruments. Use color-coded bins and labels. Ensure a clear workflow from dirty to clean.
4. Install Hands-Free Fixtures
Hands-free sinks, soap dispensers, and paper towel dispensers reduce contact points and prevent cross-contamination.
5. Use Barrier Protection
Design your operatory to accommodate barriers on frequently touched surfaces. Choose equipment with smooth surfaces that are easy to wrap or wipe.
6. Ensure Proper Ventilation
Good airflow reduces airborne pathogens. Install HEPA filters and ensure adequate ventilation. Consider air purifiers for additional protection.
| Infection Control Feature | Recommendation | Benefit |
|---|---|---|
| Surfaces | Non-porous, seamless | Easy to clean and disinfect |
| Clutter | Minimize, use closed storage | Fewer surfaces to clean |
| Zones | Clear clean/dirty separation | Prevents cross-contamination |
| Fixtures | Hands-free | Reduces contact points |
| Barriers | Smooth, wrap-friendly equipment | Protects surfaces |
| Ventilation | HEPA filters, good airflow | Reduces airborne pathogens |
Important Note: Always follow CDC and OSHA guidelines for infection control in dental settings. Design choices should support, not replace, proper protocols.
Color and Decor in the Operatory
The operatory should be calm, professional, and welcoming. Color and decor play a key role.
Best Colors for Operatories
- Soft Blue: Calming and trustworthy. A classic choice.
- Sage Green: Natural and healing. Reduces anxiety.
- Warm White: Clean and bright. A safe neutral.
- Light Gray: Modern and clinical. Professional.
Decor Tips
- Keep It Minimal: A few well-chosen pieces are enough. Avoid clutter.
- Hang Calming Artwork: Choose nature scenes or abstract art. Avoid dental-themed images that could increase anxiety.
- Add a Plant: A small, low-maintenance plant adds warmth and improves air quality.
- Consider the Ceiling: Patients look up during procedures. A calming mural or a simple, clean ceiling improves the experience.
- Display Credentials: A small, neat display of licenses and certificates builds trust.
“The operatory should feel like a sanctuary, not a workshop. Patients are vulnerable in that chair. The design should reassure them, not intimidate them.” — Dr. Patricia Nolan, Dental Office Design Consultant
Technology and Equipment Trends
Modern operatories incorporate technology that improves efficiency and patient care. Consider these trends.
1. Digital Imaging
Intraoral cameras, digital X-rays, and 3D scanners provide instant images and reduce radiation exposure. Design your operatory with space for monitors and imaging equipment.
2. Chairside Monitors
Mount a monitor near the chair so patients can see their X-rays and treatment plans. This improves communication and trust.
3. Electric Handpieces
Electric handpieces are quieter and more precise than air-driven models. They improve patient comfort and clinical outcomes.
4. CAD/CAM Systems
Same-day crowns and restorations require specific equipment and space. If you offer these services, design your operatory accordingly.
5. Advanced Suction Systems
High-volume suction and dry vacuum systems improve infection control and patient comfort. They also reduce aerosol production.
| Technology | Benefit | Space Requirement |
|---|---|---|
| Digital Imaging | Instant images, less radiation | Monitor, sensor storage |
| Chairside Monitors | Better patient communication | Mounted monitor near chair |
| Electric Handpieces | Quieter, more precise | Standard delivery system |
| CAD/CAM | Same-day restorations | Milling machine, additional space |
| Advanced Suction | Improved infection control | Specialized plumbing |
Note for Readers: Invest in technology that supports your clinical goals and patient needs. Do not adopt technology just because it is new. Ensure your team is trained and comfortable with new equipment.
Common Operatory Design Mistakes to Avoid
Even well-planned operatories can have flaws. Here are the most common mistakes and how to avoid them.
- Cramped Layout: Too little space makes movement difficult and increases stress. Fix it by planning for adequate room size from the start.
- Poor Equipment Placement: Equipment that is out of reach causes inefficiency and strain. Fix it by observing how your team works and adjusting accordingly.
- Inadequate Lighting: Dark corners and glare make procedures difficult. Fix it with layered, adjustable lighting.
- Clutter: Too many items make cleaning difficult and create a chaotic environment. Fix it with closed storage and minimal decor.
- Ignoring Ergonomics: Poor seating and equipment height lead to pain and fatigue. Fix it by investing in adjustable, supportive furniture.
- Neglecting Infection Control: Hard-to-clean surfaces and clutter undermine your protocols. Fix it with easy-clean materials and clear zones.
- Skipping Team Input: Designing without input from your clinicians leads to impractical spaces. Fix it by involving your team in the planning process.
“The biggest mistake I see is designing for looks instead of function. A beautiful operatory that is uncomfortable to work in is a failed design. Function must come first.” — Michael Torres, Healthcare Design Consultant
Budgeting for Operatory Design
Operatory design is a significant investment. Here is a simple budgeting framework.
| Item | Budget Range | Notes |
|---|---|---|
| Dental Chair | $5,000 – $15,000 | Invest in quality and comfort |
| Delivery System | $3,000 – $8,000 | Choose a system that fits your workflow |
| Dental Light | $1,000 – $3,000 | LED, adjustable, glare-free |
| Cabinets | $2,000 – $6,000 | Modular, easy-clean surfaces |
| Stools | $300 – $1,000 each | Ergonomic, adjustable |
| Sink and Fixtures | $500 – $2,000 | Hands-free recommended |
| Flooring | $500 – $2,000 | Slip-resistant, seamless |
| Lighting | $500 – $1,500 | Layered, dimmable |
| Technology | $2,000 – $20,000+ | Depends on services offered |
Pro Tip: Prioritize the items that most affect your team’s comfort and efficiency. The dental chair, delivery system, and stool are the most important investments. You can upgrade other elements over time.
Frequently Asked Questions
What is the ideal size for a dental operatory?
A standard operatory should be at least 10 feet by 12 feet. Larger rooms are needed for surgical procedures, training, or advanced technology. Always plan for adequate space for movement around the chair.
Where should the delivery system be placed in a dental operatory?
The delivery system should be within arm’s reach of both the dentist and assistant. Side delivery systems are popular because they keep equipment out of the patient’s view and reduce clutter.
What colors are best for a dental operatory?
Soft blue, sage green, warm white, and light gray are the best choices. They are calming, professional, and reduce anxiety. Avoid bright colors and dark shades that can feel overwhelming.
How can I improve ergonomics in my operatory?
Invest in adjustable stools with back support. Position equipment at the correct height for your clinicians. Use magnification to improve posture. Encourage regular breaks and stretching.
What lighting is best for a dental operatory?
Use a high-quality LED dental light with a high CRI (90+). Combine it with soft, dimmable ambient lighting. Ensure the light is adjustable and glare-free.
How do I design my operatory for infection control?
Choose non-porous, easy-clean surfaces. Minimize clutter. Create clear clean and dirty zones. Install hands-free fixtures. Ensure proper ventilation with HEPA filters.
Conclusion
Dental operatory design is a strategic investment in efficiency, comfort, and clinical quality. By focusing on workflow, ergonomics, lighting, and infection control, you can create a space that supports your team and reassures your patients.
Additional Resource
For guidance on infection control and operatory design standards, refer to the CDC’s guidelines on dental infection prevention. https://www.cdc.gov/oralhealth/infectioncontrol/index.html