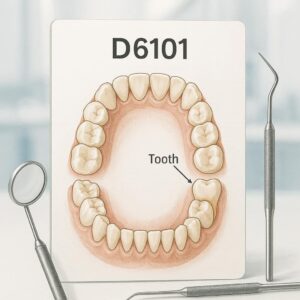
Understanding the D6101 Dental Code: A Complete Guide for Patients
If you have recently visited a periodontist (a gum specialist) or your general dentist has referred you for a complex gum procedure, you might have come across a confusing string of characters on your treatment plan: D6101.
Dental codes can often look like a foreign language. They are part of the Current Dental Terminology (CDT) set maintained by the American Dental Association (ADA). These codes are essential for insurance claims, treatment planning, and ensuring that dental offices and insurance companies are speaking the same language.
This guide is designed to demystify the D6101 dental code. We will explore what it means, why you might need it, how it differs from other codes, and what you can expect regarding costs and recovery. Whether you are a patient trying to understand a bill or simply someone curious about modern dental procedures, this article serves as your comprehensive resource.
What is the D6101 Dental Code?
Let’s start with the basics. The D6101 dental code is a specific billing and description code used in dentistry. According to the official CDT manual, D6101 is defined as:
“Debridement of a peri-implant defect and surface cleaning of the exposed implant surfaces, including surface cleaning of the implant and/or abutment, and bone graft.”
In plain English, this code describes a surgical procedure to clean an infected dental implant and repair the bone around it.
Breaking Down the Terminology
To truly understand this code, let’s break down the key terms used in the definition:
-
Peri-implant defect: “Peri-” means around. An implant is an artificial tooth root. A defect is a problem or area of damage. So, this refers to bone loss or damage surrounding a dental implant.
-
Debridement: This is a medical term for the removal of dead, damaged, or infected tissue. In this context, it means cleaning out the inflamed or infected gum tissue and bacteria from the area around the implant.
-
Surface cleaning of the exposed implant: Implants can become rough or contaminated when exposed to bacteria. This part of the procedure involves physically cleaning and smoothing the metal surface of the implant to remove bacteria and help the gums reattach.
-
Bone graft: Once the area is cleaned, the surgeon places bone grafting material into the defect (the hole in the bone) to encourage new bone growth and restore the lost support.
In short, D6101 is a rescue mission for a failing dental implant.
Why Would You Need a D6101 Procedure?
A dental implant is considered the gold standard for tooth replacement. However, like natural teeth, they are not invincible. The primary reason a patient would need the procedure described by the D6101 code is a condition called Peri-implantitis.
Understanding Peri-implantitis
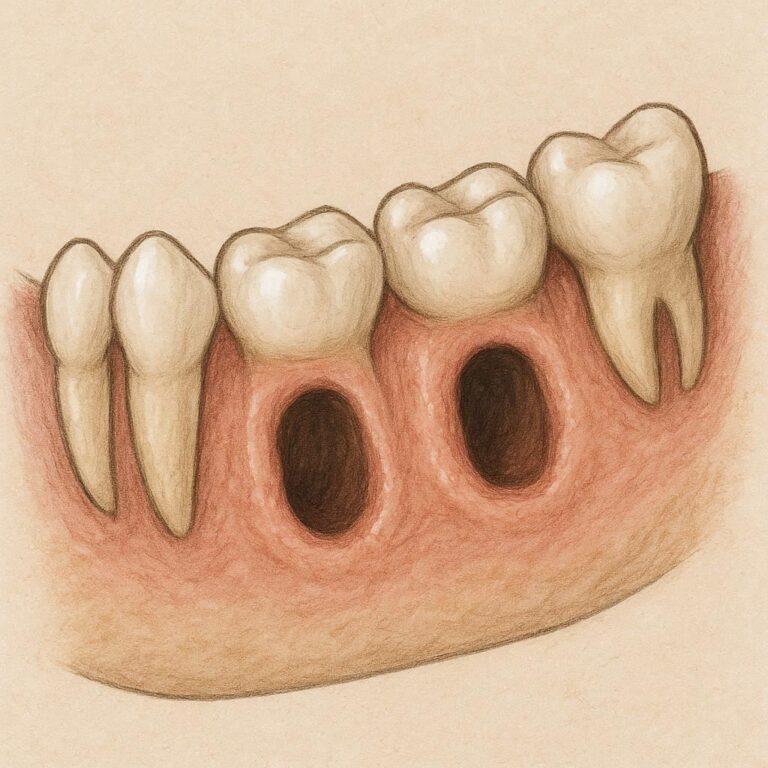
Peri-implantitis is an inflammatory condition affecting the soft and hard tissues around a dental implant. It is similar to gum disease (periodontitis) but occurs around an implant. If left untreated, it leads to progressive bone loss and can ultimately cause the implant to fail and fall out.
Think of it this way: your natural tooth has a periodontal ligament that acts as a shock absorber and provides blood supply. An implant fuses directly to the bone (osseointegration). When bacteria invade the crevice between the implant and the gum, they can destroy the bone much faster because there is no ligament to act as a barrier.
Common Causes of Peri-implantitis
Several factors can lead to this condition:
-
Poor Oral Hygiene: Just like natural teeth, implants require diligent brushing and flossing. Special tools like interdental brushes or water flossers are often needed to clean hard-to-reach areas.
-
Smoking: Tobacco use severely impairs blood flow to the gums, hindering healing and increasing the risk of infection.
-
History of Periodontitis: Patients who lost teeth due to gum disease are at a higher risk of developing peri-implantitis.
-
Uncontrolled Diabetes: Systemic conditions like diabetes can compromise the body’s ability to fight infection.
-
Cement Residue: Sometimes, when the crown is cemented onto the implant, excess cement squeezes out and gets trapped under the gums, acting as a breeding ground for bacteria.
-
Improper Prosthesis Design: A crown that is difficult to clean or an ill-fitting restoration can trap plaque.
Signs and Symptoms to Watch For
How do you know if you might need a D6101 procedure? Be on the lookout for these warning signs around your implant:
-
Bleeding when brushing or flossing around the implant.
-
Red, swollen, or tender gums surrounding the implant.
-
Pus coming from the area.
-
Bad taste in your mouth or persistent bad breath.
-
A feeling that the implant feels loose or wobbly.
-
Pain or discomfort when chewing.
-
Receding gums, making the metal implant post visible.
Important Note: If you experience any of these symptoms, do not wait. Early intervention for peri-implantitis is far less invasive and less expensive than treating advanced stages. Contact your dentist or periodontist immediately.
The D6101 Procedure: What Happens Step-by-Step?
Knowing what to expect can significantly reduce anxiety. The D6101 procedure is a surgical intervention, but it is typically performed under local anesthesia (numbing the area), so you will be comfortable throughout.
Here is a realistic walkthrough of how the procedure generally unfolds:
Step 1: Diagnosis and Preparation
Before the surgery, your dentist will take a recent 3D x-ray (CBCT) to assess the extent of the bone loss. They will also check the implant for mobility. If the implant is already loose, a different approach (possibly removal) might be necessary.
Step 2: Anesthesia and Flap Reflection
Once you are numb, the surgeon makes a small incision in the gum tissue to lift it away from the implant. This is called a “flap” procedure. It provides direct, unobstructed access to the implant threads and the underlying bone defect.
Step 3: Debridement (The Cleaning)
This is the most critical part of the D6101 code. The surgeon will meticulously clean the area:
-
Granuloma Tissue Removal: All infected, inflamed soft tissue is removed from the bone pocket.
-
Implant Surface Decontamination: The exposed threads of the implant are cleaned. This can be done using special titanium or plastic curettes (to avoid scratching the implant), ultrasonic scalers, or methods like air-powder abrasion (similar to a dental cleaning but with special powder) to remove bacterial biofilm.
Step 4: The Bone Graft (D6101)
With the implant now clean and the defect empty, the surgeon places the bone graft material. This material acts as a scaffold for your body’s own bone cells to grow into. It fills the void and helps regenerate the lost bone support around the implant. The code D6101 specifically includes this bone grafting step.
Step 5: Suturing (Stitches)
The gum flap is carefully placed back over the implant and bone graft and secured with sutures. This protects the graft and allows the area to heal.
| Step | Action | Patient Experience |
|---|---|---|
| 1 | Diagnosis & Prep (X-rays, consent) | Consultation, reviewing risks/benefits. |
| 2 | Anesthesia & Flap Reflection | Numbness, no pain, feeling pressure. |
| 3 | Debridement & Surface Cleaning | No sensation, hearing sounds of instruments. |
| 4 | Bone Graft Placement | No sensation, pressure during graft placement. |
| 5 | Suturing | Feeling of pulling/pressure. |
D6101 vs. Other Dental Codes: Avoiding Confusion
One of the most common sources of confusion for patients is the difference between D6101 and other similar-sounding codes. They are all related to implants and grafts, but they describe different procedures. Let’s clear that up.
D6101 vs. D6102
This is the most important distinction. If D6101 is the “rescue mission,” D6102 is the “major reconstruction.”
-
D6101: Debridement of a peri-implant defect and bone graft.
-
Indication: Moderate bone loss where the implant is still stable.
-
Complexity: Less complex.
-
-
D6102: Debridement of a peri-implant defect and bone graft and removal of the implant crown and/or abutment.
-
Indication: Severe bone loss where you need to take the top part off to properly clean the implant.
-
Complexity: More complex. The crown must be unscrewed, the area cleaned, and then a new or the same crown is re-attached.
-
Simple Analogy: Imagine cleaning a bottle.
-
D6101 is like cleaning the mouth of the bottle with a brush without taking the lid off.
-
D6102 is like unscrewing the lid completely to scrub the inside of the neck thoroughly.
D6101 vs. D4266 and D4265
These codes are for gum disease around natural teeth, not implants.
-
D4266 refers to a specific gum surgery to get access to a defect on a tooth.
-
D4265 is the code for placing a biologic material (like enamel matrix derivative) to aid regeneration around a tooth.
It is vital that your dentist uses the correct code (D610x for implants, D426x for teeth) to ensure your insurance claim is processed correctly.
Comparison Table: D6101 vs. D6102
| Feature | D6101 | D6102 |
|---|---|---|
| Official Name | Debridement, peri-implant defect, and bone graft | Debridement, peri-implant defect, with bone graft, and implant/abutment removal |
| Crown Removed? | No. The crown stays in place. | Yes. The crown/abutment is temporarily removed. |
| Indication | Moderate peri-implantitis, accessible defect. | Severe peri-implantitis, inaccessible defect, or need for component replacement. |
| Complexity | Lower | Higher |
| Cost | Generally less expensive | Generally more expensive |
Cost and Insurance Considerations for D6101
Dental procedures can be a significant financial investment. Understanding the costs associated with the D6101 code is an important part of your treatment planning.
What is the Typical Cost?
The cost of a D6101 procedure can vary widely based on several factors:
-
Geographic Location: Costs in major cities are typically higher than in rural areas.
-
Specialist vs. General Dentist: A periodontist, who is a specialist, may charge more than a general dentist performing the same procedure.
-
Extent of the Defect: A larger bone defect may require more graft material, increasing the cost.
-
Type of Bone Graft: There are different types of graft materials (your own bone, donated bone, animal-derived bone, or synthetic). Your own bone (autograft) is often considered the “gold standard” but requires a second surgical site, which can increase the cost and complexity.
As a very rough estimate, you might expect the cost for a D6101 procedure to range from $1,500 to $4,000 or more. This fee typically includes the surgical procedure itself, the bone graft material, and the follow-up care.
Does Dental Insurance Cover D6101?
This is where it gets tricky. Dental insurance can be unpredictable with surgical procedures.
-
Surgical Coverage: Most dental insurance plans include a certain percentage of coverage for “surgery” or “periodontics.” D6101 falls under this category. Your plan might cover 50% to 80% of the cost, depending on your plan type and whether you have met your deductible.
-
Annual Maximums: Dental plans have a low annual maximum (often $1,500 – $2,000). Since the D6101 procedure alone can exceed this amount, you may be responsible for the remaining balance even after insurance pays its portion.
-
“Not a Covered Benefit”: Some insurance policies explicitly exclude treatment for peri-implantitis, considering it a complication they do not cover. Your dentist’s office will verify your benefits, but you should be prepared for the possibility that the procedure may not be covered.
Questions to Ask Your Insurance Provider
Before your procedure, call the customer service number on your insurance card and ask these specific questions:
-
“Is code D6101 a covered benefit under my plan?”
-
“What is my deductible, and has it been met?”
-
“What is my coverage percentage for periodontal surgery (e.g., 50%, 80%)?”
-
“Does this procedure go towards my annual maximum? How much of my annual maximum is remaining?”
Recovery and Aftercare: Ensuring Success
The success of a D6101 procedure depends as much on the healing phase as it does on the surgery itself. Your body needs time and the right conditions to regenerate bone and reattach gum tissue.
The Healing Timeline
-
First 24-48 Hours: You will likely experience some swelling and minor discomfort. Applying an ice pack to the outside of your face in 20-minute intervals can help. Stick to soft foods and avoid chewing on the surgical side.
-
First 1-2 Weeks: The gum tissue will heal. You will return for a follow-up appointment to have the sutures removed. You must be very gentle when cleaning the area.
-
Months 1-4: This is the critical bone healing phase. The graft material is integrating with your existing bone. It is still vulnerable, and excellent hygiene is crucial.
-
4-6+ Months: The bone graft has typically matured enough to provide solid support for the implant. Your dentist will take x-rays to confirm the success of the bone regeneration.
Post-Operative Instructions: A Helpful Checklist
Your dentist will give you specific instructions, but here are the general guidelines for a smooth recovery:
-
Medication: Take any prescribed antibiotics exactly as directed to prevent infection. Use over-the-counter pain relievers as needed.
-
Oral Hygiene:
-
Do not brush or floss the surgical site for the first few days.
-
Gently rinse with a prescribed antimicrobial mouthwash or warm salt water (one teaspoon of salt in a cup of warm water) 2-3 times a day, starting 24 hours after surgery.
-
After the first few days, you may be instructed to use a very soft brush or special interproximal brushes to gently clean the area.
-
-
Diet: Stick to a soft diet for at least two weeks. Think smoothies, yogurt, soup, mashed potatoes, and scrambled eggs. Avoid hard, crunchy, or sticky foods that could disrupt the graft.
-
Activity: Avoid strenuous exercise for a few days, as increased blood pressure can lead to bleeding.
-
No Smoking: This is non-negotiable. Smoking is one of the leading causes of implant failure. If you smoke, this is the time to quit, at least for the duration of the healing process.
Important Note: If you experience severe pain that is not controlled by medication, heavy bleeding, or any signs of an allergic reaction, contact your dentist immediately.
Additional Resources
For the most authoritative and up-to-date information on dental procedures and codes, the primary source is the American Dental Association (ADA). They publish the CDT code set annually.
Visit the American Dental Association (ADA) Website
(Note: Specific code definitions are found in the current CDT manual, which is a purchased publication. Your dental provider will have direct access to the most current version.)
Frequently Asked Questions (FAQ)
1. Is the D6101 procedure painful?
You will be under local anesthesia during the procedure, so you should feel no pain, only pressure. Post-operatively, most patients report manageable discomfort that can be controlled with over-the-counter pain relievers like ibuprofen.
2. Can any dentist perform the D6101 code?
While a general dentist can perform this procedure, it is often referred to a periodontist. Periodontists are specialists with advanced training in gum disease, bone regeneration, and implant surgery, making them best equipped to handle complex cases of peri-implantitis.
3. How long does the D6101 surgery take?
The procedure time can vary based on the severity of the defect and the location of the implant. Generally, you can expect it to take between 45 minutes to 1.5 hours.
4. What happens if I don’t treat peri-implantitis?
If left untreated, peri-implantitis is progressive. It will continue to destroy the bone around your implant, eventually leading to implant mobility and failure. The implant will need to be removed, requiring a more complex (and expensive) procedure to place a new one later.
5. Will my implant look different after the D6101 procedure?
The visible part of your implant (the crown) will look the same. However, because the gum tissue is reflected and then sutured back, the gum line might look slightly different as it heals. In some cases, a small amount of gum recession may occur.
6. Is the bone graft material safe?
Yes, bone grafting is a routine and safe procedure. The materials used (whether synthetic, donated, or your own) are rigorously tested and processed to be biocompatible and safe for use in the human body.
Conclusion
The D6101 dental code represents a sophisticated and effective surgical procedure designed to save a dental implant threatened by peri-implantitis. It involves cleaning the infected area and placing a bone graft to regenerate lost support. While it is more complex than a standard cleaning, it offers a vital second chance for your implant and your smile. Understanding this code, its purpose, and what it entails empowers you to have informed conversations with your dental provider and make the best decisions for your long-term oral health.