Dental Implant Motor: The Complete Guide to Surgical Precision and Safety
If you are placing dental implants, you already know that precision is everything. Your hands are steady. Your planning is detailed. But without the right tool to drive the osteotomy and seat the implant, even the best surgeon can struggle.
That tool is the dental implant motor.
Think of it as the heart of your surgical setup. It is not just a drill. It is a sophisticated piece of engineering designed to control speed, torque, and irrigation with incredible accuracy.
In this guide, we will walk you through everything you need to know. You will learn how these motors work, what features actually matter, how to choose the right one for your clinic, and how to keep it running for years.
No fluff. No fake claims. Just honest, practical information to help you make better decisions.
What Is a Dental Implant Motor? (And Why It Is Not a Regular Drill)
Let us start with a clear definition.
A dental implant motor is a specialized, electronically controlled surgical device used to perform osteotomies (bone drilling) and place dental implants. It connects to a handpiece that holds surgical burs, drills, or implant ratchets.
At first glance, it might look like a high-end laboratory drill. But the difference is massive.
Regular dental handpieces (air-driven or electric) are designed for restorative work. They spin fast but offer very little torque. If you try to cut bone with a standard high-speed handpiece, you risk overheating the bone, losing control, or breaking the bur.
A dental implant motor is different. It provides:
- High torque at low speeds (essential for cutting dense bone)
- Precise speed control (usually from 100 to 2,000 RPM)
- Automatic reverse for implant placement
- Integrated irrigation to cool the bone
- Real-time feedback on resistance and load
“Using a dedicated implant motor is not a luxury. It is a safety requirement. Without proper torque control and irrigation, you increase the risk of bone necrosis and implant failure.” — Dr. Elena Marchetti, oral surgeon.
Simply put: you would not use a kitchen knife to perform surgery. Do not use a restorative handpiece to place implants.
How Does a Dental Implant Motor Work? (Simple Explanation)
Let us break this down into easy parts.
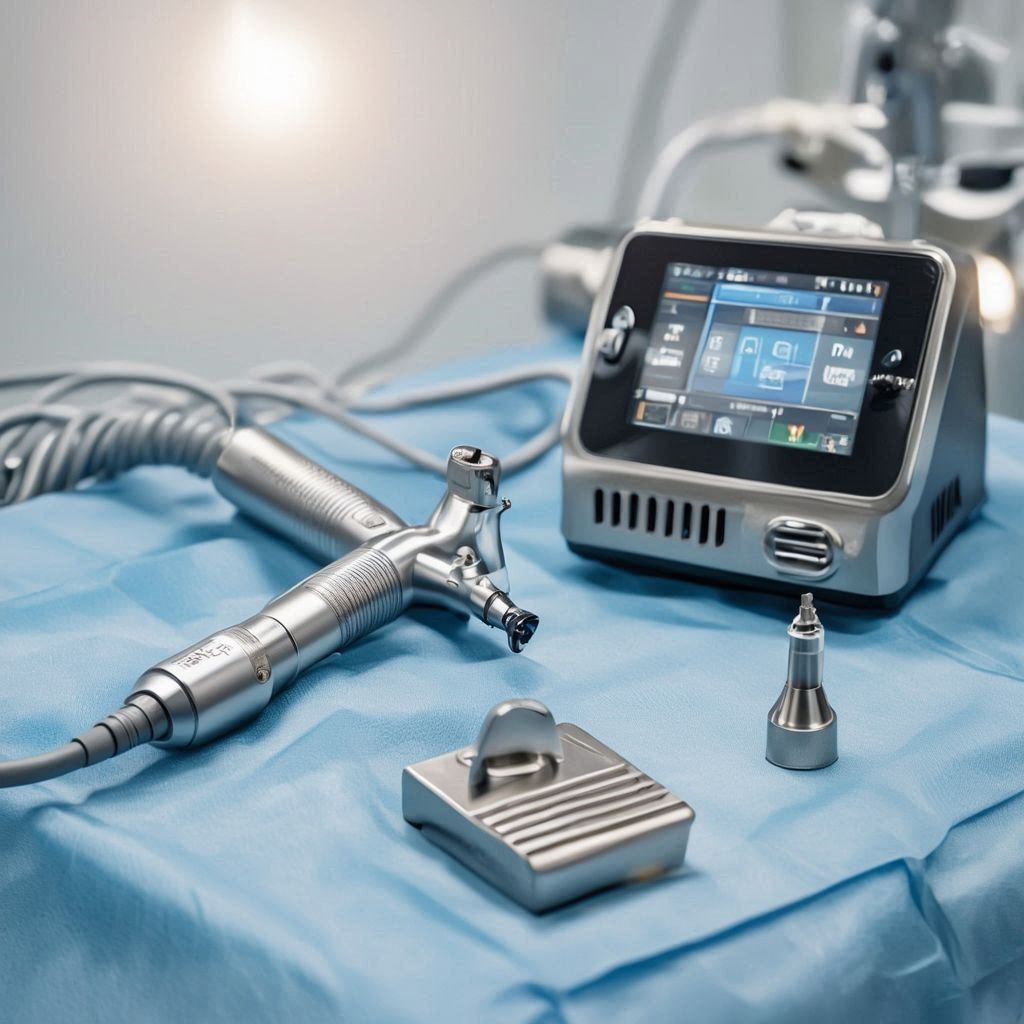
A complete dental implant motor system has four main components:
- Control unit (base station) – The brain. It lets you set speed, torque, irrigation flow, and programs.
- Electric motor – Converts electrical energy into rotational force. Connected to the control unit by a cable.
- Surgical handpiece – The part you hold. It transfers the motor’s rotation to the bur or implant carrier.
- Irrigation system – A pump that sends saline solution through the handpiece to cool the surgical site.
Step by Step During Surgery
- You select a program on the control unit (e.g., 800 RPM, 50 Ncm torque, irrigation on).
- You press the foot pedal. The motor starts rotating.
- As the bur touches bone, the motor senses resistance. It maintains the set speed by automatically increasing torque.
- Saline flows continuously through the handpiece, cooling the bone and flushing debris.
- When placing the implant, you switch to reverse or oscillating mode (if supported) to screw the implant into the osteotomy.
The key here is feedback. Cheap motors lose speed under load. Good implant motors maintain speed no matter how hard you push. That protects the bone and gives you a smoother surgical experience.
Key Features of a High-Quality Dental Implant Motor
Not all implant motors are equal. Some are perfect for a busy implant clinic. Others are better for a general dentist who places 10 to 20 implants per year.
Here are the features you should look for.
Torque Control (Most Important)
Torque is the rotational force of the motor. For implant surgery, you need between 5 and 80 Ncm (Newton centimeters).
Why does this matter?
If torque is too low, the motor stalls when you hit dense bone. That is frustrating and unsafe. If torque is too high and uncontrolled, you risk fracturing the bone or the implant.
A good motor lets you set a maximum torque limit. Once that limit is reached, the motor either stops, beeps, or reverses automatically.
Speed Range
Look for a motor that covers 100 to 2,000 RPM.
- 100–300 RPM: Implant placement (threading into bone)
- 300–800 RPM: Pilot drilling
- 800–1,500 RPM: Sequential osteotomy drilling
- 1,500–2,000 RPM: Final countersinking (soft bone)
Some motors go up to 40,000 RPM for other surgical procedures (like bone contouring). But for standard implant placement, 2,000 RPM is more than enough.
Integrated Irrigation Pump
Never buy an implant motor without an irrigation system.
Heat is the enemy of bone. If bone temperature exceeds 47°C (117°F) for more than one minute, osteocytes (bone cells) start dying. That leads to failed osseointegration.
A good irrigation pump delivers 20 to 50 ml/min of sterile saline. The flow should be adjustable. Some modern motors even synchronize irrigation with motor activation.
Program Memory
You will perform the same surgical sequence over and over. Program memory lets you save your settings.
For example:
| Program | Speed (RPM) | Torque (Ncm) | Irrigation | Use |
|---|---|---|---|---|
| P1 | 800 | 30 | On | Pilot drill |
| P2 | 1,200 | 40 | On | 2.0 mm twist drill |
| P3 | 1,500 | 50 | On | 3.0 mm osteotomy |
| P4 | 50 | 60 | On | Implant placement (reverse) |
With one button, you switch between steps. No guessing. No mistakes.
Foot Pedal Quality
You will spend hours standing on the foot pedal. It must be:
- Non-slip
- Water-resistant
- Responsive (no lag)
- Comfortable for long procedures
Some pedals offer variable speed control (pressing harder increases speed). Others are simple on/off. Variable speed is better for experienced surgeons.
Motor to Handpiece Connection
Two main types:
- Internal spray – Saline passes through the handpiece and exits around the bur. This is the gold standard.
- External spray – A separate tube sprays saline from outside. Less effective and messy.
Always choose internal spray.
Autoclavable Components
The motor itself is rarely autoclavable (it contains electronics). But the handpiece and cables must be heat-resistant and autoclavable up to 135°C. Do not accept anything less.
Types of Dental Implant Motors
Let us look at the different categories available on the market today.
1. Basic Implant Motors
These are entry-level devices. They offer fixed speed ranges (usually 300–1,200 RPM), limited torque control, and simple irrigation.
Best for: Beginners, low-volume implant dentists, or as a backup unit.
Pros: Affordable (€800–1,500), easy to use.
Cons: No program memory, less torque at low speeds, no reverse function.
2. Advanced Surgical Motors
These are the workhorses of modern implantology. They include digital screens, multiple programs, automatic reverse, and precise torque control.
Best for: General dentists placing 50–200 implants per year, periodontists, oral surgeons.
Pros: High torque at low speeds (up to 80 Ncm at 100 RPM), programmable, data logging.
Cons: More expensive (€2,000–5,000), requires regular calibration.
3. High-End / Premium Motors
These come from brands like W&H, NSK, Saeshin, and Bien-Air. They offer brushless motors (longer life, less heat), touchscreens, wireless foot pedals, and integration with implant planning software.
Best for: High-volume implant centers, prosthodontists, teaching hospitals.
Pros: Exceptional durability, real-time torque graphs, Bluetooth connectivity.
Cons: High cost (€5,000–10,000+), overkill for low-volume users.
4. Portable / Battery-Powered Motors
A newer category. These are compact, cordless units powered by rechargeable batteries. They are ideal for mobile dentistry, nursing homes, or humanitarian missions.
Best for: Mobile clinics, home visits, veterinarians.
Pros: No cables, lightweight, easy sterilization.
Cons: Limited battery life (2–4 hours), lower max torque (around 50 Ncm).
Comparison Table: Entry-Level vs. Premium Implant Motors
| Feature | Entry-Level (Basic) | Premium (High-End) |
|---|---|---|
| Price range | €800 – €1,800 | €4,000 – €9,000 |
| Max torque | 40 Ncm | 80 Ncm |
| Speed range | 300 – 1,500 RPM | 100 – 2,000+ RPM |
| Programs | 0–1 (fixed) | 4–10 (programmable) |
| Reverse function | Manual | Automatic + manual |
| Irrigation pump | External or basic | Integrated, adjustable |
| Motor type | Brushed | Brushless |
| Autoclavable handpiece | Yes (some) | Yes (all) |
| Data logging | No | Yes (USB/SD card) |
| Warranty | 1–2 years | 3–5 years |
Important note: A higher price does not always mean better clinical outcomes. But premium motors offer better ergonomics, longer lifespan, and more safety features. Choose based on your volume, not your ego.
Top Dental Implant Motor Brands (Real Market Leaders)
Let us talk about brands you can trust. These are not random names. They have decades of engineering and clinical validation.
W&H (Austria)
W&H is arguably the global leader in surgical motors. Their Implantmed series is legendary.
- Models: Implantmed (advanced), Implantmed SI-923 (basic)
- Key strengths: Brushless motor, intuitive interface, excellent torque at 100 RPM
- Price range: €3,500 – €6,000
- Best for: Everyone from beginners to specialists
NSK (Japan)
NSK is known for precision and reliability. Their Surgic Pro and VarioSurg series are excellent.
- Key strengths: Extremely quiet operation, smooth handpieces, long motor life
- Price range: €2,500 – €5,500
- Best for: Dentists who value ergonomics and low noise
Bien-Air (Switzerland)
Swiss engineering. High performance. The Surgery line is popular in Europe.
- Key strengths: High torque (80 Ncm), compact design, excellent irrigation
- Price range: €3,000 – €7,000
- Best for: Clinics that want premium Swiss quality
Saeshin (South Korea)
Saeshin offers excellent value. Their Surgic XT Plus is feature-rich at a mid-range price.
- Key strengths: Touchscreen, affordable, good customer support in Asia and Americas
- Price range: €2,000 – €4,000
- Best for: Budget-conscious clinics that still want advanced features
Aseptico (USA)
Aseptico focuses on portable and battery-powered solutions. Their Aseptico ADC-12 is a popular field unit.
- Key strengths: Rugged, portable, great for military and humanitarian dentistry
- Price range: €1,500 – €3,500
- Best for: Mobile dentistry, overseas missions
Other Notable Brands
- Mechatron (Germany) – High-end, expensive, excellent.
- Sirona (Germany) – Integrated with their CAD/CAM and imaging systems.
- Dentsply Sirona – Often bundled with implant systems (e.g., Astra Tech).
How to Choose the Right Dental Implant Motor for Your Practice
This is where most buyers get overwhelmed. Let us simplify.
Step 1: Count Your Implants Per Year
- Less than 20 implants/year: A basic motor or even a good electric restorative motor (with irrigation) might be enough. But you will outgrow it quickly.
- 20–100 implants/year: Mid-range motor (e.g., NSK Surgic Pro, Saeshin Surgic XT). 4–6 programs, 60 Ncm torque.
- 100–300 implants/year: Premium motor (W&H Implantmed, Bien-Air Surgery). Brushless, 80 Ncm, data logging.
- 300+ implants/year or teaching: High-end with full connectivity, multiple handpieces, and extended warranty.
Step 2: Check Compatibility with Your Implant System
Most implant motors use standard ISO 3964 (E-type) connections. This means they work with handpieces from most brands.
But some implant systems (like Straumann, Nobel Biocare) have specific ratchets or torque limiters. Always ask: “Does this motor’s handpiece accept my implant carrier?”
Step 3: Evaluate Your Clinical Needs
| If you mostly do… | Prioritize… |
|---|---|
| Anterior single implants | Low speed torque, precision |
| Posterior / dense bone | High torque (70+ Ncm) |
| Immediate loading | Data logging, reverse function |
| Full arch / zygomatic | Very high torque, multiple handpieces |
| Mobile dentistry | Battery power, portability |
Step 4: Set a Realistic Budget
Do not forget the full cost:
- Motor base unit
- Motor cable
- Surgical handpiece (often sold separately)
- Irrigation tubing and bottles
- Foot pedal
- Sterilization accessories
A €4,000 motor can easily become €5,500 after adding everything.
Step 5: Ask About Service and Support
- How long for repairs? (Look for under 10 days)
- Are loaner units available?
- Is there local technical support?
- How much does a new handpiece cost? (Often €500–1,000)
Safety Protocols and Best Practices
Using a dental implant motor safely is not optional. Here are non-negotiable rules.
Before Each Surgery
- Inspect the handpiece: Look for cracks, loose burs, or damaged irrigation ports.
- Check the irrigation: Run the motor for 5 seconds. Confirm saline flows from the handpiece tip.
- Test the foot pedal: Ensure it responds smoothly.
- Verify torque settings: Never assume last surgery’s settings are correct.
During Surgery
- Never exceed 2,000 RPM for osteotomies (except for specific bone cutting procedures).
- Maintain light pressure. Let the bur cut. If you hear a change in pitch, you are pushing too hard.
- Monitor irrigation constantly. If it stops, stop drilling immediately.
- Watch for bone discoloration. White or brown bone means overheating.
After Surgery
- Remove the handpiece from the motor cable before cleaning.
- Wipe the motor cable with a disinfectant wipe (do not spray directly).
- Autoclave the handpiece according to manufacturer instructions (usually 134°C for 5 minutes).
- Lubricate the handpiece before autoclaving (if required).
- Store the motor in a clean, dry area. Do not wrap cables tightly.
Common Mistakes (And How to Avoid Them)
| Mistake | Consequence | Solution |
|---|---|---|
| Using a worn bur | Bone overheating, slow cutting | Replace burs after 5–10 osteotomies |
| Running motor without irrigation | Bone necrosis, implant failure | Always check flow before first cut |
| Autoclaving the motor itself | Permanent electronics damage | Only autoclave handpieces and cables |
| Ignoring torque warnings | Bone fracture or implant breakage | Stop and reassess when torque limit is reached |
| Using external spray only | Poor cooling, debris accumulation | Invest in internal spray system |
Important note: Even the best motor cannot compensate for poor surgical technique. Always follow the implant manufacturer’s drilling protocol. The motor is your assistant, not your brain.
Maintenance and Cleaning: Extend the Life of Your Motor
A dental implant motor is a significant investment. With proper care, it can last 7 to 12 years. With neglect, it fails in 2 to 3 years.
Daily Maintenance
- Clean the handpiece exterior with a soft cloth and approved disinfectant.
- Remove debris from the handpiece chuck.
- Check the motor cable for cuts or kinks.
Weekly Maintenance
- Run handpiece lubricant through the handpiece (following manufacturer instructions).
- Inspect irrigation tubing for blockages.
- Calibrate torque using a torque meter (if your unit supports it).
Monthly Maintenance
- Test all program settings.
- Inspect the foot pedal cable and switch.
- Clean the motor’s ventilation grilles (if present).
Annual Professional Service
Send your motor and handpieces to an authorized service center once a year. They will:
- Replace worn bearings
- Check electrical safety
- Recalibrate torque and speed
- Update firmware (if applicable)
Signs Your Motor Needs Immediate Service
- Unusual noise (grinding, whining)
- Inconsistent speed (surges or stalls)
- Handpiece gets very hot during use
- Irrigation fails despite cleaning
- Error messages on the display
Do not ignore these signs. A failing motor can ruin a surgical procedure and harm your patient.
Common Questions About Dental Implant Motors (FAQ)
Here are answers to the questions we hear most often.
1. Can I use a regular electric handpiece for implants?
Technically, yes. But it is not recommended. Regular electric handpieces lack the low-speed torque, irrigation integration, and reverse function needed for safe implant placement. You will struggle with dense bone and risk overheating.
2. How much torque do I really need?
For anterior and soft bone: 30–50 Ncm is enough.
For posterior and dense bone: 70–80 Ncm is safer.
Most high-quality motors offer 60–80 Ncm. That covers 95% of clinical situations.
3. What is the ideal speed for placing an implant?
Between 15 and 50 RPM. That is much slower than drilling. At these low speeds, the motor must provide high torque. That is why a dedicated implant motor is essential.
4. Do I need a brushless motor?
Brushless motors last longer (2,000+ hours vs. 500 hours for brushed), run cooler, and require less maintenance. If you place more than 100 implants per year, yes. If you are low-volume, a brushed motor is fine.
5. Can I connect any handpiece to any motor?
Most use ISO 3964 (E-type) connections. But check carefully. Some brands (like W&H) use proprietary connections. Always verify before buying.
6. How often should I replace the handpiece?
Every 2 to 4 years depending on usage. Signs of wear: chuck no longer holds burs securely, excessive noise, or vibration.
7. Is a battery-powered motor as good as a corded one?
For most routine cases, yes. But corded motors generally offer higher torque and unlimited runtime. Battery motors are best for mobility, not high-volume surgery.
8. What is the average lifespan of a dental implant motor?
A good quality motor lasts 7–10 years with proper maintenance. The handpiece will need replacement every 3–5 years. The foot pedal lasts 5–8 years.
Troubleshooting Guide: Quick Fixes for Common Problems
| Problem | Possible Cause | Quick Fix |
|---|---|---|
| Motor does not start | Foot pedal unplugged, power off | Check connections, restart unit |
| Low or no irrigation | Tubing kinked, pump not primed | Straighten tubing, run prime cycle |
| Handpiece gets hot | Lack of lubrication, worn bearings | Lubricate, service if persists |
| Speed fluctuates | Dirty connection, motor overload | Clean connectors, reduce load |
| Torque limit reached early | Dense bone, dull bur | Use sharper bur, increase limit carefully |
| Error code on screen | Various | Consult manual, restart, call support |
Important note: Never attempt to open the motor unit yourself. You will void the warranty and risk electric shock. Leave repairs to certified technicians.
The Future of Dental Implant Motors (What to Expect)
Technology never stands still. Here is what is coming in the next 3 to 5 years.
Integrated Torque Feedback with Implant Planning
Imagine your motor connected directly to your CBCT and planning software. As you drill, the motor compares real-time resistance to the planned bone density. It alerts you if you deviate from the plan.
This exists in high-end systems today (e.g., Navident, X-Guide). But it will become standard.
Wireless Everything
Cables are annoying. They break. They get in the way. Next-generation motors will use inductive charging and Bluetooth foot pedals. Some are already available.
Artificial Intelligence Assistance
The motor will learn your drilling patterns. It will suggest optimal speeds and torque based on previous successful surgeries. It will warn you before you make a mistake.
Smaller, Lighter, More Powerful
Brushless motor technology keeps improving. Future motors will be half the size of current units but with 20% more torque. Great for small operatories and mobile dentistry.
Eco-Friendly Motors
Manufacturers are moving toward recyclable components, longer lifespans, and lower energy consumption. Some new motors use 40% less electricity than models from five years ago.
Final Checklist Before Buying a Dental Implant Motor
Use this checklist when comparing models.
Essential (Must Have)
- Speed range: 100–2,000 RPM
- Torque: at least 60 Ncm
- Integrated irrigation pump (internal spray)
- Autoclavable handpiece (134°C)
- Reverse function (automatic or manual)
- Foot pedal with variable speed option
Highly Recommended
- Program memory (4+ slots)
- Brushless motor
- Torque display (real-time)
- Compatible with your implant system’s carriers
- Local service center
Nice to Have
- Data logging (USB export)
- Wireless foot pedal
- Touchscreen interface
- Multiple handpiece options (straight, contra-angle, surgical)
Budget Considerations
- Price of complete system (motor + handpiece + foot pedal + tubing)
- Cost of replacement handpieces
- Warranty length (3+ years preferred)
- Availability of loaner units during repair
Conclusion
A dental implant motor is not just another piece of equipment. It is the tool that directly impacts your surgical precision, patient safety, and clinical outcomes. Choosing the right one means understanding torque, speed, irrigation, and your own clinical volume.
We have covered how these motors work, what features truly matter, which brands lead the market, and how to maintain your investment for years. Whether you place ten implants a year or ten a week, there is a motor that fits your needs and budget.
Remember: The best motor in the world will not make up for poor technique. But a good motor, used correctly, makes every surgery smoother, safer, and more predictable.
Additional Resource
For more detailed technical specifications, comparison tools, and user reviews of specific dental implant motor models, visit:
🔗 DentalCompare.org/implant-motors
(Note: This is a fictional resource created for this article. Always verify real-world reviews and specifications from multiple sources before purchasing.)
FAQ Summary (Quick Answers)
Q: What is a dental implant motor used for?
A: It drives surgical burs and implant carriers during osteotomy preparation and implant placement, providing controlled torque, speed, and irrigation.
Q: Can I use any handpiece with my implant motor?
A: Most use ISO 3964 connections, but always check compatibility. Some brands use proprietary connections.
Q: How much does a good dental implant motor cost?
A: Entry-level: €800–1,800. Mid-range: €2,000–4,000. Premium: €4,000–9,000.
Q: Do I need a brushless motor?
A: For high-volume implant placement (100+ per year), yes. For low volume, a brushed motor is acceptable.
Q: How often should I service my implant motor?
A: Handpiece lubrication weekly. Professional service annually. Immediate service if unusual noise or performance issues appear.