Dental Implant Steps: From Consultation to a Confident Smile
The loss of a tooth is more than a gap in a smile; it is a biological event that triggers a cascade of changes. The bone that once supported the root begins to resorb, weakening the foundation of neighboring teeth. Adjacent teeth may shift, altering your bite and compromising your ability to chew effectively. For decades, the solutions—dentures and bridges—addressed the crown (the visible part of the tooth) but ignored the root, leaving the underlying problem of bone loss unchecked.
Then came the paradigm shift: the dental implant. A dental implant is not merely a prosthetic tooth; it is a sophisticated, biocompatible titanium or zirconia screw that is surgically placed into the jawbone to act as an artificial tooth root. This single innovation revolutionized restorative dentistry by providing a solution that is functionally, aesthetically, and biologically superior. It restores not just the tooth, but the entire tooth organ, halting bone loss and providing a level of stability and comfort that is often indistinguishable from a natural tooth.
The journey to receiving a dental implant is a meticulously planned and executed collaboration between you, your restorative dentist, and often a surgical specialist like an oral surgeon or a periodontist. It is a process that demands precision, patience, and a deep understanding of oral biology. This article will serve as your definitive guide, demystifying each step of the dental implant process, from the initial spark of consideration to a lifetime of confident smiles. We will delve deep into the science, the art, and the practical realities of this life-changing procedure.
2. Phase 1: The Foundational Consultation and Meticulous Planning
The success of a dental implant is determined long before the first surgical tool is ever lifted. It is forged in the detailed and critical planning phase, where potential problems are identified and solved on paper and screen, ensuring a smooth and predictable surgical outcome.
Initial Consultation: The First Conversation
Your journey begins with a comprehensive consultation. This is far more than a simple chat; it is a data-gathering mission and a relationship-building session. Your dentist will:
-
Review Your Medical History: A thorough review is essential. Conditions like uncontrolled diabetes, osteoporosis, cardiovascular disease, or a history of radiation therapy to the jaw can affect healing and treatment planning. All medications, including blood thinners and bisphosphonates, must be disclosed.
-
Discuss Your Dental History: Why was the tooth lost? Trauma, decay, or gum disease? Understanding the past helps prevent future complications. Your history with periodontal disease is particularly relevant, as healthy gums are critical for implant success.
-
Understand Your Goals and Expectations: Are you looking to restore function for eating? Improve speech? Or is aesthetic enhancement the primary goal? A clear understanding of your desires ensures the final result meets your vision.
-
Conduct a Preliminary Oral Examination: The dentist will visually examine the edentulous (toothless) area and adjacent teeth, check your bite (occlusion), and assess your oral hygiene. This initial exam helps determine if you are a preliminary candidate.
The Diagnostic Arsenal: 3D CBCT Scans & Intraoral Impressions
If you are deemed a potential candidate, the next step is advanced diagnostics to see what lies beneath the surface.
-
Panoramic X-ray (Panorex): This two-dimensional image provides a broad overview of the entire oral cavity—jaws, teeth, sinuses, and nerves. It’s a good initial screening tool.
-
Cone Beam Computed Tomography (CBCT): This is the gold standard for implant planning. A CBCT scanner rotates around your head, capturing hundreds of images that are reconstructed into a precise 3D model of your jawbone. This model allows the dental team to:
-
Measure Bone Quantity and Quality: Precisely determine the height, width, and density of the bone at the implant site. Insufficient bone volume is a primary reason a patient may not be an immediate candidate.
-
Locate Vital Structures: Identify the exact position of critical anatomical features like the inferior alveolar nerve (which provides sensation to the lower lip and chin) and the maxillary sinuses. Placing an implant without knowing the location of these structures can lead to permanent numbness or sinus complications.
-
Plan with Pinpoint Accuracy: Using specialized software, the surgeon can virtually place the implant within the 3D model, selecting the ideal implant size, angle, and depth for maximum stability and avoidance of vital structures.
-
-
Intraoral Scans or Impressions: A digital scanner or traditional physical impression is taken to create a model of your teeth. This model is used to study your bite and can be integrated with the CBCT data for guided surgery planning.
The Blueprint: Collaborative Treatment Planning
Armed with all this data, your dental team develops a customized treatment plan. This plan addresses:
-
The Number of Implants Needed: Is it for a single tooth, multiple teeth, or a full arch?
-
The Need for Additional Procedures: Does the site require bone grafting or a sinus lift? (These will be covered in detail later).
-
The Surgical Protocol: Will it be a traditional two-stage surgery or an immediate load protocol?
-
The Timeline: A realistic schedule from surgery to final restoration, including healing periods.
-
The Financial Investment: A detailed breakdown of all costs involved.
This plan is presented to you, and all your questions are answered. Informed consent is obtained, ensuring you fully understand the procedure, its benefits, risks, alternatives, and costs.
Pre-Surgical Preparations: Ensuring a Sterile and Safe Environment
In the days leading up to surgery, you may be prescribed antibiotics to prevent infection or asked to use an antibacterial mouthwash like chlorhexidine. If sedation is planned, you will be given pre-operative instructions, such as fasting. The surgical team prepares the operatory, ensuring all instruments are sterilized and the advanced surgical guides, if used, are ready.
3. Phase 2: The Surgical Procedure – Precision in Action
On the day of surgery, the meticulously crafted plan is executed with precision. While the specifics may vary, the core steps of placing a standard implant remain consistent.
Anesthesia and Sedation: Ensuring Complete Comfort
The procedure begins with profound local anesthesia administered to the surgical site, completely numbing the area. For patients with dental anxiety, additional sedation options are available, from oral sedatives (a pill) to IV sedation, which induces a state of deep relaxation, often with no memory of the procedure afterward.
The Incision and Reflection: Gaining Access to the Jawbone
Once you are completely comfortable, the surgeon makes a small incision in the gum tissue at the implant site. This flap of tissue is gently reflected (pulled back) to fully expose the underlying jawbone, providing direct visual and physical access for the next steps.
The Sequence of Drilling: A Testament to Precision
This is where the CBCT data and surgical planning become reality. Using a series of specialized drills that increase in diameter incrementally, the surgeon carefully prepares a precise osteotomy (a hole) in the jawbone.
-
Pilot Drill: A small, round drill marks the exact location and initial angulation, as determined by the surgical guide or freehand skill.
-
Sequential Drilling: A series of drills, each slightly wider than the last, gradually widen the osteotomy to the exact diameter required for the chosen implant. This slow, gradual process prevents excessive heat generation, which can cause bone cell death (necrosis) and jeopardize osseointegration. The drills are constantly cooled with a sterile saline solution to manage temperature.
-
Profile Drill/Thread Former: The final drill in the sequence often shapes the top of the osteotomy to match the specific profile of the implant being placed.
-
Depth Gauge: The surgeon frequently checks the depth and alignment of the osteotomy to ensure it matches the virtual plan perfectly.
The Sequential Drilling Process for a Standard Dental Implant
| Step | Instrument | Purpose | Key Consideration |
|---|---|---|---|
| 1 | Pilot Drill / Round Bur | To initiate the osteotomy and establish correct position and angulation. | Precision here dictates the entire placement. |
| 2 | 2.0mm Twist Drill | To gradually widen the osteotomy to a specific diameter. | Constant irrigation with saline is critical to prevent thermal bone injury. |
| 3 | 2.8mm Twist Drill | Further widens the osteotomy to the final diameter. | Depth stops on the drill ensure the precise depth is not exceeded. |
| 4 | Profile Drill / Countersink | Shapes the crest (top) of the bone to accommodate the implant’s collar. | Ensures the implant sits flush with or slightly below the bone crest. |
| 5 | Bone Tap (Optional) | Used in dense bone to pre-cut the threads that the implant will follow. | Not always necessary; many modern implants are “self-tapping.” |
Implant Placement: The Fixture Finds Its Home
The sterile, packaged implant is then opened and attached to a handpiece or a manual driver. The surgeon carefully inserts the implant into the prepared osteotomy, slowly screwing it into place until it is fully seated at the predetermined depth and position. The implant is designed to fit snugly within the bone, achieving what is known as primary stability—a mechanical hold from the pressure of the bone against the implant threads. This primary stability is a critical prerequisite for successful osseointegration.
The Healing Cap and Suturing: Guiding Soft Tissue Healing
Once the implant body is placed, a key decision is made:
-
Two-Stage Surgery (Standard Protocol): A cover screw is placed on top of the implant, and the gum tissue flap is sutured closed over it, completely burying the implant. This protects it during the initial healing phase. After healing, a second minor surgery is needed to expose the implant and attach a healing cap.
-
One-Stage Surgery: A longer healing abutment is attached to the implant immediately after placement. This abutment protrudes through the gum tissue, so a second surgery is not required. The gum heals around this abutment.
The incision is then sutured with dissolvable or non-dissolvable stitches. A postoperative X-ray is usually taken to confirm the implant’s final position.
4. Phase 3: The Crucial Healing Period – Osseointegration
With the surgery complete, the most critical biological process begins. The success of the entire procedure now hinges on the body’s innate ability to heal.
The Biological Miracle: What is Osseointegration?
Coined by Professor Per-Ingvar Brånemark, the pioneer of modern implantology, osseointegration refers to the direct structural and functional connection between living bone and the surface of a load-bearing artificial implant. It is not the bone simply healing around the implant; it is a direct bond at the microscopic level.
After implantation, the body treats the titanium or zirconia surface as a natural structure. Bone-forming cells (osteoblasts) migrate to the site and begin to deposit new bone matrix directly onto the specially treated, often roughened, surface of the implant. Over time, this new bone matures and literally locks the implant into place, providing secondary stability, which is a biological hold that is far stronger and more permanent than the initial mechanical hold.
The Healing Timeline: A Patient’s Journey Through the Months
-
First 48-72 Hours: The body responds to the “injury” of surgery. There may be swelling, discomfort, and minor bleeding, all of which are managed with ice packs, prescribed pain medication, and a soft diet.
-
First Two Weeks: The soft tissue (gums) heals rapidly. Stitches are removed if non-dissolvable. Inflammation subsides.
-
3 to 6 Months (Lower Jaw) / 4 to 8 Months (Upper Jaw): This is the critical period for osseointegration. The lower jaw (mandible) is typically denser than the upper jaw (maxilla), so it often requires a shorter healing time. During this period, the implant is left undisturbed under the gumline (in a two-stage approach) to allow the bone to fuse with it without any disruptive forces.
Post-Operative Care: Instructions for Success
Your role during this phase is paramount. Adhering to post-operative instructions is non-negotiable:
-
Diet: Strictly stick to a soft, cool diet for the first week. Avoid hot foods, hard foods, and chewing on the surgical site.
-
Oral Hygiene: Keep the area clean but avoid direct brushing. Use prescribed mouthwash and gently clean around the area as instructed.
-
Medications: Take all antibiotics as prescribed to prevent infection and use pain medication as needed.
-
Habits: Absolutely no smoking. Smoking is one of the greatest risk factors for implant failure as it severely compromises blood flow and healing. Avoid strenuous exercise for a few days.
Potential Complications and Their Management
While success rates are high (over 95% for healthy patients), complications can occur:
-
Failed Osseointegration: The implant fails to bond with the bone and becomes loose. It must be removed, the site allowed to heal, and a new implant can often be placed later.
-
Infection (Peri-implantitis): An infection similar to gum disease can occur around the implant. This requires prompt professional treatment with antibiotics and deep cleaning.
-
Nerve Impingement: A rare complication if planning is inadequate, leading to temporary or permanent numbness.
-
Sinus Problems: For implants in the upper back jaw, a communication with the sinus cavity can occur, which usually requires repair.
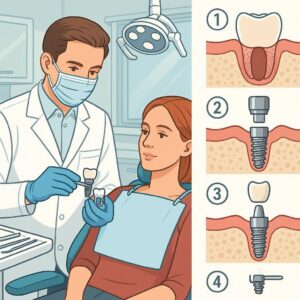
5. Phase 4: The Restorative Phase – Crafting the Visible Tooth
Once your dentist confirms via X-ray and clinical examination that osseointegration is complete and the implant is stable, the final phase begins: creating and attaching the beautiful, functional tooth that the world will see.
Uncovering the Implant and Taking Impressions
In a two-stage procedure, a second, much smaller surgery is performed. A small incision is made to expose the top of the implant. The cover screw is removed, and a healing abutment or gingival former is screwed onto the implant. This abutment shapes the gum tissue around the future tooth to create a natural-looking gumline. After about two weeks of healing around this abutment, the gums are ready for the final impression.
An impression coping is attached to the implant, and a highly accurate digital scan or traditional mold is taken of your entire arch. This impression captures the exact position and orientation of the implant beneath the gums. This data is sent to a dental laboratory where your final crown will be crafted by skilled technicians.
The Abutment: The Critical Connector
The abutment is the component that connects the implant fixture (in the bone) to the prosthetic crown (the tooth). It can be stock (pre-fabricated) or custom-milled from titanium or zirconia to achieve the ideal emergence profile and aesthetic result. The abutment is torqued onto the implant with a specific force to ensure it is secure.
Fabricating the Crown: Where Art Meets Science
At the dental lab, a master ceramist fabricates your crown. Using the impressions, photos, and shade guides provided by your dentist, they layer and bake porcelain onto a metal or zirconia core, meticulously crafting a tooth that matches the exact color, shape, translucency, and texture of your natural teeth. This process is where science meets art, and the result is a restoration that is virtually indistinguishable from a natural tooth.
The Final Seating: The Moment of Transformation
At your final appointment, the healing abutment is removed. The final crown, which is either cemented onto the abutment or screw-retained directly through the crown and into the implant, is carefully placed. Your dentist will check the fit, your bite, and the aesthetics. Once everyone is satisfied, the crown is secured permanently. You are then handed a mirror to see your new smile for the first time—a transformative moment that is the culmination of months of careful planning and healing.
6. Advanced Techniques and Special Considerations
Not every case is straightforward. Modern implantology has developed sophisticated solutions for complex scenarios.
Immediate Load Implants: Teeth in a Day?
This protocol, often marketed as “Teeth in a Day,” involves placing the implant and attaching a temporary crown on the same day. This is only possible under very specific conditions: the implant must achieve exceptionally high primary stability (over 35 Ncm of torque), and the patient must have excellent bone quality and quantity. The temporary crown is kept out of direct chewing forces to allow osseointegration to occur without disruption. It satisfies the immediate aesthetic desire but carries a slightly higher risk and requires strict patient compliance.
Bone Grafting and Sinus Lifts: Building a Strong Foundation
If the CBCT scan reveals insufficient bone volume, the site must be built up before an implant can be placed.
-
Bone Grafting: A bone graft material (which can be autogenous from your own body, allograft from a donor, xenograft from an animal, or alloplastic synthetic) is placed at the deficient site. A membrane is often used to cover the graft and guide regeneration. The graft must then heal for several months before the implant can be placed.
-
Sinus Lift (Maxillary Sinus Augmentation): The maxillary sinuses are air-filled spaces located just above the upper back teeth. When a upper molar is lost, the sinus floor often expands, leaving insufficient bone height for an implant. A sinus lift procedure involves carefully lifting the sinus membrane and placing bone graft material underneath it, creating a new foundation for the future implant.
Full Arch Solutions: All-on-4® and Other Protocols
For patients who are missing all of their teeth in one or both arches, placing an implant for every tooth is unnecessary and impractical. Protocols like the All-on-4® treatment concept use just four strategically placed implants to support a full arch of fixed, non-removable teeth. The two back implants are angled to maximize contact with stronger bone and avoid vital structures like the sinuses. This often allows for immediate function with a temporary prosthesis on the same day as surgery, even in cases with moderate bone loss.
Zirconia vs. Titanium Implants: A Material Comparison
While titanium has a long, proven history of success, zirconia (a high-strength ceramic) implants are growing in popularity, especially for patients with metal sensitivities or allergies or for highly aesthetic areas in the front of the mouth. They are white, highly biocompatible, and resistant to plaque. However, they are a one-piece design (abutment and fixture are fused), which can limit flexibility in certain clinical situations compared to the two-piece titanium system.
7. Life with Dental Implants: Maintenance and Longevity
A dental implant is a lifelong investment, and its longevity depends heavily on how well you care for it.
A Daily Hygiene Regimen for Implant Longevity
Implants require care similar to—but sometimes more meticulous than—natural teeth. The biggest threat is peri-implantitis, an inflammatory disease affecting the soft and hard tissues around an implant.
-
Brushing: Use a soft-bristled toothbrush. Low-abrasive toothpaste is recommended.
-
Flossing: Use implant-specific floss (often thicker or super floss) or water flossers to clean around the abutments and under the prosthesis where plaque loves to accumulate.
-
Interdental Brushes: These are essential for cleaning around the abutment posts.
The Non-Negotiable: Professional Check-ups and Cleanings
You must see your dentist and hygienist every six months (or more frequently if recommended). They will use specialized plastic or titanium instruments to clean the implants without scratching their surface and will take periodic X-rays to monitor the bone levels around the implants to ensure long-term health.
The Long-Term Outlook: Success Rates and Sustainability
With proper care and maintenance, dental implants have a success rate of over 95% over a 10-year period. Many implants last a lifetime. The crown itself, being made of porcelain, may need replacement due to wear or chipping every 10-15 years, but the implant fixture itself, fused to the bone, remains stable.
8. Conclusion
The journey of receiving a dental implant is a testament to the fusion of modern technology, surgical artistry, and biological science. It is a meticulously planned process that moves from comprehensive diagnosis and precise virtual planning to a surgical procedure governed by accuracy and a healing period reliant on the body’s incredible regenerative power, culminating in a restoration that seamlessly blends form and function. By choosing a dental implant, you are not just filling a gap; you are investing in a long-term solution that preserves your jawbone, protects your oral health, and restores the confidence to smile, speak, and eat without a second thought.
9. Frequently Asked Questions (FAQs)
Q1: Does the dental implant procedure hurt?
A: The procedure itself is performed under local anesthesia and often sedation, so you should feel no pain. Post-operative discomfort is typically manageable with over-the-counter or prescribed pain medication and is similar to that of a tooth extraction.
Q2: How long does the entire process take from start to finish?
A: The timeline varies significantly based on individual healing and the need for additional procedures like bone grafts. A straightforward case can take 4-6 months for a lower implant and 5-8 months for an upper implant. Complex cases requiring grafting can extend the timeline to 9-12 months or more.
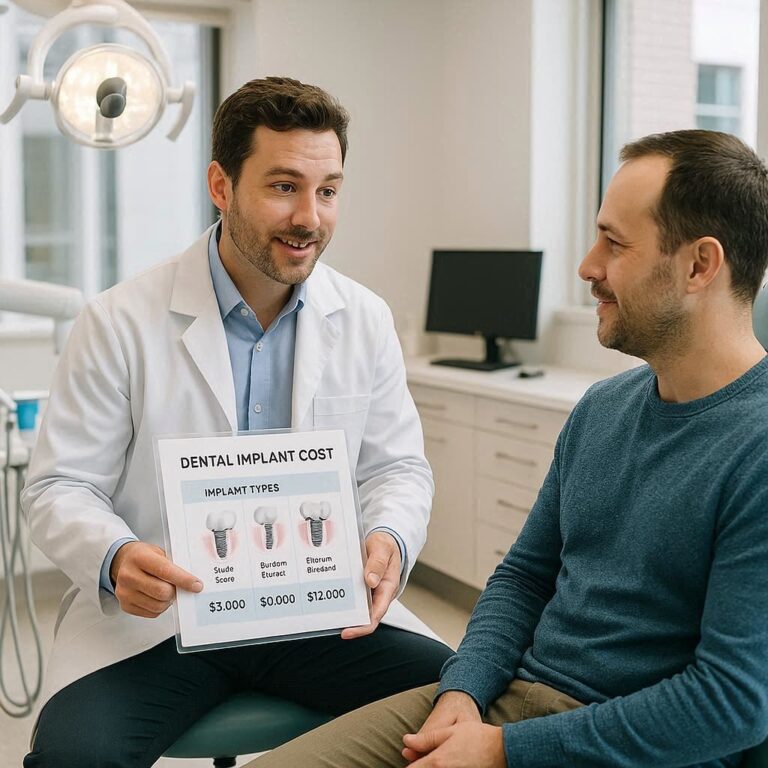
Q3: Are dental implants worth the cost?
A: While the upfront cost is higher than other options like bridges or dentures, implants are often more cost-effective over a lifetime. They prevent bone loss, do not require altering adjacent healthy teeth (as a bridge does), and are a permanent solution that can last decades, unlike dentures or bridges which need replacing every 5-15 years.
Q4: Who is not a good candidate for dental implants?
A: Uncontrolled diabetics, heavy smokers, patients who have undergone radiation therapy to the jaw, those with uncontrolled periodontal disease, and individuals with certain autoimmune diseases may not be ideal candidates. However, many of these are relative contraindications, and a thorough evaluation by a skilled implant team is necessary.
Q5: Can my body reject a dental implant?
A: Strictly speaking, implants are not rejected like an organ transplant (which is an immune response). Implant failure is usually due to a failure to osseointegrate (often due to infection, poor blood supply, or premature loading) or later due to peri-implantitis.
10. Additional Resources
-
American Academy of Implant Dentistry (AAID): https://www.aaid-implant.org/ – A resource for patient information and finding credentialed implantologists.
-
International Congress of Oral Implantologists (ICOI): https://www.icoi.org/ – A global organization dedicated to providing implant education to professionals and the public.
-
Journal of Oral Implantology: A peer-reviewed publication for the latest scientific research in the field (more technical).
-
Your Local Periodontist or Oral Surgeon: The best resource is always a consultation with a qualified dental professional who can address your specific situation.