Dental Code D3460: Your Complete Guide to Apicoectomy Surgery
- On
- InDENTAL CODE
If you’ve recently been told by your dentist or endodontist that you need a procedure identified by the code “D3460,” you might be feeling a mix of curiosity and anxiety. Medical and dental codes can often feel cold and clinical, but behind every code is a story about restoring your health and saving your natural smile.
Dental Code D3460 refers to a specific surgical procedure known as an Apicoectomy—or more formally, a “Periradicular Surgery.”
The goal of this guide is to demystify this procedure completely. We will walk through everything you need to know, from the reasons you might need this surgery to the recovery process and financial considerations. Think of this as your friendly, reliable roadmap to understanding how this procedure can save your tooth.
Table of Contents
ToggleWhat Exactly is Dental Code D3460 (Apicoectomy)?
Let’s break it down in the simplest terms. You may already be familiar with a standard root canal. During a root canal, the dentist or endodontist cleans out the infected pulp from inside the crown and roots of your tooth.
But what happens if an infection returns at the very tip of the root, deep in the jawbone?
This is where D3460 comes in. It is a surgical procedure designed to remove the very tip of the tooth’s root (called the apex) along with any infected tissue surrounding it.
Imagine a tree root that has a small infection at its very end. You don’t need to cut down the whole tree; you just need to carefully remove the infected tip and clean the soil around it. That is precisely what an apicoectomy does for your tooth.
Important Note: D3460 is specifically defined as an “Apicoectomy/Periradicular Surgery, Anterior.” This means it applies to the front teeth (incisors and canines). While the principles are the same for back teeth, the coding often specifies the location due to the complexity of the surgery.
Why Is It Called “Periradicular Surgery”?
-
Peri- means around.
-
Radicular means root.
So, periradicular surgery simply means surgery around the root of the tooth. It’s a very precise way of describing the area the dentist is working on.

Why Would You Need an Apicoectomy? (The Purpose of D3460)
Nobody wakes up hoping to need oral surgery. An apicoectomy is usually a procedure of last resort, but it is a highly successful one. Here are the most common reasons your dental professional might recommend D3460:
1. Persistent Infection After a Root Canal
This is the most common reason. A standard root canal cleans the main canals of the tooth. However, teeth are complex structures. They can have tiny, accessory canals or lateral branches that are impossible to see or clean with standard root canal instruments. Bacteria can hide in these microscopic spaces and continue to cause infection at the root tip, even years after the initial treatment.
2. Calcified Canals
As we age, the root canals inside our teeth can become narrower and filled with calcium deposits, making them impossible to navigate with traditional root canal files. If an infection develops in a tooth with calcified canals, a non-surgical root canal retreatment might not be possible. Surgery (D3460) allows the doctor to bypass the blockage by approaching from the other end—the root tip.
3. To Remove Irritants
Sometimes, debris, filling material, or medication used during a previous root canal can irritate the tissues surrounding the root. If this irritant cannot be removed through the crown of the tooth, surgery is required to clean it out from the root tip.
4. Biopsy and Investigation
In rare cases, a dark spot on an X-ray at the tip of a root might not be a standard infection. D3460 allows the surgeon to remove the tissue and send it to a lab for a biopsy to rule out other pathologies.
5. To Repair a Fracture or Damage
Small cracks or fractures can occur at the very tip of a root. If these cracks are only at the apex, removing the fractured tip can save the rest of the tooth.
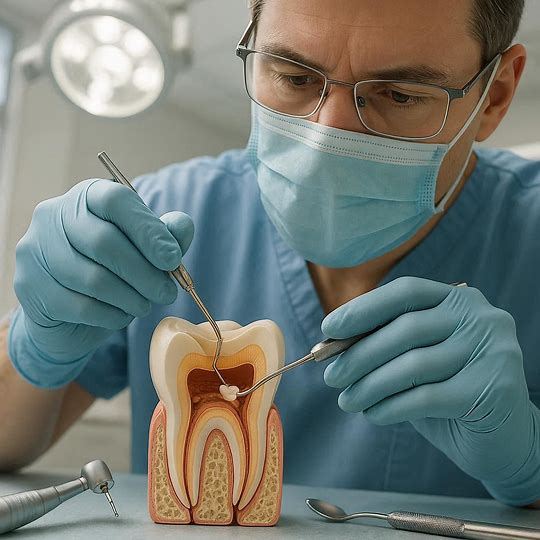
The Procedure: A Step-by-Step Walkthrough
Knowing what to expect can significantly reduce anxiety. An apicoectomy is usually performed by an endodontist (a root canal specialist) under a local anesthetic—the same kind used for a standard filling. You will be awake but completely numb and comfortable.
Let’s walk through the surgery together, step by step.
Step 1: Diagnosis and Imaging
Before any surgery, your endodontist will take digital X-rays and, in most modern practices, a 3D scan called a Cone Beam Computed Tomography (CBCT). This scan provides a detailed, three-dimensional view of your tooth, the root shape, the infection site, and the surrounding vital structures like nerves and sinuses. This advanced imaging is crucial for planning a safe and effective surgery.
Step 2: Anesthesia and Preparation
You will receive a local anesthetic to numb the area completely. The doctor will also apply a topical gel to your gum first to make the injection as comfortable as possible. Once you are completely numb, the area is cleaned and disinfected.
Step 3: Incision and Access
The surgeon makes a tiny incision (cut) in your gum tissue, lifting a small flap to expose the underlying jawbone. This flap is carefully created to heal quickly and neatly afterward.
Step 4: Bone Window
Directly over the tip of the root, the surgeon may need to remove a tiny amount of bone to access the root tip. This creates a small “window” to the infection site.
Step 5: Apicoectomy (Removing the Root Tip)
Using a special microscopic surgical instrument, the surgeon gently removes the last 3–4 millimeters of the root tip. This eliminates the tiny, uncleaned branches of the canal where bacteria might be hiding.
Step 6: Root-End Preparation and Filling
This is a critical step. The surgeon uses an ultrasonic device to prepare a small cavity (a “class I cavity”) in the end of the remaining root. This cavity is then filled with a small, biocompatible filling material, usually Mineral Trioxide Aggregate (MTA) or a similar substance. This creates a perfect seal to prevent any future infection from leaking out of the root into the bone.
Step 7: Curettage and Cleaning
The surgeon carefully removes any infected or inflamed soft tissue (the “cyst” or “granuloma”) from the surrounding bone.
Step 8: Suturing (Stitches)
The gum flap is carefully placed back into its original position and secured with a few tiny stitches. These are often dissolvable, but sometimes the doctor will need to remove them at a follow-up appointment.
Apicoectomy vs. Root Canal Retreatment
When a tooth that has already had a root canal becomes infected again, you usually have two main options. Here is a simple comparison to help you understand the difference.
| Feature | Non-Surgical Root Canal Retreatment | Surgical Apicoectomy (D3460) |
|---|---|---|
| Approach | Through the crown (top) of the tooth. | Through the gum and bone, at the root tip. |
| Procedure | The old filling material is removed, canals are re-cleaned, and new fillings are placed. | The tip of the root is removed and sealed from the end. |
| Invasiveness | Non-surgical. Feels similar to a standard root canal. | Minimally invasive surgery, but involves cutting the gum. |
| Best For | Infection in the main root canal that can be reached from the top. | Infection at the tip, blocked canals, or when retreatment is too risky. |
| Success Rate | Generally high, but can be lower if the case is complex. | Generally high (reported around 85-95% in healthy patients). |
A Word from the Doctor: “The decision between retreatment and surgery isn’t always easy. I always ask myself, ‘What gives this tooth the best chance for long-term survival with the least amount of intervention for the patient?’ Sometimes, going in through the top makes sense. Other times, a targeted surgical approach is the most predictable way to save the tooth.” — Dr. Evelyn Reed, Endodontist
Recovery and Aftercare: What to Expect
Healing from an apicoectomy is generally very manageable. Most patients are surprised at how little discomfort they feel, especially compared to a toothache! Here is what the recovery timeline looks like and how to take care of yourself.
The First 24-48 Hours
-
Discomfort: You can expect some soreness and swelling in the gum area. This is normal and a sign that your body is healing.
-
Pain Management: Over-the-counter pain relievers like ibuprofen (Advil) or acetaminophen (Tylenol) are usually sufficient. Your doctor may prescribe something stronger if needed.
-
Swelling: Apply an ice pack to the outside of your face for 20 minutes on, 20 minutes off. This is your best friend for keeping swelling to a minimum.
-
Bleeding: Some minor oozing from the surgical site is normal for the first few hours. Bite gently on a gauze pad placed by your doctor to help control it.
-
Diet: Stick to soft foods and liquids. Think smoothies, yogurt, soup, and mashed potatoes. Do not use a straw as the sucking motion can dislodge the blood clot and delay healing.
Days 3-7
-
Soreness: The initial discomfort will begin to subside. You may still feel tenderness when touching the area.
-
Oral Hygiene: You can gently brush your other teeth, but be very careful around the surgical site. Your doctor may give you a special antibacterial mouth rinse (like chlorhexidine) to use twice a day.
-
Activity: You can generally return to work and normal activities after a day or two of rest. Avoid heavy lifting and strenuous exercise for about a week.
Long-Term Healing
-
Tissue Healing: The gum tissue will heal over the incision site in a couple of weeks.
-
Bone Healing: The bone around the root tip will take several months to fully regenerate. The success of the procedure is often confirmed with a follow-up X-ray 6 to 12 months later, showing new bone filling in the old infection site.
A Handy Checklist for a Smooth Recovery
-
Take medications as prescribed: Don’t wait for the pain to get bad.
-
Ice, ice, baby: Use ice packs religiously for the first 48 hours.
-
Soft food only: Give your jaw a vacation.
-
No spitting or sucking: Let your mouth heal naturally.
-
Sleep with your head elevated: This helps reduce swelling.
-
Call your doctor if: You have severe pain, uncontrollable bleeding, or a fever.
The Financial Side: Cost and Insurance for D3460
Let’s talk about money. Dental procedures can be a significant investment, but it’s important to view them as an investment in your long-term health—saving a natural tooth is almost always better (and cheaper in the long run) than extracting it and replacing it with a bridge or implant.
How Much Does an Apicoectomy Cost?
The cost of D3460 can vary widely depending on several factors:
-
Geographic Location: Costs are generally higher in major metropolitan areas.
-
The Tooth’s Location: An anterior (front tooth) apicoectomy, which this code specifies, is less complex than one on a lower molar, and thus, less expensive.
-
The Specialist: An endodontist, due to their advanced training and specialized equipment (like a surgical microscope), will charge more than a general dentist performing the procedure.
-
Complexity: If the case requires extensive bone grafting or involves complex anatomy, the price may increase.
On average, you can expect the cost of an Dental Code D3460 (anterior apicoectomy) to range from $900 to $1,500. This fee usually covers the surgery itself but may not include the initial consultation, the CBCT scan, or the follow-up visits.
Navigating Dental Insurance
Dental insurance can be tricky. Here’s what you need to know about coverage for D3460:
-
It’s Major Service: Apicoectomies fall under “Major Restorative” or “Oral Surgery” categories in most insurance plans.
-
Coverage Percentage: Plans typically cover 50% to 80% of the cost after you have met your annual deductible. For example, if the procedure costs $1,200 and you have a 50% coverage with a $100 deductible, your insurance might pay $550, leaving you with a $650 out-of-pocket cost.
-
Annual Maximums: This is a crucial point. Most dental insurance plans have a low annual maximum payout (often $1,500 to $2,000). If you’ve already had other major work done that year, you may have limited benefits left for the apicoectomy.
-
Pre-Authorization: Always ask your dentist’s office to submit a pre-treatment estimate to your insurance company. This will give you a written estimate of what your plan will pay before you commit to the procedure.
Financial Note for Readers: Don’t let the cost deter you from seeking necessary treatment. Most dental offices are happy to work with you. Ask about:
In-house membership plans (if you don’t have insurance).
Third-party financing (like CareCredit), which offers low or no-interest payment plans.
Payment plans arranged directly with the office.
Potential Risks and Complications (An Honest Look)
As with any surgical procedure, there are potential risks. An ethical and skilled practitioner will always discuss these with you. Being informed helps you make the best decision for your health.
-
Swelling and Discomfort: As discussed, this is expected and manageable.
-
Infection: Although the surgery is done to treat an infection, any surgical site carries a small risk of post-operative infection.
-
Nerve Damage: This is a rare but serious risk, primarily for teeth in the lower jaw. The inferior alveolar nerve runs near the roots of the lower premolars and molars. Damage to this nerve can cause temporary or, in extremely rare cases, permanent numbness or tingling in the lip, chin, or gums.
-
Sinus Issues: For upper teeth, particularly premolars and molars, the roots are very close to the maxillary sinus (the air space behind your cheek). There is a small chance the surgery could create a small opening into the sinus. Your surgeon is trained to manage this if it happens.
-
Tooth Fracture: In rare cases, the stress of the procedure or an underlying crack can lead to a vertical root fracture, which usually means the tooth cannot be saved.
-
Failure of the Procedure: Even with a perfectly executed surgery, the infection can sometimes return. This is why follow-up appointments are essential.
Your best protection against these risks is choosing an experienced endodontist who uses modern technology like surgical microscopes and CBCT scans.
Success Rates and Long-Term Outlook
You want to know: will this work? The news is good.
The success rate for apicoectomies is very high. Studies show long-term success rates ranging from 85% to 95% in suitable candidates. The procedure has been refined over decades, and the introduction of the surgical microscope and advanced filling materials like MTA has dramatically improved outcomes.
The prognosis for your tooth depends on several factors:
-
The quality of the existing root canal: A well-done initial root canal provides a better foundation.
-
The skill of the surgeon: Experience matters.
-
The health of your gums: Patients with healthy periodontal (gum) tissues heal better.
-
Your overall health: Conditions like uncontrolled diabetes or immune disorders can affect healing.
-
Tooth restorability: The tooth must have a strong enough structure above the gum line (crown) to withstand normal biting forces afterward. Often, a crown is recommended after an apicoectomy to protect the tooth.
If successful, an apicoectomy can add many years, even decades, to the life of your natural tooth.
Frequently Asked Questions (FAQ)
Q: Is an apicoectomy very painful?
A: Most patients report that the procedure itself is painless due to the local anesthesia. Post-operatively, there is soreness and swelling, but it is usually well-managed with over-the-counter pain relievers and ice packs. It is often less painful than the original toothache that led to the root canal.
Q: How long does the D3460 procedure take?
A: An apicoectomy on an anterior tooth typically takes between 30 and 60 minutes. This can vary based on the complexity of the root anatomy and the extent of the infection.
Q: Can any dentist perform an apicoectomy?
A: While a general dentist can perform this surgery, it is most often performed by an endodontist. Endodontists are specialists with two to three years of additional training beyond dental school, focusing specifically on saving teeth and performing these microsurgeries. They also have access to specialized equipment like operating microscopes that increase the success rate.
Q: What if the apicoectomy fails?
A: If the infection returns after an apicoectomy, options become limited. The next step is often extraction of the tooth. At that point, you would discuss replacement options with your dentist, such as a dental bridge or a dental implant.
Q: Will I need a crown after an apicoectomy?
A: Not always, but often. The decision depends on the strength of the remaining tooth structure. If the tooth had a large filling or previous crown, it will likely need a new crown to protect it from fracturing, now that the root has been surgically treated.
Additional Resources
For further reading and to find a qualified specialist near you, we recommend visiting the official website of the American Association of Endodontists (AAE) . They provide excellent, patient-friendly information on apicoectomies and other endodontic treatments.
Visit the American Association of Endodontists: Patient Information (Please note: This is a hypothetical link to the main patient resource page. Always check the official website for the most current information.)
Conclusion: Saving Your Smile, One Root at a Time
Dental Code D3460, or apicoectomy, is a remarkable procedure that allows dental specialists to save teeth that were once considered hopeless. It is a precise, micro-surgical solution for persistent infections at the root tip. While it requires a financial and time investment, the reward is preserving your natural tooth, your bite, and your smile.
Remember, this procedure is not a first resort but a powerful last line of defense. By understanding the process, the recovery, and the risks, you can move forward with confidence, knowing you are making an informed decision about your oral health. If your dentist has recommended this surgery, ask questions, seek a specialist if needed, and trust in the incredible technology and skill dedicated to saving your tooth.

dentalecostsmile
Newsletter Updates
Enter your email address below and subscribe to our newsletter