ADA Code for Gingivectomy for Restorative Access
- On
- InDENTAL CODE
If you have ever sat in the dental chair preparing for a crown or a filling and heard the doctor mention “gum work” before starting, you have witnessed the concept of restorative access. Sometimes, the teeth are healthy, but the gums get in the way. When that happens, a specific procedure is required to expose the tooth properly.
For dental professionals, this is where precision matters. It is not just about the surgical skill; it is also about the code you use to bill for it. Using the wrong code can lead to claim denials, lost revenue, and frustrated patients.
In the world of dental coding, the phrase “ada code gingivectomy for restorative access” usually points to one of two specific codes: D4210 or D4211. But knowing which one to use depends on a variety of factors, from the number of teeth involved to the complexity of the case.
This article is designed to be your comprehensive guide. Whether you are a seasoned dentist, a new dental hygienist, or a front office coordinator trying to navigate insurance paperwork, we will walk you through everything you need to know. We will cover the clinical definitions, the documentation requirements, the insurance nuances, and the best practices to ensure you are paid correctly for the essential service of preparing the gums for restorative work.
Let’s get started.
Table of Contents
ToggleUnderstanding the Clinical Need: Why Remove Gum Tissue for a Filling?
Before we dive into the codes themselves, it is important to understand the “why.” In a perfect world, a tooth cavity or fracture ends right at the gum line, making it easy for us to pack a matrix band and place a restoration. But in reality, dentistry is rarely perfect.
Sometimes, decay extends subgingivally—meaning below the gum line. Other times, a tooth is fractured deep into the root structure. If a dentist tries to place a crown or a filling without accessing this area, they risk two things: poor margins and future periodontal disease.
A gingivectomy for restorative access is performed to remove the gingival tissue (gums) that is obstructing the view or access to the tooth structure. By removing this tissue, the dentist can achieve a clean, dry field. This allows for proper isolation, accurate impressions, and a restoration that fits seamlessly against the tooth root, preventing future decay or gum irritation.
It is a proactive step. It ensures that the restoration (crown, veneer, or filling) does not invade the biological width—the necessary space between the base of the gum pocket and the bone that keeps gums healthy. If a restoration invades this space, chronic inflammation, pain, and bone loss will follow.
The Two Main ADA Codes: D4210 vs. D4211
When we talk about the specific ADA code gingivectomy for restorative access, we are essentially discussing a surgical procedure to cut away gum tissue. The American Dental Association (ADA) Current Dental Terminology (CDT) provides two primary codes for this service.
It is crucial to distinguish between these two. They are not interchangeable. Choosing the correct one depends entirely on the scope of the procedure.
D4210: Gingivectomy or Gingivoplasty – Four or More Contiguous Teeth or Tooth Bounded Spaces Per Quadrant
D4210 is the code used when the procedure involves a larger area. If you are working on four or more teeth that are next to each other (contiguous) within the same quadrant of the mouth, this is the code you will likely use.
This code is often used for cases of generalized gingival enlargement, periodontal pocket reduction, or when multiple teeth in an area need restorative access. Because it covers a larger surface area, it typically carries a higher fee and requires more complex anesthesia and post-operative care.
Key characteristics of D4210:
-
Involves 4 or more teeth in a row.
-
Covers a larger surgical area.
-
Often includes contouring (gingivoplasty) to reshape the gum line for aesthetics and healing.
-
Usually requires a full quadrant of anesthesia.
D4211: Gingivectomy or Gingivoplasty – One to Three Contiguous Teeth or Tooth Bounded Spaces Per Quadrant
D4211 is the code designed for localized procedures. When a dentist needs to expose a single tooth for a crown, or a couple of teeth for veneers, this is the appropriate code. It covers one to three contiguous teeth.
This is the code most frequently associated with “restorative access” because often, a crown prep or a deep filling only involves one or two adjacent teeth.
Key characteristics of D4211:
-
Involves 1 to 3 teeth in a row.
-
Focused, localized surgical site.
-
Often performed immediately before a crown or filling procedure.
-
Less invasive than D4210, though it is still a surgical procedure.
Comparing D4210 and D4211
To help visualize the difference, here is a comparison table outlining the key distinctions between these two codes.
| Feature | D4210 | D4211 |
|---|---|---|
| Number of Teeth | 4 or more contiguous teeth | 1 to 3 contiguous teeth |
| Scope | Quadrant or full arch area | Localized area |
| Common Use | Generalized tissue overgrowth, full quadrant crown prep, periodontal therapy | Single crown access, deep filling access, esthetic contouring for 1-2 teeth |
| Anesthesia | Usually block anesthesia for the quadrant | Local infiltration or small block |
| Post-op Care | More extensive; may require periodontal pack, specific home care | Minimal; healing is usually rapid |
| Reimbursement | Higher fee schedule | Lower fee schedule |
Important Note: Both D4210 and D4211 are considered surgical procedures. They are not simply “trimming” the gums. Proper surgical consent, sterilization, and post-operative instructions are mandatory for both.
The Nuances of “Restorative Access”
One of the biggest challenges in dental billing is when the gingivectomy is performed strictly to facilitate a restoration, such as a crown (D2740) or a core buildup (D2950). Insurance companies often scrutinize these combinations.
Why? Because some payers consider the gingivectomy a component of the restorative procedure. In their view, if you need to remove gum tissue to do a crown, it is simply part of the crown preparation.
However, the ADA CDT manual is clear: gingivectomy is a distinct, separate procedure. If documentation supports that the gingivectomy was necessary due to pathological issues (subgingival decay, fracture extending below the gum line, or violation of biological width), it should be covered separately.
Separating the Procedure: Is it Bundled?
Insurance companies love to “bundle” procedures. Bundling means they consider one service included in the cost of another. For example, if you perform D4211 (gingivectomy) and D2740 (crown) on the same tooth on the same day, some insurers may deny the gingivectomy, stating it is part of the crown prep.
To avoid this, the documentation must be impeccable. You must prove that the gingivectomy was medically necessary and not just a convenience for the dentist.
When is it usually covered?
-
When the decay extends more than 3mm subgingivally.
-
When the fracture line goes below the gingival margin.
-
When the existing restoration violates the biological width.
-
When the gingival tissue is hyperplastic (overgrown) due to medication or inflammation, preventing proper impression taking.
When is it often denied?
-
When the gingival margin is merely “close” to the restoration site.
-
When the dentist could have achieved access with a simple retraction cord.
-
When there is no mention of subgingival pathology in the narrative.
Documentation: Your Best Defense
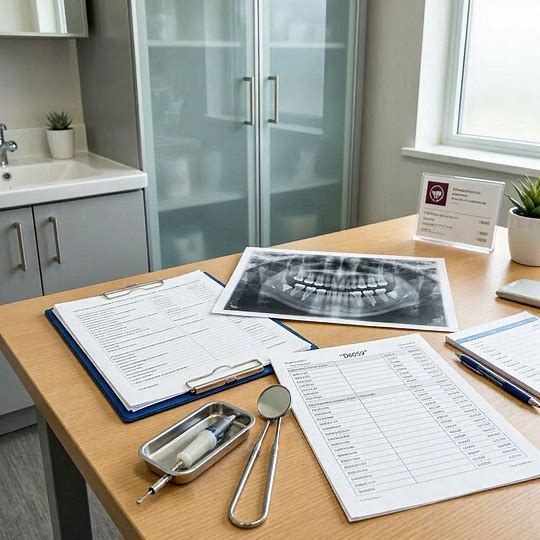
If there is one section of this article that you should bookmark, it is this one. Proper documentation is the only way to ensure that the ADA code gingivectomy for restorative access results in a paid claim.
Insurance companies do not pay for convenience. They pay for medical necessity. Your clinical notes must tell a story that justifies the surgical removal of healthy (or unhealthy) gum tissue.
Here is what you need to include in the patient’s chart:
-
Pre-operative assessment: Note the probing depths. If the decay is at 5mm or deeper, write that down.
-
Radiographic evidence: Attach a bitewing or periapical radiograph showing the decay extending subgingivally. A picture is worth a thousand words.
-
Diagnosis: Use specific terms. Instead of “gums in the way,” write: “Tooth #3 presents with recurrent caries extending 4mm subgingivally on the distal aspect, violating the biological width. Gingivectomy is required to expose sound tooth structure for crown margin placement.”
-
Description of procedure: Note the surgical technique used (laser, scalpel, electrosurgery). Specify the teeth involved.
-
Photographs: In the modern dental era, intraoral photographs are invaluable. A “before” picture showing the tissue covering the decay, and an “after” picture showing the exposed tooth, provide undeniable proof of necessity.
Pro Tip: Always include a narrative on the claim form (or electronic attachment) that states: “Gingivectomy performed to access subgingival caries/fracture. This is not a cosmetic procedure. It is required to establish a sound margin and prevent future periodontal complications.”
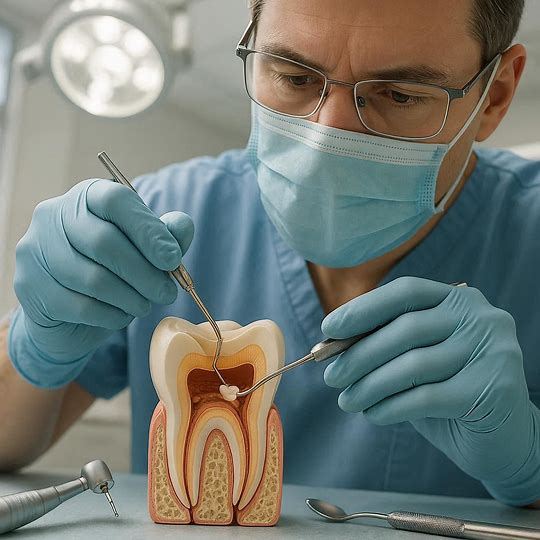
Clinical Techniques: How the Procedure is Performed
The way a gingivectomy is performed can vary based on the dentist’s training, the equipment available, and the patient’s specific anatomy. While the ADA code does not specify the method of tissue removal, the technique can influence healing time and patient comfort.
1. Scalpel Gingivectomy
This is the traditional method. Using a #15 or #12 scalpel blade, the dentist makes an incision to remove the pocket wall. This method is highly effective but often requires sutures and a periodontal pack (a protective dressing) to aid healing.
2. Laser Gingivectomy
Lasers (such as diode or CO2 lasers) have become increasingly popular for restorative access. The laser ablates (vaporizes) the tissue while simultaneously cauterizing the blood vessels and nerve endings.
-
Pros: Minimal bleeding, no sutures often required, less post-operative pain, and faster healing.
-
Cons: Higher equipment cost; requires specific safety training.
3. Electrosurgery
This uses a high-frequency electrical current to cut tissue. It is similar to laser in that it provides hemostasis (controls bleeding). It is very effective for small areas like restorative access for a single crown.
Regardless of the method, the clinical goal remains the same: remove enough tissue to expose 2-3mm of sound tooth structure above the bone level to ensure a proper restoration.
The Patient Journey: What to Expect
For the reader who might be a patient rather than a dental professional, understanding what this procedure entails can alleviate anxiety. If your dentist has recommended a gingivectomy before placing a crown, here is what you can expect.
Before the Procedure
Your dentist will take X-rays to see how deep the decay goes. They will probe your gums to measure the pocket depths. You will likely receive a local anesthetic to numb the area completely. You should not feel any sharp pain during the procedure, only pressure.
During the Procedure
Depending on the method used, you may hear a humming sound (laser or handpiece) or feel slight vibrations. The procedure usually takes between 15 and 45 minutes, depending on how many teeth are involved. If a laser is used, you may smell a slight burning odor—this is normal and is just the vaporization of tissue.
After the Procedure (Recovery)
-
Healing: The area will heal by secondary intention (meaning it closes up on its own). It usually takes about 2 to 4 weeks for the gums to fully mature and look normal.
-
Pain: You may have mild to moderate discomfort for the first 24 to 48 hours. Over-the-counter ibuprofen usually suffices.
-
Diet: Soft foods are recommended for a few days. Avoid spicy, crunchy, or hot foods.
-
Oral Hygiene: You will need to be gentle. Instead of brushing the surgical site, you may be instructed to rinse with warm salt water or a prescribed mouthwash (like chlorhexidine) to keep the area clean.
Common Billing Scenarios and How to Handle Them
Let’s look at a few real-world scenarios to understand how to apply the ADA code gingivectomy for restorative access effectively.
Scenario 1: The Single Crown with Deep Decay
Situation: Patient presents for tooth #30. The X-ray shows decay extending 4mm below the gum line on the distal. The dentist performs a gingivectomy on teeth #30 and #31 (two contiguous teeth) to expose the margin. The dentist then places a core buildup and a crown.
Coding:
-
D4211 (1-3 teeth) – Gingivectomy.
-
D2950 – Core buildup.
-
D2740 – Crown.
Documentation: The narrative should specify the distal decay depth. It should state that the crown margin could not be placed without surgical exposure.
Scenario 2: Full Mouth Rehabilitation
Situation: Patient has severe wear and wants crowns on teeth #5 through #12. The gums are overgrown due to years of inflammation. The dentist performs a gingivectomy on the entire quadrant (teeth #5-12 = 8 teeth) to establish a uniform margin line.
Coding:
-
D4210 (4 or more teeth) – Gingivectomy.
Documentation: Because this is a large case, pre-operative photos and probing depths are essential. The necessity here is to re-establish biological width and allow for accurate impressions.
Scenario 3: The Denial
Situation: You submitted D4211 with D2740. The insurance company denied the D4211 stating it is “bundled into the crown.”
Appeal Strategy:
-
Check the contract: Some PPO plans explicitly state they do not cover gingivectomy for restorative access. If that is the case, you must collect from the patient.
-
Send an appeal letter: If the plan does cover it, send a narrative with the radiograph attached. Reiterate that the decay was subgingival and the procedure was not for “gum contouring” but for surgical access to remove pathology.
Important Notes for Dental Professionals
To wrap up the technical side, here are some critical considerations to keep in mind when performing and billing for this service.
-
Consent is Key: Because this is a surgical procedure, a separate consent form is advisable. Do not bury it in the general treatment consent. Patients should understand that their gums will be cut, there will be a recovery period, and the final crown will look different because the gum line has changed.
-
Periodontal Maintenance: If a patient is in a “periodontal maintenance” phase (D4910) and you perform a gingivectomy for restorative access, you must be careful. The gingivectomy is a surgical procedure and resets the clock. You should not bill D4910 on the same day as a surgical gingivectomy.
-
Time Factor: If you are a dentist reading this, ensure your schedule allows for the extra time. Adding a gingivectomy to a crown prep appointment adds at least 15 to 30 minutes. If you don’t account for this, you are working for free.
-
Medical vs. Dental Insurance: In some cases, if the gingivectomy is performed to treat a pathological condition (like drug-induced gingival hyperplasia), it may be billable to medical insurance. However, this is a complex area that requires specific diagnosis codes (ICD-10) and a separate claim.
List: Top 5 Reasons Claims Get Denied
To help you avoid common pitfalls, here is a quick list of why gingivectomy claims often fail.
-
Insufficient Narrative: The claim lacks specifics about subgingival decay or biological width violation.
-
Modifier Missing: If the gingivectomy is performed on a different tooth than the crown, the claim might be misunderstood.
-
Frequency Limitations: Some insurance plans limit gingivectomy to once every 3-5 years per quadrant. Check the patient’s history.
-
Missing Radiographs: Without visual proof of the decay depth, the payer assumes it was not necessary.
-
Bundling: The payer’s policy states that gingivectomy is included in the restorative service (crown or filling). Knowing your fee schedule and payer policies upfront is essential.
Conclusion
Navigating the world of dental coding requires a blend of clinical knowledge and administrative strategy. The ADA code gingivectomy for restorative access is not a one-size-fits-all solution. Whether you choose D4210 for larger areas or D4211 for localized issues, success hinges on two things: clinical necessity and exceptional documentation.
By understanding the distinct differences between these codes, mastering the art of the narrative, and communicating clearly with patients about their surgical needs, you can ensure that your practice is paid fairly for the essential work of creating healthy, restorable teeth. Remember, this procedure is not just about exposing a tooth; it is about ensuring the longevity of the restoration and the long-term health of the surrounding gum tissue.
Frequently Asked Questions (FAQ)
Q1: Is a gingivectomy for a crown painful?
A: The procedure itself is performed under local anesthesia, so you should feel no pain during the cutting. After the anesthesia wears off, there is usually mild soreness similar to a pizza burn, which typically subsides within 2 to 3 days. Over-the-counter pain relievers are usually sufficient to manage discomfort.
Q2: Will my dental insurance cover a gingivectomy if I’m getting a crown?
A: It depends on your specific plan and the medical necessity. If the decay or fracture is deep below the gum line (subgingival), most dental insurances will cover it. If the procedure is done purely for cosmetic reasons or to make the dentist’s job easier without deep decay, it may be denied. Always check with your insurance provider beforehand.
Q3: How long does it take for gums to heal after a gingivectomy?
A: Initial healing, where the area is no longer tender, takes about one week. Full maturation and reattachment of the gums, where they look smooth and pink, takes approximately 4 to 6 weeks. During this time, it is important to keep the area clean to prevent infection.
Q4: Can a laser be used for a gingivectomy instead of a scalpel?
A: Yes, lasers are very commonly used for gingivectomies today. Many patients prefer lasers because they cause less bleeding, often require no stitches, and can result in a faster, more comfortable recovery. However, the ADA code used (D4210 or D4211) remains the same regardless of the instrument used.
Q5: What is the difference between a gingivectomy and a gingivoplasty?
A: While often billed under the same code, a gingivectomy involves the removal of gum tissue (usually to reduce pocket depth or expose tooth structure). A gingivoplasty involves reshaping the remaining gum tissue for a more natural contour. In restorative access cases, both are often performed together to ensure the gum line looks natural around the new crown.
Disclaimer: This article is intended for educational and informational purposes only. Dental coding and insurance policies vary by region and payer. Always verify coverage and coding requirements with the specific insurance plan and consult the current ADA CDT manual before submitting claims.

dentalecostsmile
Newsletter Updates
Enter your email address below and subscribe to our newsletter