ADA Code for Internal Bleaching
- On
- InDENTAL CODE
You finish an endodontic procedure on a maxillary central incisor. The tooth is sound, the seal is perfect, but the patient hesitates before smiling. A dark shadow stains the tooth crown, a silent reminder of the trauma from years ago. The patient asks the question you have heard hundreds of times: “Can you make it white again?”
You know the answer is yes. You also know the procedure that follows has a specific name, a specific clinical sequence, and, most importantly for your practice, a specific billing code. That code is not D9972 (external bleaching). It is the ADA code for internal bleaching. Navigating this code correctly ensures you receive fair compensation for a technically demanding service, while keeping your patient’s trust intact. Let us explore every facet of this code, from the clinical rationale to the insurance narrative that secures payment.
Table of Contents
ToggleUnderstanding the Foundation: What Is Internal Bleaching?
Before we dive into the numbers on a claim form, we need a clear clinical picture. Internal bleaching, also known as walking bleach or non-vital bleaching, is a procedure designed to lighten a tooth that has undergone root canal therapy. The discoloration originates from within the dentin, not from the enamel surface.
The Science Behind Intrinsic Discoloration
Why does a root-canaled tooth turn dark? The answer lies in the pulp chamber. When the pulp dies, whether from trauma, decay, or iatrogenic causes, red blood cells break down. This process releases iron sulfides and other pigmented molecules that penetrate deep into the dentinal tubules. Over time, these molecules oxidize and create a gray, brown, or yellowish stain that no amount of external brushing can remove.
Endodontic sealers and leftover pulp tissue remnants can also contribute. A tooth might also appear pink if resorption occurs internally. Internal bleaching addresses these stains by placing a strong oxidizing agent, typically sodium perborate or hydrogen peroxide, directly inside the pulp chamber. The agent diffuses into the dentin and breaks down the chromogenic molecules into smaller, colorless ones.
Internal vs. External Bleaching: A Defining Table
Understanding the distinction between these two procedures is the single most important step in correct coding. Mislabeling them leads to denied claims and frustrated patients. We can break down the differences clearly.
| Feature | Internal Bleaching (Non-Vital) | External Bleaching (Vital) |
|---|---|---|
| Primary ADA Code | D9989 (previously D9974) | D9972 |
| Tooth Condition | Endodontically treated, non-vital | Vital, healthy pulp |
| Stain Origin | Intrinsic, inside dentin | Extrinsic, on enamel surface |
| Bleaching Agent Location | Placed inside the pulp chamber | Applied to the external tooth surface |
| Clinical Procedure | Access cavity, seal, internal medication | Tray fabrication or in-office gel application |
| Number of Visits | Typically multiple visits (walking bleach) | Single or multiple visits |
| Protective Barrier | Internal cervical seal required | Gingival dam or isolation |
This table clarifies why a single code cannot cover both procedures. The diagnosis, risk factors, and clinical time differ significantly. When you use the correct code, you communicate the complexity of the service accurately to the payer.
The Journey of the ADA Code: From D9974 to D9989
Dental billing is not static. The American Dental Association (ADA) updates the Code on Dental Procedures and Nomenclature (CDT Code) regularly to reflect the evolution of clinical practice. The code for internal bleaching underwent a significant change that still causes confusion in practices today.
A Look Back at CDT 2013
For many years, the code D9974 served as the descriptor for “Internal Bleaching – Per Tooth.” This code placed internal bleaching under the broader category of “Miscellaneous Services,” alongside occlusal guards and external bleaching. However, the clinical reality of internal bleaching differs vastly from its external counterpart. The ADA recognized this misclassification and acted.
The Shift to D9989 in CDT 2014
In 2014, the ADA deleted D9974 and introduced a new code: D9989 “Non-Vital Bleaching, Per Tooth.” This change did not simply renumber the service. It reclassified it. D9989 now falls under the category of “Adjunctive General Services.” This category shift emphasizes the therapeutic, and often medically necessary, nature of the procedure. Non-vital bleaching is not cosmetic dentistry in the same way that external bleaching for social reasons is cosmetic. This distinction becomes critical when we write narratives for medical necessity later.
Important Note: Despite D9989 being the current, correct code since 2014, many dental software systems, older claim forms, and even some insurance carriers still reference D9974. Do not use D9974 on current claims. Doing so flags your claim as outdated and practically guarantees an automatic rejection or a request for additional information that delays payment.
Decoding D9989: A Detailed Definition
We must look at the official CDT descriptor to code with precision. The full entry for D9989 reads:
D9989 Non-Vital Bleaching, Per Tooth
This descriptor means the code applies to a single tooth, not an arch. The “non-vital” specification explicitly requires the tooth to have undergone root canal treatment or be confirmed non-vital before starting. The procedure involves opening the tooth, placing a bleaching agent internally, and sealing the tooth temporarily.
When Is the Internal Bleaching Code Appropriate?
You can confidently use D9989 in these clinical scenarios:
-
A single, endodontically treated central incisor presents with a dark gray discoloration five years after a sports injury.
-
A premolar, previously treated with a pulpectomy, shows a yellowish-brown stain that distresses the patient when they smile.
-
A lateral incisor darkens following successful root canal therapy due to sealer remnants in the coronal pulp chamber.
Common Misuse Scenarios to Avoid
Misuse of D9989 creates audit risks and patient billing disputes. Avoid coding internal bleaching when:
-
The tooth is vital. If the tooth has a living pulp, you cannot perform non-vital bleaching. You must use D9972 for external bleaching or consider other cosmetic codes.
-
You are performing a microabrasion. Removing white spot lesions or superficial enamel defects with acid and pumice falls under D9970 (enamel microabrasion).
-
You are placing a full coverage crown solely to mask color. If the tooth is structurally sound but dark, internal bleaching often provides a more conservative, less invasive solution than a crown. Insurance may deny a crown as cosmetic if you do not document structural need. Internal bleaching, correctly documented, may have a different coverage pathway.
Comprehensive Coding and Documentation Protocols
Proper coding requires more than picking a number from a list. You must build a documentation framework that supports the code. Payers look for specific evidence that the procedure was not elective but necessary for oral health or function.
Verifying Patient Eligibility and Benefits
Before you seat the patient for the procedure, your administrative team must perform a thorough benefits check. This step prevents surprise bills and angry phone calls.
-
Ask the Right Question: Do not ask, “Does the plan cover D9989?” This is too broad. Ask, “Is CDT code D9989 a covered benefit under the patient’s plan when performed for a non-vital tooth exhibiting intrinsic discoloration due to pulpal necrosis?” This specific phrasing triggers a more detailed review from the insurance coordinator.
-
Check Frequency Limitations: Some plans treat internal bleaching as a once-per-tooth, per-lifetime benefit. Confirm this detail early.
-
Document the Call: Record the date, time, name of the insurance representative, and the reference number for the call. This documentation protects you if the payer later reverses their pre-treatment determination.
The Narrative: Building a Medical Necessity Argument
Many payers initially process D9989 claims as cosmetic denials. You must prove medical necessity to overturn these denials. A strong narrative connects the discolored, non-vital tooth to a functional or psychological impairment that goes beyond aesthetics.
A powerful narrative includes these elements:
-
History of Trauma or Pathology: “The patient reports a traumatic injury to tooth #8 sustained during a basketball game in 2018.”
-
Previous Endodontic Treatment: “Tooth #8 was treated with non-surgical root canal therapy on 11/15/2021 by Dr. Smith.”
-
Current Clinical Presentation: “Clinical examination reveals a visually unpleasing, dark grayish-brown discoloration of the tooth crown, which is inconsistent with the patient’s otherwise healthy and normal dentition. The tooth is otherwise asymptomatic and functional.”
-
Psychosocial Impact Statement: “The patient states that the appearance of this single front tooth causes significant social anxiety and distress in professional settings, leading them to avoid smiling and covering their mouth when speaking.”
-
Purpose of Treatment: “Internal non-vital bleaching is necessary to restore the tooth to a normal, healthy appearance and resolve the functional psychosocial impairment. This conservative treatment prevents the need for more invasive and costly restorative procedures, such as a porcelain crown, to mask the underlying intrinsic discoloration.”
This narrative frames the procedure not as a luxury, but as a necessary intervention to restore normal function and psychological well-being, which is the definition of medical necessity in many plans.
Internal Bleaching in Specific Treatment Plans
The presence of internal bleaching in a comprehensive treatment plan can influence the sequence and timing of other procedures. We must consider these interactions carefully.
The Connection with Endodontic Therapy (D3000–D3999)
Internal bleaching is never a standalone event. It has a prerequisite: a successfully completed root canal. The quality of the root canal filling directly impacts the bleaching outcome. A poorly condensed gutta-percha, a missed canal, or an inadequate coronal seal spells disaster for the whitening process. Bacteria and fluids from a failing root canal will re-stain the tooth from the inside out.
-
Sequence is Key: Always complete endodontic therapy first, confirm healing with a radiograph, and then schedule internal bleaching.
-
Waiting Period: You must wait until the tooth is completely asymptomatic and the root canal filling has fully set. A waiting period of at least two weeks after obturation is standard practice.
-
Coding Endo and Bleaching Together: You can bill for the root canal and the internal bleaching on the same treatment plan, but they are performed and billed on different dates of service. Never place a bleaching agent during the obturation visit and bill for both services on the same day. The services are sequential, not concurrent.
Internal Bleaching as an Alternative to a Crown
This is a significant value proposition for your patient. A dark, structurally sound anterior tooth often receives a full coverage crown as the default solution. A crown requires significant tooth reduction, carries a risk of future root fracture, and typically costs the patient a much higher co-payment.
Internal bleaching offers a biologically conservative alternative. You access the existing endodontic access cavity, a space that is already open. You perform the whitening treatment through that pathway, preserving every millimeter of healthy tooth structure.
-
Code Comparison for Documentation:
-
Option A: D9989 (Internal Bleaching) + D2393 (Resin-Based Composite – Three Surfaces, Posterior, to restore access) = Lower fee, minimally invasive.
-
Option B: D2740 (Crown – Porcelain/Ceramic Substrate) = Higher fee, significant tooth reduction.
-
Documenting this comparison in your clinical notes demonstrates that you proposed the most conservative, medically appropriate treatment first. This documentation can support a narrative of medical necessity for the bleaching procedure.
Step-by-Step Clinical Protocol: A Walkthrough for Team Calibration
Aligning your clinical team around a standardized protocol ensures consistent, predictable outcomes and flawless documentation. Each step has a corresponding record-keeping requirement.
Step 1: Clinical Diagnosis and Preoperative Imaging
You identify the discolored, non-vital tooth. You take a high-quality preoperative radiograph to assess the root canal obturation, the periodontal ligament space, and the periapical region. You must rule out internal resorption, root fractures, or periapical pathology before you begin. A failed root canal will never bleach successfully.
-
Documentation: Take a preoperative photograph. The standard of care is to document the shade of the tooth and the adjacent teeth using a standardized shade guide, placing the guide tab in the photograph.
Step 2: The Critical Cervical Seal
This step is non-negotiable. You must protect the periodontal ligament from the caustic effects of the bleaching agent. Without a proper internal seal, you risk external cervical resorption, a devastating complication that can lead to tooth loss.
Access the pulp chamber through the existing endodontic access. Remove all restorative materials and any remaining pulp horn tissue. Identify the cementoenamel junction (CEJ) internally. A common technique is to place a 2mm thick barrier of a resin-modified glass ionomer or a flowable composite at the level of the CEJ, extending slightly into the canal orifice. You must confirm this seal is complete with a radiograph.
-
Documentation: Note the material used for the cervical seal (e.g., GC Fuji II LC, 3M Vitrebond). Document the verification of the seal placement via radiograph.
Step 3: Application of the Walking Bleach Technique
The walking bleach technique is the most common and code-appropriate method. You place a mixture of sodium perborate and an inert liquid, such as sterile water or saline, into the dried pulp chamber. You do not use 30-35% hydrogen peroxide in a sealed internal environment for unsupervised walking bleach, as this significantly increases the risk of cervical resorption.
Pack the paste loosely into the chamber, leaving 2-3mm of space for the temporary restoration. Place a firm, but non-bonded, temporary filling like Cavit or IRM directly over the paste. Ensure a 3-4mm thickness of the temporary to create a bacteria-tight seal.
-
Documentation: Record the bleaching agent used (e.g., “Sodium perborate monohydrate mixed with sterile saline”), the method of placement, and the temporary restorative material.
Step 4: Recall and Re-evaluation Visits
The patient returns in 1-2 weeks. You remove the temporary restoration and the bleaching paste. You evaluate the shade change, comparing it to the preoperative photograph and shade tab. The typical course of treatment requires 2-4 such applications.
The final visit is crucial. You remove the final bleaching paste, irrigate the chamber copiously, and dry it. You must then place a permanent, bonded restoration. A standard practice is to etch, prime, and bond the internal chamber and fill it with a light-colored composite resin. This bonded internal restoration reinforces the tooth and seals the dentinal tubules, locking in the new shade.
-
Documentation: Record the number of bleaching applications, the final shade achieved, and the definitive restorative material used to close the access cavity.
Pro Tip: The CDT code D9989 is a “per tooth” code. It covers the entire course of treatment for that single tooth, from the first application to the final restoration. Do not bill D9989 for each walking bleach recall visit. Doing so is incorrect coding and an overpayment risk.
The Hidden Risk: External Cervical Resorption (ECR) and the ADA Code
We cannot discuss internal bleaching without a frank conversation about its most serious risk. External Cervical Resorption (ECR) is an insidious, often painless, destructive process where cells resorb the tooth structure at the cervical region, just below the gingival attachment. The relationship between internal bleaching and ECR is well-documented, particularly with the use of high-concentration hydrogen peroxide and the absence of a proper cervical seal.
How the Code and Clinical Protocol Mitigate Risk
The existence of the specific ADA code D9989 implies a recognized, standardized procedure. This procedure, when followed correctly, is safe. The standard of care explicitly demands the cervical seal we described. From a medico-legal and billing perspective, your documentation of that seal is your strongest defense.
If a patient later develops ECR and there is no record or radiograph of a cervical seal, a reviewer can argue the procedure was performed negligently, regardless of the billing code. The code does not protect you; the adherence to the clinical protocol the code represents protects you. A payer might even retroactively deem the service non-covered and request a refund if the clinical records show a deviation from the standard of care.
Insurance Claim Mastery: From Form to Payment
Understanding the code is half the battle. Mastering the submission process ensures your claim survives the payer’s automated and manual reviews.
Diagnostic Coding Linkage with ICD-10-CM
The ADA code describes the service. The ICD-10 code describes the diagnosis. Linking them correctly is vital. A common denial reason is “No medical necessity proven,” which often translates to a missing or incorrect diagnosis code.
For internal bleaching of a non-vital tooth, the most appropriate ICD-10 diagnosis code is:
-
K03.7 – Posteruptive color changes of dental hard tissues
-
This code covers intrinsic stains, including those from pulpal hemorrhage, endodontic materials, and necrosis.
-
Supporting ICD-10 codes you might use, depending on the history, include:
-
Z96.5 – Presence of tooth-root canal filling (to indicate the tooth is non-vital and treated)
-
S02.5XXA – Fracture of tooth (traumatic), initial encounter (for the historical trauma record, though K03.7 is the primary working diagnosis for the bleaching procedure itself)
Place K03.7 in box 34A of the 2019 ADA Dental Claim Form, corresponding to the line for D9989.
Crafting the Perfect Claim Narrative (Box 35)
Box 35, the “Remarks” section, is your opportunity to tell the patient’s story in 80 characters or less, and then expand in an attached narrative report.
A short and powerful Box 35 entry for the initial claim:
“Asymptomatic non-vital tooth #8. Intrinsic dark discoloration. Dx: K03.7. Non-vital bleaching to restore normal tooth color and function, avert need for crown.”
For a narrative attachment, use the longer version we built earlier, always tying the procedure back to the resolution of a functional or psychosocial impairment.
Pre-authorization: A Critical Step
Never assume coverage for D9989. Many plans list it as a non-covered cosmetic service by default. Filing a pre-authorization, which includes a preoperative photo, a radiograph, and a full narrative, is the most reliable path to a paid claim.
-
Pre-auth Packet Checklist:
-
Completed pre-authorization form.
-
Pre-operative periapical radiograph.
-
High-resolution intraoral photograph clearly showing the discolored tooth and adjacent healthy teeth with a shade guide in frame.
-
A formal narrative of medical necessity, signed by the treating dentist.
-
A copy of the patient’s historical endodontic treatment notes, if available.
-
A pre-authorization does not guarantee payment, but an approval binds the insurance company to honor the benefit for that specific procedure, provided you complete it within the authorization timeframe.
Coding Scenarios: Common Cases and Solutions
Let us walk through some realistic cases you will face on Monday morning.
Scenario 1: The Post-Traumatic Dark Central Incisor
-
Patient: A 22-year-old female with a history of a bicycle accident at age 12. Tooth #9 has been root canal treated and restored with a composite. It is now a dark gray, noticeably different from tooth #8.
-
Clinical Action: You confirm the tooth is asymptomatic and the root canal is radiographically successful. You place an internal cervical seal, begin the walking bleach procedure with sodium perborate, and see the patient twice for re-application. The final shade matches tooth #8 perfectly.
-
Coding: Bill D9989 on the date of the initial procedure, linked to ICD-10 K03.7. Your narrative notes the traumatic history and the psychosocial impact on a young adult’s professional presentation. You do not bill for the re-application visits separately.
Scenario 2: The Discolored Tooth Under an Existing Crown
-
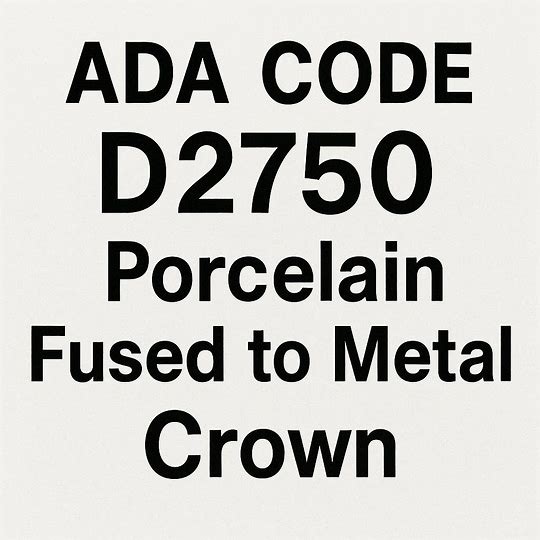
Patient: A 55-year-old male presents with a dark shadow at the gingival margin of an existing porcelain-fused-to-metal crown on tooth #7. The tooth had a root canal many years ago. The metal margin is showing, but the darkness also seems to originate from the root.
-
Clinical Action: You discuss replacing the crown. However, the patient prefers a less expensive option. You create an access cavity through the lingual of the crown, perform internal bleaching to lighten the underlying tooth structure, and restore the access with a tooth-colored filling.
-
Coding: The primary procedure is still D9989, as you are performing internal bleaching on a non-vital tooth. The diagnostic code is K03.7. Your notes must detail that the crown was already present and the access was through an existing restoration. You must also inform the patient that the crown’s porcelain shade will not change, only the darkness from the root will lessen. This manages expectations and is a critical part of the informed consent documented in your record.
Comparative Analysis: A Visual Guide to Bleaching Codes
A quick reference chart helps the administrative and clinical team distinguish between codes at a glance. Post this in your billing office or keep it as a laminated card in the operatory.
| CDT Code | Nomenclature | Tooth Vitality | Agent Location | Category | Typical Payer View |
|---|---|---|---|---|---|
| D9972 | External Bleaching – Per Arch | Vital | External enamel surface | Miscellaneous | Cosmetic; rarely covered |
| D9973 | External Bleaching – Per Tooth | Vital | External enamel surface | Miscellaneous | Cosmetic; rarely covered |
| D9970 | Enamel Microabrasion | Vital | External enamel surface | Adjunctive | May be covered for developmental defects |
| D9989 | Non-Vital Bleaching | Non-Vital | Internal pulp chamber | Adjunctive | May be covered with medical necessity |
| D9974 | (Deleted code – Do Not Use) | N/A | N/A | N/A | Will be denied |
This table crystallizes the decision-making process. If the tooth is vital, D9989 is incorrect. If the tooth is non-vital, D9989 is the only bleaching option.
Navigating Denials and Appeals
A denial for D9989 is common. Many claims are auto-adjudicated and denied for a standard reason: “COSMETIC SERVICE: NOT A COVERED BENEFIT.” Do not accept this outcome without a fight.
The Three-Step Appeal Process
An appeal is a structured argument. You must dismantle the payer’s reason for denial point by point.
Step 1: The Standard Appeal Letter
Write a formal letter. Reference the original claim number, the date of service, the patient’s name, and the denied procedure D9989. Politely and firmly state that the automatic denial is clinically inappropriate. A template for the body of this letter reads:
“This denial is being appealed on the basis of medical necessity. The procedure, CDT D9989 – Non-Vital Bleaching, was performed to restore the normal, healthy color of tooth #8, which had suffered an intrinsic, post-traumatic discoloration following successful endodontic therapy. The discoloration was not a cosmetic preference; it was a pathological result of pulpal necrosis, resulting in a severe and clinically documented psychosocial functional impairment for the patient. The standard of care for this condition is internal non-vital bleaching, a conservative treatment that avoids the unnecessary and more costly alternative of a full-coverage crown. Per the patient’s benefit booklet, medically necessary adjunctive services for the restoration of oral function are a covered benefit.”
Step 2: Attach Indisputable Evidence
Include new, hard evidence that was not part of the initial claim submission:
-
A side-by-side comparison of the preoperative and postoperative intraoral photographs with the shade guide clearly visible.
-
A redacted copy of the clinical narrative highlighting the psychosocial impact statement.
-
A letter from the patient, if they are willing, describing how the dark tooth affected their daily life and how the treatment has improved their well-being.
Step 3: Request a Reviewer with Clinical Qualifications
In your appeal letter, explicitly request that a dental consultant licensed in your state review the appeal. A physician reviewer may not understand the pathological nature of a non-vital tooth discoloration and the standard of conservative care that internal bleaching represents.
The Financial Conversation: Fee Setting and Patient Payment
The billing code is the linchpin of a fair financial arrangement. Internal bleaching is a technically sensitive, multi-visit procedure. Your fee must reflect the skill, time, materials, and risk management it requires.
Setting Your Practice Fee for D9989
Calculate your fee based on a detailed understanding of your costs. The fee for D9989 should encompass the entire episode of care, not a single appointment.
-
Direct Clinical Time: Initial access and placement (30 min), plus two re-evaluation and re-application visits (15 min each).
-
Final Restoration Time: The bonded internal composite restoration at the final visit (45 min).
-
Materials: Sodium perborate, RMGI for cervical seal, temporary filling material, bonding agents, composite resin, and disposables.
-
Risk Factor: This is a delicate procedure with a serious, known complication (ECR). Your fee is a reflection of the responsibility you assume.
A fee that is less than double your hourly operatory rate may underestimate the true cost of providing this service with the required standard of care.
The Patient Payment Conversation
Your patient may not understand why this “simple whitening” costs more than an over-the-counter strip. Your explanation must be educational, not defensive.
-
Frame the Value: “Mrs. Jones, the procedure we are doing is not a surface whitening. It is a therapeutic treatment to heal the internal color of your tooth. It is a multi-step process, performed under strict isolation and with a protective barrier inside the tooth to ensure its long-term safety. It is a conservative alternative to a $1,500 crown, which would require grinding down your healthy tooth structure.”
-
Present the Financial Options: Offer a clear, written treatment plan.
-
The practice fee for D9989.
-
The estimated insurance coverage (if any), based on your pre-authorization.
-
The patient’s estimated co-payment.
-
Payment options, including cash discounts or short-term, in-house payment plans for the non-covered portion.
-
When patients understand the clinical complexity, the conservative nature, and the long-term value, they are far more likely to accept the fee for a service that dramatically improves their smile.
Special Considerations for Pediatric Patients
Traumatic dental injuries in childhood often leave a lasting mark, literally. A child who falls and injures a permanent incisor may undergo apexification or root canal treatment, leaving the tooth susceptible to discoloration as they mature into young adulthood. Internal bleaching is a viable, conservative option for these young permanent teeth, but timing is everything.
Waiting for Skeletal Maturity
Do not perform internal bleaching on a tooth in a patient who is still undergoing significant craniofacial growth. The tooth continues to erupt, and the gingival margin will recede slightly as the patient matures. If you bleach the tooth to match the current adjacent teeth, it may appear darker later as more of the root surface is exposed. Moreover, the pulp chamber and canal morphology may still be maturing.
-
Clinical Rule: Delay internal bleaching until the patient is in their late teens and the tooth has reached its final occlusal and gingival position. Often, a composite veneer or a simple temporary covering serves as a better interim solution for a 12 or 14-year-old.
-
Coding Note: The ADA code D9989 does not have an age restriction per se, but the standard of care dictates this clinical judgment. Your documentation for a younger patient must include a specific note stating that the tooth is skeletally mature and in its final position, justifying the procedure’s timing.
The Role of the Dental Assistant in Documentation
A well-trained dental assistant is your greatest asset in airtight coding. They often capture the narrative in real-time as you perform the procedure. Your assistant’s entries in the clinical notes build the foundation for the billing team to assign D9989 correctly.
Intraoperative Documentation Checklist for Assistants
Train your assistants to record these specific data points for every internal bleaching visit:
-
Pre-op: Shade of target tooth and adjacent teeth, using a standardized guide. A photograph is taken with the shade tab.
-
Isolation: Method of isolation (rubber dam, from which tooth to which tooth).
-
Cervical Seal: The specific material used and the confirmation that a radiograph was taken to verify seal depth and position.
-
Bleaching Agent: The exact chemical name, concentration, and mixture used (e.g., “Sodium perborate monohydrate mixed with sterile water to a thick paste consistency”).
-
Temporary Restoration: The material used to seal the access cavity (e.g., “Cavit W, thickness of 4mm”).
-
Final Visit: Final shade achieved, the etching/bonding protocol for the internal composite, and the composite brand and shade used for the final restoration.
This structured, checkbox-style documentation embedded in your practice management software makes it nearly impossible to miss a step and provides bulletproof support for a D9989 claim.
A Historical Perspective: The Evolution of a Code
The story of the ADA code for internal bleaching is a story of the dental profession’s growing understanding of biology. In the early days, internal bleaching was a crude technique. A cotton pellet soaked in 35% hydrogen peroxide was placed inside the tooth, often without a protective barrier, and left for days. The results were dramatic but came with a terrifyingly high rate of external cervical resorption. The billing was also crude; it was often lumped into a generic “miscellaneous” service or simply coded as a standard filling.
The introduction of a specific, separate code marked a turning point. By moving from D9974 to D9989, the ADA and the dental community signaled that this was no longer a simple, interchangeable “whitening” process. It was a distinct, non-vital, adjunctive therapeutic procedure with its own set of risks, standards, and clinical protocols. The code’s evolution from a general “Miscellaneous” category to the more specific “Adjunctive General Services” category mirrors the profession’s journey toward viewing the non-vital tooth not just as a dead piece of anatomy, but as a complex biological unit requiring careful, conservative management.
Understanding this history deepens your respect for the code. D9989 carries the weight of past failures and the promise of current, evidence-based success. When you write that code on a claim, you are not just billing. You are participating in a refined, modern standard of care.
Tele-dentistry and D9989: A Modern Intersection
The landscape of care delivery is changing. A patient might first present their dark tooth through a virtual consultation. You can make a preliminary diagnosis and discuss the possibility of internal bleaching via a secure video call.
Coding for the Virtual Visit
You will not perform the internal bleaching procedure virtually. You will perform a teledentistry evaluation. This visit has its own code, D9995 (synchronous real-time teledentistry) or D9996 (asynchronous). Your documentation for this virtual visit is the starting point for the subsequent D9989 claim.
-
The Record: Your D9995 record will note the patient’s chief complaint (“Dark front tooth”), the visual assessment via high-resolution screen sharing (“Appears to be intrinsic discoloration of a likely non-vital tooth, consistent with known history of trauma”), and your provisional diagnosis (“Posteruptive color change, likely of non-vital origin, K03.7”).
-
The Bridge to Treatment: This D9995 documentation creates a pre-existing record of medical necessity. When the patient comes in for the D9989 procedure, your in-person clinical exam confirms the virtual finding. The two records together form an unbroken chain of diagnosis and treatment that is incredibly compelling to an insurance reviewer.
A Final Word on Audits and Compliance
Any discussion of ADA codes is incomplete without addressing audits. Payers have sophisticated software that flags anomalies. For D9989, the most common audit trigger is a practice billing the code for multiple teeth on the same day or billing the code with a high frequency for a single provider.
Red Flags That Invite Audits
-
Billing D9989 on a vital tooth without an endodontic code (D3xxx) in the patient’s history. An auditor will immediately see a disconnect.
-
A high number of D9989 procedures that never proceed to a final, permanent restoration. The chart must show the case was completed.
-
Billing D9989 for the same tooth multiple times after the completion of a treatment series. The code pays for an episode of care, not for a lifetime of touch-ups.
Your best defense is a clean, consistent, and complete clinical record for every instance of D9989. If your recordkeeping is sloppy, the payer has every right to recoup their payment. Make your records a masterpiece of clarity, and you will never fear a letter from an auditor.
Conclusion
The ADA code for internal bleaching, D9989, represents a conservative, therapeutic procedure designed to restore a non-vital tooth’s natural color. Correct use of this code requires a clear clinical diagnosis of intrinsic discoloration, a documented cervical seal protocol, and a robust narrative of medical necessity that distinguishes the service from cosmetic external bleaching. Mastering D9989’s billing and documentation ensures fair compensation while upholding the highest standard of conservative care for your patients.
Frequently Asked Questions (FAQ)
Q: Is the D9974 code still acceptable for internal bleaching?
A: No. D9974 was deleted from the CDT code set in 2014. The correct, current code for this procedure is D9989. Using an old code will result in a denied claim.
Q: How many times can I bill D9989 for the same tooth?
A: D9989 is a “per tooth” code that covers the entire treatment episode, which typically includes multiple walking bleach applications. You bill it once. Do not bill it for each re-application visit.
Q: Will dental insurance cover the cost of internal bleaching?
A: Coverage varies significantly by plan. Internal bleaching is often initially denied as cosmetic. However, with a detailed narrative of medical necessity, a clear psychosocial impact statement, and a pre-authorization, many medical or higher-tier dental plans may provide coverage as an adjunctive service.
Q: What is the most important step in the clinical procedure for billing security?
A: The placement and radiographic documentation of the internal cervical seal. This step is the standard of care to prevent external cervical resorption and is a key marker that the procedure was performed at the highest level, protecting you in audits and medico-legal review.
Q: Can I bill D9989 and a crown on the same day?
A: You should not. Internal bleaching is a multi-visit process. The final step is a bonded internal composite restoration, not a crown. If a crown is later needed for a different reason (e.g., a new fracture), you would bill it at that future date, with separate documentation for the new diagnosis.
Additional Resource
To verify your coding practices and stay current with any future changes, always consult the official source. The American Dental Association’s dedicated page for dental codes is your most reliable reference: ADA CDT Code Check

dentalecostsmile
Newsletter Updates
Enter your email address below and subscribe to our newsletter