What Not to Do Before Teeth Whitening
Achieving a brilliantly white smile often feels like preparing for a major life event. You schedule the appointment, imagine the results, and anticipate the boost in confidence. However, the journey to pearly whites does not begin in the dentist’s chair or with the unboxing of a home kit. It starts days in advance. The actions you take immediately before your whitening session significantly determine the final shade of your teeth and, more importantly, the health of your enamel. Ignoring the preparatory phase can lead to patchy results, intense sensitivity, or even lasting damage to your teeth. Yet, most people focus exclusively on the aftercare. This guide serves as your definitive roadmap to the pre-treatment phase. We will explore exactly what you must avoid in the hours and days leading up to the procedure. From specific dietary villains to dangerous home remedies, this advice ensures your whitening journey starts on the strongest possible foundation.
The Critical Importance of the Pre-Whitening Window
Think of your tooth enamel not as a solid, impenetrable surface, but as a mesh-like filter containing microscopic pores. Throughout the day, this mesh absorbs pigments, acids, and bacteria. When you apply a whitening agent—whether hydrogen peroxide or carbamide peroxide—it opens these pores further to oxidize and lift out deep-set stains. If the surface of your teeth is saturated with new staining particles or biological contaminants, the whitening agent cannot penetrate effectively. Worse, if the surface is coated in acidic residue, the reaction between the acid and the peroxide can chemically burn soft tissue or erode enamel.
The preparation phase is about creating a clean, neutral canvas. A clean canvas allows the whitening gel to work uniformly across every tooth surface. Without this preparation, you risk a condition known as “spotting,” where the gel lightens the underlying enamel but leaves color-blocking biofilm on the surface, resulting in a mottled, uneven appearance. Additionally, managing the biological state of your mouth prevents the excruciating “zingers”—sharp, electric shocks of pain in the teeth—that occur when the peroxide reaction hits exposed nerve endings through compromised gum tissue. By studying the “do nots” first, you actively minimize the biggest complaint associated with cosmetic dentistry: pain.
The Acid Trap: Why pH Balance Matters
Before diving into specific foods and drinks, you must understand the role of pH. A healthy mouth sits at a neutral pH of around 7.0. When you consume anything acidic—citrus fruits, soda, wine, or coffee—the pH of your oral environment drops into the danger zone below 5.5. At this level, enamel demineralization begins. The surface of your teeth softens, and those microscopic pores widen in a negative, uncontrolled way. If you apply a strong chemical oxidizer to a mouth in an acidic state, you are not just whitening; you are chemically stripping the matrix of your teeth. Dentists universally agree that the number one mistake patients make is not the ingestion of staining foods immediately after, but the consumption of acidic eroders immediately before. You might think you are simply risking a little sensitivity, but the reality is micro-erosive wear. The gel slides into softened grooves and creates permanent divots and transparency at the biting edges. Always ensure your last meal before treatment is neutral or alkaline, never sour.
What Not to Eat in the 72 Hours Before Treatment
The countdown to a white smile begins three days out. The 72-hour window is vital for individuals using professional-strength hydrogen peroxide gels, as these temporarily dehydrate the teeth and make them highly absorbent. Loading the enamel with dark chromogens just before sealing them in with a whitening treatment is a recipe for disaster. The trapped pigments oxidize differently, often turning a greyish or bluish hue under the peroxide release.
Deep-Colored Sauces and Condiments
You must strictly eliminate sauces that have soaked into the enamel matrix. Soy sauce, balsamic vinegar, tomato ketchup, and curry pastes are the primary offenders. These condiments contain highly concentrated tannins and acid.
- Soy Sauce: The dark, fermented liquid instantly clings to the biofilm on teeth, leaving a yellow-brown residue that penetrates deep into the micro-fissures.
- Tomato-Based Sauces: The lycopene in tomatoes gives them their bright red color, but when reduced into a pasta sauce, it becomes a sticky, acidic coating that loves to latch onto the protein pellicle of the tooth.
- Curry: Turmeric and other deep spices offer significant health benefits, but their vivid yellow-orange staining power is legendary. Even a rinse with water does not remove the immediate chemical bond it forms with the salivary layer.
Instead, choose white sauces based on cream, Alfredo (minus the garlic specks), or melted butter without spices during this critical window. If you must have flavor, rely on salt and white pepper.
The Berry and Pigment Issue
Fresh fruit is usually a health food, but before whitening, it is a liability. Blueberries, blackberries, cherries, and pomegranates pack a heavy chromogen punch. Chromogens are deeply pigmented molecules that stick to dental enamel. Dark berries possess a particularly insidious ability to stain because the skin and juice contain malvidin and anthocyanins. These are the same chemicals that permanently stain your best cotton shirts. You do not want them sitting on your teeth when the whitening gel traps them under a chemical heat reaction. Avoid mixed berry smoothies and even dark-colored “superfood” powders 72 hours prior. If you want fruit, reach for bananas, white-fleshed apples (peeled), or pears. These provide fiber without the dye-like effect.
The Dark Drink Ban
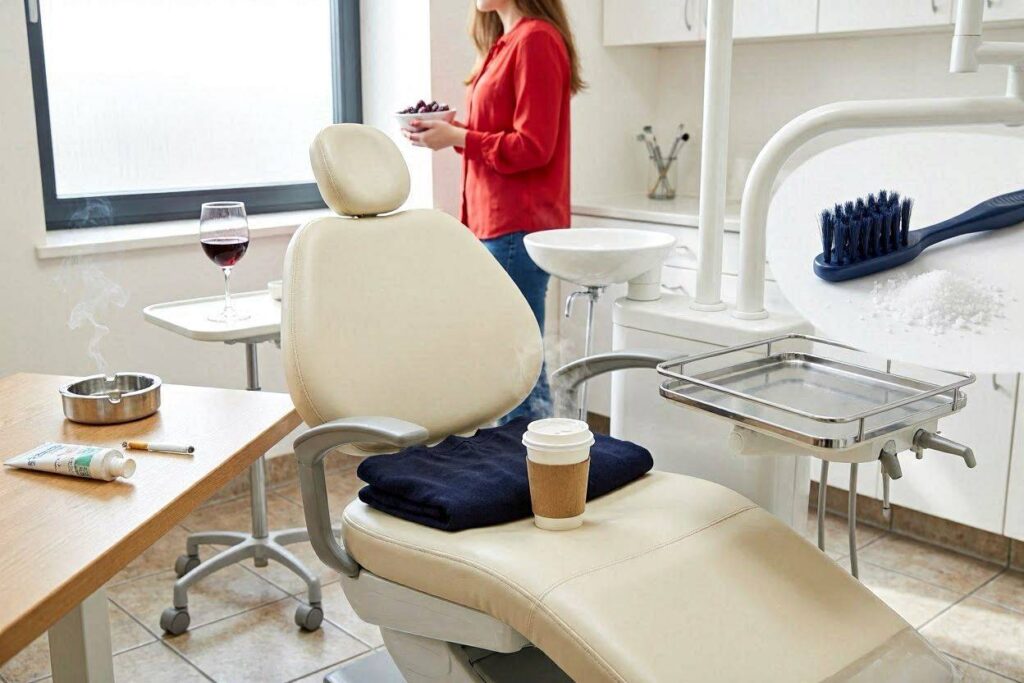
You must temporarily break up with your morning dark roast and evening red wine. The dehydration caused by caffeine in dark sodas and coffee reduces saliva flow, a natural protective barrier. Red wine stains due to the combination of acid, tannin, and pigment; it etches the tooth, and then the grape pigment sinks in. Clear, unsweetened fluids are your only friends here. We cannot overstate the importance of avoiding green tea as well; while lighter in color, its tannin load is uniquely efficient at binding to tooth enamel, sometimes staining faster than black tea. Stick to water, white coconut water, and clear, non-citrus herbal teas like chamomile.
Table: Pre-Whitening Food Swaps (72 Hours)
| Category | Avoid Completely | Safe Alternatives |
|---|---|---|
| Proteins/Sauces | Soy sauce, Curry, Balsamic Vinaigrette, BBQ Sauce | Plain chicken, White fish, Alfredo sauce, Butter |
| Vegetables/Fruit | Blueberries, Cherries, Beets, Pomegranates | Bananas, Cauliflower, Peeled Apples, Jicama |
| Beverages | Red Wine, Coffee, Black Tea, Cola | Water, White Coconut Water, Skim Milk |
| Snacks | Dark Chocolate, Colored Candies | White yogurt (plain), White cheddar cheese, Saltines |
The Brushing Blunder: Over-Scrubbing and Timing
Oral hygiene is excellent, but aggressive hygiene immediately before a cosmetic procedure is counterproductive. The goal is a clean mouth, not a bleeding one. One of the most common pre-whitening errors is scrubbing the gums with a hard-bristled brush right before applying the gel. Whitening gels, particularly high-concentration peroxide, are caustic to soft tissue. If you have created micro-tears in your gum line by brushing too hard, the peroxide will cause instant chemical burns. These appear as white patches on the pink gum tissue that peel off in layers over the following days.
Furthermore, refrain from brushing immediately before the session—specifically, do not brush and then insert a tray while the toothpaste residue is fresh. Many toothpastes contain sodium lauryl sulfate (SLS) and fluoride, which create a chemical film on the teeth. This film acts as a barrier, preventing the whitening gel from making uniform contact with the enamel. A safer strategy involves brushing thoroughly an hour before the treatment, rinsing extremely well with plain water, and allowing your natural salivary pellicle to reform. This freshly regenerated protein layer protects nerve endings without blocking the peroxide ion exchange. Do not use an electric toothbrush on the whitening setting right before treatment; the micro-sonic vibrations can temporarily sensitize the nerve pulp, guaranteeing you will jump out of the chair at the first zap of the curing light.
Skincare Crossover: Oral and Lip Precautions
A section often missing from dental advice is the skin immediately surrounding the mouth. If you are visiting a professional clinic, the dentist places a rubber dam or liquid dam to protect your gums. However, they rarely discuss the lips and perioral skin. Do not undergo any lip waxing, threading, or chemical exfoliation 48 hours before teeth whitening. The retraction tools used by dentists stretch the lips. If the skin is freshly stripped of its outer layer or inflamed from waxing, the stretching can crack the corners of the mouth, creating angular cheilitis-like sores.
Also, review your lip balm. Avoid any petroleum-based balm with added menthol or camphor on treatment day. These ingredients can react with the oxygenating process of the peroxide, causing a mild burning sensation on the lip edge. You should also wipe off any foundation or liquid makeup that might creep into the mouth cavity. High-definition liquid makeups often contain iron oxides or titanium dioxide, which react violently under UV or LED curing lights used to accelerate whitening, leading to localized heat burns on the tissue. Arrive with a completely bare face, or at least a clean, product-free mouth area. This simple step prevents the distraction of burning skin while your teeth are being treated.
The Medication and Mouthwash Interaction
Chronic dry mouth, or xerostomia, is the enemy of safe whitening. Saliva buffers the peroxide reaction. If your mouth is dry, the gel concentration effectively doubles, becoming caustic. Several over-the-counter medications and products induce dry mouth. Do not take antihistamines (allergy pills) or decongestants for 12 to 24 hours before the appointment if you can safely skip them. These drugs shut down the salivary glands, leaving you without a rinse cycle during a critical time.
Equally dangerous is the misuse of strong mouthwashes right before bleaching. Avoid antiseptic mouthwashes containing chlorhexidine or essential oils with high alcohol content. These antiseptics kill bacteria, but they also chemically strip the protective mucin layer covering the teeth and gums. They leave the teeth “naked.” Applying peroxide to stripped teeth dramatically increases the depth of penetration, turning mild sensitivity into sharp nerve pain. Similarly, avoid fluoride rinses immediately beforehand; the stannous fluoride compounds temporarily block the tubules, which sounds great, but they also leave a microscopic metallic film. When the peroxide interacts with this metallic residue, it can create a free-radical chemical reaction that tastes horrific and produces uneven lightening. The rule is simple: no rinse, none at all, in the final hour before the treatment. Just water.
Behavioral and Habitual Restrictions
Whitening preparations extend beyond diet. They include the physical habits you might subconsciously engage in during the waiting room. If you are a nail-biter, sit on your hands. Nail-biting introduces dirt, bacteria, and physical micro-scratches onto the incisal edges of your front teeth. Whitening gel will seep into these tiny crevices, causing a stinging pain that lingers. Chewing on pens or ice cubes creates similar stress fractures. Stress fractures are invisible to the naked eye, but the liquid peroxide fills them and transmits the chemical straight to the dentin layer.
Do not smoke or vape in the hours leading up to the procedure. This advice sounds obvious due to tar staining, but the chemical mechanism runs deeper. The heat of inhalation, whether from tobacco or a vaping coil, increases intra-pulpal blood pressure. The pulp is the living nerve center of your tooth. Inflamed, heated pulp reacts hysterically to the oxidizing power of peroxide. Even if you vape a nicotine-free solution, the vegetable glycerin and propylene glycol coat the teeth in a sticky, hydrophobic film. Because whitening gels are water-based, they cannot penetrate through this oily base, leading to a splotchy result. Give your teeth a significant rest period free from suction and heat.
The “Natural” Remedy Trap
The internet is full of dangerous pre-whitening “hacks,” often involving acidic scrubs to supposedly prime the teeth. You must resist every single one of them. Do not brush your teeth with apple cider vinegar, lemon juice, or baking soda in the days leading up to professional treatment. The logic propagated online claims that acidic pre-washes remove the pellicle and open the pores. This logic is catastrophically flawed. These substances dissolve the structural minerals of your teeth. You do not want to strip the protective matrix away; you want to clean it. Baking soda, despite its mild alkalinity, is a highly abrasive crystal. If you grind baking soda paste into your gum line right before a peroxiding agent, you will create a raw, abraded collar on the tooth neck. The resulting sensitivity is so severe that many patients cannot complete their treatment plan.
Charcoal toothpaste falls into the same category. Activated charcoal is an abrasive scrubber. It promises detoxification, but it leaves microscopic carbon particles wedged in the enamel tubules and cracks. When the oxygen from the whitening gel hits these trapped carbon deposits, it creates a bubbling effect inside the tooth structure. This physical gas release can cause a sharp, sudden pressure sensation that mimics a cavity. Keep your pre-treatment routine boring and basic. Leave the scrubbing agents on the pharmacy shelf. You cannot safely “deep clean” your enamel by scratching it; you can only damage it.
“The most painful whitening cases I see are those who tried to ‘pre-treat’ their teeth with acidic fruit peels. The whitening gel physically burned the exposed dentin. It took weeks for the pain to subside.” — A Professional Dental Hygienist’s observation on pre-procedure damage.
The Lifestyle Timing: Scheduling Don’ts
Timing is a logistical consideration with biological consequences. Do not schedule a teeth whitening session during the peak of your menstrual cycle if you are prone to gingivitis. Hormonal fluctuations cause increased blood flow to the gums, a condition known as menstrual gingivitis. The gum tissue swells and bleeds more readily. Applying concentrated peroxide to hormonally swollen gums feels like pouring acid on a cut. Reschedule for the week after your period when tissue inflammation is typically at its lowest.
Do not schedule whitening immediately before a major social event where you plan to eat and drink. This scheduling error belongs in the pre-whitening category because the psychology of preparation directly influences your compliance. If you know you have a wedding in four hours, you will likely skip the vital pre-cleaning steps due to time pressure. You need a buffer of zero social obligations immediately after the session to allow the teeth to rehydrate without stain. A high-stress rush job always results in a skipped meal (leading to acidic fasting breath) or a hurried tooth brushing that damages the gums. Choose a calm, low-stress day. Block off the entire evening after the treatment. The mental state of relaxation ensures your body’s inflammatory response stays low, directly impacting comfort levels.
The Hydration Equation
A common pre-treatment blunder involves restricting water intake to avoid needing bathroom breaks during a long chair session. Do not become dehydrated. Dehydration reduces saliva volume, as discussed, but it also physically shrinks the dental pulp slightly, altering the hydrostatic pressure inside the tooth. When you suddenly rehydrate or apply a peroxide gel that attracts water, the rapid shift in internal pressure triggers severe sensitivity. Drink plenty of plain water in the 12 hours leading up to the appointment. Well-hydrated teeth are less brittle, and the interstitial fluid in the dentin tubules acts as a shock absorber against the ionic charge of the bleach. Think of your teeth as sponges. A dry sponge cracks when flexed; a wet sponge bends. Keep your oral tissues saturated with water, not sugary drinks or electrolyte mixes that often contain citric acid to maintain flavor profiles. Just pure, still water.
The Silent Saboteur: Residual Toothpaste
Let us revisit the mouth with more focus on a specific chemical reaction. Many whitening toothpastes contain blue covarine or other optical brighteners. These do not clean teeth; they paint them. If you brush with a “purple shampoo” type toothpaste for teeth right before a professional treatment, you deceive the colorimeter and the dentist’s shade guide. The initial shade match becomes artificially cool-toned, masking the true yellow warmth underneath. The dentist may formulate a treatment plan based on this false light baseline, leading to an overestimation of the natural shade and an under-treatment of the yellow pigments. You will finish the session and, once the covarine film rinses away over the next 24 hours, your teeth will look exactly as they did before. Always use a plain, white, non-whitening toothpaste 24 hours before the session. Save the fancy optical brighteners for the days after your final whitening maintenance.
Table: The 24-Hour No-Go Countdown
| Time Before Treatment | Do Not Do This | Reason |
|---|---|---|
| 24 Hours | Consume dark alcohol (Red Wine, Rum, Whiskey) | Deep, sticky chromogens bond firmly with the dehydrated enamel surface. |
| 12 Hours | Take Antihistamines or Decongestants | Drug-induced dry mouth eliminates the buffering saliva needed for safety. |
| 6 Hours | Drink Carbonated Beverages (even clear soda) | Carbonic acid softens the enamel matrix, making it vulnerable to chemical erosion. |
| 2 Hours | Eat a Heavy, Garlicky, or Spicy Meal | Strong sulfur compounds linger in breath and alter the oral pH drastically. |
| 1 Hour | Brush Teeth Aggressively | Micro-abrasions on the gums cause instant chemical burns upon peroxide contact. |
| 30 Mins | Apply Lip Balm or Makeup around the mouth | Oils and pigments react poorly with light-curing units and cheek retractors. |
Stomach Acid and Stress Burps
A hidden aspect of preparation involves managing acid reflux or silent reflux. If you suffer from GERD or even occasional heartburn, do not eat a trigger food the night before. Lying down allows stomach acid to creep up into the esophagus and pool in the back of the mouth. You may wake up with a sour taste, but the damage to the enamel lingers unseen. The enamel on the tongue-side of your teeth—the lingual surface—may be chemically etched by gastric juices with a pH of 1.5 to 2.0. Applying whitening gel to these acid-etched lingual surfaces causes severe burning, not to mention rapid erosion of the material you need most. If you feel a hint of acid reflux, rinse immediately with a solution of baking soda and water (to neutralize the acid) but do not brush for at least an hour. Pushing acid into the tubules with a toothbrush creates a sub-surface stain no bleach can fix, turning it into a white spot lesion. Do not suck on sour candies to freshen breath; sour equals acid. Use a pH-neutral breath strip if necessary.
The Psychology of the “Last Hurrah”
Almost every patient falls victim to the “Last Supper” mentality. The thought process goes: “I’m whitening my teeth tomorrow, so tonight, I should drink all the red wine and eat all the pasta sauce I want.” This is the single most destructive pattern for results. The chromogens from that final meal do not just sit on the surface; the acid in the wine etches the teeth while the dark pigment stains. You arrive at the clinic with freshly stained, softened teeth. The whitening gel then opens the softened layer wide, bleaching the stain into a pale yellow ghost color that is extremely difficult to remove later. It is much harder to lift a 12-hour-old wine stain than a naturally aged one because the pigment sits in the freshly opened lattice, not deep in the pulp. Deny yourself the binge. Consider your whitening appointment the start of a new discipline, not the end of an era. If you indulge, you are essentially asking your dentist to clean freshly applied paint off a wall; it smears before it lifts.
The Temperature Sensitivity Check
Before you even begin the preparatory diet, perform a sensitivity test at home. Do not ignore existing dental pain. If you sip ice water and feel a sharp, lingering shock in a specific tooth, cancel the whitening appointment and see a general dentist first. Whitening agents travel through any cavity, crack, or leaking filling straight to the nerve. This does not cause a minor twinge; it causes an explosive, breathtaking pain that feels like an electrical shock. Pre-existing sensitivity indicates that your enamel barrier is already compromised. Whitening does not fix this; it explodes it. Do not rely on desensitizing toothpaste to “get you through” a whitening session if you have an active cavity. Desensitizing agents block the sensation, but the peroxide physically inflames the nerve tissue, potentially causing irreversible pulpitis—a condition requiring a root canal. A simple cold test with a cotton pellet at the dentist’s office takes two seconds and saves months of regret.
Food Particles and the Biofilm Barrier
You must floss, but you must not floss violently 10 minutes before the procedure. Instead, floss meticulously the night before and in the morning, then stop. Your aim is to remove the interproximal food chunks that rot and produce sulfuric acid. A large chunk of meat or popcorn kernel stuck between molars does two things: it physically blocks the gel from entering that space, leaving a dark triangle, and it ferments bacteria. When the curing light heats the gel, it also warms this trapped debris, creating a foul odor and a heated bacterial soup that seeps into the gum pocket. Do not use wooden toothpicks in the waiting room. Toothpicks splinter and leave microscopic wood fibers in the tight contact points between teeth. These fibers absorb the whitening gel, wicking it directly against the sensitive gum papilla for the entire session, causing a localized ulcer. A water flosser set to low pressure is the safest final cleaning method one hour before, as it uses plain water to flush debris without scratching.
The “Medication Mouth” Blues
Certain medications alter the oral microbiome and saliva composition permanently or semi-permanently. Tetracycline antibiotics taken during tooth development cause intrinsic staining, which we know. However, current medications, specifically some inhalers for asthma and allergy nasal sprays, deposit a fine powder on the teeth. Do not use a dry-powder inhaler directly before walking into the operatory. The powder sits on the enamel and creates a distinct, bitter chemical taste when mixed with peroxide. It also blocks the gel in a speckled pattern. Rinse your mouth very thoroughly with water after your morning inhaler dose, but time it at least an hour before the bleach application. Antidepressants that cause dry mouth should be managed with more aggressive water hydration, never with a lozenge that adds sugar or citric acid to an already dry mouth. Talk to your dentist about your full medication list; a good clinician adjusts the lip and gum barriers based on your hydration levels, but only if they know the full picture.
Exploding the “Charcoal Cleanse” Myth
Let’s take a harder stance on this trend because it remains pervasive. The black, gritty powder looks impressive on social media, covering the mouth in a terrifying black foam. The damage, however, is real and lasting. Charcoal ranks high on the Relative Dentin Abrasivity (RDA) scale. Brushing with it literally sands down your enamel. Enamel does not grow back. If you sand it down in the days before whitening, you thin the protective white shell. The underlying dentin is yellow. So, by scrubbing with charcoal to make your teeth white, you permanently thin the white layer, exposing the yellow layer, and then you pay to chemically lighten the yellow layer. This is a vicious cycle of irreversible damage. Do not brush with charcoal toothpaste or any paste with a gritty, sandy texture for at least two weeks prior to whitening. You need the full thickness of your enamel to insulate the nerve from the chemical reaction. Treat your enamel like a precious, finite fabric that cannot be rewoven.
The Uncomfortable Truth About Desensitizers
Over-the-counter desensitizing agents like gels and varnishes might seem like a smart pre-game defense. However, randomly applying a high-potassium nitrate gel right before a custom-tray whitening session can backfire. These gels plug the tubules. If the plug is incomplete or uneven, the peroxide enters some tubules but not others. This causes a pressure differential inside the tooth fluid, which creates a sharp hydraulic pain spike. Unless your dentist instructs you to apply a specific pre-treatment gel (usually overnight for two weeks before whitening), do not experiment with these products on the day of. The only safe pre-rinse for home users is a neutral pH sodium fluoride rinse, and only if used 30 minutes prior and allowed to fully absorb and dry. Even then, professional supervision is preferred. The safest pre-treatment for pain is simply having a well-hydrated, intact, clean tooth surface free of food debris.
Table: Your Pre-Whitening Checklist (Don’t Forget!)
| Task | Action to Avoid | The Safe Alternative |
|---|---|---|
| Morning Meal | Skipping breakfast (causes acid reflux). | Eating a banana and a glass of milk (neutral pH). |
| Hygiene | Brushing with a hard-bristle brush right before. | Brushing gently with a soft brush an hour prior, rinsing thoroughly. |
| Lips | Applying colored gloss or long-lasting lipstick. | Applying lanolin-only ointment lightly on the lips to prevent cracking. |
| Comfort | Ignoring the urge to urinate (distraction causes biting). | Using the restroom immediately before sitting in the chair. |
| Jewelry | Wearing metal tongue or lip piercings. | Removing all oral piercings to prevent galvanic shock. |
The Oral Piercing Hazard
Do not attempt to leave a metal tongue bar, lip ring, or even a small smiley piercing in during whitening. The gel is an oxidizing agent. Metal acts as a catalyst. When peroxide touches a metal ring, it creates a rapid oxidation reaction, generating intense heat and a foul, metallic battery-acid taste. This is called galvanic shock. The electrical current created by the metal interacting with the ionic solution of the bleach shoots through the tooth structure. It is not just unpleasant; it can theoretically damage the amalgam restorations or the bond of the metal piercing itself, causing micro-pitting. Silicone or plastic retainers are somewhat safer but still create a physical barrier that collects gel and leads to uneven whitening. The best practice is to remove everything. Arrive at the appointment with a bare, metal-free oral cavity. If a piercing has recently closed slightly, ask the professional for assistance with sterile lubricants to reinsert it after the final rinse, but never during.
Caffeine and Stress: The Internal Heat Source
Consuming a large dose of caffeine right before a whitening session is a mistake. Caffeine is a vasoactive stimulant. It increases blood flow and heart rate. The increased blood pressure directly translates to increased pressure inside the tooth’s pulp chamber. A pressurized, hyper-sensitive nerve reacts dramatically to the dehydrating effect of whitening gel. Avoid your morning energy drink, pre-workout supplement, or double espresso. These substances also contain massive amounts of acid and dark coloring. The combination of internal pressure, external acid erosion, and surface stain preps the mouth for a terrible experience. If you need energy, take a B-complex vitamin (in a swallowable pill, not a sublingual acidic lozenge) with a large glass of water. Keep your cardiovascular system calm. The calmer your heart rate, the less you will feel the pulse in your teeth when the curing light warms them up.
Incorrect Tray Preparation
If you are using an at-home system with custom or boil-and-bite trays, do not overload the gel syringe. More gel does not mean whiter teeth; it means chemical burns on your gums. The pressure of the tray against the teeth naturally extrudes excess gel onto the gum line. If you fill the tray with a continuous, heavy line of gel, you guarantee soft tissue bleaching. The gums turn white and slough off. This is painful and visually shocking. Place only a small dot of gel in the middle of the facial surface of each tooth imprint on the tray. A droplet the size of a pinhead is sufficient. Furthermore, do not ignore the back of the tray. If you get gel on the backside of the tray (lingual side) and you have lingual gum recession, you will burn the thin tissue behind your front teeth, a spot very hard to heal. Wipe any overflow immediately with a dry cotton swab. If you can taste the chemical peroxide flavor strongly in your saliva, you have loaded the tray incorrectly and are swallowing a low dose of bleach. Suction or spit, remove the tray, clean the gums, and reload correctly.
The In-Office Behavior Code
Once seated, do not touch the retracted tissues with your tongue. The dentist places a cheek retractor and cotton rolls. The inner cheek tissue sits against the bare, unprotected teeth. If you keep probing the dry, isolated tooth surface with your wet tongue, you reintroduce salivary enzymes onto a surface the dentist has meticulously dehydrated. Saliva contains catalase, an enzyme that breaks down hydrogen peroxide into water and oxygen instantly. If you lick the teeth, you deactivate the gel before it can work, creating a wet, weak spot. Keep your tongue parked on the roof of your mouth. Breathe through your nose. Do not speak while the gel is on. Speaking draws air across the teeth and cools them, but it also activates the cheek muscles, pumping saliva from the parotid glands. This minor flood of saliva dilutes the sealed gel at the gum line, causing marginal leakage and a bitter taste. Silence is golden, and in this case, silence ensures the chemical stays in place.
The Days-Ahead Diet Reset
To truly optimize the 72-hour window, shift your diet to prioritize minerals that fortify the enamel lattice. Do not starve yourself of calcium and phosphorous. In the days before, avoid a raw vegan or extremely acidic “detox” diet consisting purely of grapefruit and spinach smoothies. You want a remineralized, strong surface. Eat high-quality dairy like cheese. Cheese stimulates saliva and deposits calcium phosphate directly onto the enamel surface. Hard cheeses like cheddar are particularly effective. Avoid stringy, melted mozzarella immediately before (it sticks), but 48 hours out, cheese is a superfood for your smile. Additionally, incorporate selenium and zinc-rich foods like eggs and pumpkin seeds. These trace minerals support the health of the gum tissue, ensuring the biological seal around the tooth is tight. A tight gum seal prevents the dreaded chemical creep of peroxide into the sulcus.
Special Note on Dental Work
Do not whiten your teeth if you have recently (within two weeks) bonded a new composite filling or crown to a visible front tooth. Composite resin absorbs peroxide and hydrolyzes over time, but during the active phase, it does not change color. If the dentist matched the filling to your current, unbleached tooth color, and you bleach the natural tooth next to it, the filling remains dark. Wait. Also, do not attempt to “pre-soak” a fake tooth to lighten it; it simply degrades the resin bonds. For those with braces, do not attempt in-office or home whitening while brackets are attached. The glue line will remain dark orange, creating a grid pattern of yellow squares when the brackets finally come off. This results in a much more expensive cosmetic repair.
The Night-Before Relaxation Rule
Do not drink alcohol the night before. This instruction goes beyond the staining and acid load of wine or beer. Alcohol is a diuretic. It systematically dehydrates the entire body, including the pulp of the teeth. Alcohol also causes restless sleep. A tired body feels pain more acutely. A patient who partied the night before sits in the chair with a dry mouth, inflamed gums, and a raw nerve system. The whitening experience will be unnecessarily brutal. Swap the nightcap for a cup of chamomile tea (cool, not hot, to avoid burning the tissue) and an extra liter of water. Prepare your sleep environment to ensure you get eight hours. The body’s reparative systems work during sleep; you want the dentin fluid flow to be slow, stable, and balanced by the time morning arrives.
Analyzing the “Sensitivity Strips”
Some patients think they can game the system by using numbing gels (topical benzocaine) applied to the gums right before the dentist applies the whitening gel. Do not do this without explicit permission. Topical anesthetics alter the surface tension of the gum tissue and sometimes contain red or pink coloring agents that stain the rubber dam. Additionally, if the gum is numb, you lose the vital warning sign of pain. Pain is a safety signal indicating the gel has leaked onto the tissue and is causing a burn. If you block that signal, you can sustain a severe chemical burn without realizing it until the anesthetic wears off hours later. The pain tells you to speak up. Enduring it silently, or masking it, leads to weeks of soft tissue sloughing. Do not “tough it out.” If it hurts, it’s leaking, and you need to tell the clinician immediately.
“I told my patient to stop using her charcoal scrub a week before, but she didn’t. The oxygen bubbles literally fizzed in the grooves she’d worn into her teeth. The sound scared her more than the sensitivity.” — A Dentist’s warning about abrasive pre-treatment.
The Final Rinse Protocol
Thirty minutes before the session, if your mouth feels grimy, do not reach for a commercial rinse. Simply swish vigorously with still, room-temperature water. The mechanical action of swishing dislodges loose debris. Do not use a water flosser at high pressure right at the last second. The water jet can force liquid up into the gum sulcus, creating a watery, bleeding environment around the tooth neck. The whitening gel needs a perfectly dry, isolated field to adhere properly. A soggy gum pocket leaks crevicular fluid, which is alkaline and neutralizes the acidic pH of the carbamide peroxide before it can break down into hydrogen peroxide. You want the gum tissue to be in a resting, non-inflamed, dry state. Simply swish water gently; your natural saliva is actually the best final coating if allowed to be a thin, even film.
The Common Cold and Congestion
If you wake up with a completely blocked nose and must mouth-breathe, seriously consider postponing. Mouth breathing during a whitening session dries the teeth rapidly in a very uneven pattern. The front central teeth dry to a chalky white state, while the moisture from the back of the tongue keeps the sides wet. The peroxide works faster on the dry sections, leading to a patchy, striped result known as the “mouth breather pattern.” Moreover, constant interruption to swallow the saliva pool caused by mouth breathing disrupts the isolation. Your comfort and the result depend on steady, closed-nose breathing. If you cannot breathe through your nose for 45 minutes, the procedure will fail aesthetically. Wait until your sinuses clear.
Understanding the Gingival Barrier
The dentist places a gingival barrier, a light-cured resin painted onto the gums. Do not underestimate the importance of staying still during this phase. If you move your tongue, swallow prematurely, or shift your lips, you can contaminate the uncured resin with saliva, preventing it from sealing. The dentist might think it’s sealed, but a microscopic channel remains. The peroxide then leaks under the barrier. You experience a delayed, throbbing burn. When the dentist asks you to sit perfectly still with the cheek retractor in, they are not being overly cautious; they are ensuring the barrier cures into a tight gasket. Any movement of the facial muscles or tongue can dislodge the delicate layer before the light locks it in. Once the barrier is set, do not probe it with your tongue to check if it’s “hard.” You will chip it.
Why a Clean Slate Wins
Returning to the core principle, the pre-whitening phase is a subtractive process. You are removing variables. You are not adding “miracle” primer rinses or doing aggressive baking soda scrubs. You are simply removing the dark pigments, the sticky proteins, the acidic eroders, and the bacterial load. A tooth free of biofilm allows the peroxide molecule to have a direct, unobstructed chemical reaction with the inorganic stain inside the enamel. It is like cleaning a window before applying a tint film; even a speck of dust creates a visible bubble. Before whitening, the “dust” is the food debris and salivary pellicle. If you starve the surface of contaminants, the result is glassy, uniform, and translucent. If you feed the surface with a “final meal” of dark sauce, the result is a dull, patchy, opaque white.
The Psychology of the Quick Fix
Finally, release the idea that a pre-whitening scrub can undo years of neglect. If you have heavy tobacco staining or thick calcified tartar, a single polishing the day of treatment is necessary but insufficient. Do not walk in and demand the dentist “just scale and whiten” in the same hour. Inflammation from scaling causes bleeding. Bleeding and peroxide do not mix safely. Heavy tartar requires a separate cleaning appointment, usually a week or two before whitening, to allow the gums to heal and shrink to a tight, healthy collar. Attempting to do a year’s worth of hygiene in an hour before bleaching is like trying to weed a garden while simultaneously painting the fence; you just splash mud on the fresh paint. Respect the sequence. Hygiene first. Healing time second. Whitening third.
Additional Practical Reminders for the Day Of
- Contact Lenses: Do not wear them. In the extremely rare event of a splash of concentrated whitening gel, the fumes and particulate can irritate the eye. The peroxide vapor in a closed operatory can dry out contacts. Glasses are safer.
- Facial Treatments: Do not schedule Botox, fillers, or microdermabrasion within 24 hours of your session. The stretching of the lip and cheek muscles during lengthy whitening sessions can displace freshly injected filler material and cause asymmetrical settling of Botox before it binds to the receptor sites.
- Clothing: Do not wear a dark turtleneck or silk blouse. Even with a bib, the tiny splatters of whitening gel have a bleaching effect. They will leave permanent white spots on dark cotton and silk. Wear a washable, light-colored top, or something you don’t mind destroying.
The Post-Whitening Bridge (A Brief Note)
While this article focuses strictly on the pre-treatment window, the preparation directly bridges the gap to the post-treatment result. If you start the process with an acidic, inflamed mouth, the post-whitening “White Diet” becomes ten times harder because your teeth are screaming in pain, leaving you unable to eat at all. A calm, neutral, well-prepared mouth enters the post-whitening phase feeling strong, allowing you to comfortably consume the necessary remineralizing foods. The pre-care dictates the post-care outcome. It’s the most underutilized lever in cosmetic dentistry for maximizing the return on investment.
Summary Table: Do Not Do These
| The Forbidden Act | The Risk |
|---|---|
| Brushing with Charcoal | Permanent enamel loss, yellow dentin exposure. |
| Eating Tomato Sauce | Fresh chromogenic stain bonding just before the seal. |
| Drinking Red Wine | Acid erosion plus deep purple tannin penetration. |
| Skipping Water Intake | Dehydrated teeth, increased internal nerve pressure. |
| Waxing Lips | Skin tearing and chemical burns from retractors. |
The Long-Term “Don’t” That Starts Now
Do not buy into the idea that whitening is a one-time event requiring no preparation. The worst mistake is treating it casually. Teeth are biological structures, not porcelain sinks. You would not sand a wooden floor without vacuuming first. You cannot chemically oxidize a porous living tissue without cleaning the biofilm mat off the top. This pre-whitening discipline sets the stage for a low-sensitivity, dramatically brighter result. By avoiding these specific foods, habits, and products, you demonstrate respect for the biological limits of your body, ensuring the light reflects off a perfectly prepared surface for years to come.
Frequently Asked Questions (FAQ)
Can I drink white wine instead of red before whitening?
White wine is less staining in terms of dark chromogens, but it is highly acidic. The acidity can erode the enamel, leaving it soft and vulnerable to the peroxide. If you must have a drink, wait until after the treatment is fully complete.
How long before whitening should I stop drinking coffee?
Ideally, you should stop drinking coffee, black tea, and dark sodas 72 hours before your appointment. If this is impossible, rinse your mouth immediately with water after drinking, but never brush the acid and tannin mix into the teeth.
Why do my teeth feel sticky after avoiding certain foods?
That “sticky” feeling is often the clean, protein-based salivary pellicle forming naturally on a truly clean tooth surface. It is a sign that you have successfully removed the greasy, acidic film and your teeth are in a healthy, protective resting state, ready for treatment.
Is it okay to use a whitening mouthwash before my appointment?
No. Avoid all mouthwashes, especially those containing alcohol, chlorhexidine, or optical brighteners, for at least one hour before treatment. They leave a chemical film that blocks the penetration of the whitening gel.
I bit my lip; can I still whiten my teeth?
It is safer to wait until the cut or ulcer has fully healed. The peroxide will cause intense stinging and a chemical burn on the open wound, slowing healing and causing significant discomfort.
Does vaping matter before whitening?
Yes. Vape aerosol contains vegetable glycerin and propylene glycol that coat the teeth in a hydrophobic film. The water-based whitening gel cannot penetrate this oily layer, leading to a blotchy, uneven whitening result.
Additional Resource
For a deeper understanding of how chemical agents interact with oral tissues, the American Dental Association provides detailed guidance on tooth whitening safety and efficacy. Visit their official patient education portal at MouthHealthy.org to explore peer-reviewed resources on cosmetic procedure preparation and oral chemistry.
Conclusion
The path to a dazzling smile begins long before the peroxide touches your enamel, requiring a disciplined avoidance of acidic eroders, dark pigments, and abrasive scrubs. By managing your diet, hydration, and oral hygiene timing with precision, you create a clean, neutral canvas that maximizes the chemical reaction while minimizing pain and structural damage. Treating your teeth as living, absorbent biology rather than a hard, washable surface guarantees not just an immediate aesthetic win, but long-term oral health and comfort.