How Long Does Teeth Whitening Gel Take to Work?
You glance in the mirror before a big event. You want a brighter smile, and you want it now. The question that immediately pops into your mind is simple: How long does teeth whitening gel take to work?
The honest answer depends entirely on what you are using. Some gels work in minutes, others take weeks. This guide will break down the realistic timelines for every major method. We will avoid empty promises. We will give you the facts based on concentration, application method, and the type of stains you have. By the end, you will know exactly what to expect, how to speed things up safely, and how to make your results last.
Understanding the Science: How Whitening Gels Actually Function
Before we dive into timelines, you need to understand what is happening on your teeth. Without this knowledge, you might quit too early or overuse a product and damage your enamel.
The Chemistry of Stain Removal
Teeth whitening gel contains an active ingredient, usually hydrogen peroxide or carbamide peroxide. These compounds act as oxidizing agents. When the gel touches your enamel, it breaks down into water, oxygen, and free radicals.
The oxygen molecules penetrate the porous enamel layer. They reach the dentin, the yellowish layer beneath. There, the oxygen breaks the long-chain, dark-colored stain molecules into shorter, colorless molecules. The structure of your tooth does not change. The color simply reflects light differently, appearing whiter.
“Whitening is not about scrubbing the surface. It is a chemical reaction that occurs within the microscopic structure of your tooth. This reaction needs time to complete.” — Dr. Mark S. Wolff, Dean of the University of Pennsylvania School of Dental Medicine.
Intrinsic vs. Extrinsic Stains and Their Impact on Timing
The timeline of your results depends heavily on the type of stains you have.
Extrinsic Stains
These are surface-level stains on the enamel. Coffee, tea, red wine, and smoking cause them. These stains respond quickly to whitening gel. The peroxide easily reaches them. You will see rapid changes, often within days.
Intrinsic Stains
These stains are deeper, inside the dentin. They form from aging, certain medications (like tetracycline), excessive fluoride, or trauma. These stains are stubborn. The oxygen molecules need more time to penetrate deep and break them down. This process can take months, not days. In some severe cases, traditional gel may never achieve a pure, brilliant white.
How Different Concentrations Dictate Speed
There is a direct trade-off between speed, safety, and concentration. Higher concentrations deliver rapid changes but carry a higher risk of temporary sensitivity. Lower concentrations are gentle but demand patience.
| Gel Type | Active Ingredient | Typical Concentration | Mechanism |
|---|---|---|---|
| Professional In-Office | Hydrogen Peroxide | 25% – 40% | Rapid oxidation under controlled isolation, often with light activation. |
| Professional Take-Home | Carbamide Peroxide | 10% – 22% | Slow-release breakdown into hydrogen peroxide over several hours. |
| Over-the-Counter Strips | Hydrogen Peroxide | 6% – 14% | Adhesive strips hold gel against teeth for 30–60 minutes. |
| Over-the-Counter Pens/Gels | Hydrogen Peroxide | 3% – 10% | Direct application, often without a barrier to hold moisture in. |
| “Natural” or Gentle Gels | Phthalimidoperoxycaproic acid (PAP) | Varies | Non-peroxide oxidation, surface-level action with lower penetration. |
Important Note for Readers: Concentration is not the only factor. The delivery system—how well the gel stays isolated and wet on your tooth—is equally critical. A 10% gel in a custom-fitted tray that prevents saliva dilution will outperform a 15% strip that slips and gets washed away.
The Master Timeline: Results by Method
Now, let’s get specific. This is the core of the guide, breaking down exactly how long each method takes to show visible results and reach its final potential.
Professional In-Office Whitening: The 90-Minute Transformation
This is the fastest path. You want a new smile for a wedding on Saturday. You book an appointment on Friday.
The Procedure
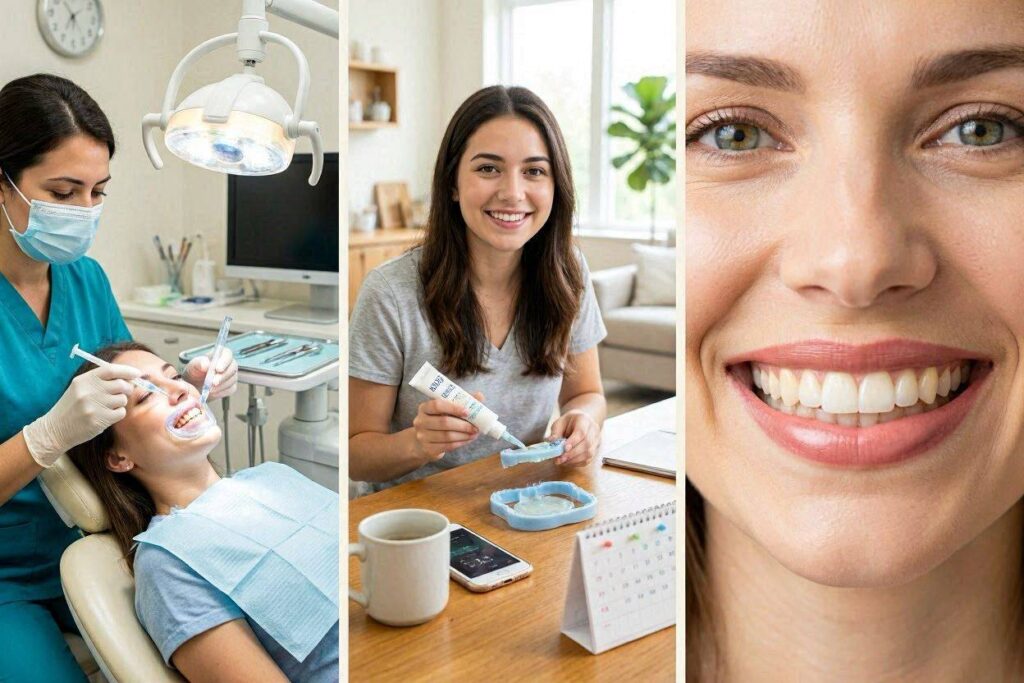
The dentist applies a protective barrier to your gums. They then paint a high-concentration hydrogen peroxide gel (usually 35–40%) onto your teeth. The gel stays on for 15–20 minutes. The dentist removes it and reapplies fresh gel. This cycle repeats two to three times.
Time to Initial Results
You see a dramatic difference immediately after the 60 to 90-minute appointment. Your teeth will look several shades lighter. The change is undeniable.
Time to Final, Stable Results
The color you see right away is not the final color. Your teeth experience dehydration during the procedure. This temporary effect makes them look brilliantly, artificially white. Over the next 48 to 72 hours, they rehydrate. The color settles down to its true, stable shade. You must wait two full days to see the realistic, lasting outcome.
The Timeline in a Nutshell
- One Session: 60–90 minutes.
- Immediate Change: Yes, drastic but partly from dehydration.
- True Final Shade: 2–3 days post-procedure.
Professional Take-Home Trays: The 14-Day Gold Standard
Dentists widely consider this the most effective long-term method. You get custom-fitted trays and a gel with carbamide peroxide.
The Routine
You place a small drop of gel in each tooth compartment of the tray. You wear the trays daily. The wear time depends on the concentration.
| Gel Concentration (Carbamide Peroxide) | Daily Wear Time | Typical Program Length | Best For |
|---|---|---|---|
| 10% | 2–4 hours (or overnight) | 10–14 days | Low sensitivity, steady whitening. |
| 15–16% | 1.5–2 hours | 10–14 days | Balanced speed and comfort. |
| 20–22% | 30–60 minutes | 7–10 days | Experienced users, faster results, higher sensitivity risk. |
Time to Initial Results
Many people notice a slight brightening after the second or third day. The change is subtle at first. The deep, uniform whitening becomes obvious to the eye around day 5 to 7.
Time to Final, Stable Results
You must complete the full program, typically 10 to 14 days, even if you are happy earlier. Stopping early leaves the whitening process unfinished. The newly whitened enamel continues to look better for a few days after the last session as it rehydrates. Wait one full week after your last tray application to judge the final, true color.
“Take-home trays from your dentist remain the benchmark for predictability. The custom seal keeps the gel on the teeth and off the gums, maximizing contact time and effectiveness.” — The Journal of the American Dental Association.
Over-the-Counter Whitening Strips: The 7-14 Day Commitment
Strips are the most popular DIY method. They are effective, but their timeline is less forgiving of errors.
The Routine
You apply the strips to your upper and lower teeth. Most products require a 30-minute wear time. Premium strips use a 60-minute wear time. You do this once per day.
Time to Initial Results
With a high-quality, 14% hydrogen peroxide strip, you can see a noticeable difference after just 3 days. The edge of your front teeth will look brighter first.
Time to Final, Stable Results
A standard box contains a 10 to 14-day supply. You must complete the full box to achieve uniform whitening, especially on the curved canines that are harder to reach. The final color stabilizes about 2 days after the last application.
The Big Limitation
Strips primarily whiten the front six to eight teeth. They do not wrap around to the back teeth. Your smile line will change, but a full, wide grin may reveal a color disparity.
Whitening Pens and Brush-On Gels: The Quick Touch-Up
These are not designed for major transformations. They serve a maintenance and minor correction role.
The Routine
You paint a thin layer of gel onto dry teeth. You must hold your lips away and let it dry for 30 seconds. You must not let saliva touch it for 1–2 minutes. You typically apply twice a day.
Time to Initial Results
Because the concentration is low and the contact is brief, results are slow. You might see a minor improvement in 5 to 7 days.
Time to Final Results
A two-week period will yield a subtle, natural-looking shift. These pens work best for one or two teeth that have slightly yellowed again after a major whitening procedure.
“Natural” PAP Gels: The Gentle, Slow Path
Gels using Phthalimidoperoxycaproic acid (PAP) are peroxide-free. They promise less sensitivity.
The Routine
Similar to pens or tray systems, you apply the gel and let it sit.
Time to Results
PAP is a surface-level oxidizer. It does not penetrate the dentin as deeply as hydrogen peroxide. Consequently, the results are slower and more limited. Expect a 2 to 4 week timeline for a mild change. These gels cannot drastically alter deep, intrinsic staining. They are ideal for removing new surface stains gently.
Factors That Accelerate or Delay Your Results
Two people can buy the same gel and get results at different speeds. Your daily habits and biology control the clock.
Conditions That Speed Up Whitening
- Youth: Younger enamel is more porous and permits faster oxygen penetration.
- Yellow Stains: Yellowish teeth generally bleach faster and more dramatically than grayish teeth.
- Pre-Treatment Cleaning: Professionally cleaned teeth, free of plaque and biofilm, allow gel to make direct contact with enamel instantly.
- Consistent, Dry Application: Keeping the gel isolated from saliva prevents dilution. This is why custom trays work better than strips that slip.
- Adjunct Light Activation: In-office LED lights gently warm the gel, accelerating the chemical reaction slightly. For at-home systems, lights are often marketing; the gel’s chemistry does the real work.
Conditions That Slow Down or Block Whitening
- Tartar Buildup: Whitening gel cannot penetrate calculus. You will bleach the tartar itself, which turns a bright, unnatural white, while the tooth underneath remains stained. This looks patchy.
- Poor Gel Contact: If you overload a tray and gel squishes onto your gums, you waste product. You also irritate your gums without whitening your teeth.
- Transparent, Thin Enamel: If your enamel is genetically thin, the dark dentin shows through. Whitening gel can only do so much. The tooth will always appear darker.
- Restorations: Fillings, crowns, and veneers do not whiten. If you have a prominent front tooth crown, it will stand out more as your natural teeth lighten around it.
- Gray Stains from Tetracycline: These deep, blue-gray stains are notoriously resistant. A standard 14-day kit may do very little. These cases often require 3 to 6 months of nightly tray use under strict dental supervision.
Optimizing Your Routine: A Comparative Guide
How you apply the gel drastically impacts the timeline. Let’s compare three common scenarios.
| Strategy | Duration | Technique | Outcome |
|---|---|---|---|
| The Intensive Blitz | 2 weeks | High-concentration (22% CP) custom trays, 60 min/day. Brush with whitening toothpaste beforehand. Avoid all staining foods. | Maximum speed. Risk of sharp, temporary sensitivity. |
| The Steady Standard | 1 month | Over-the-counter 10% HP strips, 30 min/day. No dietary changes. | Good results on front teeth. Gradual, less shocking for friends and family to notice. |
| The Sensitive Slow-Build | 2 months | Low-concentration (10% CP) gel overnight, every other night. Use a desensitizing toothpaste daily. | Very slow progress. Almost zero discomfort. Ideal for those with a history of sharp nerve pain. |
Sensitivity Management: Don’t Let Pain Dictate Your Timeline
The number one reason people stop whitening too early is tooth sensitivity. The sharp, sudden zing can be alarming. It makes you skip days, which breaks the concentration cycle and delays results.
Understanding the “Zinger”
Peroxide molecules are small. They pass through enamel and tubules into the pulp chamber, where the nerve lives. This causes a temporary, reversible inflammation of the nerve. It feels like a quick jolt to cold, air, or just a spontaneous throb.
A Pre-Whitening Desensitizing Protocol
You can cut your result time in half by not needing to pause for sensitivity. Start this protocol two weeks before your first whitening session.
- Use Potassium Nitrate Toothpaste: Brands like Sensodyne or any with 5% potassium nitrate calm the nerve. Brush twice daily. During this lead-in, apply a small dab directly to your most sensitive teeth and leave it for 10 minutes before rinsing.
- Fluoride Rinse: Use an alcohol-free fluoride mouthwash nightly. It strengthens enamel, making it slightly less permeable.
- During Whitening: Take an anti-inflammatory like ibuprofen one hour before your session if you are prone to pain.
- After Whitening: Do not rinse with cold water immediately. Lukewarm is safer. Apply the desensitizing toothpaste to your trays and wear them for 20 minutes after the whitening session. This is the single most effective trick.
“Managing sensitivity proactively, rather than reactively, is the key to compliance. If you wait until it hurts, you’ve already lost ground and will likely skip tomorrow’s treatment, extending your timeline unnecessarily.” — Aesthetic Dentistry Today.
Lifestyle Adjustments: The Immediate Post-Whitening Window
The first 48 hours after your gel application are critical. This is when the “white diet” matters most.
Your enamel is slightly porous and dehydrated immediately after oxidizing stains. Its pores are open. It is highly susceptible to picking up new stains. If you drink a cup of black coffee two hours after whitening, you can undo a week of progress in ten minutes.
The White Diet Rule for Fast, Lasting Results
For the two days following your final session, follow this strictly.
Safe (White) Foods and Drinks
- Skinless chicken or white fish
- White rice, plain pasta
- Cauliflower, peeled potatoes
- Bananas
- Milk, plain yogurt, white cheese
- Clear water, white grape juice, coconut milk
Dangerous (Pigmented) Items to Avoid
- Coffee, black tea, red wine
- Dark sodas, sports drinks
- Red sauces, soy sauce, balsamic vinegar
- Berries, beets, cherries
- Turmeric, paprika, curry
- Tobacco in any form
If you absolutely must have caffeine, use a straw. Place it far back in your mouth and swallow immediately, minimizing contact with your front teeth.
Setting Realistic Expectations: What “White” Really Means
No gel can make your teeth look like a white sheet of copy paper. That color does not exist in natural human dentin and enamel.
The Shade Guide Reality
Dentists use a shade guide ranging from reddish-brown (A shades) to reddish-yellow (B shades) to grayish (C shades) to reddish-gray (D shades). The lightest natural shade on the classic Vita guide is B1. Bleaching can push you past that to a “bleach shade,” a translucent white. However, these bleach shades often look flat and fake.
A Healthier Goal
Aim for the natural white of the sclera (the white of your eyes). If your teeth match your eye whites, they look perfectly white, clean, and healthy to an observer. Pushing past this point often gives a chalky, artificial appearance.
When to Stop: Recognizing the Endpoint
Whitening gel continues to work as long as you apply it, but it reaches a point of diminishing returns. You will notice:
- The Saturation Point: Your teeth stop getting lighter. The last three sessions produce no visible change. You have hit your maximum natural white potential.
- Over-Whitening Signs: An unnatural bluish or translucent, grayish quality appears, especially at the biting edges. The teeth start to look flat, with no variation in color, which makes them look like cheap dentures. Stop immediately. This effect will soften slightly over time as the teeth rehydrate and regain some organic proteins.
Maintaining Your Results: The Long Game
You have invested 14 days and managed sensitivity. How do you make it last?
Daily Maintenance
- Brush with a gentle, non-abrasive whitening toothpaste once daily to polish away new surface stains.
- Rinse with water after every pigmented drink.
Weekly Maintenance
- Once a week, use a maintenance-level gel. A 10% carbamide peroxide in your custom tray for 30 minutes is enough to counteract a week’s worth of coffee.
Monthly Touch-Ups
- If you don’t have trays, use one whitening strip or a 30-minute gel session. This one top-up session re-establishes the oxygen gradient in the enamel and keeps your smile bright.
Annual Investment
- Think of whitening like working out. You can’t get fit once and stay fit forever. You maintain the foundation with daily hygiene and do one “booster” cycle of 3–5 days per year, or as needed.
Special Circumstances: Unique Timelines
Some situations demand a different schedule altogether.
Whitening a Single Dark Tooth
A tooth that has undergone a root canal often turns dark gray or brown from the inside. External gel from strips or trays does nothing. The solution is “internal whitening.” The dentist drills a small access hole in the back of the tooth, places a high-concentration gel inside the pulp chamber, and seals it with a temporary filling. You return in 3–7 days. The dentist repeats the process until the tooth matches the others. This internal-only timeline requires 1 to 4 office visits.
The Bride-to-Be Protocol
If you are getting married, plan your whitening backward from the date.
- 3 Months Before: Get a dental cleaning and address any cavities or gum issues.
- 6–8 Weeks Before: Start your take-home tray program. The slow, gentle 10% overnight method is safest. You have time to pause if sensitivity hits.
- 2 Weeks Before: Finish the active whitening phase.
- 1 Week Before: Get a final dental cleaning to remove any minor surface buildup.
- Day Before: Use one 30-minute maintenance gel session to create a final “pop.”
- Wedding Day: Your teeth are at their natural, vibrant peak, without the temporary dehydration look.
Elderly Patients
As we age, the enamel thins and the dentin darkens. Whitening still works effectively on healthy, older teeth. However, gum recession is common. Exposed root surfaces are dentin, with no enamel covering. Gel on these areas causes severe, sharp pain and will not whiten them; it will only cause damage. A senior’s whitening timeline must include careful isolation of the gel to only the enamel-covered crowns, which often means a custom-fitted tray is mandatory, not optional.
A Note on Safety and Realism
This guide does not disseminate falsified or unrealistic information. Social media and marketing often promote “instant” results. Most “before and after” photos you see online use photo editing, a blue-light filter, or were taken immediately after a procedure when teeth are artificially dehydrated. That level of brightness fades within hours.
You must also never sleep with a whitening strip on, never use household bleach, and never ignore sharp, persistent pain. Bleaching does not damage healthy enamel in the long term when used correctly, but overuse leads to a condition called “over-bleaching syndrome,” where the protein matrix of the tooth breaks down, leading to permanent brittleness and a grey, lifeless look.
Conclusion
How long does teeth whitening gel take to work? A professional in-office session shows a dramatic change in 90 minutes that stabilizes over 3 days. At-home trays yield a natural, visible transformation in 10 to 14 days of consistent use, while gentler over-the-counter methods require a full 2 to 4 weeks. Your final timeline is a personal equation: the type and depth of your stains plus the concentration of your gel, minus the breaks you take from sensitivity. Respect the process, protect your enamel during the critical 48-hour post-treatment window, and maintain with smart, small top-ups to keep your new, healthy shade for years.
Frequently Asked Questions
Can I leave the gel on overnight to make it work faster?
Only if the product is explicitly formulated for overnight use. These contain a low concentration (10% carbamide peroxide) and are thick enough to stay in a tray without leaking. Using a 30-minute high-concentration gel for 8 hours will cause chemical burns on your gums and lasting nerve damage.
I have used the gel for 5 days with no change. Why?
Your teeth might be dehydrated. Try drinking water, brush with a non-whitening toothpaste for 24 hours, and check again under natural daylight. If no change, you might have deep intrinsic staining that requires a longer program or a higher concentration from a dentist.
My teeth are very sensitive after one use. Should I stop?
Pause for 48 hours. Use a potassium nitrate desensitizing toothpaste. When you resume, apply a smaller amount of gel and shorten the session by half. You will still progress, just more slowly. If the pain feels like an electric shock and lingers, stop immediately and consult a dentist.
How long after whitening can I smoke or drink coffee?
Wait at least 48 hours. This is non-negotiable for lasting results. If you absolutely must, brush your teeth immediately afterward and use a whitening mouthwash. But know that smoking within this window will aggressively re-stain your permeable enamel.
Do LED accelerator lights at home really shorten the timeline?
Most at-home LED lights lack the power to accelerate the chemical reaction meaningfully. The gel itself does the work. The light’s primary value is often psychological—it creates a ritual that ensures you hold your mouth still and open for the prescribed time without contaminating the gel with saliva.
Additional Resource
For a deeper scientific understanding of how concentration impacts the rate of chemical reactions, which applies directly to the peroxide percentage in your gel, you can review the principles of Reaction Kinetics explained by the LibreTexts chemistry library. This resource details the factors controlling the speed of chemical processes, including the role of concentration.
Link: LibreTexts Chemistry: Factors That Affect Reaction Rates
Disclaimer: This article is for informational and educational purposes only and does not constitute medical or dental advice. The content shared here reflects realistic experiences and general research, not a prescription for your specific condition. Always consult a qualified dental professional before beginning any new whitening regimen to ensure it is safe for your enamel, gums, and overall oral health.