How To Manufacture Dental Implants?
You hold a dental implant in your hand. It is small, lightweight, and seemingly simple. A tiny screw, really. Yet this small device must integrate with living bone, withstand years of chewing forces without fracturing, resist corrosion in the warm, acidic environment of the mouth, and remain biologically inert so the body does not reject it. Manufacturing something that achieves all of this is anything but simple.
The process of manufacturing dental implants combines precision engineering, materials science, surface chemistry, and rigorous quality control. This guide walks you through every step of how dental implants are made, from raw material to sterile, packaged product ready for surgical placement.
Overview of the Manufacturing Process
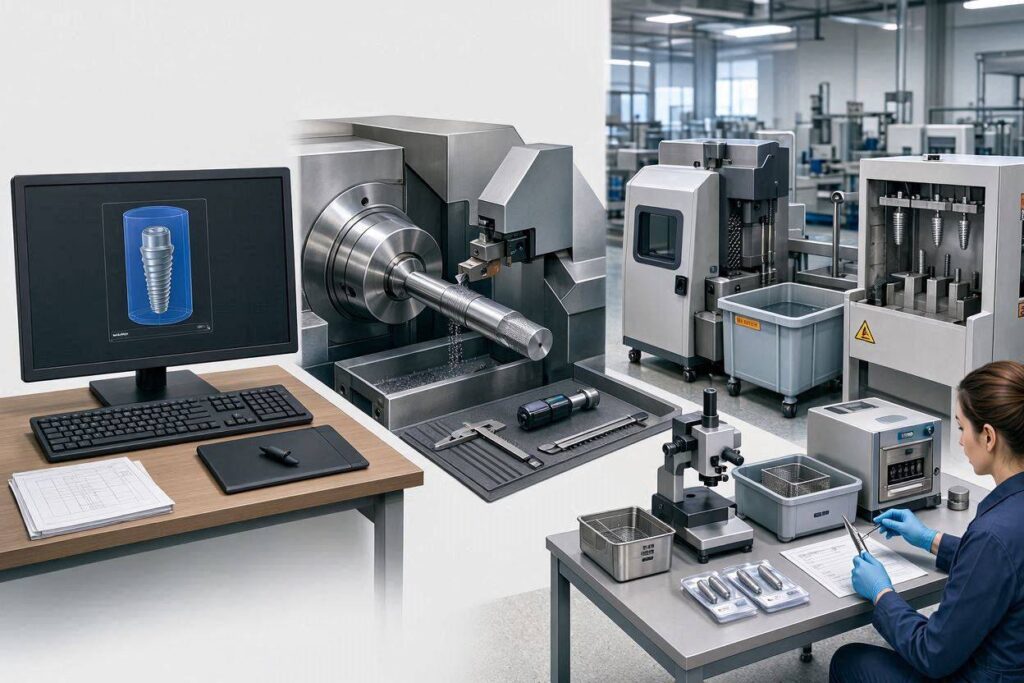
Dental implant manufacturing can be divided into several major phases:
- Raw material selection and preparation
- Primary shaping (machining or forming)
- Surface treatment
- Cleaning and passivation
- Quality control and testing
- Sterilization and packaging
Each phase involves multiple steps, specialized equipment, and strict adherence to regulatory standards. The entire process, from raw material to finished implant, typically spans several days to weeks depending on the complexity of the surface treatments and the manufacturer’s protocols.
Raw Materials: Where Dental Implants Begin
The quality of a dental implant begins with the quality of its raw material. Implant manufacturers start with carefully specified metals or ceramics.
Titanium and Titanium Alloys
The vast majority of dental implants are made from titanium or titanium alloys. The raw material arrives at the manufacturing facility in the form of round bars or rods, typically 3 to 6 millimeters in diameter.
Common materials used:
| Material | Designation | Composition | Use |
|---|---|---|---|
| Commercially pure titanium grade 4 | CP Ti Gr 4 | Unalloyed titanium | Standard implants |
| Ti-6Al-4V | Grade 5 titanium alloy | Titanium with 6% aluminum and 4% vanadium | Higher-strength implants |
| Ti-6Al-4V ELI | Extra-low interstitial | Reduced oxygen, nitrogen, iron | Improved ductility |
| Titanium-zirconium alloy | Roxolid (Straumann) | Titanium with approximately 13-15% zirconium | Higher strength; smaller diameter implants |
Why These Materials
Titanium’s unique properties make it the material of choice:
- Biocompatibility: Titanium forms a stable oxide layer that prevents corrosion and does not trigger immune rejection
- Osseointegration: Bone cells attach directly to the titanium oxide surface
- Strength-to-weight ratio: Titanium is strong enough to withstand chewing forces while being lighter than steel
- Elastic modulus: Titanium is more flexible than some alternatives, which may provide a more favorable stress distribution to surrounding bone
- Fatigue resistance: Titanium withstands millions of loading cycles without failing
Zirconia
Some implants are made from zirconia (zirconium dioxide), a ceramic material. Zirconia implants begin as zirconia powder that is pressed into blanks and sintered. Zirconia offers a white color that eliminates the risk of dark metal showing through thin gum tissue. The manufacturing process for zirconia differs significantly from titanium and involves ceramic processing techniques including powder compaction, green machining, and high-temperature sintering.
Raw Material Certification
Every batch of raw material arrives with certification documents verifying:
- Chemical composition
- Mechanical properties (tensile strength, yield strength, elongation)
- Microstructure
- Absence of contaminants
- Compliance with relevant standards (ASTM, ISO)
Manufacturers verify these properties through their own testing before accepting material into production.
Primary Shaping: Creating the Implant Form
The implant’s basic shape is created through precision machining, the most critical manufacturing step.
Swiss-Type CNC Machining
Dental implants are manufactured primarily using Swiss-type CNC (Computer Numerical Control) lathes. These specialized machines are designed for producing small, complex, high-precision parts.
How Swiss machining works:
- The titanium bar is fed through a guide bushing that supports it close to the cutting tool
- The cutting tool moves to remove material while the bar advances
- The guide bushing provides support very close to the cut, minimizing deflection
- Multiple tools work in sequence to create the implant’s features
- The part is cut off from the bar when complete
Why Swiss machining for implants:
- Achieves tolerances of ±5 microns or better
- Produces the fine thread geometry essential for implant stability
- Creates the internal connection features that must mate precisely with abutments
- Maintains consistency across thousands of parts
- Handles the small diameters typical of dental implants
Machining Sequence
A typical machining sequence for a titanium implant includes:
| Step | Operation | Purpose |
|---|---|---|
| 1 | Facing | Create flat end on the bar stock |
| 2 | Rough turning | Remove bulk material to approximate shape |
| 3 | Thread cutting | Create the external threads (single or multiple passes) |
| 4 | Finish turning | Achieve final dimensions and surface finish |
| 5 | Internal drilling | Create the central bore for the abutment connection |
| 6 | Internal threading | Cut threads for the abutment screw |
| 7 | Feature milling | Create anti-rotational features (hex, octagon, or conical connection) |
| 8 | Grooving | Cut thread relief grooves or other features |
| 9 | Parting off | Separate the finished implant from the bar |
Thread Geometry
The external threads of a dental implant are not simple V-threads. They are carefully engineered for specific purposes:
| Thread Feature | Design Purpose |
|---|---|
| Thread pitch | Affects ease of insertion and load distribution |
| Thread depth | Influences primary stability in different bone densities |
| Thread shape (V, square, buttress, reverse buttress) | Optimizes load transfer to bone |
| Thread lead | Single, dual, or triple leads affect insertion speed |
| Microthreads near the neck | Preserve crestal bone |
| Self-tapping features | Cutting flutes that allow the implant to cut its own path |
The Internal Connection
The internal connection is the most precise feature of the implant. It must mate exactly with the abutment to prevent micromovement and bacterial leakage. Manufacturing tolerances for internal connections are typically in the single-digit micron range.
Common connection designs:
- External hex (older design)
- Internal hex
- Internal octagon
- Conical connection (Morse taper)
- Hybrid designs combining conical and indexed features
Machining Zirconia Implants
Zirconia implants require a different approach. Zirconia is extremely hard and brittle in its final sintered state, making it difficult to machine. The manufacturing approach depends on the specific ceramic system:
Approach 1: Green machining followed by sintering
- Zirconia powder is pressed into a blank under high pressure
- The soft “green” blank is machined to near-final shape
- The machined green part is sintered at high temperature (typically 1400–1600°C)
- The part shrinks by approximately 20–25% during sintering (shrinkage is accounted for in the initial machining)
- Final finishing operations as needed
Approach 2: Hard machining of pre-sintered or fully sintered zirconia
- Zirconia is pre-sintered to an intermediate state
- Diamond tooling machines the hardened ceramic
- Final sintering to full density
- Or, fully sintered zirconia is machined with specialized diamond tooling
Approach 3: Injection molding
- Zirconia powder mixed with binder to create a feedstock
- Feedstock is injection-molded into implant shape
- Binder is removed through thermal or chemical debinding
- Part is sintered to full density
Each approach has advantages and limitations in terms of precision, surface quality, and production efficiency.
Surface Treatment: Engineering the Implant Surface
The surface of a dental implant is where biology meets technology. The surface treatment determines how bone cells respond to the implant and how quickly and completely osseointegration occurs.
Why Surface Matters
A smooth titanium surface does not osseointegrate well. Bone cells need microscopic texture to grip and recognize the surface as a suitable substrate for attachment. Surface treatments create this texture and modify the chemical properties of the surface to encourage bone formation.
Blasting
Blasting propels hard particles against the implant surface to create roughness.
| Blasting Media | Characteristics |
|---|---|
| Alumina (aluminum oxide) | Common; creates moderate roughness |
| Titanium oxide | Biocompatible; no foreign material residue |
| Calcium phosphate | Bioactive; may enhance bone response |
| Silica | Used in some proprietary processes |
The blasting parameters (particle size, pressure, angle, duration) are precisely controlled to achieve specific surface roughness values.
Acid Etching
Acid etching follows blasting in many protocols. The acid removes particles embedded from blasting and creates fine-scale microporosity.
Common etching protocols:
| Acid | Purpose |
|---|---|
| Hydrochloric acid | General etching |
| Sulfuric acid | Creates specific pit morphology |
| Hydrofluoric acid | Used cautiously; aggressive etchant |
| Dual acid etching | Sequential acids for layered topography |
The SLA (Sandblasted, Large grit, Acid-etched) surface is one of the most well-documented implant surfaces, combining blasting with a coarse grit followed by acid etching to create a macro-rough and micro-rough topography.
Anodization
Anodization is an electrochemical process that thickens the naturally occurring titanium oxide layer and can create specific surface topographies.
The anodization process:
- The implant is immersed in an electrolyte solution
- An electrical voltage is applied, with the implant as the anode
- The titanium oxide layer grows thicker
- At specific voltages, distinctive pore structures form
- The resulting surface has increased oxide thickness and specific crystallinity
Anodized surfaces can incorporate elements from the electrolyte, such as calcium and phosphorus, creating a bioactive surface.
Hydroxyapatite Coating
Hydroxyapatite (HA) is a calcium phosphate compound similar to the mineral component of natural bone. Coating an implant with HA creates a surface that bone recognizes as familiar.
Coating methods:
| Method | Process | Characteristics |
|---|---|---|
| Plasma spraying | HA powder is heated and propelled onto the implant surface | Most common; thicker coating |
| Sputter deposition | HA is vaporized and deposited in a vacuum chamber | Thinner, more uniform coating |
| Biomimetic deposition | Implant is immersed in simulated body fluid; HA precipitates onto the surface | Mimics natural mineralization |
| Electrochemical deposition | HA is deposited using electrical current | Controlled thickness and composition |
Plasma-sprayed HA coatings have a long clinical track record and are used on many implant systems, particularly those targeting faster healing or compromised bone.
Hydrophilic Treatments
Some modern implants receive treatments that make the surface highly attractive to water and blood. Hydrophilic surfaces accelerate the initial healing events by promoting protein adsorption and cell attachment.
Achieving hydrophilicity:
- Chemical modification of the surface
- UV light treatment
- Storage in liquid rather than air
- Proprietary conditioning processes
Hydrophilic implants must be packaged to maintain their surface chemistry until the moment of surgical placement.
Cleaning and Passivation
After surface treatment, the implant must be meticulously cleaned and passivated before it is safe for clinical use.
The Importance of Cleaning
Manufacturing residues including cutting fluids, metallic particles, blasting media, and acid residues must be completely removed. Any contamination left on the implant surface can:
- Interfere with osseointegration
- Cause inflammation or foreign body reaction
- Introduce toxic substances into the body
- Compromise the corrosion resistance of the implant
Cleaning Processes
A multi-step cleaning protocol typically includes:
| Step | Process | Purpose |
|---|---|---|
| Ultrasonic cleaning | Implants placed in cleaning solution with ultrasonic agitation | Dislodge particles and residues |
| Alkaline cleaning | Immersion in alkaline solution | Remove organic residues and oils |
| Acid cleaning | Controlled acid exposure | Remove metallic contaminants |
| Multiple rinses | Ultrapure water rinses | Remove cleaning agents |
| Drying | Clean hot air or vacuum drying | Remove moisture without contamination |
Passivation
Passivation is a chemical treatment that optimizes the protective oxide layer on titanium. While titanium naturally forms an oxide layer in air, controlled passivation ensures uniformity and maximum corrosion resistance.
Passivation processes:
- Nitric acid passivation (traditional)
- Citric acid passivation (more environmentally friendly)
- Controlled oxidation through heat or electrochemical means
After passivation, the implant surface is chemically stable, corrosion-resistant, and ready for biological contact.
Quality Control and Testing
Every dental implant is a medical device subject to rigorous quality standards. Manufacturers implement extensive quality control throughout production.
In-Process Inspection
Quality checks occur at multiple points during manufacturing:
| Inspection Point | What Is Checked |
|---|---|
| Raw material receipt | Certification verification, composition testing |
| After machining | Dimensional accuracy, surface defects |
| After surface treatment | Surface roughness, coating thickness |
| After cleaning | Surface cleanliness, absence of residues |
| Final inspection | Complete dimensional verification, visual inspection |
Dimensional Verification
Implant dimensions are verified using precision measurement equipment:
- Optical comparators: Project the implant profile at magnification for measurement
- Coordinate measuring machines (CMM): Touch-probe measurement to micron accuracy
- Laser micrometers: Non-contact diameter measurement
- Vision systems: Automated optical inspection
- Thread inspection: Specialized gauging for thread geometry
Surface Characterization
The implant surface is analyzed using sophisticated techniques:
| Technique | What It Measures |
|---|---|
| Contact profilometry | Surface roughness (Ra, Rz values) |
| Scanning electron microscopy (SEM) | Surface topography at high magnification |
| Energy-dispersive X-ray spectroscopy (EDS) | Elemental composition of the surface |
| X-ray photoelectron spectroscopy (XPS) | Chemical state of surface elements |
| Contact angle measurement | Surface wettability/hydrophilicity |
Mechanical Testing
Implants undergo mechanical testing to verify structural integrity:
| Test | What It Evaluates |
|---|---|
| Tensile testing | Strength of the material |
| Fatigue testing | Resistance to repeated loading cycles |
| Torque testing | Strength of the implant body and connection |
| Insertion/removal testing | Thread integrity |
Regulatory Compliance
Dental implants are regulated as Class II or Class III medical devices depending on the regulatory framework. In the United States, the FDA regulates dental implants as Class II devices requiring 510(k) clearance, except for specific types that may require premarket approval.
Manufacturers must comply with:
- FDA Quality System Regulation (21 CFR Part 820)
- ISO 13485 (Medical devices quality management systems)
- ISO 10993 (Biological evaluation of medical devices)
- ISO 14801 (Fatigue testing of dental implants)
Sterilization
The final manufacturing step is sterilization. Dental implants are supplied sterile and must remain sterile until the package is opened in the surgical field.
Sterilization Methods
| Method | Process | Advantages | Considerations |
|---|---|---|---|
| Gamma irradiation | Exposure to gamma radiation from Cobalt-60 source | Penetrates packaging; no residue; well-established | May affect some polymers; requires radiation source |
| Electron beam | Exposure to high-energy electrons | Faster than gamma; less material degradation | Limited penetration depth |
| Ethylene oxide (EtO) | Exposure to ethylene oxide gas | Suitable for heat-sensitive materials | Requires aeration to remove residual gas |
| Plasma sterilization | Low-temperature hydrogen peroxide plasma | Fast; no toxic residues | Limited penetration; surface treatment considerations |
Gamma irradiation is the most common method for titanium dental implants. It provides reliable sterility assurance without affecting the metal implant. For implants with hydrophilic surfaces, the interaction between sterilization method and surface chemistry must be carefully managed.
Packaging
Implant packaging serves multiple functions:
- Maintains sterility until use
- Protects the implant from physical damage
- Provides labeling and traceability information
- Facilitates aseptic presentation in the surgical field
Typical packaging configuration:
| Layer | Material | Function |
|---|---|---|
| Primary | Glass vial or blister with protective holder | Direct implant contact; maintains sterility |
| Secondary | Sealed pouch or box | Additional barrier; labeling |
| Tertiary | Shipping carton | Protection during transport |
Sterility Assurance Level
Implants must achieve a Sterility Assurance Level (SAL) of 10⁻⁶, meaning there is less than a one-in-one-million probability of a viable microorganism surviving the sterilization process. This is the standard for implantable medical devices.
Cleanroom Manufacturing
Dental implant manufacturing occurs in controlled environments to prevent contamination.
Cleanroom Classifications
| Cleanroom Class (ISO) | Maximum Particles (per cubic meter) | Application in Implant Manufacturing |
|---|---|---|
| ISO Class 5 | 3,520 particles ≥0.5 µm | Critical operations; final cleaning; packaging |
| ISO Class 7 | 352,000 particles ≥0.5 µm | General manufacturing; surface treatment |
| ISO Class 8 | 3,520,000 particles ≥0.5 µm | Supporting operations |
Workers in cleanrooms wear specialized garments including gowns, hoods, masks, gloves, and shoe covers to minimize particle shedding and contamination.
Environmental Monitoring
Manufacturers continuously monitor their cleanroom environments:
- Airborne particle counts
- Temperature and humidity
- Microbial contamination (settle plates, contact plates, air sampling)
- Pressure differentials between zones
The Complete Manufacturing Flow
Bringing all the steps together, here is the complete manufacturing flow for a typical titanium dental implant:
| Stage | Location | Key Activities |
|---|---|---|
| 1. Raw material | Receiving area | Certification verification, incoming inspection |
| 2. Machining | Machine shop | Swiss-type CNC machining of implant form |
| 3. Initial cleaning | Cleaning area | Removal of machining residues |
| 4. Surface blasting | Surface treatment area | Creation of macro-roughness |
| 5. Acid etching | Chemical processing | Creation of micro-roughness |
| 6. Additional treatments | Surface treatment area | Anodization, coating, or hydrophilic treatment |
| 7. Final cleaning | Cleanroom (ISO 7+) | Multi-step cleaning to remove all residues |
| 8. Passivation | Cleanroom | Optimization of oxide layer |
| 9. Drying | Cleanroom | Contamination-free drying |
| 10. Final inspection | Quality control lab | Dimensional, visual, and functional testing |
| 11. Packaging | Cleanroom (ISO 5) | Placement in primary packaging |
| 12. Sealing | Cleanroom | Hermetic sealing of primary package |
| 13. Labeling | Packaging area | Application of labels with traceability information |
| 14. Sterilization | Sterilization facility | Gamma irradiation or alternative method |
| 15. Release | Quality assurance | Final review and batch release |
| 16. Distribution | Warehouse | Shipping to dental clinics and hospitals |
Manufacturing Costs and Economics
Understanding what drives manufacturing costs provides context for implant pricing.
Major Cost Drivers
| Cost Factor | Impact |
|---|---|
| Raw materials | High-quality titanium alloys are expensive; certified medical-grade material adds cost |
| Precision machining | Swiss CNC machines cost $100,000–$500,000+; skilled operators required |
| Surface treatments | Chemical processing, cleanroom requirements, and proprietary technologies add cost |
| Quality control | Extensive testing at multiple stages; sophisticated equipment and personnel |
| Regulatory compliance | Maintaining quality systems, audits, and regulatory submissions |
| Sterilization and packaging | Specialized packaging materials and sterilization processing |
| Research and development | Ongoing investment in new designs, surfaces, and clinical studies |
Scale Economics
Larger manufacturers can spread fixed costs across higher volumes, but precision and quality demands limit the extent of economies of scale. Even large manufacturers produce implants in relatively small batches compared to consumer products.
Innovation and Future Directions
Implant manufacturing continues to evolve.
Additive Manufacturing (3D Printing)
Additive manufacturing is emerging as an alternative to subtractive machining for some implant applications:
- Selective laser melting (SLM): Titanium powder is melted layer by layer to build the implant
- Electron beam melting (EBM): Similar to SLM but uses an electron beam in a vacuum
- Advantages: Can create complex porous structures; potentially less material waste
- Current limitations: Surface finish requires post-processing; slower than machining for simple geometries
- Applications: Currently more common for custom implants and components with intentional porosity
Nanotechnology
Surface modifications at the nanometer scale are an active area of research:
- Nanotube arrays created by anodization
- Nanoparticle coatings
- Biomolecule immobilization on surfaces
Bioactive Surfaces
Future implants may actively stimulate bone formation rather than simply providing a passive surface for bone attachment:
- Growth factor incorporation (BMP-2, others)
- Peptide-modified surfaces
- Gene-activated surfaces
Quality Differences Between Manufacturers
Not all implants are manufactured to the same standards. Understanding the differences helps clinicians make informed choices.
What Distinguishes Premium Manufacturers
| Factor | Premium (Straumann, Nobel Biocare) | Value Brands |
|---|---|---|
| Raw material purity | Higher-grade titanium; stricter specifications | May use standard grades |
| Machining precision | Single-digit micron tolerances | May have wider tolerances |
| Surface technology | Extensive R&D; clinically documented surfaces | May use standard or copied surfaces |
| Connection design | Precision-engineered with documented stability | May have simpler designs |
| Quality control scope | Extensive in-process and final inspection | May have less comprehensive QC |
| Clinical documentation | Decades of published research | Limited or no independent research |
| Regulatory history | Long track record with regulators | Newer to market; shorter history |
| Warranty and support | Comprehensive warranty; global availability | Limited warranty |
Conclusion
Manufacturing dental implants is a highly sophisticated process combining precision CNC machining, advanced surface engineering, rigorous cleaning and passivation, and strict quality control within cleanroom environments. From certified medical-grade titanium bars, Swiss-type lathes create implants with micron-level precision, after which blasting, acid etching, anodization, or coating processes create surfaces optimized for bone cell attachment and osseointegration. Every implant undergoes extensive dimensional, mechanical, and surface quality testing before terminal sterilization and packaging. The entire process operates under stringent regulatory oversight as these are implantable medical devices intended to remain in the human body for decades.
Frequently Asked Questions
What materials are dental implants made from?
The vast majority of dental implants are made from commercially pure titanium (grade 4) or titanium alloy (Ti-6Al-4V). Some implants are made from zirconia ceramic. The raw material arrives as certified bars or rods that undergo precision machining.
How are the threads on a dental implant made?
Threads are cut on Swiss-type CNC lathes using precision cutting tools. The thread geometry is engineered for specific purposes: self-tapping features, load distribution, and primary stability. Multiple passes with progressively deeper cuts create the final thread form.
Why is the implant surface treated?
A smooth titanium surface does not osseointegrate well. Surface treatments create microscopic roughness that bone cells recognize and attach to. Blasting creates macro-roughness, acid etching creates micro-roughness, and additional treatments can create specific chemical properties that accelerate healing.
How are dental implants sterilized?
Gamma irradiation is the most common method. The packaged implants are exposed to gamma radiation from a Cobalt-60 source, achieving a sterility assurance level of 10⁻⁶. Alternative methods include electron beam processing and ethylene oxide gas.
What quality standards apply to dental implant manufacturing?
Manufacturers must comply with ISO 13485 (quality management for medical devices), ISO 10993 (biological evaluation), and ISO 14801 (fatigue testing). In the United States, the FDA regulates implants under 21 CFR Part 820 (Quality System Regulation).
Additional Resources
- International Organization for Standardization: www.iso.org
- U.S. Food and Drug Administration – Dental Implants: www.fda.gov/medical-devices/dental-devices/dental-implants
- Academy of Osseointegration: www.osseo.org