Dental Office Organization Ideas: Smart Systems to Reduce Clutter and Save Time
A disorganized dental office wastes time, money, and energy. Staff hunt for supplies that should be within reach. Paperwork piles up on the front desk. The sterilization area becomes a bottleneck because no one can find the right instruments. Organization is not about being tidy for appearances. It is about building systems that make your practice faster, calmer, and more profitable. This guide shares practical dental office organization ideas you can implement this week.
Why Organization Matters in a Dental Office
Every minute spent searching for something is a minute not spent on patient care. Over a year, those minutes add up to hours of lost productivity. Organization also affects how patients perceive your practice. A cluttered front desk or messy treatment room undermines trust, even if the clinical care is excellent.
Good organization reduces stress. When everything has a place and everyone knows where that place is, the whole team works with more confidence and less friction.
“Organization is not about perfection. It is about making the next task easier for the next person.” — Dental Office Efficiency Consultant
Key Benefits of an Organized Practice
- Time savings: Less searching, more doing.
- Cost control: Fewer duplicate orders and expired supplies.
- Reduced stress: A calm environment supports better decisions.
- Better patient impressions: A tidy office signals competence.
- Compliance readiness: Inspections go smoothly when records are in order.
Start With a System, Not a Purge
Many practices try to organize by cleaning everything at once. That approach fails because it creates chaos before it creates order. Instead, build systems that prevent clutter from returning.
The Five-Step Organization Framework
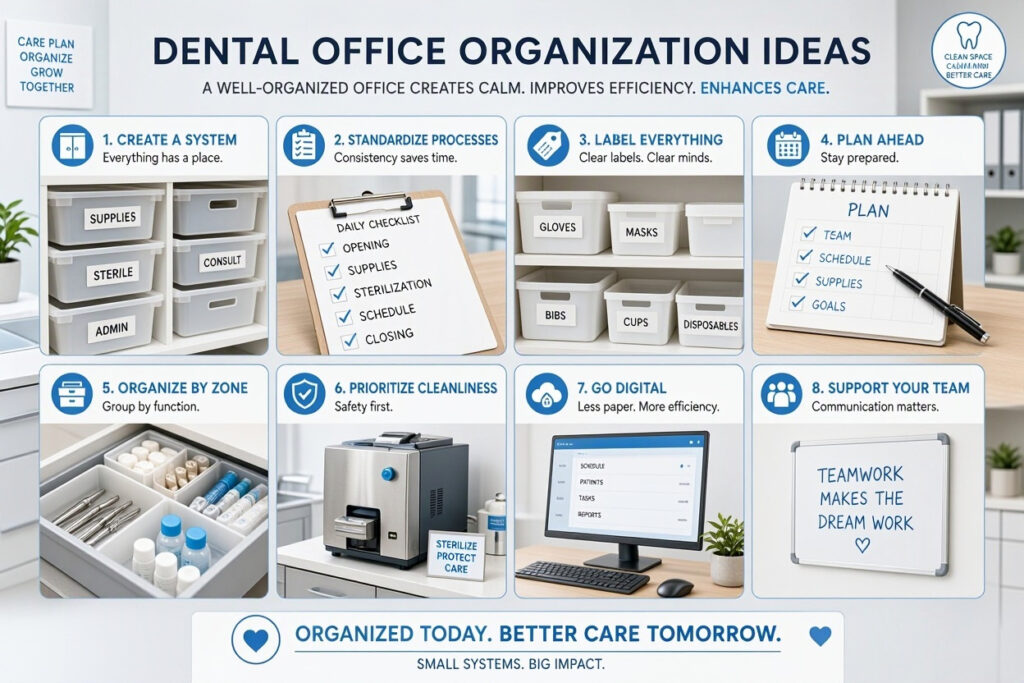
- Sort: Remove everything that does not belong.
- Set limits: Decide how much of each item you need.
- Assign a home: Every item gets a specific location.
- Label clearly: Make the location obvious.
- Maintain daily: Build small habits that keep the system working.
Tip: Tackle one zone per week. Start with the front desk, then treatment rooms, then storage, then the sterilization area.
Front Desk Organization Ideas
The front desk is the busiest spot in the practice. It collects paper, phone messages, payment slips, and patient forms. Without a system, it becomes a pile zone.
Paper Management
- Use a single inbox tray: One place for all incoming paper.
- Sort daily: File, act, or discard. Do not let paper sit.
- Go digital where possible: Scan forms and use electronic records.
- Keep a shred bin nearby: Sensitive documents get destroyed immediately.
Desk Drawer Systems
| Drawer | Contents | Organization Method |
|---|---|---|
| Top drawer | Pens, sticky notes, staples | Small dividers |
| Second drawer | Patient forms and brochures | File folders with labels |
| Third drawer | Payment supplies, receipt paper | Bins by category |
| Bottom drawer | Personal items and backup supplies | Sealed containers |
Cable and Technology Management
- Use cable trays under the desk to hide wires.
- Label cords with colored tags for quick identification.
- Mount monitors on arms to free desk space.
- Keep a small tech kit with chargers and adapters in one labeled box.
Important Note: Keep patient information out of sight. Use privacy screens and turn monitors away from the waiting area.
Treatment Room Organization
Treatment rooms must be efficient. Staff should not leave the room for common supplies. Everything needed for a typical appointment should be within arm’s reach.
Supply Placement Rules
- Top drawers: High-use items like gloves, masks, and barriers.
- Middle drawers: Instruments and disposables used daily.
- Lower drawers: Backup supplies and less-used items.
- Wall-mounted holders: Frequently used instruments within easy reach.
Drawer Organization Tips
- Use dividers: Keep items separated and visible.
- Label every drawer: Even if the contents seem obvious.
- Follow a standard layout: Every room should have supplies in the same place.
- Restock at end of day: Never start the day with empty drawers.
Comparison Table: Storage Solutions
| Solution | Best For | Cost | Notes |
|---|---|---|---|
| Drawer dividers | Small supplies | Low | Adjustable options work best |
| Labeled bins | Bulk items | Low | Clear bins show contents |
| Wall-mounted racks | Instruments | Medium | Saves counter space |
| Rolling carts | Mobile supply stations | Medium | Good for shared rooms |
| Cabinet organizers | Paper and files | Low | Prevents pileups |
Tip: Standardize every treatment room. When all rooms look the same, any staff member can work in any room without searching.
Sterilization Area Organization
The sterilization area is the engine room of the practice. A disorganized setup creates bottlenecks and infection control risks.
Core Organization Ideas
- Separate dirty and clean zones: One area for receiving and cleaning, another for packaging and sterilizing.
- Use color-coded trays: One color for each operatory or procedure type.
- Label every shelf: Instruments, pouches, and supplies each get a home.
- Keep a log clipboard handy: Sterilization records should be easy to complete.
- Store pouches and wraps by size: Small, medium, and large in separate bins.
Daily Sterilization Routine
- Receive instruments and place in the dirty zone.
- Clean and dry according to protocol.
- Package and label with date and cycle.
- Load the autoclave and log the cycle.
- Store in the clean zone, organized by type.
Important Note: Never store clean instruments near dirty ones. Physical separation is essential for infection control.
Supply Storage Organization
Supply closets become dumping grounds without a system. A few simple rules keep them functional.
Supply Room Rules
- Inventory first: Count what you have before buying more.
- Use clear bins: You can see what is inside without opening.
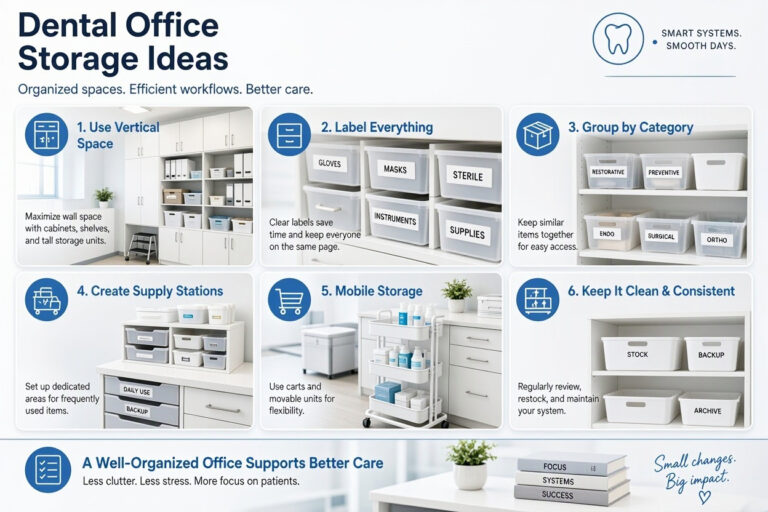
- Label shelves by category: Gloves, masks, disposables, instruments, and paper goods.
- Store heavy items low: Prevents injury and damage.
- Keep a running order list: Note items as they run low.
- FIFO rotation: First in, first out. New supplies go behind old ones.
Inventory Tracking Methods
| Method | Effort | Best For |
|---|---|---|
| Paper checklist | Low | Small practices |
| Spreadsheet | Medium | Growing practices |
| Inventory software | Medium to High | Larger practices |
| Kanban cards | Low | Visual teams |
Tip: Set a par level for each item—the minimum amount you should always have. When stock hits par, reorder immediately.
Digital Organization
Paper clutter is only half the battle. Digital clutter slows down your team too.
Digital Organization Ideas
- Standardize file names: Use consistent formats like “PatientName_Date_DocumentType.”
- Create folder templates: New patient folders should follow the same structure.
- Use cloud storage: Access files from any workstation.
- Back up regularly: Automatic daily backups protect against data loss.
- Clean your inbox: Sort emails into folders and unsubscribe from unnecessary lists.
Important Note: Follow HIPAA rules for all digital files. Use encrypted storage and secure passwords.
Team Roles and Accountability
Organization only works when everyone participates. Assign clear responsibilities.
Sample Role Assignments
- Office manager: Oversees systems and conducts weekly spot checks.
- Dental assistants: Maintain treatment room drawers and restock daily.
- Hygienists: Keep their rooms standardized and report low supplies.
- Front desk: Manage paper flow and desk organization.
- Sterilization tech: Owns the sterilization area organization.
Simple Accountability Tools
- End-of-day checklist: Five minutes to reset each area.
- Weekly walkthrough: A quick inspection of all zones.
- Monthly deep clean: Reorganize one area per month.
- Team recognition: Acknowledge good organization publicly.
Budgeting for Organization
Organization does not require a big budget. Small investments deliver big returns.
| Item | Typical Cost | Impact |
|---|---|---|
| Drawer dividers | $20 – $60 | High |
| Label maker | $20 – $50 | High |
| Clear storage bins | $50 – $150 | High |
| Wall-mounted racks | $50 – $200 | Medium |
| Rolling carts | $100 – $300 | Medium |
| Inventory software | $30 – $100 per month | High for larger practices |
Tip: Start with labels and dividers. They cost little and make an immediate difference.
Common Organization Mistakes to Avoid
- Organizing without a system: Clutter returns within weeks.
- Buying bins before sorting: You end up storing things you do not need.
- Ignoring the team: Systems fail when staff are not involved.
- No labels: Unlabeled storage becomes a guessing game.
- Skipping maintenance: Organization is a habit, not a one-time event.
- Overcomplicating: Simple systems get used; complex ones get abandoned.
Frequently Asked Questions
How do I organize a dental office efficiently?
Start with one zone at a time. Sort, set limits, assign homes, label everything, and build daily maintenance habits. Standardize treatment rooms so supplies are in the same place in every room.
What are the best storage solutions for a dental office?
Drawer dividers, clear labeled bins, wall-mounted racks, and rolling carts. Label everything and follow a consistent layout across all rooms.
How often should I reorganize the office?
Do a quick daily reset, a weekly walkthrough, and a monthly deep clean of one area. Full reorganizations are rarely needed if daily habits are maintained.
How do I keep the sterilization area organized?
Separate dirty and clean zones, use color-coded trays, label every shelf, and follow a daily routine. Never store clean instruments near dirty ones.
How can I reduce paper clutter at the front desk?
Use a single inbox tray, sort daily, go digital where possible, and keep a shred bin nearby. Give every paper item a clear destination.
Additional Resource
For office organization systems and productivity tools, visit the National Association of Professional Organizers (NAPO) for professional organizing resources and checklists.
Conclusion
Dental office organization ideas work best when they become systems, not one-time cleanups. Start with one zone, sort and label everything, and standardize each room. Assign clear roles and build small daily habits. With consistent effort, your practice becomes faster, calmer, and more professional.