How Do You Fix a Failed Dental Implant
Dental implants have transformed modern dentistry. They offer a permanent, stable solution for missing teeth. Success rates hover impressively around 95%. Yet, failures do happen. When an implant fails, it can feel devastating. You invested time, money, and hope. Now, you face discomfort and uncertainty.
But a failed implant is rarely the end of the road. You have options. Modern dentistry provides clear, effective pathways to fix the problem. You can reclaim your oral health. You can restore your smile. This guide walks you through every step. You will learn why implants fail, how dentists diagnose the issue, and exactly what treatment involves. You will also discover how to prevent future problems.
Let us explore how to fix a failed dental implant with honesty, clarity, and hope.
Understanding Dental Implant Failure
Dental implant failure means the implant loses its connection to the bone. It cannot function as a stable anchor for the replacement tooth. The problem may surface soon after placement or years later. Understanding the type of failure you face shapes the entire treatment plan. You must recognize the problem early. You must act quickly.
Early vs. Late Failure
Implant failure splits into two main categories. These categories depend on timing and cause. Knowing the difference helps you understand your situation.
Early Failure
Early failure occurs shortly after surgery. It happens before the final crown attaches. The implant fails to fuse with the jawbone. Dentists call this process osseointegration. The titanium post never bonds firmly. You may notice loosening within weeks or months. Pain and inflammation often accompany early failure.
Several factors trigger early failure. Infection at the surgical site tops the list. Poor bone quality creates an unstable foundation. Surgical trauma damages surrounding tissues. Overheating the bone during drilling harms cells. Contamination of the implant surface prevents bonding. Systemic diseases slow healing. Smoking severely restricts blood flow. Uncontrolled diabetes impairs recovery.
Early failure feels discouraging. But it often allows for relatively straightforward removal. The bone loss is usually minimal. Healing proceeds quickly after extraction. You can often try again with better preparation.
Late Failure
Late failure strikes after successful osseointegration. The implant has served you well for a year, five years, or even longer. Then, problems emerge. The implant feels loose. The gums bleed around the crown. You sense deep discomfort.
The primary culprit in late failure is peri-implantitis. This inflammatory condition mirrors gum disease around natural teeth. Bacteria accumulate in the crevice between the implant and gum. The infection inflames soft tissues. It then attacks the supporting bone. Without treatment, bone loss accelerates. The implant eventually loses support.
Excessive biting forces also cause late failure. Grinding or clenching your teeth puts tremendous pressure on implants. The mechanical stress damages the bone connection. A loose prosthetic tooth or worn crown intensifies the problem. Cement from the crown can seep under the gum, causing inflammation. Systemic health changes also play a role. Newly developed osteoporosis or immune disorders may weaken bone support.
Late failure presents greater challenges. Bone loss often extends more extensively. Fixing the problem demands thorough planning.
Signs of a Failing Implant
Your body sends clear signals when an implant struggles. You must listen. Early detection saves bone. It simplifies treatment. It preserves your options.
Watch for these warning signs:
- Persistent Pain or Discomfort: Initial surgical pain fades within days. Lingering or worsening pain signals trouble. Deep aching around the implant site is not normal. Pain when biting down confirms a mechanical or biological problem.
- Implant Mobility: A healthy implant feels like a natural tooth root. It never moves. Any wobble or shift demands immediate attention. You may notice movement when chewing or pushing with your tongue.
- Gum Inflammation and Bleeding: Red, swollen, or tender gums around the implant indicate peri-implant mucositis or peri-implantitis. Bleeding during brushing or flossing signals active infection.
- Receding Gums: The gum line pulls away from the implant. Metal threads may become visible. Recession exposes the rough implant surface. Bacteria cling to this surface more readily.
- Pus or Discharge: Fluid oozing from the gum around the implant confirms infection. You may notice a bad taste. The odor often smells unpleasant.
- Difficulty Chewing: Pain or instability during eating indicates lost support. You may unconsciously favor the other side.
- Swelling or Abscess: A gum abscess resembles a pimple near the implant. Facial swelling points to a spreading infection.
- X-Ray Bone Loss: Radiographs reveal dark areas around the implant. Progressive bone loss appears over time. Your dentist measures this in millimeters.
If you experience any of these symptoms, contact your dentist immediately. Waiting worsens bone destruction. Quick action opens more treatment doors.
Diagnosing the Cause of Failure
Successful treatment depends on accurate diagnosis. Your dentist acts like a detective. The goal is to uncover the exact cause of failure. A targeted solution saves you from repeating mistakes. The diagnostic process typically involves three key steps.
Clinical Examination
The dentist begins with a hands-on assessment. They look, probe, and test.
- Visual Inspection: The dentist examines the gums for redness, swelling, or recession. They check for pus or fistula tracts. They assess the crown condition.
- Probing: A periodontal probe measures the space between the implant and gum. Deep pockets indicate bone loss and tissue detachment. Healthy peri-implant probing depths range from 3 to 4 mm. Bleeding on probing confirms inflammation. The dentist notes any purulent discharge.
- Mobility Testing: The dentist gently tests the implant with instruments or fingers. Any movement is a definitive sign of failure. A stable crown does not always mean a stable implant. The crown may remain on the implant while the implant itself moves within the bone.
- Occlusion Analysis: The dentist checks how your teeth meet. They identify high spots on the implant crown. They look for signs of grinding or clenching. Colored articulating paper marks contact points. The dentist evaluates lateral and protrusive movements.
- Soft Tissue Assessment: The quality and quantity of keratinized gum tissue around the implant matter. Thin or absent attached gum increases vulnerability to inflammation.
Radiographic Imaging
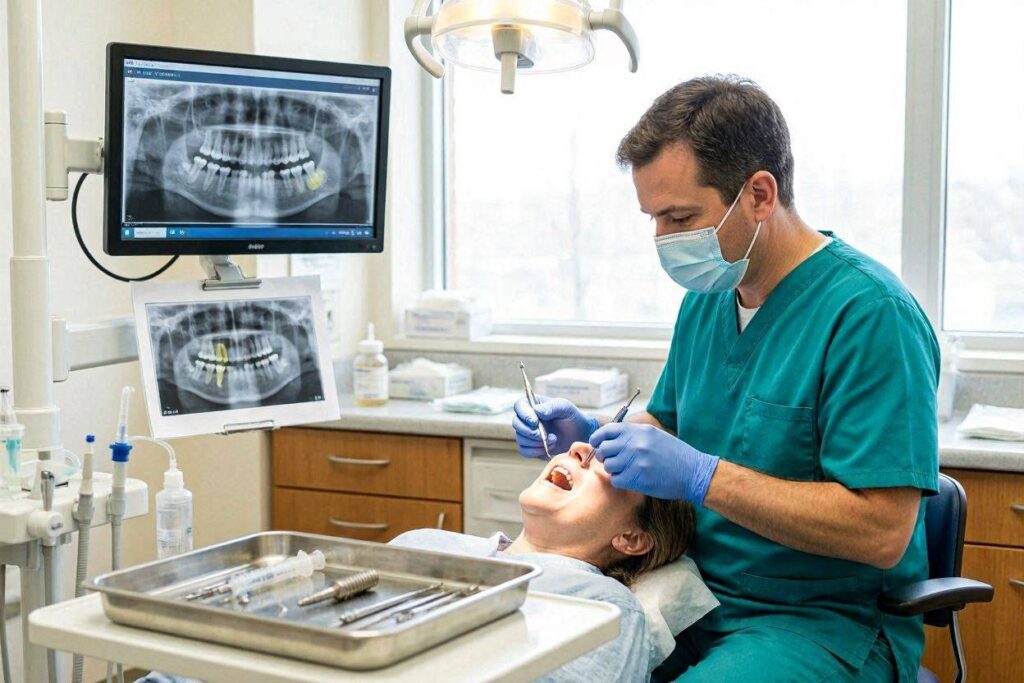
X-ray imaging reveals what hides beneath the gum. It visualizes the bone-implant interface. It tracks changes over time.
- Periapical Radiographs: These small, focused X-rays show the implant and surrounding bone in high detail. They reveal the shape of bone loss. A saucer-shaped defect around the neck is common in peri-implantitis. The radiograph shows whether bone loss extends along the entire implant or affects only one side.
- Panoramic Radiographs: A panoramic X-ray provides an overview of the entire jaw. It shows the implant’s position relative to anatomical structures. The dentist can locate the mandibular nerve or maxillary sinus. This view helps rule out nerve impingement or sinus problems.
- Cone Beam Computed Tomography (CBCT): CBCT offers three-dimensional imaging. It eliminates guesswork. The scan reveals the exact volume and density of remaining bone. It shows bone thickness on the cheek side and tongue side. It maps the position of nerves and blood vessels. CBCT proves essential for planning complex re-treatments. It allows virtual implant placement before actual surgery.
Important Note: Comparing current X-rays with older ones is vital. The dentist measures bone levels and compares them to baseline images taken at crown placement. Progressive bone loss over time confirms active disease. A single X-ray provides a snapshot, while comparison shows the trend.
Patient History Assessment
Your health history offers critical clues. The dentist asks detailed questions. Honest answers guide proper treatment.
- Medical History Review: The dentist updates your health conditions. They ask about diabetes control, osteoporosis treatment, and autoimmune diseases. They inquire about any new diagnoses since implant placement. They list all current medications. Some drugs, like bisphosphonates, affect bone healing. Antidepressants like SSRIs have been linked to higher implant failure rates. Proton pump inhibitors for acid reflux may reduce calcium absorption.
- Surgical History: The dentist reviews the original implant procedure. When was the implant placed? Was a bone graft performed? Were there any immediate complications? Details from the initial surgery inform the re-treatment strategy.
- Habits and Lifestyle: The dentist asks about smoking and alcohol consumption. Both impair healing. Smokers face a significantly higher risk of peri-implantitis. Nicotine constricts blood vessels and suppresses immune function. Heavy alcohol use contributes to bone loss and poor oral hygiene.
- Oral Hygiene Practices: How do you clean around the implant? What tools do you use? Do you floss under the crown? Do you use a water flosser or interdental brushes? The dentist identifies hygiene gaps. They assess your technique and frequency.
- Parafunctional Habits: Do you grind or clench your teeth? Do you wake up with jaw soreness or headaches? Bruxism exerts destructive forces on implants. The dentist asks about night guards.
Gathering this information paints a complete picture. It guides a personalized and effective solution.
Treatment Options for a Failed Dental Implant
Once the diagnosis is clear, your dentist presents a treatment roadmap. The goal is to eliminate infection, restore health, and replace the missing tooth function. Options range from conservative management to complete implant replacement. Your specific situation dictates the best path.
Nonsurgical Interventions
Surgery is not always the first answer. Early or limited problems sometimes respond to nonsurgical care. This approach is most effective for peri-implant mucositis—inflammation confined to soft tissue without bone loss. It can also manage early peri-implantitis with very shallow bone defects.
Mechanical Debridement
The dentist cleans the exposed implant surface. They remove plaque and calculus deposits. Special instruments protect the titanium surface from scratches. Metal scalers designed for natural teeth can damage implants. The dentist uses plastic, carbon fiber, or titanium-tipped curettes. Ultrasonic scalers with non-metal tips help dislodge debris.
The goal is to eliminate bacterial biofilm. Smooth, clean implant surfaces discourage bacterial recolonization. The dentist works meticulously around and under the gum line. You may receive local anesthetic for comfort.
Antimicrobial Therapy
Cleaning alone may not clear deep infection. Antimicrobial agents boost the bacterial kill. The dentist may apply chlorhexidine gel or chips into the peri-implant pocket. These release medication slowly over days. Local delivery targets bacteria directly.
Oral antibiotics may follow for more widespread infection. A combination of amoxicillin and metronidazole commonly treats peri-implantitis pathogens. Dentists reserve systemic antibiotics for definite bone loss. They avoid overuse to prevent resistance.
Chemical Decontamination
The exposed implant threads often harbor endotoxins. Mechanical cleaning cannot completely sterilize the surface. Dentists use chemical agents to detoxify the implant. Common irrigants include:
- Chlorhexidine solution: Broad-spectrum antiseptic.
- Hydrogen peroxide: Oxygen release disrupts anaerobic bacteria.
- Citric acid or tetracycline paste: These condition the implant surface and may encourage reattachment.
- Saline irrigation: Copious sterile saline flushes out debris and chemicals.
Patient Education and Home Care
Nonsurgical success leans heavily on your home care. The dentist or hygienist demonstrates proper cleaning techniques. You learn to use small interdental brushes, floss threaders, or water flossers. You commit to meticulous daily hygiene. Frequent recall visits, often every three months, monitor your status.
Outcome Expectations
Nonsurgical therapy aims to halt disease progression. It reduces inflammation and deep pockets. However, it cannot regenerate lost bone. True resolution often requires surgical access. Think of nonsurgical care as a first line or a holding action. It stabilizes the situation while you prepare for more definitive treatment if needed.
Surgical Removal and Replacement
When the implant has failed structurally or infection is advanced, removal becomes necessary. This sounds drastic, but it clears the way for a healthy new start. The procedure involves several stages.
Implant Removal
The removal process, or explantation, requires skill and precision. The goal is to extract the failed implant with minimal trauma to surrounding bone. Preserving bone makes future reimplantation possible.
Technique
The dentist administers local anesthesia. They make a small incision in the gum to access the implant. If bone covers the implant shoulder, they remove a small amount to expose the head. Then, they use specialized tools.
For early failures where osseointegration never occurred, the implant may unscrew easily. A torque wrench or ratchet back-turns the implant. It comes out with little resistance.
For integrated implants with limited bone loss, the dentist may need a trephine bur. This hollow, circular drill cuts a small margin of bone around the implant. The implant and a thin bone sleeve are removed together. The defect remains circular and contained, which heals predictably.
For severely mobile implants, simple extraction forceps may suffice. The dentist gently lifts the implant free.
Post-Removal Debridement
After removal, the socket requires thorough cleaning. The dentist curettes away granulation tissue—soft, inflamed tissue that lines the defect. They irrigate copiously. They inspect the site for any remaining debris or fibrous tissue.
Healing Phase
The site heals like a tooth extraction. A blood clot forms in the socket. The gum closes over. Bone fills the void naturally over several months. Soft diet and gentle cleaning protect the healing site. The dentist schedules follow-up to ensure uneventful recovery.
A quote from a patient who underwent explantation:
“I was scared to have the implant taken out. But it was a relief to remove the source of infection. The healing was smooth. Now, I have a clean slate to work with for a new tooth.”
Bone Grafting
Implant failure often leaves behind a bone defect. Infection eats away bone. The original surgery may have exposed thin bone walls. Explantation itself removes some bone. For successful reimplantation, you must rebuild the foundation. Bone grafting restores lost volume and density.
Why Bone Grafting Matters
Dental implants need sufficient bone to surround and stabilize them. A minimum of 1.5 to 2 mm of bone should encircle the implant on all sides. The bone height must accommodate the implant length without encroaching on nerves or sinuses. Bone loss compromises these dimensions. Grafting recreates the needed architecture.
Types of Bone Grafts
Several graft materials are available. Your dentist selects based on defect size, location, and personal preference.
| Graft Material | Source | Advantages | Considerations |
|---|---|---|---|
| Autograft | Your own body (usually jaw, chin, or hip) | Gold standard; contains living cells and growth factors; highest regenerative potential | Requires second surgical site; limited quantity; donor site discomfort |
| Allograft | Donor human bone (tissue bank) | No second surgical site; ample supply; good bone-forming scaffold | Processed to remove cells; slightly slower integration than autograft |
| Xenograft | Animal bone (typically bovine) | Excellent scaffold; very slow resorption; widely available | No living cells; acts as filler rather than true regenerator; long resorption time |
| Alloplast | Synthetic materials (hydroxyapatite, tricalcium phosphate) | Unlimited supply; no disease transmission risk; predictable resorption | Variable performance; purely synthetic; some materials resorb too quickly |
The Grafting Procedure
The dentist opens the gum tissue to fully expose the bone defect. They clean the site meticulously. They then place the selected graft material into the void. The graft particles pack tightly. A membrane often covers the graft. This barrier membrane prevents fast-growing gum cells from invading the space. It allows slower bone cells to populate the area.
The dentist closes the gum with sutures. The graft site heals over four to nine months. During this time, your body replaces the graft with your own living bone. A CBCT scan later confirms sufficient bone regeneration for a new implant.
Sinus Lift and Ridge Augmentation
In the upper back jaw, the maxillary sinus may drop low, leaving minimal bone height. A sinus lift procedure raises the sinus floor and adds bone beneath it. For narrow jaw ridges, lateral ridge augmentation expands bone width. These advanced grafting techniques create implant sites where none existed. They apply directly to failed implant sites in compromised areas.
Key Reality: Bone grafting adds time to your treatment timeline. You cannot rush biological healing. Patience here pays huge dividends. A well-grafted site supports a durable, long-lasting new implant.
Reimplantation
After bone healing and confirmation of adequate volume, you are ready for a new implant. Reimplantation is the placement of a fresh implant into the previously failed site.
Timing of Reimplantation
The approach can be immediate or delayed.
Delayed Reimplantation
This is the standard protocol. After implant removal and grafting, the site heals completely. The dentist waits four to nine months. A CBCT confirms mature bone. Then, they place the new implant. This staged approach yields the most predictable results. It allows full infection resolution and robust graft integration.
Immediate Reimplantation
In rare, select cases, the dentist places a new implant at the same time as the failed implant removal. This works only if the failure was mechanical (fractured implant) with no infection, and sufficient bone remains. The new implant must achieve primary stability—firm anchorage in remaining bone. Immediate replacement saves months of treatment time. But it carries higher risk. Any residual bacteria may infect the new implant.
Most dentists prefer a staged approach for safety. Discuss with your dentist which path suits your specific condition.
Choosing the New Implant
The replacement implant may differ from the original. The dentist may select a wider or longer implant to engage fresh bone. They may use a different surface technology. Modern implants feature roughened, hydrophilic surfaces that accelerate bone healing. These innovations improve the chances of success the second time around.
Surgical Technique Refinements
The dentist applies lessons from the first failure. They use precise, low-speed drilling with copious irrigation to prevent bone overheating. They may use a surgical guide fabricated from a CBCT scan. This guide directs the implant into the optimal bone, avoiding thin areas. Achieving primary stability drives the surgical plan. If the implant feels loose at insertion, the dentist reassesses—perhaps placing a larger implant or adding more graft material.
Healing and Restoration
The new implant requires three to six months of undisturbed healing. You wear a temporary tooth—possibly a removable flipper or a bonded bridge—during this time. After osseointegration confirms on X-ray, the dentist places the final abutment and crown. You regain full function.
The reimplantation process is detailed and multi-step. But it offers a fresh chance for a permanent, healthy tooth. Many patients enjoy decades of success from their second implant. The key is meticulous execution and addressing the root cause of the initial failure.
Alternative Prosthetic Solutions
Sometimes, replacing the implant in the same site is not possible or practical. You may lack sufficient bone even for grafting. Your health may preclude more surgery. Or, you simply may choose a different path. Several non-implant options exist. They restore function and aesthetics reliably.
Fixed Dental Bridge
A traditional bridge replaces a missing tooth by crowning the adjacent teeth. The dentist prepares the teeth on either side of the gap. They take impressions. A dental lab fabricates a custom bridge. The false tooth (pontic) connects to the crowns. The dentist cements the bridge in place.
Bridges offer a fixed, stable solution. You do not remove it. It feels secure. Eating and speaking return to normal. The procedure takes just a few weeks. It costs less than multiple implant surgeries. Bridges function well for 10 to 15 years or longer with proper care.
The downside involves the adjacent teeth. Preparing them removes healthy enamel. These anchor teeth become more vulnerable to decay and root canal problems. Cleaning under the bridge demands special floss threaders. If one anchor tooth fails, the entire bridge fails.
Removable Partial Denture
A partial denture replaces one or more missing teeth with an appliance you take out at night. It consists of a metal or flexible plastic framework. The replacement teeth attach to the framework. Clasps grip your natural teeth for retention. Modern flexible partials use translucent clasps that blend with gums.
Partial dentures present the least invasive option. No drilling of adjacent teeth occurs. They cost significantly less than bridges or implants. They are easy to repair or modify. For patients who cannot undergo surgery, partials offer a practical solution.
However, many find removable appliances less desirable. They can feel bulky. They may move during eating or speech. They require daily removal and cleaning. Long-term, they transmit less chewing force and may contribute to bone loss in the edentulous area.
Implant-Supported Bridge in a New Location
If the failed implant site is compromised, but other areas of the jaw have good bone, the dentist may place implants in alternative positions. An implant-supported bridge uses two or more implants to support multiple crowns. The bridge spans the edentulous space without grafting the failed site. This approach avoids difficult grafting while still providing a fixed, implant-borne solution. It protects the remaining natural teeth from bridge preparation.
Treatment Decision Factors
Choosing between reimplantation and alternative prosthetics involves several considerations:
- Bone Condition: Severe bone loss that resists grafting makes reimplantation unpredictable.
- Health Status: Uncontrolled diabetes, heavy smoking, or bisphosphonate therapy may contraindicate another implant.
- Financial Capacity: Multiple grafting and implant surgeries increase costs significantly.
- Time Commitment: Reimplantation spans many months. Bridges and partials are faster.
- Patient Preference: Some patients prefer the closest replica of a natural tooth. Others prioritize minimal surgery.
Your dentist should present all viable options. They should discuss the pros and cons of each. A collaborative decision empowers you.
Below is a comparative overview.
| Feature | Reimplantation with Grafting | Fixed Bridge | Removable Partial Denture |
|---|---|---|---|
| Invasiveness | High (multiple surgeries) | Moderate (tooth preparation) | Minimal (no surgery) |
| Treatment Time | 8-15 months | 2-4 weeks | 2-6 weeks |
| Bone Preservation | Excellent (stimulates bone) | None (bone resorption continues) | Minimal (some resorption) |
| Longevity | 20+ years with care | 10-15 years | 5-10 years |
| Impact on Adjacent Teeth | None | Requires tooth reduction | Clasps may stress teeth |
| Cost | High | Moderate | Low to moderate |
| Patient Satisfaction | Very high | High | Moderate |
Preventing Future Implant Failure
You have invested significant effort and resources in fixing your failed implant. Safeguarding that investment becomes a top priority. Prevention is not passive. It requires active partnership between you and your dental team. The following strategies dramatically lower the risk of experiencing another failure.
Maintaining Oral Hygiene
Implants demand meticulous care. They are not “maintenance-free.” Bacteria threaten their survival daily. Your home care routine must be thorough and consistent.
Daily Cleaning Routine
Brush at least twice a day. Use a soft-bristled electric or manual toothbrush. Focus on the gum line around the implant crown. Angle the bristles toward the gum at 45 degrees. Spend two full minutes brushing.
Flossing is non-negotiable. Implant crowns often connect to abutments with tiny micro-gaps. Bacteria colonize these spaces. Floss threaders help you pass floss under the crown. Slide the floss along the implant surface in a C-shape. Move it up and down to disrupt biofilm.
Interdental brushes offer another effective tool. These small, cone-shaped brushes fit between teeth. Select the appropriate size. Insert the brush gently into the space between the implant and adjacent tooth. Move it in and out to sweep away plaque.
Water Flossers
A water flosser uses a stream of pulsating water to clean around implants. It flushes debris from under the crown and reduces gum pocket bacteria. Many patients find it easier than string floss. It supplements but does not replace mechanical cleaning. Use the water flosser on a low setting to avoid gum trauma. Point the tip toward the gum line.
Antimicrobial Mouth Rinses
An alcohol-free chlorhexidine or essential oil mouth rinse reduces bacterial load. Use it as a short-term boost during healing. Long-term daily use of chlorhexidine causes staining and taste alteration. Your dentist may recommend daily non-alcohol rinse for high-risk patients.
Professional Maintenance Cleanings
See your dentist or hygienist every three to four months. Implant maintenance involves specialized care. The hygienist uses non-metal instruments to clean exposed implant surfaces. They measure peri-implant probing depths. They check for bleeding or suppuration. They scale the crown without scratching it. They polish meticulously.
Think of these visits as an inspection and deep clean. Early signs of inflammation receive immediate intervention. This proactive rhythm prevents minor issues from escalating.
Lifestyle Modifications
Your habits either support or sabotage implant health. Some changes deliver outsized protective effects.
Smoking Cessation
Smoking represents the single most controllable risk factor for implant failure. Smokers face a failure rate two to three times higher than non-smokers. Nicotine constricts blood vessels in the gums and bone. Reduced blood flow starves tissues of oxygen and healing factors. Smoking suppresses immune cells that fight periodontal bacteria. Smokers accumulate more plaque and calculus.
Quitting smoking transforms your implant prognosis. Even reducing smoking helps. Many resources exist—nicotine replacement, counseling, support groups. Your dentist can guide you. If you undergo reimplantation, commit to a strict no-smoking protocol during healing.
Moderate Alcohol Consumption
Heavy alcohol intake correlates with poor oral hygiene, nutritional deficiencies, and direct toxic effects on bone cells. Limit alcohol to moderate levels. Avoid binge drinking. Stay well-hydrated to maintain saliva flow, which naturally cleanses the mouth.
Balanced Nutrition
A nutrient-rich diet supports bone and soft tissue health. Ensure adequate calcium and vitamin D intake. Vitamin D facilitates calcium absorption and possesses anti-inflammatory properties. Sunlight exposure, fatty fish, fortified dairy, and supplements maintain adequate levels. Vitamin C strengthens gum collagen and resists bacterial invasion. Eat plenty of fresh fruits and vegetables. Protein provides amino acids for tissue repair. Zinc and antioxidants support immune function.
A diet low in refined sugars reduces bacterial fuel. Limit sugary snacks and beverages. If you consume sugar, rinse with water afterward.
Regular Dental Check-Ups
You cannot reliably detect early implant problems yourself. Professional surveillance catches trouble you miss. Commit to a lifetime of scheduled recall visits.
Frequency
Most implant patients benefit from check-ups every six months. Those with a history of peri-implantitis or multiple risk factors need three- to four-month intervals. The dentist customizes the schedule to your risk profile.
Examination Components
The dentist performs a targeted implant exam at every visit. They visually inspect the soft tissues. They probe gently. They note any bleeding. They check the implant and crown for mobility. They evaluate occlusion. They take periodic X-rays—typically every one to two years—to compare bone levels. Any change triggers further investigation and early intervention.
Occlusion Guard Checks
If you wear a night guard to protect against grinding, the dentist checks it for wear. An ill-fitting guard causes more harm than good. They adjust the guard to maintain even, protective contacts. Replace the guard when it becomes thin or damaged.
Managing Systemic Conditions
Your overall health directly impacts your mouth. Stable systemic conditions support stable implants. Uncontrolled disease undermines them.
Diabetes Management
Diabetic patients face higher implant failure risks due to impaired microcirculation and immune response. The key variable is glycemic control. Well-controlled diabetes (HbA1c below 7%) carries implant failure rates close to the general population. Poorly controlled diabetes dramatically increases risk.
Work closely with your physician. Monitor blood sugar regularly. Adhere to medication, diet, and exercise plans. Inform your dentist of your latest HbA1c result. If you need reimplantation, aim for optimal control before surgery.
Osteoporosis and Bisphosphonates
Osteoporosis weakens bone density. Bisphosphonate medications (Fosamax, Actonel, Boniva) and other antiresorptives alter bone metabolism. They increase the risk of medication-related osteonecrosis of the jaw (MRONJ) after dental surgery. This condition causes bone to die and become exposed.
If you take these medications, discuss the risk with your dentist and physician. Dentists often proceed with caution. A “drug holiday” may be considered, but only in consultation with the prescribing doctor. Alternative implant prosthetics may prove safer for some.
Autoimmune and Immunosuppressive Conditions
Rheumatoid arthritis, lupus, and other conditions affect healing. Immunosuppressive medications, including corticosteroids and biologics, slow tissue repair. A candid discussion with your medical team weighs the benefits against the risks. Careful surgical technique, antibiotic prophylaxis, and extended healing periods may mitigate risks.
Hormonal Factors
Postmenopausal women experience accelerated bone loss. The jawbone is not exempt. Adequate calcium and vitamin D intake, weight-bearing exercise, and medical management help stabilize bone density. Discuss hormone replacement or other therapies with your doctor.
Advanced Techniques in Implant Salvage
Sometimes, you aim not to remove the failed implant but to save it. Salvage therapy attempts to halt disease progression and maintain the original implant. This appeals to patients wanting to avoid explantation and complex reconstruction. Advanced techniques push the boundaries of what salvage can achieve.
Laser-Assisted Therapy
Dental lasers offer a minimally invasive tool for treating peri-implantitis. They decontaminate the implant surface and remove diseased tissue with precision.
How It Works
The dentist accesses the infected peri-implant pocket. They insert a thin laser fiber under the gum. The laser light energy selectively targets inflamed, pigmented tissues and bacteria. It vaporizes harmful pathogens and biofilm. It leaves healthy, non-pigmented tissues relatively unaffected.
Different laser wavelengths suit different purposes. Erbium lasers effectively remove calculus from the implant surface without overheating. Diode lasers provide strong antibacterial effects in soft tissue pockets.
Advantages
Laser therapy reduces bleeding compared to traditional surgery. It minimizes post-operative discomfort. It may encourage reattachment of soft tissue to the implant surface. The bactericidal effect penetrates into threads and rough surfaces where mechanical cleaning struggles.
Limitations
Laser therapy alone cannot regenerate lost bone. Deep, wide defects still require grafting. Laser is an adjunct, not a standalone cure for advanced peri-implantitis. Success rates vary. Appropriate case selection is critical.
Procedure Protocol
Often, laser therapy combines with mechanical debridement. The dentist first cleans the implant surface with curettes or ultrasonic tips. They then use the laser to decontaminate and de-epithelialize the inner pocket lining. This creates a fresh wound surface capable of reattachment. Patients typically require multiple sessions. Regular monitoring tracks progress.
Platelet-Rich Plasma (PRP) and Growth Factors
Your own blood holds powerful healing proteins. Platelet-rich plasma concentrates these factors. Applying PRP to a surgical site accelerates healing and may improve regenerative outcomes.
The Science
The dentist draws a small amount of your blood. They spin it in a centrifuge. This separates the blood into layers. The platelet-rich layer contains platelets concentrated five to ten times above baseline. Platelets release growth factors—PDGF, TGF-beta, VEGF—that stimulate cell migration, proliferation, and new blood vessel formation. These growth factors signal bone and soft tissue cells to repair and regenerate.
Application in Implant Salvage
During surgical salvage of peri-implantitis, the dentist thoroughly debrides and decontaminates the defect. They may place bone graft material. Then, they apply PRP to the graft and defect. The PRP bathes the site in regenerative signals. It may accelerate graft incorporation and improve tissue attachment to the previously contaminated implant surface.
Another preparation, platelet-rich fibrin (PRF), forms a sticky membrane from your blood without additives. The dentist places the PRF membrane over the graft as a biological bandage. It protects the site and delivers sustained growth factor release.
Current Evidence
Studies show PRP can improve soft tissue healing and reduce post-operative discomfort. Bone regeneration data remains mixed. Some studies demonstrate enhanced early bone formation. Others show no significant long-term advantage. PRP appears beneficial but not transformative. It complements meticulous surgical technique, not replaces it.
Customized Implant Designs
The original implant failure may stem from poor fit or design. Modern digital dentistry creates implants tailored to your exact anatomy. Customized subperiosteal implants and patient-specific abutments represent a paradigm shift for compromised sites.
Subperiosteal Implants
Traditional endosteal implants sit inside the jawbone. If bone is severely deficient, a subperiosteal implant offers an alternative. This metal framework rests on top of the jawbone, under the gum. Posts protrude through the gum to support the prosthetic tooth.
Previously, subperiosteal implants required a direct bone impression during surgery. Today, CBCT scans and 3D printing enable custom design. The dentist takes a virtual impression of your jaw. A lab designs a framework that precisely conforms to your bone surface. The framework is 3D printed in titanium. The dentist places it in a single surgery. The gum heals around the posts. This approach avoids extensive bone grafting. It suits patients with extreme bone loss who seek a fixed implant solution.
Custom Abutments and Crowns
The angle and shape of the implant abutment affect force distribution and cleanability. Stock abutments rarely match natural tooth emergence perfectly. Custom abutments, designed from digital scans, mimic natural tooth contours. They guide gum tissue into a healthy, easily cleansed shape. They reduce cement trapping.
Screw-retained custom crowns offer another advantage. They eliminate cement entirely. The crown connects directly to the implant via a screw. A small filling covers the access hole. Removing the crown for maintenance or repair is simple. No residual cement lurks under the gum to trigger inflammation.
Zygomatic and Pterygoid Implants
For the severely resorbed upper jaw, zygomatic implants anchor into the cheekbone (zygoma). Pterygoid implants engage the pterygoid plate behind the maxilla. These extra-long implants bypass the deficient maxillary bone entirely. They offer a graftless solution for patients with massive bone loss who cannot tolerate or afford extensive grafting. These are highly specialized procedures performed by trained surgeons. They serve as a salvage option when standard implant sites have failed or disappeared.
Important Reality: Customized implant options are not universally available. They require advanced training and equipment. Costs are significant. They represent a niche but powerful tool for select, desperate cases.
Cost Considerations
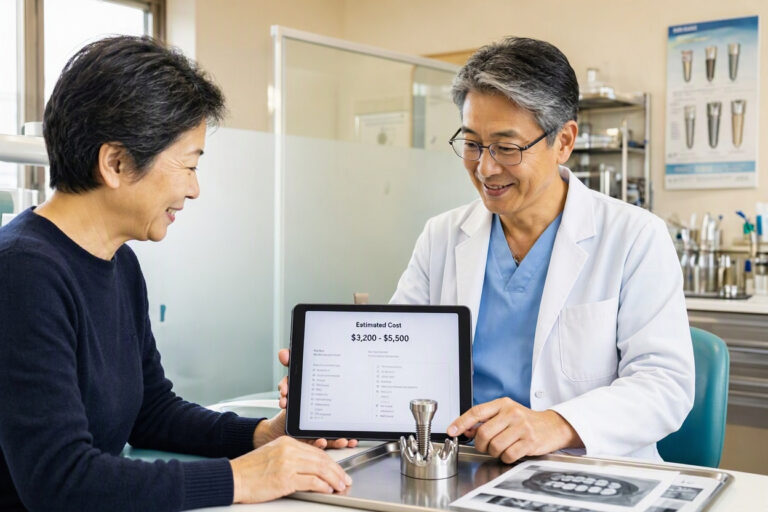
Fixing a failed dental implant involves expenses that vary widely. Understanding the cost landscape helps you plan. It prevents financial shock. It allows you to explore affordable pathways.
Cost Components
The total cost reflects multiple procedures. A typical case includes:
- Diagnosis and Imaging: Examination, periapical X-ray, and CBCT scan. $200–$800.
- Explantation: Removal of the failed implant. $300–$1,500 depending on complexity.
- Bone Grafting: Graft material and surgical placement. $500–$3,000 per site. Extensive ridge augmentation or sinus lifts cost more.
- New Implant Placement: Surgical placement of the replacement implant. $1,500–$3,000 per implant.
- Abutment and Crown: The connector and final tooth restoration. $1,000–$2,500.
- Anesthesia and Sedation: Local anesthesia is typically included. IV sedation or general anesthesia adds $500–$1,500.
- Follow-Up Care: Maintenance visits, post-operative checks, and interim temporaries.
Total Estimated Ranges
| Scenario | Estimated Total Cost (per tooth) |
|---|---|
| Nonsurgical peri-implantitis treatment | $500 – $1,500 |
| Explantation only, no replacement | $300 – $1,500 |
| Explantation + bone graft + new implant + crown | $5,000 – $12,000+ |
| Explantation + 3-unit bridge | $3,000 – $5,000 |
| Explantation + removable partial denture | $800 – $2,500 |
Insurance Coverage
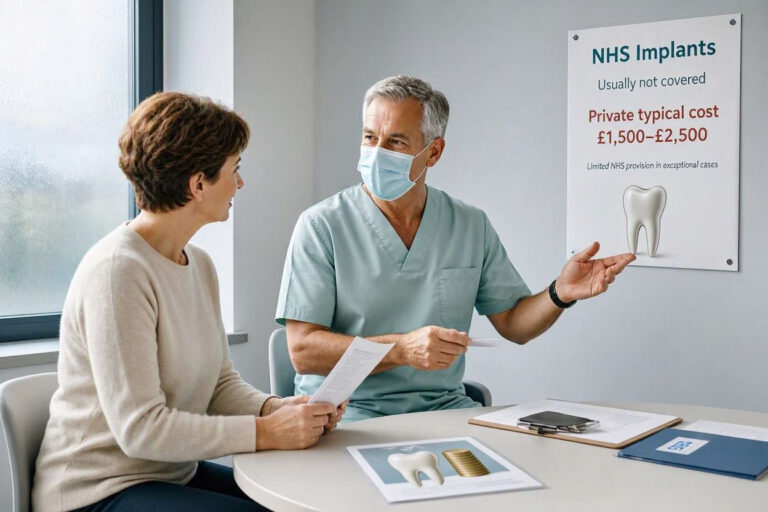
Dental insurance often covers a portion of the crown or bridge. It may not cover implant removal or grafting. Medical insurance may contribute if failure resulted from an accident or systemic disease. Explore both policies. Obtain pre-treatment estimates. Your dental office can send a predetermination letter.
Financing Options
Many dental practices offer third-party financing plans. These break the total into manageable monthly payments. Interest rates vary. Some plans offer zero-interest promotional periods. In-house membership plans provide discounted fees for uninsured patients. Dental schools and hospital residency clinics offer reduced rates. Treatment by supervised students lowers cost considerably while maintaining quality.
Value Perspective
Cost must be weighed against long-term value. A successful reimplanted tooth can last decades. A bridge or denture will likely need replacement sooner. Investing in bone grafting and a new implant may prove more cost-effective over a lifetime. Discuss longevity projections with your dentist.
Patient Education and Compliance
Your role in fixing a failed dental implant cannot be overstated. The dentist performs the surgery. You perform the daily maintenance. The partnership determines long-term success. Education is the foundation. Compliance is the engine.
Understanding Your Condition
Ask questions until you truly understand. Why did your implant fail? What specifically will the treatment accomplish? What are the risks of doing nothing? Knowledge replaces fear with confidence. Request to see your X-rays. Ask your dentist to point out bone loss, infection, or mechanical issues. A visual understanding solidifies your commitment.
Realistic Expectations
No dental restoration lasts forever. A successful reimplanted tooth still requires care. It will need maintenance and eventual replacement of the crown. It faces the same bacterial threats as the original implant. Accepting this reality keeps you vigilant. It prevents the “set and forget” mentality that dooms many implants.
Mastering Home Care
Observe a demonstration. Have the hygienist watch you clean around the implant. Receive feedback. Use a mirror to see exactly where the brush and floss go. Purchase the recommended tools—interdental brushes, water flosser, soft picks. Keep them visible in your bathroom. Establish a routine that becomes automatic.
Lifestyle Accountability
Acknowledge the impact of smoking, diet, and missed cleanings. Set realistic goals. If quitting smoking is too daunting, begin by reducing. If you skip flossing, commit to three times a week as a start. Small, consistent changes accumulate into big protection. Be honest with your dentist about your challenges. They can offer resources and adaptations.
Recognizing Recurrence Signs
Memorize the warning signs listed earlier. Pain, mobility, bleeding, swelling. Pledge to contact the dentist at the first sign of trouble. Early intervention can rescue a struggling implant before catastrophic bone loss occurs. Waiting is the enemy. Action preserves options.
Adherence to Recall Schedule
Put your maintenance visits on the calendar. Treat them as non-negotiable appointments. The investment is too large to lose to neglect. The cost of a cleaning pales compared to the cost of treating recurrent peri-implantitis. Your dental team monitors subtle changes you cannot detect. They provide professional cleaning in areas you cannot reach.
A quote from a periodontist:
“The most successful implant patients are those who understand that the surgery was just the beginning. Their daily commitment and regular professional care are what carry the implant into its second and third decade. I can fix a failed implant, but I need the patient to maintain it.”
Conclusion
Fixing a failed dental implant requires a systematic, multi-step approach. You start with accurate diagnosis of the failure cause. You proceed through removal, bone reconstruction, and careful reimplantation or choose a suitable prosthetic alternative. Long-term success then depends on your meticulous hygiene, healthy lifestyle, and regular professional maintenance. Trust the process, partner with your dentist, and you can confidently restore both your smile and your oral health.
Frequently Asked Questions
1. Can a loose dental implant be saved without removal?
Sometimes, yes. If the looseness stems from a loose abutment screw rather than bone loss, the dentist simply tightens or replaces the screw. If the implant itself moves due to bone loss, saving it requires surgical treatment of peri-implantitis. Deep cleaning, decontamination, and bone grafting may stabilize it. However, advanced mobility usually means the implant has failed structurally and requires removal.
2. How painful is dental implant removal?
Most patients experience minimal discomfort during the procedure due to effective local anesthesia. The sensation resembles pressure or vibration, not sharp pain. After the numbing wears off, mild soreness persists for a few days. Over-the-counter pain relievers usually manage this well. The recovery is often easier than the original implant placement because no drilling deep into bone occurs.
3. Will I be without a tooth while the area heals?
Yes, typically there is a healing phase. You will not have a permanent tooth attached immediately. Your dentist provides a temporary solution. Options include a removable partial denture (flipper), a temporary bonded bridge using adjacent teeth, or a temporary crown on a neighboring implant. These temporaries maintain appearance and some function while the bone heals.
4. Can a failed implant be replaced on the same day as removal?
Immediate replacement is possible but only in very specific, ideal conditions. The failure must be due to a mechanical issue like implant fracture, with no sign of infection. There must be enough healthy bone to secure the new implant firmly. If any infection or significant bone loss exists, a staged approach with a healing period and bone grafting is much safer and more predictable.
5. What happens if I choose not to treat a failed implant?
Ignoring a failed implant invites progressive damage. Chronic infection destroys more jawbone. The infection can spread to adjacent teeth or implants. Gum abscesses may form. A loose implant can fracture the bone. Eventually, the implant loses all support and may fall out or need emergency removal. The resulting bone defect is larger and harder to reconstruct. Early treatment is always less complicated and less expensive.
Additional Resources
For more detailed information on dental implant care and complications, visit the American Academy of Periodontology patient resources: https://www.perio.org/for-patients/
Disclaimer: This article provides general educational information about fixing failed dental implants. It does not constitute medical or dental advice. Dental conditions vary greatly among individuals. Always consult a qualified dentist or periodontist for diagnosis and treatment recommendations specific to your oral health needs. Do not delay seeking professional care based on information you read here.