How to Brush Dental Implants
Dental implants transform lives. They restore the ability to chew comfortably, smile confidently, and speak clearly. Yet, the longevity of this remarkable tooth replacement technology hinges on a single, daily habit: brushing. The way you brush a dental implant differs fundamentally from how you brush a natural tooth. The stakes are higher, and the techniques require more precision.
This guide moves beyond generic dental advice. It serves as your definitive manual for preserving the investment you have made in your oral health. By understanding the unique structure of an implant and adopting a tailored home-care routine, you protect yourself against a largely preventable condition called peri-implant disease. This condition remains the leading cause of implant failure.
We will explore the biomechanics of why implants demand a gentler touch, evaluate the specialized tools that make cleaning effective, and provide a detailed, step-by-step methodology that a dental professional would approve. Whether you have a single crown, a bridge supported by implants, or a full-arch restoration like All-on-4, the principles of atraumatic, thorough biofilm removal remain constant.
Your natural teeth have a biological defense system that implants lack. Therefore, your mechanical cleaning technique must compensate for this biological absence. This article provides the realistic, honest, and scientifically grounded roadmap you need to navigate a lifetime of implant success.
1. Understanding Dental Implants and Their Care
Before picking up a toothbrush, you must understand what you are cleaning. An implant is not a tooth. It is a sophisticated medical device that integrates with your jawbone. The materials are synthetic, and the connection to the body is entirely different from a natural tooth’s anatomical root suspension. Treating it like a standard tooth invites catastrophic complications.
Components of a Dental Implant
A dental implant system consists of three distinct parts. You need to visualize these layers to understand where bacteria hide and where your cleaning efforts must focus.
The implant fixture, often called the body or screw, is the component surgically placed into the jawbone. Manufacturers typically fabricate it from commercially pure titanium or a titanium alloy. A zirconia ceramic option also exists for patients with metal sensitivities or aesthetic concerns. This fixture possesses a treated surface, often roughened at a microscopic level through sandblasting or acid etching. This roughened topography encourages bone cells to attach directly to the implant surface, a biological process called osseointegration. This fusion provides the rock-solid stability that makes implants functional. Once bone covers this surface, you cannot see or directly clean it. However, if the bone recedes due to infection, that roughened surface becomes exposed to the oral cavity, and it becomes a magnet for bacterial plaque.
The abutment connects the implant fixture to the visible restoration. It screws into the implant fixture and protrudes through the gum tissue. Abutments can be stock, custom-cast, or CAD/CAM milled from titanium, gold alloy, or zirconia. The junction where the abutment meets the implant, known as the implant-abutment interface, features a microscopic gap. No matter how precisely engineers manufacture these parts, a small micro-gap exists. Bacteria colonize this gap, making the smooth, cleanable emergence profile of the abutment crucial for long-term health.
The prosthesis, or restoration, is the visible part that looks like a tooth. It can be a single crown, a bridge, or a full-arch denture. These restorations use materials like porcelain fused to metal, monolithic zirconia, lithium disilicate, or high-performance polymers. The contour of the prosthesis where it emerges from the gum must allow for hygiene access. Over-contoured restorations trap food and plaque, while under-contoured ones create food impaction zones.
| Component | Material Options | Primary Hygiene Concern |
|---|---|---|
| Implant Fixture | Titanium, Titanium Alloy, Zirconia | Exposure of roughened surface due to bone loss |
| Abutment | Titanium, Gold Alloy, Zirconia | Biofilm retention at the implant-abutment micro-gap |
| Prosthesis | Porcelain, Zirconia, PFM, PMMA | Plaque accumulation under over-contoured margins |
Differences Between Implants and Natural Teeth
The distinction between a natural tooth and an implant is stark. A natural tooth resides in a bony socket and hangs suspended by a periodontal ligament. This ligament is a network of collagen fiber bundles that acts as a shock absorber. It provides a resilient cushioning effect during chewing. More importantly for cleaning, the ligament hosts a rich network of blood vessels and immune cells that constantly patrol and fight bacterial invasion.
A dental implant lacks this ligament entirely. The titanium fixture contacts the bone directly, a state called ankylosis. This rigid connection provides no cushioning. It also lacks the robust blood supply and immune surveillance that the periodontal ligament delivers. Natural teeth receive their main blood supply from the bone and the ligament, offering a significant defense against bacterial toxins. Implants, however, receive blood only from the bone at the apex of the fixture. This limited blood flow reduces the body’s ability to mount an inflammatory response against bacteria without causing collateral damage to the bone itself.
The orientation of connective tissue fibers differs drastically. Around a natural tooth, collagen fibers insert perpendicularly into the root cementum, forming a tight seal. Around an implant, the fibers run parallel or in a circular pattern, never truly inserting into the titanium or zirconia surface. This results in a weaker biological seal around the implant neck. This seal relies more heavily on a hemidesmosomal attachment, which bacterial plaque can disrupt more easily than the robust fiber insertion into a tooth root.
“The tooth is suspended by a ligament; the implant is anchored by a screw. This is an engineering solution to a biological problem, and your brushing technique must reflect this compromise.”
This biological fragility explains why you must brush implants with such deliberate care. You are compensating for the absence of nature’s defense system. Bleeding around a natural tooth often indicates reversible gingivitis. Bleeding around an implant, however, often signals a more serious and progressive condition called peri-implant mucositis, which can quickly transition to irreversible peri-implantitis. Recognizing this vulnerability immediately elevates the importance of your daily oral hygiene routine from a mundane chore to a critical medical necessity.
2. Why Proper Brushing is Crucial
The leading cause of late implant failure is not structural fracture or biomechanical overload in most well-planned cases. It is a bacterial infection. Peri-implant disease, fueled by the very biofilm you remove with proper brushing, destroys the hard and soft tissues that support an implant. Understanding the specific threats that correct brushing neutralizes provides the motivation required to maintain flawless technique.
Prevention of Peri-Implant Disease
Peri-implant disease exists on a continuum. The initial stage is peri-implant mucositis. This condition presents as inflammation confined to the soft tissue mucosa surrounding the implant, with no evidence of bone loss. Clinical signs include redness, swelling, and bleeding upon gentle probing. The critical and hopeful aspect of this diagnosis is its reversibility. If you eliminate the causative bacterial biofilm through meticulous brushing and interdental cleaning, the inflammation resolves, and the tissues return to health.
If peri-implant mucositis remains untreated, it frequently progresses to peri-implantitis. This destructive condition involves inflammation of the mucosa and progressive loss of supporting bone. A key feature of peri-implantitis is the formation of a crater-like bone defect around the implant. This defect pattern differs from the horizontal bone loss typically seen in natural tooth periodontitis. The lesion often extends to the roughened surface of the implant fixture, which, once exposed, harbors a dense and calcified biofilm that is incredibly difficult to debride. Surgical intervention becomes necessary to access and clean this contaminated surface. Proper daily brushing stops peri-implant mucositis dead in its tracks, preventing this cascade of surgical complexity and potential implant loss.
| Condition | Tissue Involvement | Bone Loss | Reversibility |
|---|---|---|---|
| Peri-implant Mucositis | Soft tissue (mucosa) | No | Yes, with effective cleaning |
| Peri-implantitis | Soft tissue and bone | Progressive, crater-like | Requires surgical intervention |
Protection Against Plaque and Biofilm
Plaque is not a soft, easily rinsed mush. It is a highly organized, structured community of bacteria encased in a protective, self-produced matrix of polymers. This substance adheres tenaciously to surfaces. The biomaterials used in implant dentistry, such as smooth titanium and glazed porcelain, are not immune to biofilm formation. In fact, surface roughness and the complexity of prosthetic contours can increase the surface area available for bacterial colonization.
Biofilm formation begins within minutes of cleaning. A conditioning film, or acquired pellicle, forms on any surface exposed to saliva. Early colonizing bacteria, predominantly gram-positive cocci and rods, attach to this pellicle. Over hours, bacteria multiply and aggregate, producing the extracellular matrix that provides protection. If you fail to disrupt this biofilm mechanically every day, it matures into a complex, pathogenic ecosystem. Late colonizers include gram-negative anaerobic rods and spirochetes, which release potent endotoxins and enzymes that trigger a destructive host inflammatory response. This response drives the bone loss seen in peri-implantitis. Mechanical brushing remains the only effective, non-professional method to physically rupture this biofilm’s protective matrix and remove it from the implant system.
Maintaining Prosthetic Integrity
Proper brushing not only preserves the biological environment but also protects the physical implant restoration. Modern implant crowns and bridges often use porcelain or zirconia, materials prized for their strength and aesthetics. However, abrasion can roughen their surfaces over time. A scratched, dull prosthesis attracts more plaque and becomes a cosmetic concern.
Using an overly abrasive toothpaste or a hard-bristled brush may clean the implant effectively, but it gradually damages the surface glaze on porcelain and can even scratch the polished titanium abutment surface. A roughened abutment in the submucosal zone creates a plaque-retentive nightmare. Furthermore, aggressive horizontal scrubbing with high abrasive forces can, over years, contribute to gum recession. When the thin tissue biotype around an implant recedes, the grayish hue of a titanium abutment or implant fixture may become visible through the mucosa, creating an aesthetic defect that is difficult to correct. Effective but gentle brushing preserves the mirror-smooth polish on critical implant components and the high-gloss glaze on the visible crown, ensuring that your hygiene efforts today do not compromise the aesthetics and function of your restoration tomorrow.
3. Choosing the Right Tools for Brushing Implants
Walking down the oral care aisle can feel overwhelming. A wall of brightly colored packaging promises everything from whitening miracles to extreme freshness. For the dental implant patient, the selection process must become clinical and deliberate. The tools you choose form the foundation of your home care regimen. Selecting incorrectly can cause harm even with the best intentions.
Toothbrush Selection
The toothbrush is your primary weapon against peri-implant disease. The debate between manual and electric toothbrushes ends decisively in favor of electric technology for implant patients. Modern electric toothbrushes with oscillating-rotating or sonic technology consistently demonstrate superior plaque removal and reduced gingival inflammation in clinical studies. They also help control brushing force and timing.
A sonic toothbrush operates at high frequencies, generating fluid dynamics that propel a mixture of saliva, water, and toothpaste into interproximal spaces and below the gumline. This shear force disrupts biofilm beyond the reach of the bristle tips. An oscillating-rotating brush features a small, round head that cups the implant crown, effectively cleaning around the entire circumference. Both are excellent choices.
The most critical feature of any brush is the bristle type. You must choose a brush head labeled extra-soft or soft. Medium and hard bristles are categorically contraindicated for dental implant patients. Soft, end-rounded nylon bristles flex easily, adapting to the implant emergence profile without traumatizing the delicate peri-implant mucosa. They effectively remove the soft, sticky biofilm without abrading the prosthetic surface or scratching the abutment. Manual toothbrushes should exclusively have soft bristles. If you prefer a manual brush, select one with a compact head for optimal access to posterior regions and around complex multi-unit restorations. Replace the brush head or manual toothbrush every three months, or immediately when the bristles show any splaying. A worn, splayed brush loses efficacy and may direct bristles traumatically into the soft tissues.
Toothpaste Considerations
Toothpaste serves as a vehicle for therapeutic agents and a mild abrasive to assist biofilm disruption. For implant patients, the abrasive level of toothpaste becomes a primary concern. The Relative Dentin Abrasivity (RDA) scale measures the erosive potential of toothpaste on dentin. While implant components are harder than dentin, highly abrasive pastes can micro-scratch the acrylic temporary prostheses and, over many years, alter the surface texture of porcelain and titanium.
Select a toothpaste with a low RDA value. Pastes marketed for “whitening” or “tartar control” often rely on high levels of abrasives like silica, alumina, or calcium carbonate. Avoid these. A non-abrasive gel-based toothpaste often provides a safer alternative. The therapeutic agent matters. Stannous fluoride offers anti-caries, anti-gingivitis, and anti-hypersensitivity benefits. Stannous fluoride has also demonstrated activity against the volatile sulfur compounds responsible for halitosis. Sodium fluoride offers excellent caries protection without the potential metallic taste or transient staining sometimes associated with stannous fluoride.
Consider a toothpaste specifically formulated for gingival health and microbiome balance. Formulas containing ingredients like hyaluronic acid, lactoferrin, or natural enzymes can support tissue healing and selectively combat pathogenic bacteria. Regardless of formulation, apply only a pea-sized amount. More paste generates excess foam, which can mask the tactile feedback you need to feel the bristles engaging the margins of the implant restoration effectively.
Interdental Cleaning Tools
A toothbrush cleans only the visible facial, lingual, and occlusal surfaces. It simply cannot reach the interproximal surfaces between implants and adjacent teeth or between two adjacent implants. These hidden areas form the primary reservoir for biofilm. For natural teeth, flossing effectively cleans these contact points. For implants, the requirements change, and the tools become more specialized.
Interdental brushes, often called proxy brushes, are the workhorse for implant interproximal hygiene. These consist of a thin wire core with soft nylon filaments twisted into a bottle-brush shape. Select a brush with a plastic-coated wire core to prevent scratching the titanium abutment or the porcelain restoration. Sizing is crucial. The brush should fill the space with slight resistance, allowing the filaments to contact the undersurface of the crown, the abutment surface, and the adjacent tooth root. A poor fit wastes effort. Use these brushes daily, inserting them from the cheek side and the tongue side to ensure comprehensive biofilm disruption.
Water flossers have established themselves as an essential device for implant maintenance. These devices use a pulsating, pressurized stream of water to flush out debris, food particles, and loosely adherent plaque bacteria from around implants and prosthetic components. The standard jet tip works well, but specialized tips with soft, rubber-like bristles add a gentle mechanical scrubbing action for the abutment and crown margins. Water flossers are particularly beneficial for full-arch fixed restorations, where cleaning under the prosthesis prevents odour and tissue inflammation. A water flosser cannot fully replace interdental brushes for physically disrupting mature biofilm, but it provides a powerful adjunctive clean.
Floss specifically designed for implants proves useful. This floss typically consists of a spongy, yarn-like component and a stiff nylon threader tip. The threader allows you to pass the floss under the bridge pontic or through the space between an implant and a natural tooth. You then move the spongy portion back and forth, polishing the undersurface of the implant restoration and cleaning the abutment. Never snap the floss against the gum tissue; use a gentle, controlled polishing motion.
| Tool | Ideal Use Case | Key Feature |
|---|---|---|
| Interdental Brush | Single implant crowns, implant-to-tooth spaces | Plastic-coated wire to prevent scratching |
| Water Flosser | Full-arch bridges, debulking loose debris | Pulsating pressure reaches deep pockets |
| Implant-Specific Floss | Under bridge pontics, tight contacts | Spongy component for polishing abutments |
4. Step-by-Step Guide to Brushing Dental Implants
Knowledge of anatomy and tools sets the stage. Execution with flawless technique determines the outcome. Brushing dental implants is not about effort; it is about deliberate methodology. Every stroke, every angle, and every second of brushing must have a purpose. Follow this structured protocol to ensure complete biofilm removal without causing any iatrogenic tissue trauma.
Preparation
Begin with clean hands. Wash thoroughly with soap and water. This prevents introducing external bacteria into your mouth during the flossing and brushing process. If you use an interdental brush or floss, perform this step first, before applying toothpaste. Dry interproximal surfaces allow the bristles or floss to grip the biofilm more effectively. Pre-cleaning these spaces also allows the therapeutic agents in your toothpaste to reach more surface area during the brushing phase.
Apply a pea-sized amount of your selected low-abrasive toothpaste to a dry or slightly dampened extra-soft brush head. For electric toothbrush users, applying paste to a dry brush prevents the premature flinging of paste across the bathroom mirror. Start with the electric brush off to distribute the paste around the mouth before activating the power. This prevents the rapid dispersion of toothpaste.
Brushing Technique
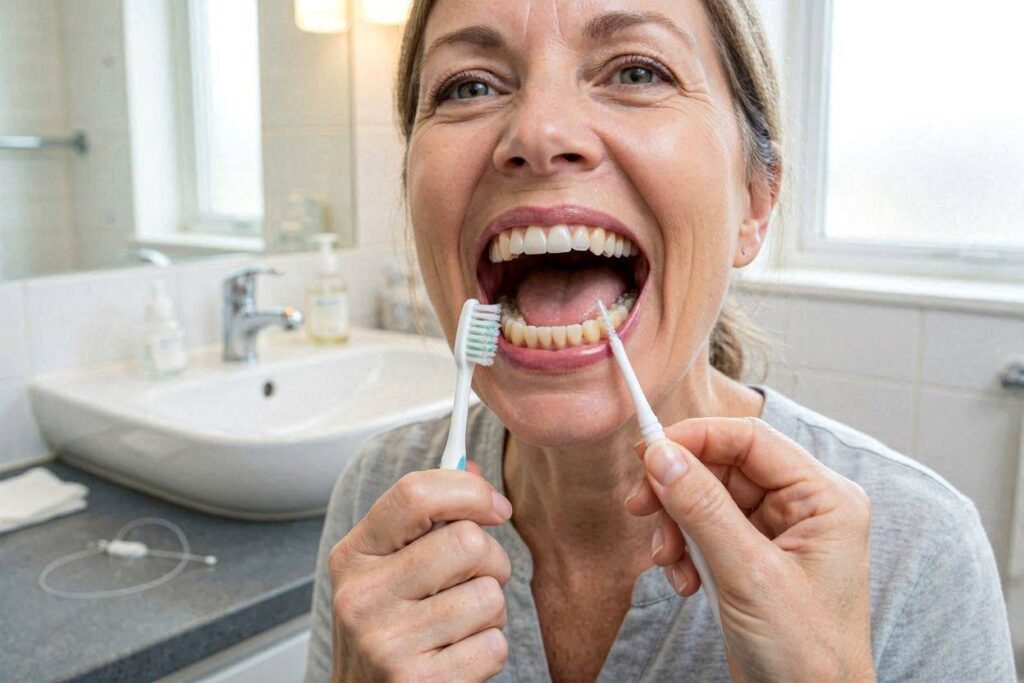
The modified Bass technique, adapted for implant considerations, forms the core of effective cleaning. Position the brush head at a 45-degree angle to the long axis of the implant crown. For the cheek and tongue-facing surfaces, the bristles should point toward the gumline, with a portion of the bristles gently engaging the sulcus. This sulcus is the shallow, cuff-like space where the implant crown meets the gum. This is the danger zone. Biofilm starts forming here and triggers peri-implant mucositis. The 45-degree angle allows the bristles to penetrate this critical space without traumatizing the thin mucosal cuff.
Activate the electric brush or begin manual strokes. Use gentle, controlled pressure. Lighten your grip. A sonic brush requires only feather-light contact; let the fluid dynamics and bristle motion do the work. Forcefully pressing a sonic brush against the teeth stalls the bristles and eliminates the fluid-cleaning action. For an oscillating-rotating brush, guide the small, round head slowly from tooth to tooth, pausing for a few seconds on each surface. The movement should be methodical, tracing along the gumline and then polishing the entire facial surface down to the biting edge.
For the biting surfaces of the restoration, clean them thoroughly but with a parallel brush orientation. For the lingual, or tongue-side, surfaces of anterior implants, this often requires vertically orienting the brush head to accommodate the narrow anatomy. Focus intensely on the implant-retained restoration. Spend dedicated time on each implant crown, ensuring you brush the entire circumference. A common error involves paying attention only to the visible aesthetic zone while neglecting the hidden palatal or lingual surfaces where thick biofilm accumulates unnoticed.
Duration and Frequency
Time your brushing. A full-mouth cleaning session should last a minimum of two minutes. For patients with multiple implants or complex full-arch prostheses, this session may easily extend to three or four minutes. Most electric toothbrushes feature a built-in quadrant timer that briefly pauses or alters the vibration pattern every 30 seconds. Use this feature. Spend a full 30 seconds on each quadrant, paying extra attention to the sextants containing your implants.
Brush your dental implants at least twice daily. Morning brushing removes the biofilm that matured overnight, when salivary flow decreases and bacterial proliferation increases. The pre-bedtime brushing session is even more critical. Saliva serves a protective buffering and antimicrobial function. During sleep, salivary flow essentially ceases. Going to sleep with any remaining plaque allows eight uninterrupted hours of bacterial growth and endotoxin production on the implant surfaces. This causes the inflammatory burden that drives disease. If you can only brush perfectly once a day, choose bedtime. For patients with a history of peri-implantitis, dentists often recommend a third brushing session after the midday meal.
5. Interdental and Proximal Cleaning
If you brush meticulously but ignore the spaces between your teeth, you are cleaning less than 60% of the total implant surface area. The proximal surfaces, those facing adjacent teeth or other implants, exhibit higher plaque accumulation because they are protected from the friction of the tongue, cheeks, and food bolus. Mastering interdental cleaning transforms a good home care routine into an exceptional one.
Interdental Brushes
Interdental brushes provide the most effective mechanical removal of established biofilm from concave, root-like abutment surfaces. Their ability to conform to irregular shapes far exceeds that of string floss. For a single implant with an adjacent natural tooth, you must clean both the implant abutment and the natural root. The junction between the two represents a biological transition zone requiring careful attention.
Select the largest size that fits the space without causing pain or tissue blanching. Metal-core brushes without a plastic coating must be used with extreme caution around titanium abutments. Repeated metal-on-metal contact scratches the highly polished abutment surface, creating microscopic grooves where bacteria thrive and remain protected from saliva and antibiotics. Always use plastic or silicone-coated interdental brushes for implant care. Insert the brush at the gumline, angled slightly toward the biting surface to follow the contour of the crown. Gently move it in and out a few times. Then, angle it toward the gumline to clean the sulcular region. If the anatomy permits, enter the space from both the cheek side and the tongue side. This ensures that you disrupt biofilm on the entire circumference of the proximal surfaces.
Flossing Around Implants
Traditional waxed nylon floss has limited utility around standalone single implant crowns due to the often-bulbous emergence profile that prevents the floss from effectively wrapping the abutment. However, implant-specific floss or “super floss” has a dedicated application. This floss features a stiff end threader, a spongy central portion, and a standard floss tail. The stiff end allows you to navigate under the pontic of an implant-retained bridge. The spongy portion then engages the underside of the pontic and the abutment surfaces.
The technique is gentle and horizontal. Insert the threader, grasp the floss on the opposite side, and gently pull until the spongy component is in contact with the undersurface. Use a shoe-shine motion to rub the spongy floss against the tissue-facing side of the bridge and the abutment. Avoid pressing the threader tip forcefully into the fragile tissue under the pontic. This tissue, often an immobile band of keratinized mucosa, can be easily traumatized, leading to an ulceration that becomes a nidus for food accumulation and infection. For single implants with a flat, accessible proximal surface, a floss threader with a loop can be used to pass floss and then wrap the restoration, but an interdental brush almost always provides a superior mechanical result.
Water Flossers
A water flosser is a complementary tool, not a standalone substitute for mechanical disruption in most cases. However, its value is immense. For patients with full-arch fixed restorations on six or more implants, cleaning under the prosthesis with an interdental brush is impossible. The water flosser becomes the only accessible method for flushing the intaglio, or tissue-facing surface, of the bridge. This area collects food debris and harbors yeast and bacterial colonies that cause chronic malodor and inflammation.
Use a water flosser after mechanical brushing and interdental brush cleaning. Fill the reservoir with lukewarm water. Warm water provides a more comfortable experience for sensitive peri-implant tissues. For enhanced therapeutic effect, you can add a small amount of an antimicrobial mouthwash, but consult the manufacturer’s instructions to avoid damaging the unit. Start at a low pressure setting, especially if you have deep pockets or exposed implant threads. Direct the stream at a 90-degree angle to the tooth axis, pausing briefly in each interproximal space. Allow the water to pulse for three to five seconds, flushing debris out. Trace along the entire gumline of the implant restoration, including the lingual aspect, which often collects the most debris due to gravity and salivary pooling.
6. Additional Oral Hygiene Practices
Brushing and interdental cleaning constitute the core mechanical protocol. A truly comprehensive implant maintenance regimen embraces additional practices that modulate the oral microbiome, reduce the overall bacterial load, and support the resilient health of the entire mouth. These adjunctive steps create an environment where peri-implant disease struggles to take hold.
Antimicrobial Rinses
Mechanical biofilm disruption is the gold standard. Antimicrobial rinses are chemical adjuncts, not replacements, for brushing. They can, however, reach niches that even the finest brush or water flosser may miss, particularly in patients with complex prostheses or dexterity challenges.
A mouthwash containing chlorhexidine gluconate at 0.12% remains the most potent anti-plaque agent available. Chlorhexidine binds to oral tissues and implant surfaces, providing a prolonged bacteriostatic and bactericidal effect. However, its long-term use carries side effects, including brown staining of teeth and prosthesis surfaces, altered taste sensation, and increased calculus formation. Dental professionals typically restrict prescription chlorhexidine to short-term therapeutic courses, such as two weeks following implant surgery or for treating an acute flare-up of peri-implant mucositis.
For daily, long-term use, select a non-staining, alcohol-free antimicrobial rinse. Formulations containing essential oils, such as thymol, menthol, eucalyptol, and methyl salicylate, have decades of clinical data supporting their efficacy in reducing plaque and gingivitis. These oils penetrate the biofilm matrix and disrupt bacterial cell walls without the significant staining profile of chlorhexidine. Alcohol-free versions prevent the desiccation of the oral mucosa, which is important because a dry, alcoholic environment can reduce salivary film thickness on implant surfaces, potentially reducing the natural protection saliva offers. Newer rinses featuring stabilized chlorine dioxide or dilute sodium hypochlorite also show promise in targeting the anaerobic pathogens that drive peri-implantitis without cytotoxicity to gingival fibroblasts.
Tongue Cleaning
The dorsal surface of the tongue is a vast, crypt-laden reservoir for bacteria, food debris, and desquamated epithelial cells. It serves as the primary source of volatile sulfur compounds that cause halitosis. More critically, the tongue acts as a bacterial reservoir that can re-seed the biofilm on freshly cleaned implant surfaces within minutes of completing oral hygiene.
Make tongue cleaning a non-negotiable part of your daily routine. A tongue scraper, typically made of flexible plastic or metal, is more effective at removing the thick biofilm coating from the tongue than a toothbrush. Position the scraper at the very back of the tongue and gently pull forward. Apply enough pressure to remove the white or yellowish coating without causing a gag reflex or injuring the delicate taste buds. Rinse the scraper and repeat until the surface appears pink and clean. Perform this twice daily. Cleaning your tongue directly reduces the total microbial load circulating in your saliva, giving your implants a cleaner environment from the moment you finish your brushing routine.
Regular Professional Maintenance
Home care, no matter how diligent, cannot replace professional maintenance. You will form calculus, also known as tartar, which is mineralized, calcified plaque that regular brushing cannot remove. On an implant, calculus forms most heavily on the lingual surfaces of lower restorations, near the opening of salivary ducts. This calculus harbors live bacteria on its rough surface and must be removed by a dental professional.
Schedule a professional maintenance visit with your dentist or dental hygienist every three to four months for the first year after implant restoration. If you demonstrate excellent home care and stable peri-implant tissues, your recall interval may extend to every six months. Patients with a history of periodontitis or peri-implantitis should generally remain on a strict three-month recall indefinitely.
During a professional implant maintenance appointment, the clinician will probe gently around the implant with a special non-metallic or plastic periodontal probe to check for bleeding, a key indicator of inflammation. They will also use specialized instrumentation. Standard stainless-steel scalers and ultrasonic inserts will severely scratch and damage titanium abutments and implant surfaces. Professionals must use instruments made from titanium, plastic, carbon composite, or specially designed non-contacting ultrasonic tips to remove calculus without causing surface damage. Finally, the clinician will polish the prosthesis with a fine, non-abrasive paste and re-inforce the customized home care techniques that apply specifically to your implant configuration. This visit serves as both a therapeutic cleaning and an educational feedback loop.
7. Common Mistakes When Brushing Implants
The path to implant failure is often paved with good intentions. Patients understand the importance of keeping their implants clean, but in their enthusiasm, they frequently adopt counterproductive habits. Recognizing these common errors is the first step toward correcting them and ensures that your home care efforts move you toward health, not harm.
Using Hard-Bristled Brushes
The belief that “harder cleans better” is a persistent and dangerous myth. Toothbrush manufacturers often label hard-bristled brushes as “firm” or “for heavy cleaning.” This implies a deeper clean. In reality, a hard-bristled brush acts like sandpaper on the polished surfaces of an implant abutment and the glaze of a porcelain crown.
The sharp, rigid tips of hard bristles do not flex to adapt to the complex, concave contours of an implant restoration’s emergence profile. Instead, they skip over these curved surfaces, missing the biofilm entirely while concentrating force on the high points. This causes two severe problems. First, it abrades the highly polished, mirror-smooth neck of the titanium abutment. A roughened abutment surface accelerates aggressive biofilm formation. Second, it traumatizes the thin, avascular peri-implant mucosa. Over time, this mechanical trauma causes gingival recession. Once the mucosa recedes, the darker, grayish titanium substructure becomes visible through the thin tissue, creating a permanent, uncorrectable aesthetic defect. Never use a brush labeled medium, hard, or firm on any dental implant restoration.
Aggressive Scrubbing
Modern hygiene philosophy emphasizes the distinction between debridement and abrasion. Effective plaque removal requires systematic, low-force contact that respects the tissues. Many patients harbor anxiety about implant failure and overcompensate by scrubbing with excessive force. This “scrubbing” mentality directly contradicts the biological needs of peri-implant tissues.
Aggressive horizontal scrubbing with heavy pressure causes soft tissue laceration and recession, exactly as a hard brush does. Even with a soft brush, too much force bends the bristles and flattens them against the tooth, preventing their tips from engaging the critical subgingival zone. If you notice that the bristles of your new toothbrush flare out after just a few weeks, you are using too much pressure. Let the brush do the work. Electric toothbrushes with pressure sensors provide excellent biofeedback, often lighting up or pausing when you exceed a safe force threshold. Implant patients should actively practice a lighter grip. Hold a manual toothbrush like a pen, using your fingertips, not your whole hand. The goal is to gently agitate and sweep away the soft biofilm, not to scour a stain off a hard surface.
Neglecting Interdental Areas
The most common pattern of peri-implant bone loss begins in the interproximal space. The anatomy of a natural tooth root includes a concavity that faces the interdental space. The implant abutment, while circular in cross-section, creates a protected niche between it and the adjacent root. Food traps easily in this zone, and biofilm matures undisturbed because a toothbrush simply cannot reach it.
Patients often report that they floss, but when questioned, they admit to only flossing the contacts between natural teeth. An implant crown requires dedicated, systematic interdental cleaning around every exposed abutment surface. Every implant site demands attention. Failing to use an interdental brush or an implant-specific floss daily is equivalent to not cleaning the sides of the implant at all. Over months and years, this neglected biofilm triggers the localized bone loss that so often leads to the discovery of peri-implantitis at a routine dental check-up. Integrate interdental cleaning as an unskippable part of your morning and evening routine, before you brush.
Skipping Professional Check-Ups
The insidious nature of peri-implant disease makes routine professional evaluation indispensable. Early peri-implant mucositis often causes no pain. The only signs may be subtle redness or slight bleeding upon touch that the patient may not notice or may dismiss as “normal.” By the time a patient detects discomfort, mobility, or a bad taste, the disease has often progressed to deep, advanced peri-implantitis with significant bone loss.
The standard “six-month checkup” model for natural teeth may be insufficient for some implant patients. As stated, a three-to-four-month recall interval provides a much safer observation window. During this visit, the clinician compares baseline probing depths and radiographs taken at the time of restoration to current measurements. A change of even one millimeter in probing depth, when accompanied by bleeding, signals active disease. Skipping these maintenance visits removes the safety net that catches peri-implant disease in its reversible stage. You cannot effectively manage what you do not measure. View these appointments as a non-negotiable investment in protecting the surgical and restorative investment you have already made.
8. Patient Education and Compliance
Clinical success depends on technical skill, but long-term survival depends on patient behavior. You are the primary caregiver for your dental implants. The most brilliantly executed surgical placement and the most precisely engineered porcelain crown will fail in a mouth that does not receive consistent, correct daily care. Recognizing warning signs and adopting lifelong compliant habits places the destiny of your implant squarely in your own hands.
Recognizing Warning Signs
You must become intimately familiar with the normal, healthy appearance and feel of the tissues surrounding your implant. Healthy peri-implant mucosa typically appears pale pink and firm. It may have a slightly more matte, stippled texture similar to that of attached gingiva. When you clean around it, it should not bleed. Minor bleeding during aggressive flossing might occur occasionally even in healthy tissue, but consistent, easy bleeding is a red flag.
Monitor for these specific warning signs daily:
- Bleeding on Brushing or Interdental Cleaning: Easy, consistent bleeding is the cardinal sign of peri-implant mucositis.
- Color Change: Mucosa that appears beefy red, bluish-purple, or dusky compared to surrounding tissues signals inflammation.
- Swelling or Puffiness: A swollen, glossy appearance of the marginal gum around the implant.
- Suppuration: Any pus or discharge emerging from the implant sulcus when you press on the gum. This indicates active, deep infection and requires immediate professional attention.
- Change in Sensation: A dull ache, throbbing sensation, or a feeling of pressure in the implant area without chewing.
- Bad Taste or Odor: A persistent foul taste or odor localized to the implant site, despite cleaning.
- Mobility: Any perceived movement in the implant restoration. A properly osseointegrated implant should feel as solid as an immovable rock.
If you observe any of these signs, do not wait for your next scheduled cleaning. Contact your dental provider immediately. Early intervention during the mucositis stage can completely resolve the condition with a professional cleaning and refined home care. Delayed intervention condemns you to surgical management and potential implant loss.
“Bleeding is not normal. The gum around a healthy implant is like skin; it seals and protects. If it bleeds when you brush, it is sending you a signal that you have a bacterial infection that has breached that seal.”
Encouraging Routine Habits
Consistency requires a habit, and a habit requires a cue. Tie your implant cleaning routine to an existing, deeply ingrained daily trigger. For instance, after your nightly shower, immediately proceed to the sink for interdental cleaning. Or clean immediately after your morning coffee. The trigger must be consistent.
Invest in the correct tools and make them convenient. Keep an interdental brush kit on the bathroom counter, not hidden in a drawer. Store a water flosser on the countertop, filled and ready to go. Any friction in the process, such as having to dig through a cluttered cabinet to find your floss, reduces the likelihood of compliance. Consider travel-sized versions of your essential implant care tools in your work bag for an after-lunch cleaning, especially if you wear a full-arch prosthesis that traps food.
Lifestyle Factors
Systemic health directly influences the oral environment and the inflammatory response driving peri-implant disease. The two most impactful lifestyle factors are smoking and glycemic control in diabetes.
Tobacco smoking, including vaping with nicotine, profoundly constricts the blood vessels in the oral mucosa. This reduces the already-limited blood supply to peri-implant tissues, masking the clinical signs of inflammation. A smoker may not exhibit the characteristic bleeding on probing that signals early disease, leading to a false sense of security while bone destruction advances silently. Nicotine also impairs the function of immune cells, including neutrophils and macrophages, which fight the bacteria colonizing the implant surface. Cigarette smoking remains one of the strongest risk factors for implant failure and peri-implantitis. Ceasing all tobacco and nicotine products provides the single greatest lifestyle improvement for implant longevity.
Poorly controlled diabetes mellitus, characterized by chronically elevated blood glucose, has a similar detrimental effect. High glucose levels impair wound healing, alter the oral microbiome to favor pathogenic species, and create a systemic pro-inflammatory state that fuels the destruction of the bone supporting an implant. Well-controlled diabetes, with HbA1c levels within the target range advised by your physician, does not preclude implant success. Diligent blood sugar management, combined with meticulous oral hygiene, creates a strong defense against complications.
9. Advances in Implant Maintenance Technology
The world of preventive dentistry is experiencing a digital revolution. For decades, the toothbrush was a mechanical instrument, unchanged in principle. Now, it is becoming a connected health device. These technological advances offer unprecedented support for the implant patient, providing real-time feedback, data tracking, and novel material sciences that actively combat biofilm formation. Integrating these innovations into your routine can elevate your maintenance protocol to a new level of precision.
Smart Electric Toothbrushes
The modern smart toothbrush transcends simple sonic vibration. It acts as a coach, a data logger, and a safety monitor. These brushes use Bluetooth connectivity to pair with a smartphone application that displays real-time 3D mapping of the dentition. The app tracks which zones you have cleaned and, more importantly, which zones you have consistently missed.
For the implant patient, the pressure sensor feature is transformative. The brush head uses haptic feedback, often a red light or a specific vibration pattern, to alert you the moment you exceed a pre-set pressure threshold. This immediate biofeedback trains you to permanently lighten your brushing force, protecting your implant abutments and mucosal tissue from abrasive trauma. The app also logs the duration of brushing, encouraging compliance with the prescribed two-to-four-minute routine. Some advanced models use artificial intelligence to analyze your brushing pattern and offer personalized tips, such as “spend more time on the lower right lingual quadrant.” These devices turn a mindless daily chore into a guided, data-driven therapy session.
Guided Oral Hygiene Apps
Beyond the toothbrush ecosystem, standalone oral hygiene apps serve as interactive educational and motivational platforms. Dentists and dental hygienists can create personalized visual treatment plans within these apps, highlighting the specific implant sites and recommending the exact interdental tools, such as a pink 1.2mm interdental brush or a soft rubber-tipped perio-aid, to be used at each location.
These apps often feature instructional videos demonstrating the correct technique for cleaning under a specific bridge design or navigating a complex implant-supported overdenture bar. They can also serve as a symptom diary. You can photograph any area of concern, such as a red spot on the gum, and securely share it with your dental provider for remote triage. This guided support bridges the gap between professional appointments, ensuring that the complex home care instructions do not get forgotten over time.
Antimicrobial Coatings and Toothpastes
Material science is moving beyond passive titanium toward surfaces that actively resist bacterial colonization. Researchers have developed novel antimicrobial coatings for implant abutments and prosthetic components. These include surfaces doped with silver nanoparticles, which release ions toxic to bacterial cell walls, or coatings with photosensitive agents that generate reactive oxygen species upon light exposure, effectively oxidizing and killing bacteria on the surface. While these surfaces show promise in reducing early biofilm formation, mechanical plaque removal remains essential, as a saliva-derived protein film eventually coats any surface, potentially blocking the antimicrobial effect.
For home care, toothpaste formulations now go beyond fluoride. Specialty pastes formulated for implant maintenance incorporate ingredients like hydroxyapatite, a biomimetic calcium phosphate that can fill in microscopic scratches on prosthetic surfaces, restoring a smooth, plaque-resistant finish. Other pastes utilize a dual-action system with activated oxygen to lift stains and disrupt the bacterial matrix, while remaining ultra-low in abrasivity to protect the ceramic glaze. Probiotic toothpastes introduce beneficial bacterial strains like Lactobacillus paracasei, which compete with pathogenic bacteria for space on oral surfaces, theoretically favoring a healthy, non-inflammatory biofilm. While these represent exciting frontiers, their long-term role in preventing peri-implantitis is still being defined through ongoing clinical research.
Conclusion
Mastering the care of dental implants requires understanding that an implant is a synthetic device lacking natural biological defenses, making meticulous, atraumatic cleaning the single most important factor for long-term success. The core of effective maintenance combines extra-soft brushing, specialized interdental tools, and consistent professional monitoring to disrupt biofilm before it triggers irreversible bone loss. By adopting these precise techniques and recognizing early warning signs, you transition from a passive patient to an empowered guardian of your implant, ensuring it remains a functional, aesthetic, and permanent solution for a lifetime.
FAQ
How soon after dental implant surgery can I brush the area?
You should avoid brushing the surgical site directly for the first week. During this initial healing phase, you will typically rinse with a prescribed chlorhexidine mouthwash. After the first week, you can start using an extra-soft surgical toothbrush very gently on the adjacent teeth, being careful to avoid the incision line until your surgeon advises you it is safe to proceed.
Are electric toothbrushes better than manual ones for implants?
Yes, for the vast majority of patients. Electric toothbrushes with sonic or oscillating-rotating technology offer superior biofilm removal and often include built-in pressure sensors that prevent you from brushing too hard. This feature protects the delicate gum tissue and the polished surfaces of your implant abutment from abrasive damage.
Can I use whitening toothpaste on my implant crown?
You should avoid high-abrasive whitening toothpaste. It will not whiten the porcelain or zirconia crown, which is color-stable. Instead, the abrasive particles may micro-scratch the restoration’s glaze, making it rougher and more prone to accumulating plaque and staining over time. Use a low-abrasive gel formula.
Why does my gum bleed around my implant when I brush?
Bleeding is never normal. It signals active inflammation called peri-implant mucositis, caused by bacterial biofilm left behind at the gumline or between the teeth. It is a warning sign that your cleaning technique needs to be immediately improved and focused on that area. If improved cleaning does not resolve the bleeding within a few days, consult your dentist.
What is the best way to clean under a fixed full-arch implant bridge?
The most effective tool is a water flosser with a specialized soft rubber-tip attachment. This allows you to flush food debris and non-adherent bacteria from the intaglio (underside) of the bridge. For areas you can access, superfloss with a spongy component allows you to mechanically wipe the abutment surface, but the water flosser is essential for the hidden spaces.
Additional Resource
For further information, the American Academy of Implant Dentistry offers evidence-based patient education materials on its website. You can visit their patient resources section at aaid.com to find visual guides and the latest recommendations on implant maintenance and health.
Disclaimer: The information provided in this article is intended for educational and informational purposes only. It is not a substitute for professional medical advice, diagnosis, or treatment. Always seek the guidance of your qualified dental or medical provider with any questions you may have regarding your dental health or a medical condition. Never disregard professional dental advice or delay in seeking it because of something you have read in this article.