What Is A Two Stage Dental Implant?
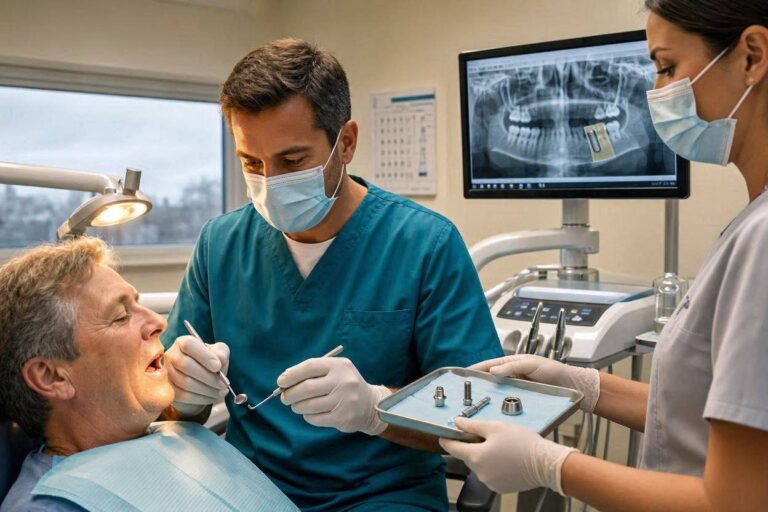
You sit in the consultation room, and your surgeon explains the implant process. They mention something called a “two stage” approach. The implant will be placed, buried under the gum, and left to heal. Months later, you will return for a second procedure to uncover it. You wonder why two surgeries are necessary when you have heard about same-day implants. What is the purpose of waiting? What happens during each stage? And why would your surgeon recommend this approach over a single-stage procedure?
A two stage dental implant procedure is the traditional, time-tested approach to implant dentistry. It separates the surgical placement of the implant from its exposure to the oral environment, allowing osseointegration to occur protected beneath the gum tissue. This guide explains every aspect of two stage implant treatment, from the biological rationale to the surgical details and recovery timeline.
Defining the Two Stage Dental Implant
A two stage dental implant procedure involves two distinct surgical interventions separated by a healing period of several months.
Stage One
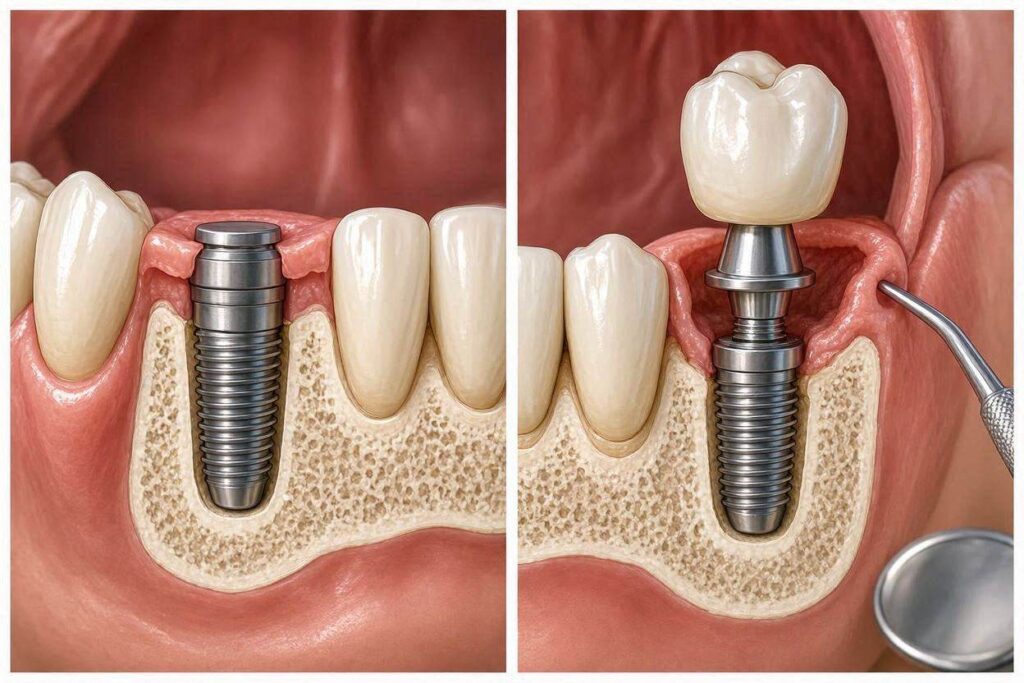
The implant fixture is surgically placed into the jawbone. A cover screw is placed on top of the implant to seal the internal connection. The gum tissue is then sutured completely over the implant, burying it beneath the mucosa. The implant is not visible in the mouth, and nothing protrudes through the gum.
The Healing Period
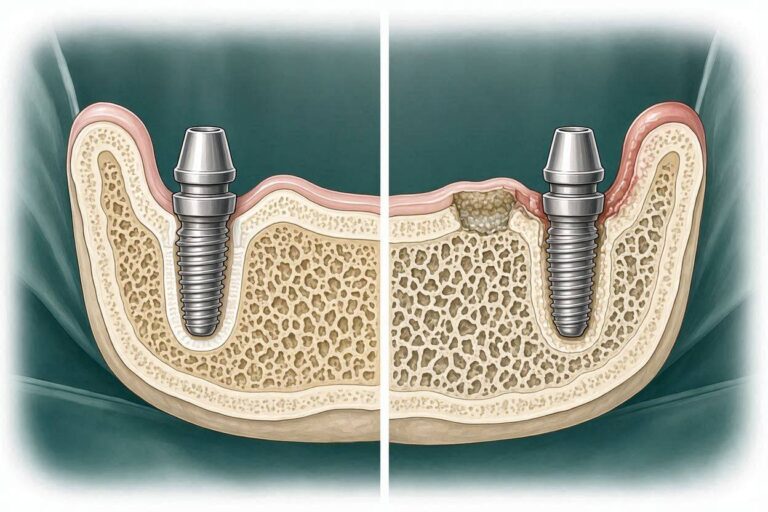
The implant remains buried under the gum for a period of 3 to 6 months, depending on the jaw location and individual healing factors. During this time, osseointegration occurs: living bone cells attach directly to the implant surface, creating a stable biological bond. The implant is protected from the bacteria-laden oral environment, from chewing forces, and from mechanical disturbance.
Stage Two
A second, minor surgical procedure exposes the implant. The surgeon makes a small incision in the gum over the implant, removes the cover screw, and attaches a healing abutment that extends through the gum into the mouth. The gum tissue heals around this abutment over the following weeks, creating a tissue collar ready for the final restoration.
The Biological Rationale: Why Two Stages
The two stage approach is rooted in a fundamental principle of implant biology: osseointegration proceeds most predictably in a protected, undisturbed environment.
Protection from the Oral Environment
The mouth is a challenging place for healing. It contains:
- Hundreds of bacterial species
- Variable pH from foods and beverages
- Mechanical forces from chewing, tongue movement, and oral hygiene
- Temperature fluctuations
By burying the implant completely under the gum, the surgeon creates a sealed environment where the bone can heal without exposure to these factors.
Prevention of Bacterial Contamination
The junction between an implant and the gum tissue is not a perfect seal, particularly during early healing. In a single-stage approach, where a healing abutment protrudes through the gum immediately, this junction represents a potential pathway for bacteria to travel down toward the healing bone-implant interface.
In a two stage approach, the gum is sutured closed above the implant. There is no communication between the oral cavity and the implant until osseointegration is well established. This biological seal provides maximum protection during the most vulnerable phase of healing.
Elimination of Micromovement
Even small movements of an implant during healing can disrupt osseointegration. Forces transmitted through a healing abutment from tongue pressure, chewing soft foods, or denture wear can cause micromotion at the bone-implant interface.
A submerged implant experiences no such forces. It rests undisturbed in the bone, allowing the delicate process of bone attachment to proceed without mechanical interference.
Predictability
The two stage approach has decades of research and clinical experience supporting its success. When the protocol is followed correctly, success rates exceed 95% for most applications. This predictability makes it the standard against which other protocols are measured.
Stage One: Implant Placement Surgery
The first stage is the primary surgical procedure.
Pre-Surgical Preparation
Before surgery, the implant team completes:
- Comprehensive clinical examination
- Imaging (panoramic X-ray, cone beam CT)
- Treatment planning, often including virtual implant placement
- Medical history review and clearance
- Informed consent discussion
The Surgical Procedure
| Step | Description |
|---|---|
| Anesthesia | Local anesthesia administered; sedation may be offered |
| Incision | An incision is made along the crest of the ridge where the implant will be placed |
| Flap elevation | The gum tissue is carefully reflected to expose the underlying bone |
| Osteotomy preparation | Progressively larger drills create a precisely sized site in the bone for the implant |
| Implant placement | The implant is threaded or pressed into the prepared site |
| Cover screw placement | A small screw is placed into the top of the implant to seal the internal connection |
| Closure | The gum tissue is repositioned and sutured completely over the implant |
| Post-operative instructions | The patient receives care instructions for the healing period |
The Cover Screw
The cover screw is a small, low-profile screw that threads into the internal connection of the implant. Its purpose is to:
- Seal the implant’s internal chamber from tissue ingrowth
- Provide a smooth surface over which the gum can heal
- Be easily located and removed during stage two surgery
Immediate Post-Operative Period
After stage one surgery, the implant site heals like any surgical wound:
- Swelling peaks at 48–72 hours
- Discomfort is managed with prescribed or over-the-counter medication
- Sutures dissolve or are removed at 1–2 weeks
- The gum tissue heals completely over the implant within 2–4 weeks
- The patient may not feel or see any evidence of the implant
The Osseointegration Period
The months between stage one and stage two are when the most critical biological process occurs.
What Happens During Osseointegration
| Time Frame | Biological Process |
|---|---|
| Days 1–7 | Blood clot forms; inflammatory cells clean the site; growth factors released |
| Days 7–14 | New blood vessels form; osteoblast precursor cells migrate to the implant surface |
| Weeks 2–4 | Osteoblasts begin depositing woven bone directly onto the implant surface |
| Weeks 4–8 | Woven bone matures; remodeling begins |
| Weeks 8–12 | Lamellar bone replaces woven bone; bone-implant interface strengthens |
| Months 3–6 | Mature osseointegration; bone continues remodeling in response to future loading |
Typical Healing Times by Jaw Location
| Jaw Location | Typical Osseointegration Period |
|---|---|
| Anterior mandible (front lower) | 2–3 months |
| Posterior mandible (back lower) | 3–4 months |
| Anterior maxilla (front upper) | 3–4 months |
| Posterior maxilla (back upper) | 4–6 months |
The mandible generally heals faster due to denser bone and better blood supply. The posterior maxilla heals slowest due to less dense bone and proximity to the maxillary sinus.
Patient Experience During the Waiting Period
During osseointegration, the patient typically:
- Wears a temporary removable prosthesis if needed for aesthetics
- Eats a normal diet (avoiding extremely hard foods)
- Maintains oral hygiene carefully
- Experiences no pain related to the implant
- May feel slight awareness of the implant site initially, which fades
- Attends periodic check-up appointments to monitor healing
Stage Two: Implant Uncovering
The second stage is a minor surgical procedure, far less involved than the first.
Timing
Stage two is scheduled after the appropriate osseointegration period for the specific case. The surgeon may confirm readiness through:
- Clinical examination (absence of symptoms, healthy tissue)
- Radiographic evaluation (bone appearance around the implant)
- Occasionally, resonance frequency analysis to quantify implant stability
The Surgical Procedure
| Step | Description |
|---|---|
| Anesthesia | Local anesthesia at the implant site |
| Incision | A small incision is made over the implant, often using a tissue punch |
| Implant exposure | The cover screw is identified and the overlying tissue is cleared |
| Cover screw removal | The cover screw is unscrewed and removed |
| Healing abutment placement | A healing abutment is screwed into the implant |
| Tissue adaptation | The gum tissue is adjusted around the healing abutment if needed |
| Sutures | A few sutures may be placed to adapt the tissue around the abutment |
The entire procedure typically takes 15–30 minutes per implant.
The Healing Abutment
The healing abutment is a temporary component that:
- Extends from the implant through the gum into the mouth
- Shapes the gum tissue to create a natural emergence profile
- Protects the implant’s internal connection during soft tissue healing
- Is wider and taller than the cover screw
- Remains in place for 2–4 weeks while the gum heals around it
After Stage Two
Following the uncovering procedure:
- Mild discomfort for 1–3 days
- The healing abutment is visible in the mouth
- Oral hygiene must be maintained carefully around the abutment
- The gum tissue matures around the abutment over 2–4 weeks
- After soft tissue healing, the restorative phase begins
The Restorative Phase
After stage two healing, the implant is ready for the final restoration.
Impressions
The dentist takes an impression of the implant and surrounding tissues. This can be:
- A traditional physical impression with impression coping and material
- A digital impression using an intraoral scanner
Abutment Selection
The final abutment is selected or custom-fabricated. This is the component that will connect the implant to the crown. It replaces the healing abutment.
Crown Fabrication
The dental laboratory fabricates the final crown based on the impression. This typically takes 1–3 weeks. A temporary crown may be placed on the implant during this period.
Crown Delivery
The final crown is placed:
- For screw-retained crowns: The crown is screwed directly to the implant or abutment
- For cement-retained crowns: The crown is cemented onto the abutment
The occlusion (bite) is carefully checked and adjusted.
Two Stage vs. One Stage Implant Procedures
Understanding the differences helps explain why a surgeon might choose one approach over the other.
One Stage Procedure
In a one stage procedure, a healing abutment is placed at the time of implant surgery, extending through the gum. There is no second uncovering surgery. The implant is exposed to the oral environment from the beginning.
Comparison Table
| Feature | Two Stage | One Stage |
|---|---|---|
| Number of surgeries | 2 | 1 |
| Implant exposure | Buried under gum | Healing abutment visible |
| Protection during healing | Maximum | Moderate |
| Bacterial contamination risk | Lower | Potentially higher |
| Micromovement risk | None | Possible |
| Predictability data | Extensive | Good; slightly less than two stage in some applications |
| Treatment time | Longer (two procedures) | Shorter (one procedure) |
| Immediate loading possible | No | Sometimes |
| Indicated for: | Most cases; complex cases; grafting | Selected cases with excellent primary stability |
When Two Stage Is Preferred
| Clinical Situation | Reason for Two Stage |
|---|---|
| Bone grafting performed simultaneously | Grafted bone needs maximum protection |
| Poor bone quality | Healing less predictable; needs protection |
| Patient bruxism or heavy occlusion | Eliminates early loading risk |
| Anterior aesthetic zone | Allows better soft tissue management |
| History of implant failure | Maximum predictability needed |
| Surgeon preference | Traditional training emphasizes two stage |
| Patient wears a denture over the site | Protects implant from denture pressure |
When One Stage May Be Appropriate
- Excellent primary stability achieved
- Good bone quality and quantity
- No grafting required
- Non-aesthetic zone
- Patient prefers to avoid second surgery
- Surgeon experienced with one stage protocol
Advantages of the Two Stage Approach
Proven Predictability
The two stage protocol has the longest track record and the most extensive research support of any implant protocol. Decades of studies document success rates exceeding 95%.
Maximum Protection During Healing
By burying the implant, the surgeon eliminates risks from:
- Bacterial ingress along the abutment-implant junction
- Mechanical forces transmitted through the abutment
- Patient non-compliance with oral hygiene during early healing
- Accidental loading from tongue, food, or opposing dentition
Better Soft Tissue Management
The two stage approach allows for more deliberate management of the gum tissue. At stage two, the surgeon can position the tissue, create adequate keratinized (tough) gum around the implant, and optimize the emergence profile. This can lead to better long-term aesthetics and tissue health.
Safer for Complex Cases
When bone grafting, sinus lifts, or other adjunctive procedures are performed, the two stage approach provides the safest environment for both the implant and the graft to heal.
Disadvantages of the Two Stage Approach
Additional Surgery
The patient must undergo a second surgical procedure, which means:
- Additional appointment time
- Additional recovery period (though minor)
- Additional anxiety for surgery-averse patients
- Additional cost (though often included in the treatment fee)
Longer Total Treatment Time
The two stage approach adds time to the overall treatment sequence:
- Stage one healing: 3–6 months
- Stage two and soft tissue healing: 2–4 weeks
- Restoration: 2–4 weeks
- Total: 4–8 months from implant placement to final crown
Longer Period Without Visible Tooth
For patients in aesthetic zones, the implant is buried and not visible. A temporary removable prosthesis must be worn during the osseointegration period. This may be less comfortable and less aesthetic than an immediately loaded temporary crown.
Psychological Impact
Some patients find it unsettling to have an implant “hidden” under their gum, unable to see or feel it. They may worry about whether it is healing properly. Good communication from the surgical team can address these concerns.
The Healing Abutment and Tissue Shaping
The healing abutment placed at stage two plays an important role in creating a natural-looking final result.
What Healing Abutments Do
- Create an emergence profile: The tissue heals around the abutment in a shape that mimics a natural tooth emerging from the gum
- Establish tissue cuff: A collar of keratinized tissue forms around the abutment, providing a seal
- Facilitate impressions: The abutment keeps the tissue open, allowing easy access for impression-taking
- Guide final abutment selection: The tissue response to the healing abutment informs selection of the final abutment
Types of Healing Abutments
| Type | Description |
|---|---|
| Standard | Cylindrical; various diameters and heights |
| Anatomic | Shaped more like a tooth cross-section |
| Custom | Individually designed for the specific site |
| Narrow | For anterior teeth with limited space |
Special Considerations
Two Stage Implants in the Aesthetic Zone
The anterior maxilla (front upper jaw) presents the greatest aesthetic challenges. The two stage approach in this area requires careful planning:
- The implant must be positioned to support a natural-looking crown
- The bone and gum tissue must be adequate to create natural contours
- Stage two must manage the tissue to create an ideal emergence profile
- Temporary restorations may be used to shape the tissue during healing
Two Stage Implants with Bone Grafting
When bone grafting is performed simultaneously with implant placement, the two stage approach is almost always indicated:
- The grafted bone needs protected healing time
- The implant provides stability to the graft
- The submerged environment protects the graft from contamination
- The osseointegration period allows the graft to mature
Two Stage Implants in the Posterior Mandible
The posterior mandible offers dense bone and generally predictable healing. However, the presence of the inferior alveolar nerve requires careful implant positioning. Two stage placement allows the surgeon to verify bone availability and nerve position before committing to implant exposure.
Recovery and Aftercare
After Stage One
| Time | Expectations | Care Instructions |
|---|---|---|
| Days 1–3 | Swelling, mild to moderate discomfort | Ice, pain medication, soft diet, rest |
| Days 3–7 | Decreasing swelling, minimal discomfort | Gentle salt water rinses, continue soft diet |
| Week 1–2 | Suture dissolution or removal | Gradual return to normal diet |
| Weeks 2–8 | No symptoms; implant healing beneath gum | Normal oral hygiene; avoid trauma to area |
| Weeks 8+ | Awaiting stage two | Regular check-ups |
After Stage Two
| Time | Expectations | Care Instructions |
|---|---|---|
| Days 1–3 | Mild discomfort at the exposure site | Gentle cleaning around healing abutment |
| Days 3–7 | Tissue adapting to abutment | Begin gentle brushing around abutment |
| Weeks 2–4 | Mature tissue cuff formed | Normal hygiene; ready for impressions |
Conclusion
A two stage dental implant procedure places the implant fixture into the jawbone and completely buries it under the gum tissue for a healing period of 3 to 6 months, during which osseointegration occurs in a protected environment free from bacterial exposure and mechanical forces. A second minor surgery then exposes the implant and places a healing abutment to shape the gum tissue before the final crown is fabricated. This approach offers the highest documented predictability, maximum protection during healing, and optimal soft tissue management, making it the preferred protocol for complex cases, simultaneous bone grafting, and any situation where maximum implant success assurance is desired.
Frequently Asked Questions
Why do I need two surgeries for a dental implant?
The first surgery places the implant in the bone. The implant is then buried under the gum to heal in a protected environment for several months. The second, minor surgery exposes the implant so the final crown can be attached. This approach maximizes the predictability of implant success.
How long between the first and second stage of a dental implant?
The healing period between stages is typically 3 to 6 months, depending on the jaw location. Lower jaw implants may heal in 3 to 4 months, while upper jaw implants often require 4 to 6 months.
Is the second stage of implant surgery painful?
Stage two is a minor procedure, far less involved than the initial implant placement. Most patients experience only mild discomfort for 1–3 days, managed easily with over-the-counter pain relievers.
Can I have a temporary tooth during the healing period?
Yes. A removable temporary prosthesis (flipper, partial denture, or modified existing denture) can be worn during the osseointegration period. This temporary tooth must be designed not to place pressure on the healing implant.
Is a two stage implant better than a one stage implant?
“Better” depends on the clinical situation. Two stage implants offer maximum protection during healing and the highest documented predictability. One stage implants eliminate the second surgery. Your surgeon will recommend the approach best suited to your specific anatomy, bone quality, and restorative needs.
Additional Resources
- American Academy of Implant Dentistry: www.aaid.com
- Academy of Osseointegration: www.osseo.org
- International Team for Implantology: www.iti.org