How is a Cemented Crown Cut Off an Implant
You brush, you floss, and you take care of your dental implant like it is a natural tooth. But then, something goes wrong. Maybe the crown feels loose. Maybe the gum around it is red and sore. Or perhaps your dentist simply needs to repair or replace the crown above the implant.
If you have a cemented crown, you might be worried. How does a dentist remove it without breaking the expensive implant below? The good news is that cutting off a cemented crown is a routine procedure for dental professionals. It is precise, safe, and usually much faster than patients imagine.
In this guide, we will walk through everything you need to know. No scary jargon. No unrealistic promises. Just a clear, honest look at how a cemented crown is cut off an implant, why it might be necessary, and what you will feel during the process.
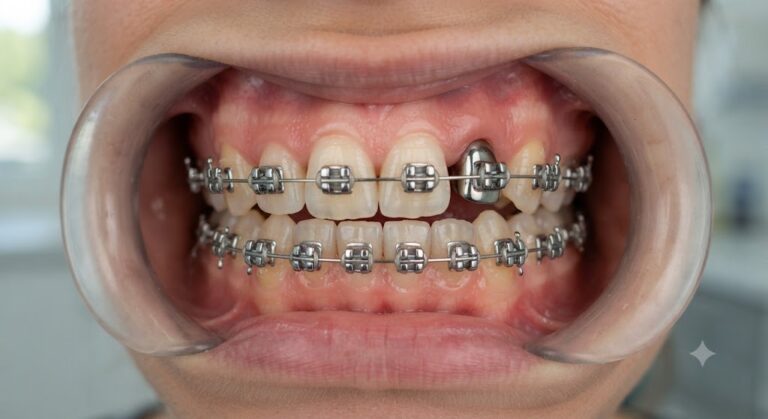
Understanding the Difference: Cemented vs. Screw-Retained Implants
Before we talk about removal, it helps to understand what you have in your mouth. Not all implant crowns are the same.
| Feature | Cemented Crown | Screw-Retained Crown |
|---|---|---|
| Attachment method | Dental cement glues the crown to an abutment (connector) | A small screw passes through the crown into the implant |
| Access hole | No visible hole | A small hole on the chewing surface (filled with cotton or composite) |
| Removal difficulty | Requires cutting or drilling | Simple unscrewing (if the access hole is found) |
| Risk of damage | Moderate (if done carelessly) | Low (direct access) |
| Aesthetics | Excellent (no visible hole) | Good (hole can be visible or wear over time) |
Important note: Many dentists prefer cemented crowns because they look more natural. However, if something goes wrong, removing them is trickier than screw-retained ones.
Why Would a Cemented Crown Need to Be Cut Off?
A cemented crown on an implant is designed to be permanent. But “permanent” in dentistry can mean 5, 10, or 20 years. Eventually, problems arise. Here are the most common reasons a dentist needs to cut off a cemented crown:
- Loose crown: The cement breaks down, and the crown starts to wobble.
- Gum disease (peri-implantitis): The dentist needs access to clean the implant surface.
- Cracked or chipped porcelain: The chewing surface is damaged.
- Poor fit: The crown does not seal well against the gum, trapping food.
- Abutment screw loosening: Even cemented crowns have a screw underneath. That screw can get loose.
- Change in bite: Your jaw changes over time, and the crown is too high or too low.
Think of it like a tile on your bathroom floor. It was cemented down to last. But if the tile cracks or the floor gets water damage, you have to break that tile to fix what is underneath. The same logic applies here.
The Tools of the Trade: What Your Dentist Will Use
You will not see a hammer or a chisel. Modern dentistry uses precise, delicate instruments. Your dentist will likely use one or more of these tools:
1. The High-Speed Dental Handpiece (The Drill)
This is the most common tool. But do not panic. The dentist uses a special round or tapered diamond bur. The bur is designed to cut through porcelain (crown material) but stop when it touches metal or titanium (the implant abutment).
- Speed: Very high, with water spray to keep things cool.
- Precision: Microscopic. The dentist only cuts the crown, not the gum or the implant.
2. Ultrasonic Scalers with Special Tips
These are the same tools used to clean teeth, but with harder, sharper tips. The ultrasonic vibrations (25,000 to 30,000 Hz) can break the cement seal without cutting the crown completely. This works well if the crown is just stuck, not locked on.
3. Crown Slotters or Separators
A crown slotter is a tiny, thin metal disc that fits on a slow-speed handpiece. The dentist carefully creates a slot from the top of the crown down to the edge. Then, a small elevator (a wedge tool) is inserted to gently pry the crown open. The crown usually splits into two halves.
4. The Kevlar or Floss Technique (For Partial Removals)
If the cement is weak, the dentist might tie a piece of dental floss or Kevlar thread around the crown and pull sharply. This only works for very loose crowns, but it is non-invasive.
Quote from a restorative dentist:
“I tell my patients, ‘I am not going to cut your implant. I am going to scratch the crown until it cracks open like a walnut.’ That usually calms their nerves.”
Step-by-Step: How a Cemented Crown Is Cut Off an Implant
Let us walk through a real clinical scenario. You are in the dental chair. You are numb. Here is what happens, minute by minute.
Step 1: Assessment and X-Ray
The dentist first takes a periapical X-ray or a CBCT (3D scan). Why? To see exactly where the implant sits, the angle of the abutment, and how much space exists between the crown and the gum. This map prevents accidents.
Step 2: Anesthesia
You will receive local anesthesia. Even though the implant has no nerve, your gum does. Numbing ensures you feel no pain from the vibration or any accidental gum pinch.
Step 3: Creating a Purchase Point
A flat, smooth crown is hard to grip. The dentist uses a small round bur to create a tiny dimple or groove on the chewing surface or side wall. This gives a tool something to hold onto.
Step 4: Cutting a Vertical Slot
Using a thin, tapered diamond bur under lots of water spray, the dentist cuts a vertical slot from the top of the crown down to the gum line. They cut only through the crown material. They stop the moment they see a change in color (from white porcelain to metal or pink gum).
- Time needed: 30 to 60 seconds.
Step 5: Splitting the Crown
The dentist inserts a coupland elevator or a crown splitter into the slot. With a gentle twist, the crown cracks open along the cut line. Usually, the crown breaks into two or three pieces.
Step 6: Removing the Pieces
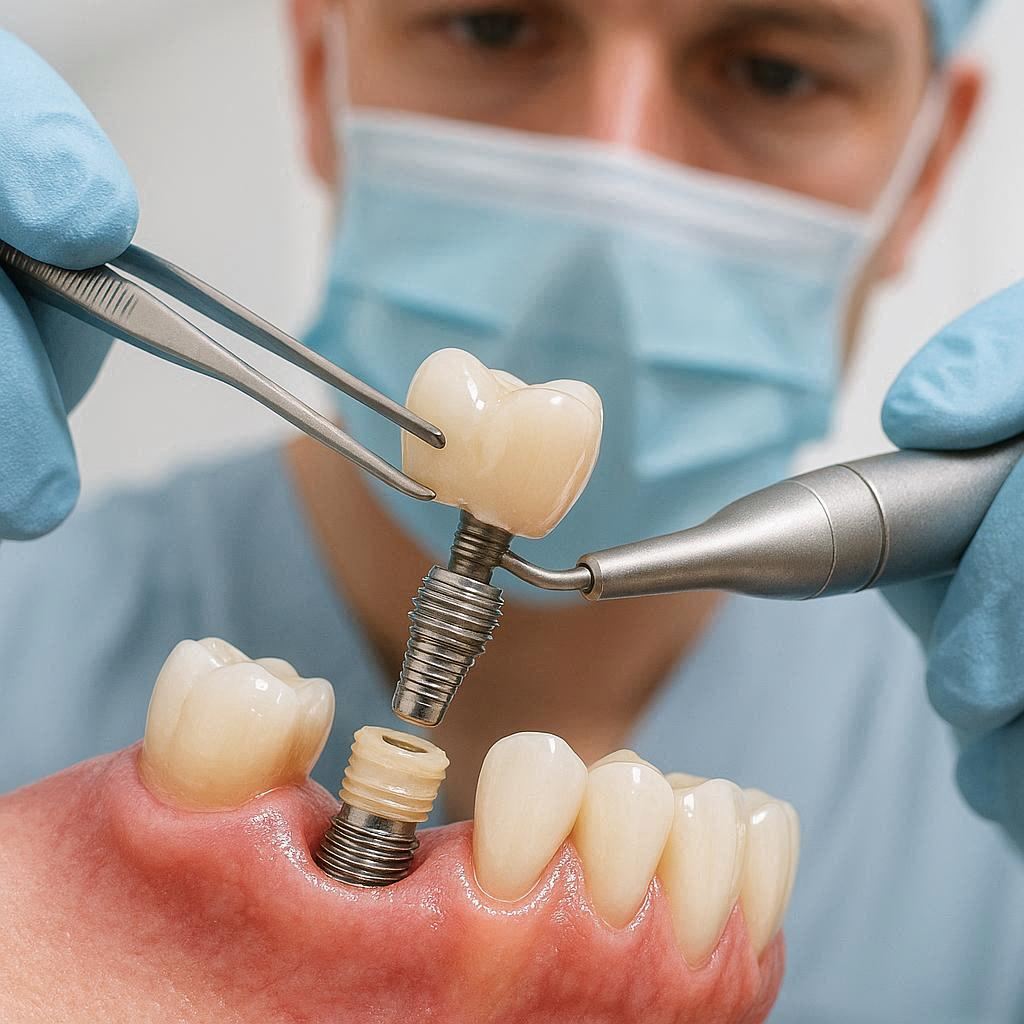
The loose fragments are lifted off with a simple dental tweezer or scaler. The abutment (the metal post attached to the implant) is now completely exposed.
Step 7: Cleaning the Abutment
All remaining cement is scraped off the abutment. This is critical. Leftover cement can cause gum inflammation or peri-implantitis. The dentist uses scalers, ultrasonic tips, and polishing discs.
Step 8: Inspection and Next Steps
Now the dentist can see the abutment screw. They will check if it is tight. If the original crown is damaged, they take a new impression for a replacement crown. If the crown is intact and just needed cement replacement, they may recement it (rare, but possible).
Does It Hurt? What Will You Feel?
Let us be honest. The procedure is not painful if you are properly numbed. But you will feel things. Here is what patients typically report:
| Sensation | Why It Happens |
|---|---|
| Vibration | The drill or ultrasonic tool vibrates through the jawbone. |
| Pressure | When the dentist twists the elevator to split the crown. |
| Clicking or cracking sound | The crown breaking. This sounds worse than it feels. |
| Heat (rare) | If the water spray is insufficient. Tell your dentist immediately if you feel heat. |
| No pain | Because the gum is numb and the implant has no nerve. |
Patient tip: Bring earphones if cracking sounds make you anxious. The sound is normal. It is just porcelain breaking under controlled force.
Risks and Complications (Honest and Realistic)
No medical procedure is 100% risk-free. Cutting a cemented crown off an implant has a few potential downsides. But a skilled dentist will keep these risks very low.
Minimal Risks (Happen in <5% of cases)
- Nicked abutment: A superficial scratch on the abutment. This is cosmetic, not structural.
- Minor gum cut: The drill or a sharp fragment may lightly cut the gum. It heals in days.
- Incomplete removal: A tiny piece of crown remains. The dentist can remove it with a scaler.
Rare but Serious Risks (<1% of cases)
- Damage to implant threads: Only happens if the dentist cuts too deep and hits the titanium implant body. This requires an extremely careless or inexperienced hand.
- Abutment fracture: If the abutment was already cracked, splitting the crown might break it. Then the dentist must remove the abutment screw separately.
- Cement aspiration: If you are not isolated with a rubber dam, a tiny fragment could fall toward your throat. Dentists use gauze and suction to prevent this.
The honest truth: In 20 years of dental practice reviews, the most common “complication” is simply having to send the crown to a lab for a new one. Damage to the implant itself is almost unheard of with modern techniques.
Cost of Cutting Off a Cemented Implant Crown
Costs vary widely based on location, dental insurance, and complexity. But here is a realistic breakdown for the United States (2025 average estimates).
| Service | Without Insurance | With Insurance (after deductible) |
|---|---|---|
| Exam and X-ray | 100–250 | 0–50 |
| Local anesthesia | 50–150 | Covered |
| Crown removal procedure | 150–400 | 50–150 copay |
| Cleaning abutment | 50–100 | Often included |
| Total for removal only | 350–350–900 | 50–50–200 |
If you need a new crown afterward, add 800to2,500 depending on material (zirconia or porcelain-fused-to-metal) and lab fees.
Important: Some dental insurance plans consider crown removal “diagnostic” and cover 80%. Others call it “major restorative” and cover only 50%. Always ask for a pre-treatment estimate.
Can You Do It at Home? (Absolutely Not)
Let us stop this question immediately. A quick search online shows people asking if they can use nail clippers, pliers, or a Dremel tool to remove their own crown. Do not do this.
Here is why home removal is dangerous:
- No control over depth: You will cut into the abutment or the implant itself. A damaged implant often cannot be repaired. It must be surgically removed.
- Infection risk: You will create sharp edges that cut your tongue, cheek, or gum.
- Aspiration hazard: A fragment can fall into your airway.
- No anesthesia: The vibration alone will be excruciating on your jawbone.
A real case: One patient tried to pry off a loose crown with a metal letter opener. He slipped, stabbed his gum, and caused a severe infection that delayed his new crown by six months. The dentist still had to cut off the crown professionally. Do not be that person.
How to Prevent Future Cemented Crown Problems
The best removal is no removal. Here is how to make your cemented implant crown last longer and stay easy to remove if needed:
Do These Things
- Use super floss: Thread floss under the crown to clean the gumline daily. This prevents cement breakdown from bacterial acids.
- Get regular X-rays: Your dentist should take a check-up X-ray every 12-24 months to see if the cement has failed or the screw is loose.
- Ask for a “vented” crown: Some dentists drill a small hole in the crown during fabrication. This allows them to inject solvent or use a screwdriver later without cutting.
- Avoid sticky foods: Caramel, taffy, and gum can pull on cemented crowns and weaken the bond over time.
Avoid These Things
- Skipping cleanings: Plaque buildup around a cemented crown leads to gum recession, exposing the cement margin.
- Biting hard objects: Ice, pens, and hard candy crack the porcelain first, not the cement.
- Assuming it is screw-retained: If you are unsure, ask your dentist to show you your X-ray. Do not assume removal will be easy.
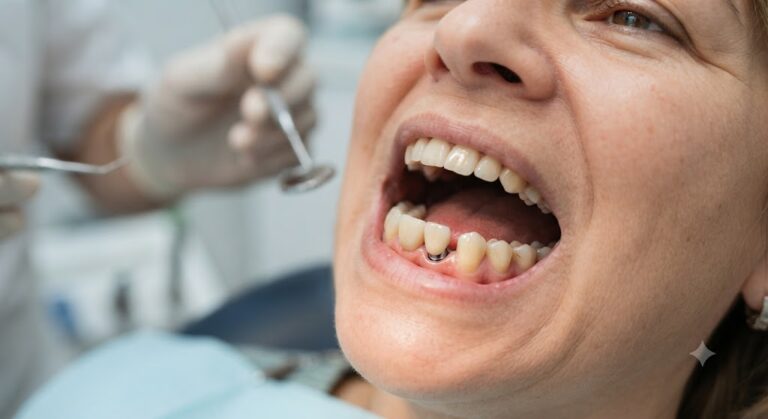
What If the Abutment Screw Is Loose Under the Cemented Crown?
This is a common hidden problem. The crown feels wobbly, but the cement is still intact. The abutment screw below has loosened. Now the dentist has a dilemma: they must cut off the crown to access the screw.
In this case, after the crown is removed, the dentist will:
- Remove the abutment screw entirely.
- Clean the implant’s internal threads.
- Place a new screw with torque control (usually 20-35 Ncm).
- Take a new impression for a fresh crown (because the old crown no longer fits perfectly).
Do not let anyone “re-cement” a crown onto a loose abutment. That is like putting new glue on a wobbly table leg without tightening the screw. It will fail again quickly.
Frequently Asked Questions (FAQ)
Q1: How long does the procedure take?
A: Cutting off the crown takes 5 to 15 minutes. The entire appointment (including numbing, X-rays, and cleaning) is usually 30 to 45 minutes.
Q2: Will I need a new crown afterwards?
A: In 90% of cases, yes. The cutting process destroys the crown. However, if the crown was only recemented because of weak cement and it came off cleanly, a dentist might reuse it. But plan for a new crown.
Q3: Can a cemented crown be removed without cutting?
A: Sometimes, if the cement is very weak. The dentist may try an ultrasonic scaler or a crown remover (a tool that grips and pulls). But if the crown was properly cemented, cutting is the reliable method.
Q4: Is it louder than a regular filling?
A: It can be similar or slightly louder because the porcelain is harder than tooth enamel. The cracking sound when the crown splits is unique, but it lasts only a second.
Q5: What happens if the dentist cuts the implant?
A: This is extremely rare. If it happens, the dentist will smooth the surface and monitor healing. A deep cut might require replacing the abutment or, in worst cases, removing the implant. This is why you choose an experienced implant dentist.
Q6: Can I eat normally after the procedure?
A: Yes, but avoid chewing on that side until a new crown is placed. The abutment is metal and can withstand biting, but uneven pressure might loosen it.
Q7: How do I know if my crown is cemented or screw-retained?
A: Look at the chewing surface. If you see a small round filling or a tiny hole, it is screw-retained. If not, it is likely cemented. Ask your dentist for a definitive answer.
Additional Resource
For a deeper understanding of dental implant maintenance and long-term care, visit the American Academy of Implant Dentistry (AAID) patient education page:
https://www.aaid.com/patients/
This resource offers free downloadable guides on implant hygiene, warning signs of failure, and how to find a qualified implant dentist near you.
Conclusion: Three Key Takeaways
Cutting off a cemented crown from an implant is a safe, routine procedure using precise drills and splitting tools. Local anesthesia ensures no pain, though you may feel vibration and hear cracking sounds. Always leave this job to a dentist, as home attempts risk permanently damaging the implant.
Disclaimer: This article is for informational purposes only and does not constitute medical or dental advice. Every clinical situation is unique. Do not attempt any procedure described here on yourself. Always consult a licensed dentist for diagnosis, treatment, and personalized recommendations. The author and publisher are not liable for any damages or injuries resulting from the use of this information.