How Should Dental Implants Be Cleaned?
A dental implant is a sophisticated medical device that replaces a missing tooth root and supports a visible crown, bridge, or denture. It is not a natural tooth, and it requires a distinctly different cleaning protocol. Failure to clean an implant correctly is the primary cause of peri-implantitis, a destructive inflammatory disease that leads to bone loss and implant failure. This guide provides the definitive, step-by-step protocol for cleaning dental implants at home and explains the essential role of professional maintenance. You will learn the exact tools, techniques, and schedules required to protect your implant investment for decades.
Why Implant Cleaning Is Fundamentally Different
A natural tooth attaches to the surrounding bone via the periodontal ligament, a resilient, vascular network of collagen fibers. This ligament provides a biological seal, a rich blood supply that delivers immune cells, and a shock-absorbing function. The gum tissue attaches to the tooth root via perpendicular connective tissue fibers inserted into cementum.
A dental implant has none of these structures. The titanium or zirconia implant body fuses directly to the bone—a rigid, non-resilient connection called osseointegration. There is no periodontal ligament and no ligament blood supply. The soft tissue attaches to the implant surface via a thin junctional epithelium and a circular cuff of connective tissue fibers that run parallel to the implant, not perpendicularly. This perimucosal seal is weaker and less capable of resisting bacterial invasion.
When bacterial plaque accumulates on the implant surface below the gumline, the host inflammatory response destroys the supporting bone. This process, peri-implantitis, can progress more rapidly than periodontitis around a natural tooth because the implant lacks the defensive vascular network of the periodontal ligament. Cleaning an implant is therefore a daily, lifelong discipline. The goal is to mechanically disrupt the bacterial biofilm before the inflammatory cascade begins.
The Daily Home Care Protocol
The daily routine centers on three tools: a toothbrush, an interdental brush, and a water flosser. Each tool performs a specific, non-redundant function.
Step 1: Brush the Implant Crown and All Tooth Surfaces
Use a soft-bristled toothbrush, either manual or electric. An electric toothbrush with a pressure sensor and an oscillating-rotating or sonic action is ideal. The pressure sensor prevents excessive force that could traumatize the peri-implant mucosa.
- Apply a non-abrasive toothpaste. Avoid toothpastes with baking soda, charcoal, or heavy silica abrasives. These can scratch the polished surface of the implant crown and cause it to lose its luster.
- Angle the bristles at 45 degrees toward the gumline, where the crown meets the soft tissue.
- Brush the facial (cheek-side), lingual (tongue-side), and occlusal (chewing) surfaces of the implant crown with small, circular or rolling motions.
- Spend a full two minutes brushing all teeth, with extra attention to the implant crown margins.
- Brush twice daily, every day, without exception.
Step 2: Clean Between the Implant Crown and Adjacent Teeth with an Interdental Brush
This is the single most important step for implant longevity. The interproximal spaces on either side of the implant crown—the embrasures—are the primary sites where peri-implantitis initiates. The abutment-crown junction and the abutment-implant interface are plaque-retentive areas that a toothbrush cannot reach.
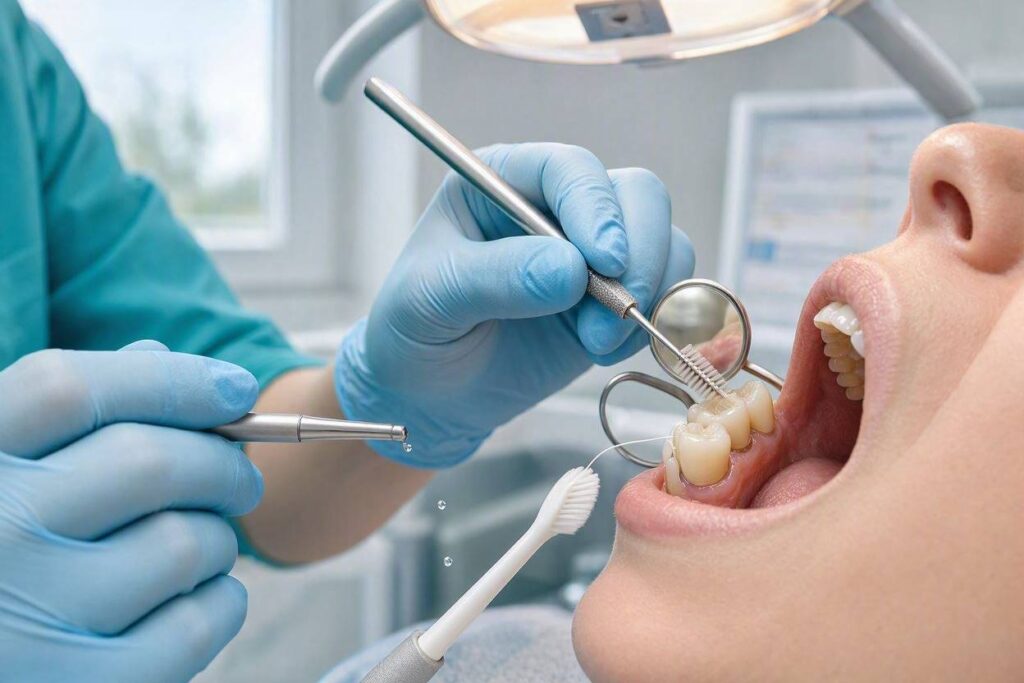
An interdental brush, also called a proxy brush or interproximal brush, is a small, bottle-brush-shaped device with bristles arranged radially around a central wire. It is inserted into the space between the implant crown and the adjacent tooth.
- Select the correct size. The brush should be the largest diameter that passes comfortably through the space without forcing. It should encounter slight resistance from the soft tissue but should not cause pain or blanching of the tissue. Your dental hygienist can help you determine the correct sizes for each space. You may need different sizes for the mesial (front) and distal (back) sides of the crown.
- Insert the brush from the facial side and gently move it in and out several times. The bristles should contact the abutment surface, the underside of the crown margin, and the adjacent tooth surface.
- If accessible, also insert the brush from the lingual side to clean the lingual embrasure.
- Do not force the brush. A brush that is too large can damage the interdental papilla and cause gingival recession.
- Perform interdental brushing at least once daily, preferably in the evening before bed when salivary flow decreases and the mouth is most vulnerable to bacterial growth.
Step 3: Floss Around the Implant Crown
Floss is a complementary tool, not a substitute for the interdental brush. In areas where the interdental space is too tight for even the smallest interdental brush, floss becomes the primary interproximal cleaner.
- Use shred-resistant floss. Standard nylon floss can shred on the margins of an implant crown or on rough abutment surfaces. Polytetrafluoroethylene (PTFE) floss, such as Glide or similar monofilament floss, is shred-resistant and slides easily through tight contacts.
- Implant-specific floss has a built-in threader, a spongy central section, and a section of regular floss. Oral-B Super Floss is the most recognized brand. The spongy section polishes the abutment and the concave underside of the crown.
- Wrap the floss around the implant crown in a C-shape. Gently slide it below the gumline, adapting it to the surface of the restoration. Move the floss up and down several times against the abutment surface. Do not snap the floss into the gum tissue.
- Floss at least once daily.
Step 4: Irrigate with a Water Flosser
A water flosser, or oral irrigator, uses a pulsating stream of water to disrupt bacterial plaque and flush out food debris from areas that mechanical brushes and floss cannot reach. For implant patients, it is a powerful adjunct.
- Use a non-metal tip. Most water flosser manufacturers offer specialized tips with a soft rubber or plastic end designed for implants and sensitive gums. Never use a metal-tipped irrigator; it will scratch the implant surface.
- Set the pressure to a comfortable medium level. High pressure is not more effective and can detach the soft tissue from the abutment, disrupting the perimucosal seal.
- Direct the water stream at the gumline. Trace the margin of the implant crown with the water jet, pausing in the interproximal embrasures to flush out the sulcus.
- For implant-supported bridges, direct the stream under the pontic (the false tooth) and around each implant abutment.
- Use the water flosser once daily, ideally after brushing and interdental cleaning.
- Optional: Add a small amount of a non-alcoholic antimicrobial mouthwash, such as a chlorine dioxide rinse, to the water reservoir for additional biofilm control. Do not use full-strength mouthwash; dilute it with water according to the water flosser manufacturer’s instructions.
Step 5: Supplement with an Antimicrobial Rinse (Optional Adjunct)
Mechanical disruption of the biofilm is the primary goal. Chemical antimicrobial rinses are adjuncts that reduce the bacterial load but cannot penetrate an established biofilm alone.
- Chlorhexidine Gluconate 0.12%: A prescription mouthwash that binds to oral surfaces and provides sustained antimicrobial release. It is useful for short-term use after implant surgery or during an acute peri-implant mucositis flare. Long-term use causes brown staining of teeth and tongue, alters taste, and can increase calculus formation. It is not a daily maintenance rinse.
- Chlorine Dioxide or Stabilized Hydrogen Peroxide Rinses: Over-the-counter, non-staining, alcohol-free rinses that can be used daily. They provide a low-level antimicrobial effect and are safe for indefinite use.
- Do not use alcohol-based mouthwashes. Alcohol can dry the oral mucosa and may irritate the peri-implant soft tissues with prolonged use.
Cleaning Specific Implant Restorations
The basic protocol is adapted for different types of implant restorations.
Single Implant Crown
Follow the full daily protocol: brush, interdental brush, floss, water flosser. The single crown has two interproximal embrasures, both of which must be cleaned.
Implant-Supported Fixed Bridge
The bridge spans a gap with one or more pontics (false teeth) resting on the gum tissue. The under-surface of the bridge is a significant plaque trap.
- Super Floss is essential. Thread the stiffened end under the pontic from the facial to the lingual side. Use the spongy section in a shoe-shine motion to clean the concave tissue surface of the pontic. Use the regular floss section around the implant abutments.
- Water flosser: Direct the stream under the bridge from both the facial and lingual sides. Pay particular attention to flushing the pontic-tissue interface.
- Interdental brushes: Clean the spaces between the implant abutments and any natural teeth.
Implant-Supported Overdenture (Snap-On Denture)
The overdenture must be removed for cleaning. The locator abutments or bar in the mouth must be cleaned separately.
- Remove the overdenture. Rinse it under running water. Brush it with a soft denture brush and a non-abrasive denture cleanser or mild liquid soap. Do not use toothpaste; it is too abrasive and will scratch the polished surface.
- Soak the overdenture overnight in a denture-cleaning solution according to the manufacturer’s instructions. This chemical soak kills Candida albicans and other microorganisms.
- Clean the locator abutments or bar in your mouth with a soft toothbrush and a low-abrasive toothpaste or antibacterial gel. Use a small interdental brush or a specialized locator abutment brush to clean around each abutment. Use a water flosser to irrigate thoroughly.
- Remove the overdenture at night while you sleep. This gives the soft tissues a period of rest and exposure to saliva’s natural antimicrobial properties.
Fixed Full-Arch Implant Bridge (All-on-4)
This restoration is screw-retained and not removed by the patient. Home care is challenging.
- Water flosser is mandatory. Use it daily with a non-metal tip to flush the interface between the bridge framework and the gum tissue, and to clean under the bridge.
- Super Floss must be threaded under the bridge through any accessible access channels.
- Interdental brushes are used where the bridge design allows embrasure access.
- Professional maintenance with removal of the bridge for cleaning and inspection every 6 to 12 months is non-negotiable. This compensates for the limitations of home care.
The Role of Professional Maintenance
Home care is the daily defense. Professional maintenance is the periodic inspection, deep cleaning, and early intervention system. Implant patients must adhere to a professional recall schedule of every 3 to 6 months, as determined by their dentist or periodontist based on individual risk factors.
Peri-Implant Probing and Assessment
The hygienist uses a specialized plastic or titanium-coated periodontal probe. Metal probes are not used because they can scratch the implant surface. The probing depth around each implant is measured at multiple sites. Bleeding on probing and the presence of purulence (pus) are recorded. These measurements are compared to the baseline values established at the time the crown was delivered.
Increasing probing depths over time, or the new onset of bleeding, are early warning signs of peri-implant mucositis or peri-implantitis. Early detection allows for non-surgical intervention before bone loss becomes irreversible.
Professional Debridement
The hygienist removes bacterial biofilm and any mineralized calculus deposits from the implant crown, abutment, and accessible implant collar. The instruments used are critical. Metal scalers and conventional ultrasonic tips are contraindicated. They scratch the titanium or zirconia surface, creating micro-retentive grooves that accelerate future plaque accumulation and can damage the implant.
The hygienist uses:
- Plastic or carbon-fiber curettes: Designed specifically for implant maintenance. They remove deposits without scratching the implant surface.
- Titanium-coated curettes: Provide a harder edge than plastic but are still non-damaging to the implant.
- Non-metal ultrasonic tips: Specialized tips made of plastic or a polymer composite that fit onto an ultrasonic scaler.
- Polishing: The crown is polished with a non-abrasive paste and a rubber cup. The abutment surfaces are polished with specialized implant polishing strips or cups.
Patient Education and Reinforcement
The professional maintenance visit is a teaching session. The hygienist can use a disclosing solution or tablet to stain the plaque on your teeth and implant. The pink or blue stain reveals the areas you are missing with your daily routine. The hygienist demonstrates the correct angulation and technique for your interdental brushes and water flosser. If your probing depths are increasing at a specific site, the hygienist can recommend a different interdental brush size or a modified cleaning approach for that area.
Conclusion
Dental implants must be cleaned with a layered daily protocol: a soft-bristled toothbrush for the crown surfaces, an interdental brush sized precisely for each embrasure to mechanically disrupt biofilm at the vulnerable abutment-gum interface, shred-resistant floss or Super Floss for tight interproximal spaces and under bridge pontics, and a water flosser with a non-metal tip on medium pressure to irrigate the sulcus. Implant-supported overdentures require removal, brushing with non-abrasive cleanser, and overnight soaking, while the locator abutments or bar are separately brushed and irrigated in the mouth. Professional maintenance every 3 to 6 months using non-metal instruments for probing and debridement is the essential complement to home care, providing early detection and intervention for peri-implant disease.
Frequently Asked Questions
Can I use a regular toothbrush and toothpaste on my implant crown?
Yes, but it must be a soft-bristled brush. Medium or hard bristles can traumatize the gum tissue and contribute to recession. Use a non-abrasive toothpaste without baking soda, charcoal, or heavy silica. Whitening toothpastes are often highly abrasive and should be avoided. An electric toothbrush with a pressure sensor is ideal.
How often should I replace my interdental brushes?
Interdental brushes should be replaced when the bristles become worn, bent, or splayed. For daily use, the average interdental brush lasts approximately one week. A brush with damaged bristles is less effective at removing plaque and can harbor bacteria. Do not use a brush until it is completely flattened.
Is a water flosser enough by itself, or do I still need to use interdental brushes?
A water flosser is an adjunct, not a replacement for mechanical interdental cleaning. The water stream flushes debris and disrupts some surface biofilm, but it does not remove the adherent, tenacious plaque layer as effectively as the bristles of an interdental brush physically wiping the surface. Use both tools in sequence: interdental brush first, then water flosser.
My gums bleed when I clean around my implant. Is this normal?
No. Healthy peri-implant tissues do not bleed when properly cleaned or probed. Bleeding indicates inflammation—peri-implant mucositis—which is the precursor to bone loss. If you notice bleeding, increase the frequency and thoroughness of your interdental cleaning and water flossing in that area. If the bleeding persists for more than a week, schedule a professional evaluation. Early mucositis is completely reversible with improved plaque control.
Additional Resource
The International Team for Implantology (ITI) provides patient-focused educational materials at iti.org. Their “Patient Information” section includes illustrated, step-by-step guides on implant maintenance, the correct selection and use of interdental brushes, and the role of professional supportive care. The ITI is a leading global academic organization in implant dentistry, and its recommendations are evidence-based and clinically authoritative.