The Process Of Placing Dental Implants On Top?
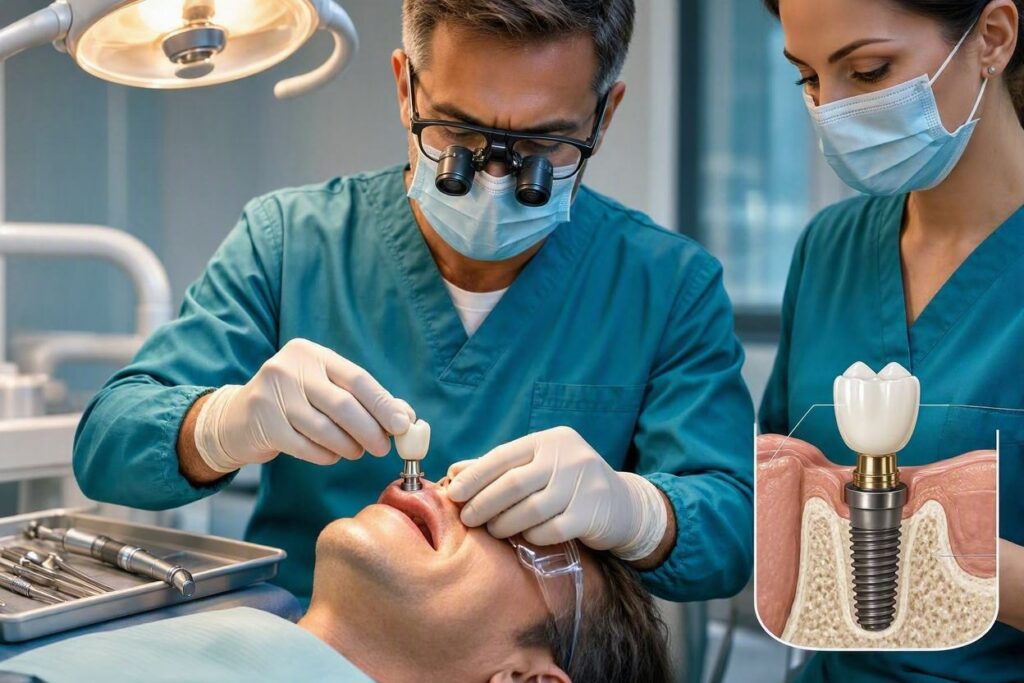
Losing a tooth in your upper jaw presents unique challenges. You use your top teeth for smiling, speaking, and biting. When one is missing, it affects your confidence and your function. Dental implants offer the best solution for replacement. But many patients are curious about the specifics. They ask: “What is the process of placing dental implants on top?” The answer involves a series of carefully planned steps. The upper jaw, also called the maxilla, has unique anatomy that requires special consideration. This guide will walk you through the entire process, from the initial consultation to the final crown, so you know exactly what to expect.
Why the Upper Jaw Is Different
The upper jaw is not just a mirror image of the lower jaw. It has some distinct characteristics that make implant placement a bit more complex.
1. Bone Density: The bone in the upper jaw is generally softer and less dense than the bone in the lower jaw. This is especially true in the back areas. Softer bone means the implant requires more time to heal and fuse (osseointegrate).
2. The Sinus Cavity: This is the big one. Above your upper back teeth sits the maxillary sinus. It is an air-filled space. When you lose a tooth, the sinus can expand downward into the space where the tooth root used to be. This leaves very little bone height for an implant.
3. The Nasal Cavity: For the front teeth, the nasal cavity is nearby. Precision is needed to avoid perforating it.
4. Aesthetics: The upper front teeth are the most visible part of your smile. The implant must be placed perfectly to ensure the crown looks natural and emerges from the gum in the right position.
Step 1: The Comprehensive Examination
The process always starts with a thorough evaluation. Your dentist will perform a visual exam and take X-rays. Crucially, they will almost certainly take a 3D Cone Beam CT scan. This scan provides a three-dimensional view of your jaw. It shows the exact height, width, and density of your bone. It also shows the precise location of your sinus and nerve pathways. This is not a guess; it is surgical planning.
Step 2: Determining the Need for Bone Grafting
Based on the 3D scan, your dentist will determine if you have enough bone to support an implant. If the sinus has expanded too much, or if the bone is too thin, you may need a preparatory procedure.
The Sinus Lift: This is a common procedure for upper back teeth. The surgeon makes a small opening in the gum and lifts the sinus membrane. They then place bone graft material into the space created. This new bone needs 4 to 6 months to harden before an implant can be placed.
Ridge Augmentation: If the bone is too thin, the surgeon may add bone graft material to the sides of the existing ridge. This widens the bone to accommodate a standard-sized implant.
Step 3: The Implant Placement Surgery
Once you have sufficient bone (or if you did not need a graft), the surgery is scheduled. Here is what happens on the day of the procedure:
1. Anesthesia: You will receive local anesthesia to numb the area completely. Many patients also choose sedation (oral or IV) for comfort and anxiety relief.
2. The Incision: The surgeon makes a small incision in the gum to expose the underlying bone.
3. Drilling: Using a series of precision drills, the surgeon creates a small hole in the bone. They start with a narrow drill and gradually widen the hole to the exact size of the implant. This is done slowly to avoid overheating the bone, which could damage the cells.
4. Implant Placement: The titanium or ceramic implant post is carefully screwed into the prepared hole. The surgeon checks for “primary stability”—meaning the implant is tight and secure immediately.
5. Closing the Site: The surgeon places a small “healing cap” or “cover screw” over the implant. The gum is then stitched closed, covering the implant completely. This is called a “two-stage” approach and is very common for top implants, especially when bone quality is a concern.
Step 4: The Healing Phase (Osseointegration)
This is the waiting game. Over the next 3 to 6 months, your body does the critical work. The bone cells grow and attach to the surface of the titanium implant. This process, called osseointegration, is what makes the implant permanent.
During this time, you will not see the implant. It is hidden under the gum. You will eat a soft diet and avoid putting pressure on the area. The upper jaw often requires a slightly longer healing time due to the softer bone.
Step 5: The Second Stage (Uncovering the Implant)
After the healing period, you return for a brief visit. The surgeon makes a tiny incision in the gum to expose the top of the implant. The cover screw is removed, and a taller piece called a healing abutment is attached. This piece sticks out above the gum line. It shapes the gum tissue to create a natural-looking emergence profile for the final tooth. You will wear this for a few weeks while the gum heals around it.
Step 6: The Final Crown
This is the exciting part. Once the gum has healed, the process moves to the restorative phase.
1. Impressions: The dentist takes impressions of your mouth, including the implant. These impressions can be digital (with an intraoral scanner) or traditional (with a putty-like material).
2. Fabrication: A dental laboratory uses these impressions to custom-craft your final crown. The crown is designed to match the color, shape, and size of your other teeth.
3. Placement: The healing abutment is removed. The final abutment is attached to the implant. The crown is then either screwed onto the abutment or cemented in place. The dentist checks the bite to ensure it is comfortable and functional.
The “Immediate Load” Option (Same-Day Tooth)
In some specific cases, for front teeth, a dentist might offer an “immediate load” implant. This means a temporary crown is attached to the implant on the same day as the surgery. This is great for aesthetics, but it carries more risk. The implant must have exceptional primary stability, and the temporary tooth must be kept completely out of contact with the opposing teeth. This is not suitable for all patients or all locations.
A Surgeon’s Perspective on Upper Implants
“The key to upper implants is planning. You have to respect the sinus. You have to respect the soft bone. But with a good 3D scan and a careful technique, the success rate is just as high as the lower jaw. The patient just needs to be a bit more patient with the healing.” – Dr. Anthony Rossi, DDS, MS, Oral Surgeon
Important Notes for Readers
- Sinus Health: If you have chronic sinusitis or active sinus infections, you may need to have this treated before you can get an upper implant. The health of the sinus is critical.
- Do Not Smoke: Smoking is a leading cause of implant failure, especially in the upper jaw. It restricts blood flow and impairs healing.
- The Temporary Bridge: If you are replacing a front tooth, your dentist can provide a temporary removable flipper or a temporary bridge to wear during the healing phase so you are not left with a gap.
- Careful with Pressure: During the healing phase, avoid blowing your nose forcefully, sneezing with your mouth closed, or using a straw. These actions create pressure changes that can disturb the healing implant, especially if a sinus lift was performed.
The Timeline at a Glance
| Step | Description | Timeframe |
|---|---|---|
| Consultation & 3D Scan | Exam, planning, and imaging. | 1-2 visits |
| Bone Graft (if needed) | Sinus lift or ridge augmentation. | + 4-6 months healing |
| Implant Placement | Surgical placement of the post. | 1 visit |
| Osseointegration | Bone fuses to the implant. | 3-6 months |
| Uncovering | Healing abutment placed. | 1 visit |
| Final Crown | Impressions and crown placement. | 2-3 visits |
The Bottom Line
The process of placing dental implants on top is a multi-step journey that requires careful planning and patience. Due to the softer bone and the presence of the sinus cavity, the upper jaw often requires additional preparation like a sinus lift. However, with modern 3D imaging and surgical techniques, the process is highly predictable and successful. The result is a permanent, stable, and beautiful replacement tooth that restores full function and confidence to your smile.
Frequently Asked Questions (FAQ)
Q: Is it more painful to get an implant in the upper jaw?
A: The procedure itself is performed under anesthesia, so you should not feel pain. Post-operative discomfort is generally mild and managed with over-the-counter or prescribed pain relievers. Some patients report more swelling with upper implants, but this varies.
Q: What happens if the implant enters the sinus cavity?
A: This is a rare complication. If the implant tip protrudes slightly into the sinus, it may not cause a problem. If it is significant, or if it causes sinus issues, the implant may need to be removed. This is why a sinus lift is performed when there is not enough bone—it prevents this from happening.
Q: How long do I have to wait to eat normally after getting an upper implant?
A: You will need to eat a soft diet for several weeks after the surgery. You can gradually return to a normal diet after the implant has fully healed and the final crown is placed. Your dentist will give you specific guidelines.
Q: Can I get an upper implant if I wear a full upper denture?
A: Yes. This is a very common and life-changing treatment. Even if you have significant bone loss, techniques like the “All-on-4” concept or zygomatic implants can provide a fixed bridge for the upper jaw with minimal or no bone grafting.
Additional Resource
For a detailed medical overview of sinus lift procedures and bone grafting, you can visit the American Academy of Periodontology: https://www.perio.org/