How Dentists Clean Children’s Teeth
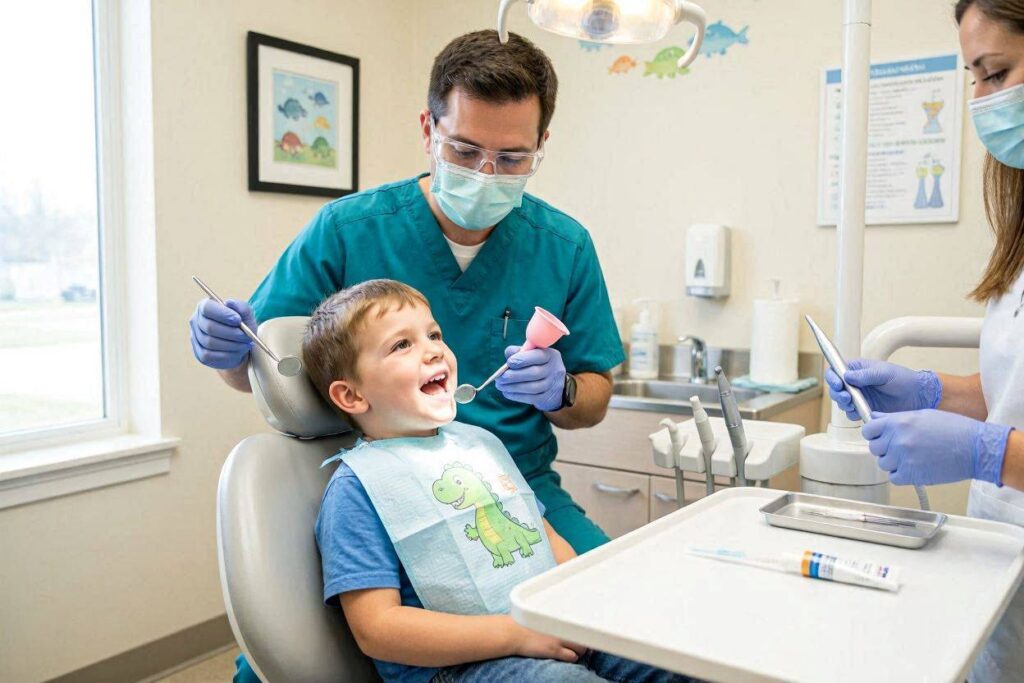
A parent sits in the corner of a bright treatment room, watching a dental hygienist lean toward a four-year-old. The child clutches a stuffed dinosaur. The overhead light hums softly. A tiny mirror appears, and the cleaning begins. The parent exhales. No tears. No wrestling. Just a calm, gentle process that looks almost like magic. But this is not magic. It is a carefully choreographed procedure built on decades of pediatric dental research, child psychology, and clinical skill. Understanding how dentists clean children’s teeth transforms a mysterious appointment into a predictable, reassuring experience. This guide walks through every step, every tool, and every technique that makes professional pediatric cleaning safe, effective, and surprisingly pleasant.
Why Professional Cleanings Matter for Kids
Baby teeth do not last forever, but they serve as crucial placeholders for permanent teeth. They guide eruption patterns, support speech development, and allow proper chewing. When plaque and tartar build up on these small teeth, the consequences reach far beyond cavities. Gum inflammation in childhood correlates with a higher risk of periodontal issues later in life. Early dental visits establish a baseline of oral health that shapes lifelong habits.
The Hidden Danger of Biofilm
Plaque is not simply leftover food. It is a sticky biofilm of bacteria that colonizes tooth surfaces within hours after brushing. Saliva minerals harden this biofilm into tartar, or calculus, within 24 to 72 hours. Once tartar forms, no toothbrush can remove it. Only professional instruments can break its bond to enamel. Children develop tartar just like adults, especially along the lower front teeth where salivary ducts release mineral-rich saliva. Pediatric cleanings interrupt this cycle before damage becomes irreversible.
Establishing a Dental Home
The American Academy of Pediatric Dentistry recommends a child’s first dental visit by age one or within six months of the first tooth. This early introduction builds what dentists call a dental home—a familiar environment where care happens consistently. Children who visit the dentist regularly from an early age experience less anxiety, require fewer emergency visits, and develop positive attitudes toward oral health. The cleaning appointment forms the centerpiece of this preventive model.
How to Prepare Your Child Before the Visit
Preparation begins at home, days before the appointment. Parents play the most influential role in shaping a child’s expectations. The words chosen, the stories told, and the emotions displayed all transmit directly to the child. A relaxed parent raises the odds of a relaxed child.
Choosing the Right Language
Avoid words that trigger fear. Dental professionals rarely use terms like “drill,” “shot,” “needle,” or “pain” around children. Parents can adopt the same approach. Replace “cleaning” with “tickle your teeth” or “count your teeth and make them shiny.” Never mention negative personal experiences. Even a casual “I hate the dentist” spoken on the phone plants a seed of dread that can persist for years. Instead, frame the visit as a positive, normal part of growing up.
Role-Playing at Home
Children process unfamiliar situations through play. A few days before the appointment, take turns being the dentist and the patient. Use a toothbrush as the “tooth counter” and a small flashlight as the “sunshine light.” Count each other’s teeth. Demonstrate opening wide. Let the child practice lying back in a reclining chair. This rehearsal demystifies the experience and gives the child a sense of control.
Timing and Comfort Considerations
Schedule the visit for a time when the child normally feels alert and cooperative. For most young children, this means mornings, after breakfast, and before nap time. Avoid late afternoon appointments when fatigue and hunger amplify irritability. Dress the child in comfortable, non-restrictive clothing. Bring a favorite comfort item—a stuffed animal, blanket, or small toy. Many pediatric dentists allow the comfort object to sit on the child’s lap or even receive a “cleaning” first.
The Pediatric Dental Environment
Walking into a pediatric dental office reveals intentional design choices absent from general adult practices. Every element, from wall colors to ceiling decorations, serves a purpose. These environmental factors reduce anxiety before the cleaning begins.
Child-Sized Everything
Pediatric dental chairs fit small bodies. Sinks hang at lower heights. X-ray sensors come in miniature sizes. Even the protective lead aprons feature cartoon characters or bright colors. This scaling communicates belonging. The child enters a world built specifically for them, not a scaled-down version of adult space. Instrument handles appear in fun shapes. Gloves come in playful colors. The message is consistent: this place welcomes children.
Sensory-Conscious Design
Bright fluorescent lights can overwhelm sensitive children. Many pediatric offices use adjustable, warmer lighting. Ceiling-mounted televisions play child-friendly programming to distract and engage. Some treatment rooms offer noise-canceling headphones. Others pipe calming music through speakers. Aromatherapy diffusers release mild, pleasant scents like vanilla or lavender. These sensory choices recognize that dental anxiety often stems from environmental overstimulation.
The Power of Positive Distractions
Distraction techniques have solid scientific backing. When a child’s attention engages with a cartoon, a story, or an interactive game, the brain’s threat-detection systems quiet. Pain perception decreases. Cooperation increases. Modern pediatric dentists use age-appropriate distraction tools: ceiling-mounted screens for supine viewing, virtual reality headsets in some advanced practices, and simple conversation that redirects focus.
The Tell-Show-Do Technique
Before any instrument touches a child’s tooth, most pediatric dentists employ a communication method called Tell-Show-Do. This technique, developed over decades of behavioral research, reduces fear of the unknown by breaking procedures into digestible steps.
Tell: Explaining in Child-Friendly Terms
The dentist or hygienist first explains what will happen using simple, non-threatening language. “I’m going to use my tooth counter to look at all your teeth. It’s a tiny mirror on a stick. See? No owies, just looking.” The explanation matches the child’s developmental level. A three-year-old receives different words than an eight-year-old. The goal is predictability without overwhelming detail.
Show: Demonstrating on a Model or Finger
Next, the professional demonstrates the tool or procedure. They might show the polisher on a gloved finger, letting the child feel the gentle vibration. They could display the suction straw, called “Mr. Thirsty,” and demonstrate how it drinks water. Some dentists use a large plastic model of teeth to show exactly where each instrument will touch. This tangible preview transforms the unknown into the familiar.
Do: Performing the Procedure Gently
Only after the child understands and consents—verbally or through cooperative body language—does the actual procedure begin. The professional moves slowly, narrates each action, and checks in frequently. “Now I’m counting your top teeth. One, two, three! Great job!” This running commentary maintains the child’s trust throughout the cleaning.
The Step-by-Step Pediatric Cleaning Process
The actual cleaning follows a structured sequence that maximizes thoroughness while respecting the child’s comfort and attention span. Each step builds logically on the previous one.
Step 1: Welcoming and Seating
The appointment begins with a greeting in the reception area. The dental assistant or hygienist calls the child by name, often crouching to eye level. This physical positioning matters—towering over a child intimidates; meeting them at their level builds rapport. The walk to the treatment room includes casual conversation about school, pets, or the child’s shirt design. Once in the room, the child chooses between flavor options for polishing paste or fluoride treatment. Choice creates agency. Agency reduces resistance.
Step 2: Medical History Review and Assessment
Before any cleaning, the team reviews the child’s medical history. Changes in medications, new allergies, recent illnesses, or hospitalizations all influence treatment decisions. Parents should update this information at every visit. The dentist performs a preliminary visual assessment, looking for obvious concerns: swelling, visible decay, dental trauma, or developing orthodontic issues. This overview shapes the cleaning approach. A child with inflamed gums may require extra-gentle instrumentation. A child with abundant plaque may need more time.
Step 3: The Visual Examination with the Mouth Mirror
The hygienist begins with a small, angled mouth mirror. This tool serves multiple purposes: it provides indirect vision of hidden surfaces, retracts the cheeks and tongue gently, and directs light into shadowed areas of the mouth. The hygienist counts teeth aloud, naming each one: “Here’s your first molar, your second molar, your front tooth we call an incisor.” This counting normalizes the mirror’s presence and builds the child’s dental vocabulary. The mirror also reveals areas of concern that need focused attention during the cleaning.
| Tool | What It Does | How It Feels |
|---|---|---|
| Mouth mirror | Reflects light, retracts cheeks, provides indirect vision | Cool, smooth, no discomfort |
| Explorer probe | Gently checks for soft spots and plaque | Light touch, may feel like a gentle poke |
| Scaler (manual) | Removes tartar from above the gumline | Scraping sensation, slight vibration |
| Ultrasonic scaler | Uses water and high-frequency vibration to break up calculus | Buzzing, tickling, water spray |
| Polisher with cup | Removes surface stains and smooths enamel | Soft spinning, ticklish, gritty paste taste |
| Suction straw | Removes water and saliva from the mouth | Slight sucking, can be noisy |
| Floss | Cleans between teeth | Gentle pressure, may feel tight |
| Fluoride applicator | Applies protective varnish or foam | Cool gel or sticky varnish, flavored |
Step 4: Periodontal Screening When Age-Appropriate
For older children, typically starting around age seven or eight, the dentist may perform a basic periodontal evaluation. This involves a thin probe with millimeter markings gently inserted between the gum and tooth. The measurement indicates gum health. Numbers between one and three millimeters suggest healthy gums. Higher numbers signal inflammation or potential gum disease. This screening catches early signs of gingivitis before they progress. For younger children, visual inspection of gum color, contour, and bleeding tendency suffices.
Step 5: Scaling — Removing Plaque and Tartar
Scaling represents the core therapeutic part of the cleaning. The hygienist uses specialized instruments to remove accumulated plaque and tartar from tooth surfaces, especially near the gumline and between teeth. Two primary scaling methods exist, often used in combination.
Manual Scaling Instruments
Handheld scalers and curettes feature sharp, curved tips designed to reach specific tooth surfaces. The hygienist uses a controlled scraping motion to lift deposits away from enamel. This method allows excellent tactile feedback—the professional feels the texture change as tartar breaks away. Manual scaling works well for isolated deposits and provides quiet, non-intimidating treatment.
Ultrasonic Scaling Devices
Ultrasonic scalers use high-frequency vibrations to shatter calculus and disrupt bacterial biofilms. A continuous water spray cools the tip and flushes debris away. Children often describe the sensation as “tickly” or “buzzy.” The water mist creates a novel sensory experience that many kids find entertaining. Ultrasonic devices reduce hand fatigue for the hygienist and speed up cleaning for patients with heavy deposits. However, the noise and vibration may frighten very young or sensitive children. Dentists reserve this tool for those who can tolerate it.
| Scaling Method | Advantages for Children | Potential Drawbacks |
|---|---|---|
| Manual scaling | Quiet, controlled, excellent tactile feedback, no water spray | Slower, may require more patient cooperation |
| Ultrasonic scaling | Faster, effective water flushing, can feel like a “tooth shower” | Noisy, vibrating, water accumulation, may startle sensitive kids |
Step 6: Polishing for Smooth, Shiny Teeth
After scaling removes hard deposits, polishing smooths the tooth surfaces. The hygienist uses a slow-speed handpiece with a small rubber cup or brush attachment. Prophylaxis paste—a gritty, flavored compound—fills the cup. As the cup spins against each tooth, it abrades surface stains and microscopic roughness left by scaling. The paste comes in flavors children love: bubblegum, grape, strawberry, chocolate, even cookie dough. Choosing the flavor engages the child and adds an element of fun.
Polishing serves both aesthetic and therapeutic purposes. Smooth enamel resists plaque accumulation better than rough enamel. The process removes the acquired pellicle, a thin protein layer that bacteria use as an anchor. Children enjoy the immediate reward: teeth that feel exceptionally smooth and look visibly brighter.
Step 7: Flossing Between Every Tooth
Even the most diligent parents struggle with flossing their children’s teeth. The professional flossing during a cleaning reaches every interdental contact point. The hygienist demonstrates proper flossing technique, often using a floss holder or pick that children can recognize. For tight contacts, they may use floss threaders. This step removes plaque from areas no brush or scaler can reach. It also identifies problem spots where flossing consistently catches or shreds, potentially indicating decay between teeth.
Step 8: Fluoride Application for Cavity Protection
The final treatment step applies concentrated fluoride to strengthen enamel and remineralize microscopic areas of early decay. Pediatric dentists offer fluoride in several forms:
Fluoride Varnish
A sticky, resin-based varnish that hardens on contact with saliva. The hygienist paints it directly onto dry teeth with a small brush. It sets within seconds and continues releasing fluoride for hours after application. Varnish works well for young children because it adheres immediately, requires no trays, and carries minimal ingestion risk.
Fluoride Foam or Gel
Delivered in disposable trays that fit over the teeth. The child bites down gently for one to four minutes while the foam or gel bathes all surfaces. This method covers teeth comprehensively but requires a child who can tolerate a tray in the mouth without gagging or biting down too hard.
Fluoride Rinse
For older children who can reliably swish and spit, a concentrated fluoride rinse provides quick, tray-free application. The child swishes for 30 to 60 seconds and spits completely.
Post-fluoride instructions typically include no eating or drinking for at least 30 minutes. This waiting period allows maximum fluoride uptake into enamel.
Step 9: The Dentist’s Examination
After the cleaning, the dentist enters for a comprehensive examination. This goes beyond what the hygienist observed. The dentist checks each tooth for decay using visual inspection, the explorer probe, and additional diagnostic tools when indicated. They evaluate occlusion—how the teeth come together—and assess jaw development. They look for signs of habits like thumb-sucking or tongue-thrusting that influence dental alignment. They palpate lymph nodes and examine oral soft tissues: tongue, cheeks, palate, floor of mouth. This thorough screening catches issues early.
When X-rays Are Needed
Children require dental X-rays less frequently than adults, but they remain important diagnostic tools. Bitewing X-rays reveal decay between teeth where visual inspection cannot see. Panoramic X-rays show developing permanent teeth, missing teeth, extra teeth, and jaw pathology. The frequency depends on caries risk. A child with no cavities and good hygiene might need X-rays every 12 to 24 months. A child with multiple cavities might need them every six months. Digital X-ray technology reduces radiation exposure to minimal levels, often less than a day of background environmental radiation.
Step 10: Oral Hygiene Education and Rewards
The appointment concludes with age-appropriate education. The hygienist demonstrates brushing technique on a large tooth model. They discuss flossing tools, dietary recommendations, and habits to avoid. For very young children, the focus stays on parents: brushing twice daily with fluoride toothpaste, avoiding bottles in bed, limiting juice consumption. For school-age children, the conversation shifts to independence with supervision, mouthguard use during sports, and the effects of sugary drinks.
The reward system reinforces positive behavior. A treasure chest of small toys, stickers, temporary tattoos, or sugar-free treats lets the child choose a prize. This tangible reward creates a positive association with dental visits. Some offices print a “report card” showing areas of excellence and areas needing improvement. Children take pride in a cavity-free report.
Specialized Techniques for Different Age Groups
Pediatric dental cleaning adapts dramatically across developmental stages. A toddler requires fundamentally different approaches than a teenager. Professionals tailor every aspect to match physical, emotional, and cognitive development.
Infants and Toddlers: Ages 6 Months to 3 Years
The earliest dental visits focus on acclimation, education, and prevention. A full cleaning may not occur at the first visit. Instead, the dentist or hygienist performs a knee-to-knee examination. The parent and dentist sit facing each other, knees touching. The child lies back with their head in the dentist’s lap and legs in the parent’s lap. This position provides security while allowing the professional access to the mouth.
During these early visits, the dentist brushes the child’s teeth with a soft toothbrush and age-appropriate toothpaste. They may use a small amount of fluoride varnish if cavity risk is high. The emphasis stays on parent education: proper brushing technique, appropriate fluoride exposure, dietary counseling, and habit assessment. The entire appointment typically lasts 15 to 20 minutes.
Preschoolers: Ages 3 to 5 Years
Preschool children bring expanding language skills and vivid imaginations. They understand cause and effect but struggle with abstract concepts. The cleaning process becomes more structured. Scaling addresses visible tartar. Polishing introduces the rubber cup and flavored paste. Fluoride varnish application follows. The professional explains each step concretely: “This is my tooth tickler. It spins around and makes your teeth feel like glass.”
Behavior management techniques prove essential at this age. Positive reinforcement, distraction, and Tell-Show-Do remain primary strategies. Some children benefit from protective stabilization—not restraint, but gentle, supportive positioning that prevents sudden movements. A parent’s hand on the child’s leg or the hygienist’s hand cupping the chin provides grounding sensory input.
School-Age Children: Ages 6 to 12 Years
This phase brings the mixed dentition: baby teeth exfoliating, permanent teeth erupting. The cleaning must navigate loose teeth, partially erupted molars with opercula of gum tissue, and orthodontic appliances in many cases. Scaling focuses on permanent molars, which accumulate plaque in their deep grooves. The hygienist pays special attention to erupting teeth, which emerge with incomplete enamel maturation and heightened cavity vulnerability.
School-age children understand more complex explanations. Professionals introduce concepts like plaque bacteria, acid production, and enamel demineralization. The education component expands to include flossing independence, mouthguard use, and the oral effects of orthodontic treatment.
Adolescents and Teenagers: Ages 13 and Up
Teenagers present unique challenges and opportunities. Hormonal changes increase gum inflammation risk. Dietary independence often means more sugary and acidic food and beverage consumption. Orthodontic appliances—brackets, wires, aligners—create plaque-retentive surfaces. Oral piercings introduce infection and trauma risks.
The cleaning process mirrors adult protocols more closely. Full-mouth scaling with ultrasonic instruments, comprehensive polishing, and detailed home care instruction dominate the appointment. The conversation shifts to topics relevant to adolescents: teeth whitening safety, tobacco and vaping effects, sports mouthguards, and the connection between oral health and social confidence.
Behavior Guidance Techniques in Detail
Pediatric dentists master a range of behavior guidance techniques beyond Tell-Show-Do. These methods ensure safe, efficient treatment while supporting the child’s psychological well-being.
Positive Reinforcement
Every cooperative behavior receives acknowledgment. “I love how you’re holding your mouth open. That helps me see your teeth so clearly!” Specific, genuine praise motivates continued cooperation. Some offices use small, immediate rewards throughout the cleaning, not just at the end. Stickers after polishing or verbal praise after successful scaling build a rhythm of positive feedback.
Distraction and Redirection
Skilled pediatric dental teams excel at conversational redirection. They ask about favorite movies, siblings, pets, or upcoming events. This verbal engagement occupies the child’s cognitive resources, leaving less attention for the procedure. Some hygienists sing songs or tell stories. Others use counting games: “Let’s count to ten while I clean this tooth. Ready? One, two, three…” The child focuses on the counting, not the cleaning.
Modeling
Watching a cooperative peer, sibling, or even a parent receive a cleaning can powerfully influence a hesitant child. Some pediatric practices schedule siblings together so the younger child observes the older child’s successful appointment. Video modeling—showing a child-friendly video of a dental cleaning—achieves similar results. The child learns what to expect and sees a peer modeling calm behavior.
Protective Stabilization When Necessary
For very young children, children with certain special needs, or situations requiring extensive treatment, protective stabilization provides safety. This is not punitive restraint. It is a gentle, supportive hold that prevents sudden movements which could cause injury from sharp instruments. Parents may hold the child in their lap with arms and legs supported. Dental staff may use specialized wraps or positioning devices. Informed consent from parents always precedes any stabilization. The goal remains the child’s safety and the delivery of necessary care.
Nitrous Oxide (Laughing Gas) Sedation
For mild to moderate anxiety, nitrous oxide offers safe, effective relaxation. The child breathes a mixture of nitrous oxide and oxygen through a small mask placed over the nose. Within minutes, a sense of calm and well-being develops. The child remains fully conscious, able to communicate, and maintains protective reflexes. The effects wear off within minutes of discontinuing the gas. Nitrous oxide does not put the child to sleep. It simply takes the edge off, making the cleaning experience more comfortable.
When Deeper Sedation Becomes Necessary
Some children require deeper sedation due to extensive treatment needs, severe anxiety, very young age, or special healthcare requirements. Oral conscious sedation uses liquid medication taken by mouth. The child becomes drowsy but responsive. General anesthesia, provided in a hospital or surgical center setting, renders the child completely asleep. These advanced options follow strict safety protocols and require specialized training and monitoring equipment. They are reserved for specific clinical indications, not routine cleanings.
Tools of the Trade: A Parent’s Visual Guide
Understanding the instruments reduces mystery and fear. Here is a detailed look at the tools parents see during their child’s cleaning.
The Mouth Mirror
A small, angled mirror on a metal or plastic handle. The reflective surface comes in front-surface and rear-surface configurations. Front-surface mirrors eliminate double reflections. The mirror allows the clinician to see hidden tooth surfaces, retract the tongue and cheek gently, and focus overhead light onto specific areas. Children often enjoy seeing their own reflection, which dentists use to engage them: “Can you see your teeth in my magic mirror?”
The Explorer or Probe
A thin, curved instrument with a sharp point. The explorer detects breaks in enamel surface, soft areas of decay, and edges of fillings. It also identifies calculus deposits and checks pocket depths around teeth. The gentle touch of an explorer provides diagnostic information no visual inspection can match. Modern “caries detection” explorers feature rounded tips that minimize damage to demineralized enamel.
The Scaler and Curette
These instruments remove hard deposits. Scalers feature pointed tips for supragingival calculus above the gumline. Curettes have rounded, spoon-shaped blades for subgingival deposits below the gumline. Both require sharp cutting edges, which means the hygienist sharpens them regularly. The scraping sound and sensation cause the most anxiety for children. Good communication and gentle technique minimize this discomfort.
The Ultrasonic Scaler
A handpiece that vibrates at ultrasonic frequencies, typically 20,000 to 45,000 cycles per second. Water flows continuously through the tip to prevent heat buildup and flush debris. The high-frequency vibration shatters calculus and disrupts biofilm. Different tip designs target different areas: universal tips for general scaling, fine tips for tight spaces, implant-safe non-metal tips for specific situations. Children who tolerate the noise and sensation often prefer ultrasonic scaling because it feels less “scrapy” than manual instruments.
The Prophylaxis Polisher
A slow-speed dental handpiece that rotates at approximately 2,000 to 5,000 revolutions per minute. Disposable rubber cups or brushes attach to the handpiece. The cup holds prophylaxis paste against the tooth surface. As it spins, the abrasive paste removes stain and smooths enamel. Disposable prophy angles feature a built-in bend and cup, eliminating the need for sterilization between patients. The polisher makes a whirring sound that may startle initially but rarely causes discomfort.
The Saliva Ejector and High-Volume Evacuator
The saliva ejector is a small, curved plastic tube that rests in the floor of the mouth. It removes saliva and water through gentle suction. Children often call it “Mr. Thirsty” or “the vacuum.” The high-volume evacuator is a larger tube that the assistant holds near the working area to remove water spray and debris during scaling and polishing. It makes a louder sucking sound. Explaining these tools beforehand prevents the child from being startled by the sudden suction.
The Air-Water Syringe
A three-way syringe delivers either a stream of water, a puff of air, or a mist combining both. The water rinses debris from teeth. The air dries tooth surfaces for examination and fluoride application. Children find the air puff surprising—it can feel cold and make a whistling sound. Describing it as “a gentle wind” or “a tooth dryer” helps normalize the sensation.
Cleaning Children’s Teeth with Special Healthcare Needs
Children with physical, developmental, intellectual, or sensory disabilities require modified approaches to dental cleaning. These modifications demand additional training, patience, and creativity from the dental team.
Autism Spectrum Considerations
Children on the autism spectrum often struggle with sensory processing, communication, and transitions. The dental office environment presents multiple sensory challenges: bright lights, unfamiliar sounds, strange tastes, and tactile sensations in a sensitive area. Effective accommodations include pre-visit social stories with photos of the office and staff, scheduling as the first appointment of the day to minimize wait time and sensory overload, consistent assignment to the same dental team members to build familiarity, use of a “tell-show-do” approach extended with longer processing time between steps, offering sensory tools like weighted blankets or noise-canceling headphones, and allowing the child to sit in the chair without reclining for initial acclimation visits.
Some children on the spectrum benefit from the “tell-show-feel-do” modification, which adds a tactile component before the actual procedure. The child feels the polisher on their finger before it touches their tooth. This extra step builds predictability and reduces defensive responses.
Down Syndrome Considerations
Children with Down syndrome face specific oral health challenges. They may have smaller mouths, delayed tooth eruption, missing or malformed teeth, and a higher prevalence of periodontal disease. Medical considerations include atlantoaxial instability, which affects neck positioning, and a higher rate of congenital heart defects requiring antibiotic prophylaxis before certain dental procedures.
Cleanings for these children involve careful attention to gum health, more frequent recall intervals (often every three to four months), and emphasis on home care support. The dental team communicates closely with medical providers to ensure safety and comprehensive care.
Children with Physical Disabilities
Mobility impairments, neuromuscular conditions, and other physical disabilities require environmental and procedural adaptations. Wheelchair-accessible treatment areas with transfer support equipment allow many children to receive care in their own wheelchair. Others transfer to a dental chair with assistance. Positioning supports—wedges, rolls, pillows—maintain comfortable, stable body alignment throughout the cleaning.
Dietary Counseling as Part of the Cleaning Visit
The cleaning appointment represents a prime opportunity for dietary intervention. The hygienist sees direct evidence of dietary habits in the pattern and severity of plaque and decay. This observation leads to personalized, non-judgmental conversations about nutrition.
The Role of Frequent Sugar Exposure
Sugar itself does not cause cavities directly. Oral bacteria metabolize sugar and produce acid as a byproduct. This acid demineralizes enamel. Each sugar exposure generates an acid attack lasting 20 to 40 minutes. Frequency matters far more than total quantity. A child who sips juice throughout the day endures near-constant acid attacks. A child who drinks the same amount of juice with a meal and then stops experiences a single, time-limited acid period.
Dental professionals explain this concept using simple analogies. “Imagine your teeth are taking a bath in acid every time you eat something sugary. They need time to dry off between baths.” This visual helps both children and parents understand why grazing and frequent snacking harm teeth.
Protective Foods and Habits
The conversation extends beyond limiting sugar. Certain foods actively protect teeth. Cheese raises oral pH and stimulates saliva flow. Crunchy vegetables mechanically clean tooth surfaces and stimulate gums. Xylitol-containing products inhibit bacterial growth and reduce plaque adhesion. Water rinses food debris and buffers acid. The dental team provides specific, actionable recommendations that families can implement immediately.
The Sippy Cup and Bottle Conversation
For toddlers, the cleaning visit addresses prolonged bottle and sippy cup use. Milk, formula, juice, and even breast milk contain sugars that pool around teeth during prolonged drinking sessions. “Baby bottle tooth decay” describes the characteristic pattern of cavities affecting upper front teeth from bedtime bottle habits. The dentist recommends transitioning to open cups by age one and limiting milk or juice consumption to mealtimes only.
Fluoride: Separating Fact from Fear
Fluoride discussions sometimes generate parental concern. The cleaning appointment provides an opportunity for evidence-based education about fluoride’s role in cavity prevention.
How Fluoride Works
Fluoride incorporates into developing enamel before teeth erupt, making the crystals more resistant to acid dissolution. After eruption, topical fluoride promotes remineralization of early decay, inhibits bacterial enzyme activity, and reduces the ability of bacteria to produce acid. This multi-pronged mechanism explains fluoride’s dramatic impact on cavity rates.
Safety of Professional Fluoride Application
Professional fluoride varnish contains 22,600 parts per million fluoride, far higher than over-the-counter products. The rapid setting and small volume used minimize systemic absorption. When applied properly—thin layer, no swallowing, post-application instructions followed—the treatment carries very low risk. Dental fluorosis, the cosmetic mottling of enamel from excess fluoride during tooth development, does not result from topical professional applications. It relates to chronic over-ingestion during early childhood when permanent teeth are forming beneath the gums.
Evidence of Effectiveness
Systematic reviews demonstrate that professional fluoride varnish applications reduce cavities in primary teeth by 37 to 43 percent. For children at high risk, quarterly applications provide the greatest benefit. This preventive strategy ranks among the most cost-effective interventions in all of healthcare.
The Importance of Dental Sealants
Although sealants represent a separate procedure from cleaning, the cleaning visit often includes sealant discussion and evaluation. Sealants deserve mention because they complement professional cleanings in pediatric cavity prevention.
What Sealants Do
Sealants are thin, plastic coatings painted onto the chewing surfaces of back teeth. The material flows into the deep grooves and pits where food and bacteria collect and toothbrush bristles cannot reach. By creating a smooth, sealed surface, sealants eliminate the primary site for occlusal decay. They effectively “seal out” cavity-causing factors.
Ideal Timing for Sealants
First permanent molars erupt around age six. Second permanent molars erupt around age twelve. Both sets benefit from sealant application soon after eruption, before decay has time to establish. Some children also benefit from sealants on baby teeth with deep grooves and high decay risk.
The Sealant Procedure
Applying sealants involves cleaning the tooth, conditioning the enamel with a mild acid gel that creates microscopic roughness, rinsing and drying the tooth, painting on the liquid sealant material, and hardening it with a curing light. The process is entirely painless and takes only a few minutes per tooth. Sealants last several years and receive checking at each recall visit.
Managing Common Childhood Dental Issues During Cleanings
Professional cleanings often uncover concerns beyond plaque and tartar. The dental team addresses these findings with appropriate urgency and referrals.
White Spot Lesions
White, chalky areas on enamel indicate the earliest stage of decay—demineralization without cavitation. These white spot lesions remain reversible with aggressive preventive measures. The dental team identifies them, photographs them for monitoring, applies fluoride varnish, and intensifies home care instruction. They may recommend products containing casein phosphopeptide-amorphous calcium phosphate, which enhances remineralization. Without intervention, white spots progress to frank cavities.
Gingivitis and Bleeding Gums
Inflamed, puffy gums that bleed easily during brushing or cleaning indicate gingivitis. In children, this typically results from inadequate plaque removal along the gumline. The bleeding can alarm parents, but the dental team explains that healthy gums do not bleed. The bleeding signals inflammation that will resolve with improved cleaning. They demonstrate proper brushing angle—45 degrees toward the gumline—and recommend electric toothbrushes for children who struggle with manual dexterity.
Tooth Grinding (Bruxism)
Many parents hear their children grinding teeth at night and worry about permanent damage. The dentist assesses wear patterns during the examination. Most childhood bruxism resolves without intervention and does not require treatment. Teeth naturally wear slightly as the child’s bite develops. Only in cases of significant wear, pain, or sleep disruption does the dentist consider intervention, typically a night guard, but rarely for primary teeth.
Eruption Cysts and Hematomas
When permanent teeth push toward the surface, bluish, fluid-filled swellings sometimes appear on the gums. These eruption cysts or hematomas look alarming but rarely require treatment. They typically rupture spontaneously as the tooth emerges. The dentist monitors them during recall visits and intervenes only if they persist or cause discomfort.
Oral Hygiene Products Recommended During Cleanings
The post-cleaning conversation often includes specific product recommendations tailored to the child’s needs. Dental professionals make these suggestions based on clinical findings.
Toothbrushes: Manual vs. Electric
For most children, powered toothbrushes provide superior plaque removal compared to manual brushes. The oscillating-rotating style (with a round brush head) shows the strongest evidence. Electric brushes compensate for developing dexterity and make brushing easier. Features like timers, pressure sensors, and companion apps engage children and build consistent habits. Manual brushes remain effective when used with proper technique for a full two minutes. The dental team recommends whatever the child will use consistently and correctly.
Toothpaste Selection
Children under three should use a rice-grain-sized smear of fluoride toothpaste. Children three and older should use a pea-sized amount. The fluoride concentration in most children’s toothpaste ranges from 1,000 to 1,450 parts per million, which provides effective cavity protection. Children who cannot reliably spit benefit from lower fluoride formulations, but the dental team assesses this individually. Flavor preferences matter enormously—mint can taste “spicy” or “burning” to young palates. Fruit-flavored toothpastes increase brushing acceptance.
Interdental Cleaning Tools
Traditional string floss works well for tight contacts. Floss picks with handles help children develop independence. Interdental brushes suit wider spaces, including around orthodontic brackets. Water flossers provide an alternative for children who resist traditional flossing. The cleaning appointment includes hands-on instruction with whichever tool suits the child’s needs.
Mouth Rinses
For children over six who can reliably swish and spit, fluoride mouth rinses add an extra layer of protection. Some formulations target specific issues like gingivitis or high caries risk. The dental team recommends specific products based on individual assessment.
The Recall Schedule: How Often Should Children Have Cleanings?
The traditional six-month recall interval stems from a reasonable evidence base but does not apply universally. Risk assessment determines appropriate timing for each child.
Low-Risk Children
Children with no history of cavities, excellent home care, favorable dietary habits, and normal tooth development may maintain health with annual cleanings. The dentist evaluates risk at each visit and adjusts the interval accordingly.
Moderate-Risk Children
One or more past cavities, inconsistent home care, fair dietary habits, or orthodontic appliances place children in the moderate-risk category. Six-month cleanings serve these children well. More frequent monitoring catches problems at reversible stages.
High-Risk Children
Multiple cavities, poor home care, frequent sugar exposure, special healthcare needs, or xerostomia (dry mouth from medications or medical conditions) define high risk. These children benefit from cleanings every three to four months. The frequent interval disrupts plaque maturation, applies fluoride more regularly, and provides ongoing education and support.
What to Expect After the Cleaning
The immediate post-cleaning period involves minimal considerations for most children. A few things deserve mention.
Post-Fluoride Instructions
If the child received fluoride varnish, the teeth may feel slightly rough or “fuzzy” until the varnish wears off, typically within four to six hours. Eating and drinking restrictions apply for 30 minutes. Hot, crunchy, or sticky foods should wait until the varnish has fully set. Brushing and flossing can resume the next day. The yellowish or clear coating on the teeth is normal and temporary.
Post-Polishing Sensitivity
Slight tooth sensitivity after scaling and polishing, especially if significant tartar removal occurred, resolves within a day or two. Desensitizing toothpaste helps if the sensation bothers the child. The sensitivity actually indicates that previously covered, unhealthy root surfaces are now exposed and can receive fluoride and protective minerals.
The Fresh, Clean Feeling
Most children leave the office running their tongues over smooth teeth. This tangible reward reinforces the value of professional cleaning. Parents can capitalize on this moment: “Don’t your teeth feel amazing? That’s how clean they can feel every day with good brushing.” The positive association builds intrinsic motivation for home care.
Common Myths About Children’s Dental Cleanings
Misinformation circulates widely among parents. The dental team addresses common myths during the cleaning visit, providing evidence-based corrections.
Myth: Baby Teeth Do Not Need Professional Care Because They Fall Out
This persistent myth causes preventable suffering. Decayed baby teeth cause pain, infection, and difficulty eating. Infections in baby teeth can damage developing permanent teeth beneath them. Premature loss of baby teeth leads to space loss and orthodontic complications. Baby teeth deserve the same preventive care as permanent teeth.
Myth: Dental Cleanings Hurt
A properly performed pediatric cleaning causes minimal or no discomfort. Areas with significant inflammation or heavy tartar may feel more sensitive, but the hygienist adjusts technique accordingly. Children with previous painful dental experiences benefit from finding a practice specializing in pediatric care and gentle approaches.
Myth: Fluoride Is Dangerous for Children
Professional fluoride application carries an exceptionally strong safety record when applied according to guidelines. The dose and delivery method limit systemic exposure. The scientific consensus, based on decades of research, supports fluoride as a safe, effective cavity prevention tool.
Myth: Children Do Not Need Flossing Until Teeth Touch
Teeth that touch do trap more food and plaque, but even spaced teeth benefit from interdental cleaning. Gum disease begins at the gumline between teeth regardless of contact points. Flossing should begin as soon as two teeth erupt adjacent to each other.
Myth: Electric Toothbrushes Damage Children’s Enamel
Properly used electric toothbrushes, especially those with pressure sensors, cause no more enamel wear than manual brushes. In fact, they often cause less damage because the child does not need to scrub aggressively. The key factor is technique, not power source.
Finding the Right Pediatric Dentist for Your Child
Not all dental practices handle children equally well. Parents should evaluate potential providers based on concrete criteria.
Pediatric Dentist vs. General Dentist
Pediatric dentists complete two to three years of additional residency training focused exclusively on children. This includes behavior management, growth and development, special needs care, and pediatric sedation. General dentists treat patients of all ages and may be excellent with children, but their training does not include the same pediatric specialization. Board-certified pediatric dentists demonstrate advanced knowledge through rigorous examination.
Questions to Ask When Choosing a Provider
Parents should feel empowered to ask specific questions before scheduling: What is your approach to a child who feels anxious or uncooperative? Do you allow parents in the treatment room during cleanings? What sedation options do you offer? How do you handle medical emergencies? What is your policy on X-rays for children? Answers to these questions reveal the practice philosophy and help parents determine fit.
Red Flags to Watch For
Warning signs include a practice that dismisses parental concerns, uses restraint without explanation or consent, pressures parents into treatment plans without discussion of alternatives, or seems rushed and impersonal. Trust and communication matter as much as technical skill. A dentist who cannot explain treatment clearly to a parent likely struggles to connect with a child.
The Evolution of Pediatric Preventive Dentistry
Modern pediatric dental care looks dramatically different from dentistry even a generation ago. Understanding this evolution contextualizes current best practices.
From Drill-and-Fill to Prevention-First
The traditional dental model focused on repairing damage after it occurred. The contemporary model prioritizes prevention through regular cleanings, fluoride, sealants, dietary counseling, and risk assessment. This shift transformed pediatric dentistry from reactive to proactive care.
Technology Improvements
Digital radiography reduced radiation exposure by 50 to 80 percent compared to film. Laser cavity detection identifies decay earlier than visual inspection. Intraoral cameras let children and parents see what the dentist sees, improving communication and acceptance of treatment recommendations. Computerized anesthesia delivery systems make injections more comfortable when needed.
Emphasis on Behavioral Science
Modern pediatric dentistry integrates findings from psychology and neuroscience. Understanding how children process fear, how parental anxiety transmits to children, and how positive reinforcement shapes behavior all inform the approach to cleanings. The result is a more humane, effective experience.
Conclusion
Professional dental cleanings for children blend clinical expertise with child psychology to create safe, gentle preventive care. From the child-friendly environment to the step-by-step Tell-Show-Do communication, every element aims to build comfort and trust while removing harmful plaque and tartar. Parents who understand what happens during these visits can prepare their children effectively, participate actively in oral health discussions, and reinforce positive habits at home. Regular pediatric cleanings, combined with fluoride, sealants, and dietary awareness, give children the foundation for a lifetime of healthy smiles.
Frequently Asked Questions
At what age should my child first visit the dentist for a cleaning?
The American Academy of Pediatric Dentistry recommends a first dental visit by age one or within six months after the first tooth appears. This initial visit focuses on acclimation, parent education, and a gentle examination. Full cleanings with scaling typically begin around age three or four, when the child can cooperate with the procedure.
Will my child feel pain during a dental cleaning?
A properly performed pediatric cleaning causes minimal discomfort. The hygienist uses gentle technique and adjusts pressure based on the child’s response. Areas with significant tartar buildup or gum inflammation may feel slightly sensitive, but sharp pain is not normal. Children should tell the hygienist if something hurts so adjustments can be made.
How long does a children’s dental cleaning take?
The cleaning portion of a pediatric appointment typically takes 15 to 30 minutes, depending on the child’s age, cooperation level, and the amount of plaque and tartar present. The full appointment, including examination and education, usually lasts 30 to 45 minutes for established patients.
Can I stay with my child during the cleaning?
Most pediatric dental practices welcome parents in the treatment room during cleanings. Your presence provides comfort and allows you to observe the techniques used. Some dentists may request that parents serve as silent observers, allowing the dental team to build direct rapport with the child. Discuss your preference with the practice beforehand.
What if my child has extreme dental anxiety?
Multiple strategies exist for anxious children. Start with a practice specializing in pediatric care. Discuss anxiety openly with the dentist. Consider a desensitization visit where no treatment occurs—just a tour and meeting the team. Nitrous oxide sedation helps many anxious children relax. For severe cases, oral sedation or general anesthesia may be appropriate.
How is cleaning different for children with braces?
Children with orthodontic appliances require more meticulous cleaning because brackets and wires trap plaque. The hygienist uses specialized instruments to clean around brackets, under wires, and between teeth. These cleanings often take longer and may occur more frequently—every three to four months during orthodontic treatment.
Does dental insurance cover children’s cleanings?
Most dental insurance plans cover two preventive visits per year, including cleanings, examinations, and fluoride treatments. The Affordable Care Act requires pediatric dental coverage as an essential health benefit. Check your specific plan for details on coverage, copayments, and in-network providers.
What is the difference between a cleaning and a deep cleaning?
A routine cleaning (prophylaxis) removes plaque and tartar from above the gumline. A deep cleaning (scaling and root planing) extends below the gumline to treat periodontal disease. Deep cleanings are rare in children and typically occur only with significant gum disease, which is uncommon in pediatric patients.
Additional Resources
American Academy of Pediatric Dentistry
Find a pediatric dentist, access parent education resources, and learn about the latest recommendations for children’s oral health.
Visit: https://www.aapd.org
Disclaimer: This article provides general information about pediatric dental cleanings and should not replace professional medical advice. Every child’s oral health needs differ. Consult a qualified pediatric dentist for personalized assessment and treatment recommendations. If your child experiences dental pain, swelling, or trauma, seek immediate professional care.