Is Crest Teeth Whitening Safe?
We all want a brighter, more confident smile. When you walk down the oral care aisle or scroll through endless online listings, the promise of a dazzling Hollywood smile from a box can feel incredibly tempting. Crest, arguably the most recognizable name in at-home teeth whitening, often sits at the top of that list. But before you tear open that package and apply that gel, a critical question forms in the back of your mind. That internal pause, that moment of self-protection, brings you right here.
You are asking the single most important question you can ask before putting a new product on your teeth: Is Crest Teeth Whitening Safe? The short answer is a resounding yes, generally speaking, when millions of people use these products according to the instructions. The scientific community and dental professionals widely accept the active ingredients as safe for at-home application on healthy teeth and gums. However, the full, honest truth is much more nuanced than a simple yes or no. Your safety doesn’t just depend on the formula inside the box. It hinges entirely on how you use it, the current state of your oral health, and your willingness to listen to your body’s signals.
This isn’t a surface-level overview. We are going to dive deep into the science of peroxide, the architecture of your enamel, the burning reality of sensitivity, and the critical mistakes people make that turn a safe product into a painful experience. Forget the marketing claims; we will look at what actually happens at a microscopic level when that gel touches your tooth surface. We will dissect every ingredient, compare every application method from strips to pens to LED kits, and build a foolproof protocol to minimize risk. By the time you finish reading this comprehensive guide, you will not just have an answer to whether Crest is safe. You will have the deep, actionable knowledge to become the most informed, cautious, and successful at-home whitener you know, protecting your smile’s health while brightening it.
The Deep Science of a Smile: Understanding Your Canvas
To truly grasp the safety conversation, you cannot just think of your teeth as solid, lifeless rocks. They are complex, living structures, and the process of whitening targets a very specific part of this architecture. Whitening is not like painting a wall; it is a chemical reaction that happens through the surface, inside the tooth, and interacts with the living tissue at the core. Understanding this landscape is the first step to becoming an empowered user.
The Porosity of Your Enamel: Not an Impenetrable Shield
Many people picture enamel as a solid, impervious shield, like a glass coating. The reality is profoundly different and directly dictates how whitening works. Your enamel, the hardest substance in your body, is actually composed of tightly packed mineral crystals, primarily hydroxyapatite, formed into microscopic, rod-like structures called enamel prisms or rods. Think of it not as a solid sheet of glass, but as a tightly bundled cluster of millions of tiny, translucent straws, all pointing from the outer surface inward toward the dentin.
Between these crystalline rods exists a microscopic network of pores or channels. This is the critical anatomical feature that makes whitening possible. The active whitening gel, usually hydrogen peroxide or carbamide peroxide, is a fluid of small molecules. When you apply it, it doesn’t just sit on top. It seeps into these microscopic pores, percolating through the enamel’s interstitial spaces via capillary action. This journey through the “straws” is what allows the gel to reach the deeply embedded stain molecules residing within the enamel layer. Without this natural porosity, whitening would be impossible. The safety question arises when we consider what happens if those pores become too wide or if the journey extends too deep, too aggressively. A safe whitening process uses this natural porosity without degrading the protein matrix that surrounds the mineral crystals. An unsafe, overused process begins to erode that matrix, widening the channels, dissolving minerals, and leaving the enamel permanently more fragile.
The Dentin Layer and the Origin of True Sensitivity
If you journey through those enamel pores, you reach the main body of the tooth: the dentin. This is a completely different world. Dentin is a living, yellow-hued, bone-like tissue that makes up the bulk of your tooth. It isn’t solid. It’s riddled with thousands of microscopic, fluid-filled tubules that radiate outward from the tooth’s inner core, the pulp. Here is the single most important anatomical fact for you to understand about whitening sensitivity. These tiny tubules contain fluid and extensions of living cells called odontoblasts. The odontoblasts reside in the pulp, but their long, arm-like extensions reach up into these tubules.
When a stimulus touches the dentin—perhaps from gum recession exposing the tooth root (which is covered in cementum, not protective enamel), a deep cavity, or, crucially, the osmotic effects of whitening gel—the fluid inside these tubules moves. This movement creates a hydrodynamic pressure change that is instantly detected by the nerve endings intertwined with the odontoblasts in the core pulp chamber. Your brain interprets this sudden, rapid fluid shift as a sharp, electric, fleeting jolt of pain. This is dentinal hypersensitivity. Whitening agents are small enough to travel through enamel and into dentin. Once there, the peroxide can create an osmotic draw or irritate the odontoblastic extensions, triggering that fluid movement. This is why sensitivity during whitening feels so deep and zinging; it’s literally the fluid in your teeth being disturbed. The safety and comfort of whitening are a balance between allowing the peroxide enough time in the enamel to break down stains, but not so much residence time in the dentin that it causes overwhelming fluid shifts and nerve irritation.
The Vital Core: Protecting the Dental Pulp
At the absolute center of the tooth lies the pulp chamber. This is the tooth’s soft, living core, a highly vascular and innervated connective tissue. It contains arteries, veins, nerves, and specialized cells. This is the vital life source of the tooth, responsible for providing nutrients, moisture, and sensory function. The ultimate safety red line for any whitening procedure, whether at home or in a dental office, is to avoid causing irreversible damage to the pulp.
When peroxide gel, especially in high concentrations used for in-office treatments like Zoom! or laser whitening, penetrates through the enamel and dentin, a small amount can reach the pulp. In a healthy tooth with normal, thick enamel, this minimal exposure causes a temporary, fully reversible pulpitis. This is the familiar, short-lived sensitivity you might feel. The pulp becomes slightly inflamed, but it recovers completely within hours or days. The danger zone is irreversible pulpitis, which means the pulp tissue is so severely insulted that it cannot recover and begins to die. This can happen if the peroxide concentration reaching the pulp is too high and sustained for too long. Scenarios that cause this include:
- Using extremely high-concentration gels on teeth with thin, worn, or genetically deficient enamel.
- Whitening teeth with deep, untreated cavities or leaky fillings that provide a direct superhighway for the gel to gush straight into the pulp.
- Leaving whitening trays or strips on for hours beyond the recommended time.
In these cases, the gel bypasses the natural slow-diffusion pathway of the enamel pores and floods the dentinal tubules, causing massive, sustained inflammation that chokes off the pulp’s blood supply. The result is a dying tooth requiring a root canal or extraction. This is the catastrophic, though preventable, failure of whitening safety. Using Crest products exactly as directed on intact, healthy teeth is overwhelmingly unlikely to cause this level of damage. The formula’s viscosity, peroxide percentage, and recommended wear time are precisely engineered to create a therapeutic window—strong enough to whiten within the enamel but dilute enough by the time it reaches the pulp to cause only transient, harmless inflammation. Your adherence to the instructions is what maintains this window of safety.
The Active Agents: Hydrogen Peroxide vs. Carbamide Peroxide
You can’t assess the safety of Crest’s products without a forensic understanding of the two chemical workhorses behind nearly all effective tooth whitening. These aren’t just generic bleaching agents; they are distinct molecules with different reaction profiles, potencies, and safety margins. Knowing the difference will change how you shop and how you whiten.
Carbamide Peroxide: The Slow-Release Pro-Drug
When you pick up a Crest Whitestrips box and read the ingredient list for the gel, you will almost always see carbamide peroxide as the active ingredient. This is a deliberate, safety-focused choice. Carbamide peroxide is not, in itself, the active bleaching agent. It is a precursor, or pro-drug. A molecule of carbamide peroxide is essentially a complex of hydrogen peroxide loosely bonded to urea. It is stable in the gel formulation and on the strip, but the moment it contacts your teeth and the moisture of your saliva, it begins to break down.
The magic, and the safety profile, lies in its chemistry. As carbamide peroxide breaks down, it decomposes into its two component parts: hydrogen peroxide (the true whitening molecule) and urea. Crucially, this decomposition is not instantaneous. It happens gradually over a period of hours. Think of this as a controlled-release capsule. A 10% carbamide peroxide gel will slowly release roughly 3.5% hydrogen peroxide as it sits on the teeth. This slow, sustained release provides a longer, gentler bath of active ingredient for your enamel. The safety advantage is profound. The peak concentration of free radicals in the enamel pores is lower, giving the pulp and nerve tissue time to acclimatize and the body’s natural buffer systems time to neutralize the oxidative stress. The urea byproduct is also beneficial; urea is commonly used in dental products because it has mild anti-plaque and salivary-stimulating properties. It helps stabilize the pH and can even assist in remineralizing minor lesions. For a product designed for unsupervised, at-home use by millions of people with widely varying oral health, this slow-release mechanism is the primary safety engineering feature. It creates a wider margin for error.
Hydrogen Peroxide: The Direct and Potent Actor
Hydrogen peroxide (H2O2) is the active bleaching agent directly. It does not need to break down; it is ready to work the moment it touches the tooth. This is the go-to active ingredient for most in-office professional whitening systems, where a dentist applies a 25% to 40% gel and carefully isolates your gums with a protective rubber dam or liquid barrier. It is also the active ingredient in some at-home products, like Crest’s Whitening Emulsions and the Pen applicators.
The safety trade-off is clear. Hydrogen peroxide works much faster because it floods the enamel’s microscopic pores with a high concentration of free radicals immediately. This is why a pen or an emulsion can claim results in minutes. The entire oxidative reaction is compressed into a shorter time window. However, this speed demands greater responsibility from you, the user. Because the oxidative burst is so rapid and potent, any leakage onto the gum tissue can cause immediate chemical burns, which appear as white, blanched patches that may sting. These are usually transient and resolve within an hour or two, but they signal that the oxidative stress was too much for that soft tissue. The rapid influx of free radicals into the dentin can also trigger a much faster, sharper pain response from the pulp’s nerves. Using a direct hydrogen peroxide product like a pen gives you great control for targeted spot treatments, but you must be surgically precise in its application to avoid the gums. It’s a more powerful tool that comes with a finer edge of safety, demanding a light, careful touch and strict adherence to the shorter wear times.
The Free Radical Oxidation: Why “Bleaching” is a Misnomer
Let’s clarify what “whitening” actually means. You are not using household chlorine bleach. The term “bleaching” is technically defined by the FDA as a product that can whiten teeth beyond their natural color, which Crest Whitestrips can do. The mechanism, however, is pure, elegant oxidation. Stain molecules that have seeped into your enamel over years of coffee, red wine, tea, tobacco use, or certain antibiotics are complex, long-chain organic molecules that are chromophoric, meaning they strongly absorb and reflect specific wavelengths of light, making them appear dark yellow or brown.
Here is the step-by-step process of how the active ingredients work safely within the enamel’s structure:
- The small peroxide molecules diffuse into the enamel’s pores, navigating the spaces between the mineral crystals.
- Upon contact with the discolored stain molecules embedded deep in the enamel lattice, the unstable peroxide decomposes. It releases highly reactive oxygen free radicals.
- These free radicals are like molecular Pac-Men. They aggressively seek out the chemical bonds, particularly the double bonds, that make the stain molecules pigmented.
- The oxygen radicals attack and break these pigmented bonds, chopping the large, dark organic molecules into smaller, simpler, non-pigmented molecules.
- The stain is not physically scrubbed or dissolved away in the traditional sense. It is chemically altered to become invisible.
The safety of this process for your enamel’s integrity lies in the specificity of the reaction. The free radicals preferentially attack the organic, carbon-based double bonds in the stain chromophores. The enamel’s mineral structure is primarily an inorganic calcium phosphate crystal (hydroxyapatite), which lacks these organic double bonds. A controlled, correctly-timed application of peroxide, therefore, can dissolve stains without dissolving the tooth itself. The danger arises when the process goes too far. If the oxidative stress is too intense or prolonged, the oxygen radicals begin to attack the sparse but vital organic protein matrix that holds the enamel crystals together. This leads to demineralization, surface roughening, and a chalky, etched appearance. This is the difference between a safe, cosmetic brightening and a destructive, pathological erosion of your tooth surface. Your goal as a user is to provide just enough oxidative force to break the stain bonds but not enough to break your tooth’s structural protein scaffolding.
The Crest Product Arsenal: A Detailed Safety Breakdown for Every Format
“Crest Teeth Whitening” isn’t a single monolithic product. It’s a vast ecosystem of gels, strips, pens, lights, and toothpastes, each with a unique interface with your oral biology. Their safety profiles are not identical. A safety strategy that works for a 30-minute strip is entirely different from what you need for an overnight gel. Let’s perform a rigorous safety audit on each major category.
Crest Whitestrips: The Gold Standard of Contact Whitening
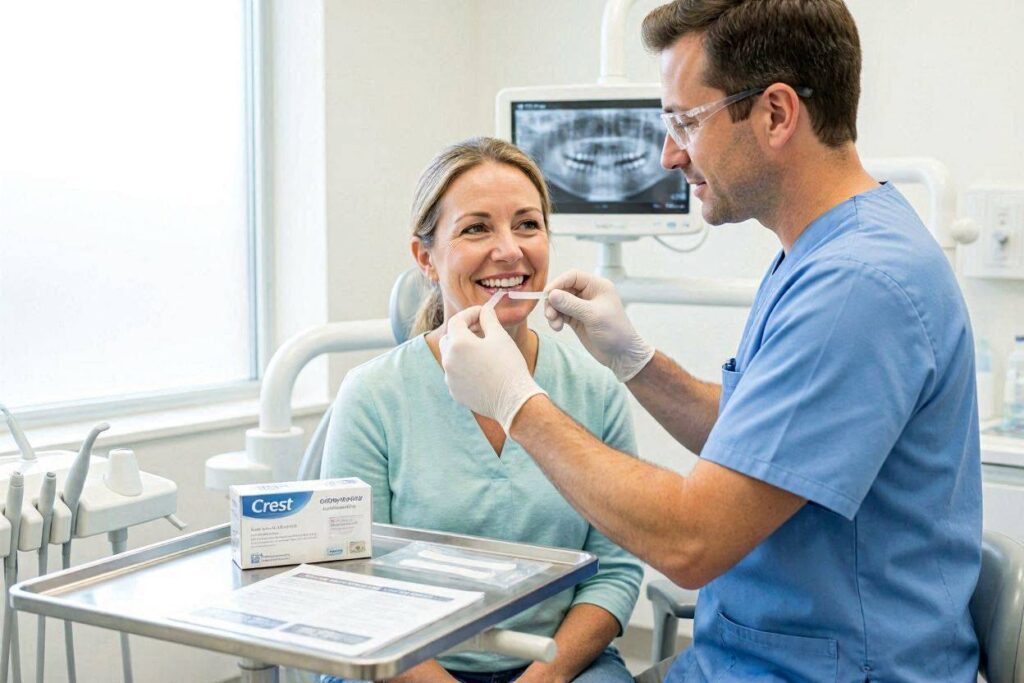
This is the flagship product, and likely what you think of first. The safety of Whitestrips is inextricably linked to two design choices: the viscosity of the gel and the precision of the strip’s placement. The gel on a Whitestrip is not a watery liquid. It is a thick, highly viscous, sticky matrix formulated with carbamide peroxide, a water-soluble polymer thickening agent, water, glycerin for moisture retention, and a pH stabilizer. This viscosity is your primary non-chemical safety feature. A thick gel cannot easily run, drool, or migrate off the tooth surface. It stays glued to the enamel, held in place by the polyethylene strip’s backing. This severely limits the gel’s contact with your gums, cheeks, and tongue, the soft tissues most susceptible to chemical burns. The strip itself acts as a physical barrier, isolating the active ingredient to the facial surfaces of the teeth.
The Common Anatomical Mismatch Problem
The design of a flat, two-dimensional polyethylene strip imposes a fundamental limitation. Your dental arch is a three-dimensional curve. The strips are designed to be folded over the incisal (biting) edges of your front teeth and tucked down. This works beautifully on the front six teeth—the canines and incisors—which are relatively flat and uniform. As you move backward into the premolar region, the strip often struggles to conform. The teeth become smaller and more curved. The most frequent safety and efficacy failure is what happens with the excess, unadapted strip material that bunches up and, critically, sits directly on the gum tissue, both on the lip side and, after folding over, the tongue/palate side.
This gel-laden plastic sitting on the gingiva is the primary cause of the white, stinging chemical burns users report. The gum tissue in that area becomes ischemic and irritated by the direct, prolonged contact with the carbamide peroxide. The result is transient “blanching,” where the tissue turns white and may feel raw for a day or two. This is not a permanent injury in most healthy individuals. The tissue sloughs off and regenerates quickly. However, it is a clear warning signal that your application technique needs refinement. To mitigate this, do not try to stretch the strip to cover every back tooth if it means sacrificing the gingival health of your premolars. You can trim the strip with a clean pair of scissors to better fit your arch length. A more advanced solution, a favorite of long-term users, is to use a flat, soft silicone finger cot or a “strip applicator tool” to press and mold the excess plastic into the interproximal spaces between the teeth and to burnish the strip’s border so it sits flush against the gumline without rolling onto the soft tissue itself. Think of it as saran-wrapping the teeth, not the gums. The safety of the strip is almost entirely in your hands during these first 60 seconds of placement.
Crest Whitening Emulsions and Pens: Direct Hydrogen Peroxide Application
The Emulsions and the Whitening Pen represent a different philosophy: speed and precision with pure hydrogen peroxide. The Emulsion is an anhydrous (water-free), gel-like liquid you paint directly onto your teeth. The Pen is a clickable, brush-tip applicator that dispenses a hydrogen peroxide gel for spot treatments. Because they use hydrogen peroxide, the oxidative burst is immediate and powerful. The product is designed to quickly break down stains on the surface layer of the enamel upon contact, then the volatile carrier base evaporates, leaving a thin film of active ingredient that theoretically continues to work.
The profound safety advantage here is the total elimination of the strip and its tissue contact issues. You have complete, manual control over what the gel touches. However, this shifts the entire burden of safety to your application technique. You become the isolation system. The single most critical mistake you can make is applying these formulas like a toothpaste, scrubbing it onto every surface and inevitably slathering your gums. This will cause immediate, widespread chemical burns. The correct, safe application ritual is a single-tooth process. Start by drying your teeth. Use a clean facial tissue or a cotton pad to thoroughly dry the facial surfaces. Saliva and moisture instantly dilute hydrogen peroxide, so a dry field is necessary, but more importantly, dry, clean gums are less likely to wick the gel toward them. Place the brush tip precisely in the center of the tooth, well away from the gumline and the interdental papilla (the little triangle of gum between teeth). Gently spread the formula to the interproximal edges but stop a full millimeter short of the gum tissue. Do not glaze over the gum. Leave a clean, gel-free margin of tooth structure. You are creating a safe zone, a no-man’s land of bare enamel that prevents the active peroxide from touching living tissue. This “paint-by-numbers” method is time-consuming but is the only safe way to use a direct hydrogen peroxide system at home. The safety of the pen is a direct reflection of your patience and precision.
LED Accelerator Lights: A Safety Reality Check
A large segment of the Crest product line includes a handheld LED light device, often battery-powered, that you hold in front of your mouth after applying a hydrogen peroxide gel. The marketing powerfully suggests that this light “accelerates” or “activates” the whitening gel. From a strict safety and scientific perspective, we must scrutinize this claim. Hydrogen peroxide breaks down via a thermo-catalytic reaction. It is activated by heat, a high pH, and time. It also absorbs light energy in the ultraviolet (UV) to near-blue visible spectrum.
The LED lights in Crest kits emit a cool, blue visible light (typically in the 400-500 nanometer wavelength range) with minimal to zero UV output. There is a genuine, peer-reviewed scientific basis that intense, specific wavelengths of light, combined with a photo-active catalyst, can speed up peroxide decomposition. Professional in-office lights like Zoom! are high-intensity, broad-spectrum lamps that generate significant heat and light energy, demonstrably accelerating the reaction. The small, battery-operated LED in a home kit is a different beast entirely. Its energy output is orders of magnitude lower. Many independent dental researchers argue that the primary whitening effect from these home LED lights is not photochemical activation but simply thermal acceleration from the heat of the light being held close to the mouth, combined with the dehydrating effect of keeping your lips retracted and a constant, warm, dry environment on the tooth surface. A dehydrated tooth loses moisture from its enamel pores, temporarily becoming more opaque and reflective, which creates an instant, dramatic whitening illusion that can fade within 24 hours as the tooth rehydrates.
Is the light itself safe? Yes, for the soft tissues. It’s just a blue LED. Is it harmful? No. Is it essential to the chemical whitening process? This is highly debatable. The potential safety risk is indirect. Users who believe the light is doing the heavy lifting may be tempted to oversaturate their teeth with hydrogen peroxide, or to use the light for longer than recommended to “boost” the effect, under the false belief the light makes it more effective. This over-application of peroxide gel, not the light, is the danger. View the light for what it is: a well-designed timer and positioning tool that helps you sit still for 10 to 30 minutes, ensuring the gel stays in contact with the teeth. The safety and efficacy are from the gel chemistry and contact time; the light is an accessory, not a medical device.
| Product Format | Active Agent | Typical Conc. | Primary Safety Mechanism | Your Critical Safety Task | Greatest Risk Profile |
|---|---|---|---|---|---|
| Whitestrips | Carbamide Peroxide | 6-14% | Gel Viscosity & Strip Occlusion | Mold and tuck strip to prevent gel on gums. | Gum blanching/burns on premolars from poor fit. |
| Emulsions/Pens | Hydrogen Peroxide | ~4-9% | Manual Application Precision | Paint a gel-free margin away from all gum tissue. | Widespread, painful chemical gingival burns from sloppy application. |
| LED Light Kits | Hydrogen Peroxide | ~6-10% | Timer & Lip Retraction | Don’t over-apply gel believing light makes it stronger. | Overuse of gel causing severe dentinal sensitivity. |
| Whitening Toothpaste | Silica, Peroxide | <1-2% Peroxide | Abrasive Action & Brief Contact | Use a soft brush and light, circular motion. | Enamel wear from aggressive scrubbing with high-abrasive formulas. |
The Sensitivity Spectrum: From Tolerable Zingers to Red Flags
Let’s talk openly about pain. Seeking a comfortable whitening experience is not just about pleasure; it is the principal safety monitoring system you have. Pain is data. It’s a direct, real-time feedback loop from the living pulp tissue inside your teeth telling you how it’s coping with the oxidative onslaught. Ignoring or suppressing this signal with painkillers to push through a treatment is not a strategy; it’s a dangerous bypass of your body’s warning system.
Decoding the Types of Whitening Pain
Not all whitening-related discomfort is the same. Your ability to differentiate between the sensations will make you a safer user.
The Evaporative Sensitivity (The “Cold Zinger”): This is the most common side effect. After a treatment, you take a breath of cool air through your mouth or sip room-temperature water, and a sharp, fleeting, electric jolt shoots through one or several teeth. This is classic hydrodynamic sensitivity. The peroxide has created a temporary osmotic gradient within the dentinal tubules. The fluid inside these tubules is moving abnormally fast in response to the evaporative cooling or temperature change, triggering the nerve. This means the pulp is mildly, reversibly inflamed (pulpitis). This is a normal, expected signal that the treatment window has been reached.
The Dull, Lingering Throb: A steady, achy, throbbing pain that persists for minutes or hours and feels like a heartbeat in a tooth is a completely different signal. This indicates a more significant, sustained inflammatory response in the pulp. The vasodilation (widening of blood vessels) inside the rigid, unyielding pulp chamber is causing pressure to build up. This is a yellow flag, a clear warning. Your protocol needs immediate modification. It means the insult (peroxide concentration or contact time) was too great for that specific tooth. Do not whiten again until this resolves completely, which might take 48 to 72 hours. When you resume, you must drastically shorten your wear time or increase your recovery days.
The Sharp, Localized Ligament Pain: If you feel a sharp pain specifically on biting down, as if the tooth is slightly “high” in its socket, this suggests inflammation has extended beyond the pulp, into the periodontal ligament (PDL) that anchors the tooth root to the bone. Peroxide, in some cases, can diffuse through thin root cementum or through accessory canals, reaching the PDL and causing a localized peri-apical inflammation. This is a significant warning. The tooth’s supporting apparatus is now reacting. This demands an immediate and complete halt to whitening until you can be evaluated by a dentist to rule out a pre-existing, asymptomatic infection or a crack that has been exacerbated.
The Soft Tissue Burn: This is a surface pain, a raw, stinging, ulcer-like feeling on your gums, cheeks, or tongue. The tissue looks white and blanched at first, then may become red and sore. This is a direct chemical burn from the gel touching non-tooth surfaces. It’s the most common failure of isolation technique. It is painful but almost always heals completely within 1-3 days as the outer layer of epithelial cells sloughs off. Treat it with warm salt water rinses and a protective emollient (like a vitamin E gel or an oral wound gel) if needed. This is a user error, not a product toxicity issue.
The Remineralization Protocol: Your Non-Negotiable Defensive Shield
You cannot approach a whitening regimen like a fitness boot camp, going hard every day and hoping your teeth just “toughen up.” Your enamel, unlike a muscle, does not grow stronger under repetitive stress; it fatigues and erodes. A safe, effective whitening protocol is not defined by the bleaching days but by the intentional recovery days in between. This is where you actively rebuild. This is the concept of active remineralization. During the recovery day, you are not just resting; you are depositing mineral ions back into the enamel pores from which they were leached during the oxidative process. You are plugging the open dentinal tubules to calm the nerves. You are restoring the enamel’s protective protein matrix.
Your recovery day protocol must include a fluoride treatment. After your final rinse on a whitening day, apply a fluoride gel or a high-concentration fluoride rinse. Do not rinse it away with water. Let it sit on the teeth for the recommended time. The fluoride ions react with the enamel’s calcium phosphate to create a new, harder, more acid-resistant mineral called fluorapatite on the tooth’s surface. This chemically strengthens the enamel and, crucially, forms microscopic plugs of calcium fluoride-like material in the openings of the dentinal tubules, physically blocking the fluid flow that causes zingers. You can also use a nanohydroxyapatite toothpaste. Hydroxyapatite is what your teeth are made of. These toothpastes contain synthetic, bio-mimetic hydroxyapatite particles that are small enough to penetrate the enamel pores and dentinal tubules. They don’t just plug the holes; they literally integrate into the enamel’s structure, refilling the demineralized zones from the inside out. This is the cutting edge of non-fluoride, biomimetic prevention. Use this toothpaste between treatments. Brush with it, and then simply spit out the excess foam. Do not rinse your mouth with water. Let the dissolved hydroxyapatite particles linger and diffuse into your teeth overnight. This is how you transform a recovery day from simple rest into active tissue regeneration. A whitening protocol without a structured remineralization protocol is a fast track to chronic, irreversible damage.
Pre-Existing Conditions: When “Generally Safe” Doesn’t Apply to You
The statement “Crest Whitening is safe” operates under a massive, often unspoken assumption: that it’s being used on a clean, sound, healthy dental canvas. Your oral health status is the single most significant variable in the safety equation. Certain conditions transform a safe cosmetic product into a direct chemical assault on your teeth’s internal structures. Ignoring these is the root cause of the most serious, irreversible injuries.
The Hidden Crisis of Micro-Leakage
You might look in the mirror and see a mouth full of perfectly sound, albeit stained, teeth. But what lies beneath the surface of an old, seemingly intact filling is one of the greatest threats to safe whitening. All filling materials—whether the silver-colored amalgam or the tooth-colored composite resin—are not chemically bonded to the tooth with a perfect, hermetic seal that lasts forever. Over years of chewing forces, temperature fluctuations from hot coffee and ice water, and the natural polymerization shrinkage of the material, a microscopic gap, often much thinner than a human hair, forms between the filling and the tooth wall. This is micro-leakage. Bacteria, saliva, food debris, and mild acids constantly seep down this gap. It’s a slow, ongoing process your dentist monitors for signs of recurrent decay or staining at the margins.
Now, introduce a low-viscosity whitening gel into this environment. The small peroxide molecules, propelled by capillary action, will find this microscopic gap and be sucked down into it. Instead of diffusing slowly and evenly through a thick, intact layer of enamel, the gel now has a straight, unimpeded express lane. It gushes down the side of the filling, past the dentin-enamel junction, and directly into the deep, highly sensitive dentin tubules. From there, its journey to the pulp is rapid. The result is not a mild, generalized zinger. It’s an acute, searing, localized pain that feels like a hot needle being driven deep into a specific tooth. This is the pain of concentrated peroxide flooding the pulp via the micro-leakage highway. If you experience this, stop immediately. The tooth with the leaking filling is not a candidate for unsupervised whitening. The safety protocol dictates that all old, suspect restorations must be evaluated, and if margins are compromised, they must be replaced with new, well-sealed fillings before any bleaching can commence.
Gum Recession and the Vulnerability of Root Surfaces
Your teeth have two distinct outer layers: the crown, covered in thick, highly mineralized enamel, and the root, covered in a thin, fragile layer of cementum. The meeting point is the cemento-enamel junction (CEJ), normally hidden under the gumline. When gums recede due to age, aggressive brushing, or periodontal disease, the root surface is exposed. This surface has no enamel armor. The cementum layer is very thin and the dentin tubules underneath are wide open and highly permeable.
Applying a whitening strip or gel to an exposed root is a direct chemical injury to the pulp. The peroxide bypasses the enamel entirely and instantly floods the large dentin tubules. This causes an immediate, breathtaking, electric shock-like pain and can trigger severe, potentially irreversible pulpitis very quickly. Furthermore, the cementum and root dentin are far more susceptible to chemical dissolution than enamel. The acidic or oxidative environment of the gel can literally etch and dissolve the root surface, causing permanent notching, gouging, and irreversible loss of tooth structure at the gumline. The safe application of whitening products on a mouth with gum recession requires absolute, perfect isolation. The gel must never, under any circumstances, touch the exposed root. This may mean the product is simply not safe for you to use on those affected teeth. The aesthetic desire for a brighter smile can never justify the permanent, destructive loss of your tooth roots.
Active Decay, Broken Teeth, and Orthodontics
An active cavity is a crater of soft, demineralized, bacteria-infested tooth structure. It provides a direct, gaping hole into the dentin and, if deep, a paper-thin wall away from the pulp. Whitening a tooth with a cavity is like pouring acid into an open wound. The pain will be searing and the risk of pushing the pulp into an irreversible, dying state is extreme. Similarly, a cracked or broken tooth represents an open fracture line that, under capillary action, will draw the liquid peroxide deep into the tooth’s interior like ink into blotting paper. The peroxide will reach the pulp, causing intense pain and possibly a bacterial infection if the crack communicates with the oral environment.
Teeth undergoing active orthodontic treatment with braces or clear aligner attachments present a unique challenge. The brackets, bands, and composite attachment buttons create an uneven surface. Whitening gel will pool around these edges. It will whiten only the exposed enamel, leaving dark, stained squares underneath the brackets. Worse, if the gel seeps under a loose bracket margin down to the etched enamel, it can cause severe sensitivity. Clear aligner trays present a similar risk to custom-fitted bleaching trays. If you load the inside of your Invisalign tray with whitening gel, the tight fit of the tray will hydraulically force the peroxide not just onto the teeth but deeply into the gum sulcus and against any exposed root surfaces, creating a severe, widespread chemical burn and root sensitivity crisis. You must wait until all orthodontic appliances are removed and any post-treatment gum inflammation has fully resolved before considering any form of gel-based whitening.
The Comprehensive Ingredient Audit: What’s on the Label and Why It Matters
You are an informed consumer, so let’s turn the box over and audit the inactive ingredients. The safety of a formula is not just about the active peroxide. The delivery base, pH stabilizers, thickeners, and humectants form a chemical environment that determines how the peroxide interacts with your tooth. A poorly formulated gel can be damaging even with a low peroxide percentage, while a masterfully engineered gel can be surprisingly gentle.
The Critical Role of pH Stabilizers
Pure hydrogen peroxide is quite acidic, with a pH of around 3.5 to 4.5. Enamel begins to demineralize and dissolve at a critical pH of about 5.5. This is why pouring a bottle of drugstore antiseptic peroxide on your teeth would be a catastrophic idea. It would etch and erode the enamel. The entire safety of a whitening gel hinges on its pH being stabilized and buffered to a near-neutral level, typically between 6.0 and 7.5. The formulation chemists at a company like Crest use buffering agents (such as sodium hydroxide, sodium stannate, or phosphate buffers) to bring the pH of the gel into this safe, bio-compatible range. At a near-neutral pH, the oxidative radical generation happens without the simultaneous acid dissolution of the enamel mineral. The gel can whiten stains without chemically melting your tooth surface.
However, chemistry is dynamic. As the carbamide peroxide breaks down into hydrogen peroxide and urea, the solution’s pH can shift. Urea further breaks down into ammonia and carbon dioxide, which can cause the local pH to increase significantly, becoming quite alkaline. A very high pH, just like a low pH, can be harmful, causing protein denaturation of the enamel pellicle and soft tissues. A high-quality, safe gel uses carefully calculated multi-buffer systems that maintain a stable, biocompatible pH throughout the entire 30-minute or multi-hour wear time. This pH stability is a hallmark of a safe, well-researched product and a key advantage of Crest’s enormous R&D budget over no-name, unregulated kits. You are paying for the chemical stability, not just the peroxide.
Glycerin, Propylene Glycol, and the Hydration Paradox
Glycerin is a ubiquitous humectant in whitening gels and toothpaste. It prevents the gel from drying out on the strip and gives it that smooth, thick feel. A persistent, controversial theory in holistic dental circles revolves around the “glycerin coating” effect. The theory posits that glycerin leaves a tenacious, microscopic film on the enamel surface that cannot be washed away by simple rinsing and that this film physically blocks the natural remineralization of the enamel by blocking the flow of salivary calcium and phosphate ions into the pores.
This requires a balanced, scientific perspective. It is true that glycerin is a thick, sticky substance that has a high affinity for tooth surfaces. It is entirely plausible it forms a temporary, residual film. However, the enamel’s remineralization process is a slow, continuous ionic exchange that happens over many hours. The claim that a single application of glycerin creates an impermeable barrier that permanently halts this process is a vast exaggeration not supported by mainstream dental materials science. Your saliva, with its powerful enzymes and detersive action, combined with the physical abrasion of your tongue and cheeks, will eventually degrade and remove this film over the course of a few hours. The practical solution is not to fear all glycerin-containing products, but to be proactive in its removal. After your whitening session, after you have rinsed with water, do an additional rinse with a non-fluoridated mouthwash that contains no glycerin itself, or perform a thorough, gentle brushing with a hydrated silica-based toothpaste to mechanically polish away any residual film. This simple step eliminates the theoretical concern and prepares a clean, film-free surface for your remineralizing treatment, whether it’s a fluoride gel, a nanohydroxyapatite paste, or simply the natural action of your own saliva.
The Architect’s Guide to Building a Fail-Safe Whitening Protocol
You are now equipped with the foundational knowledge. We’ve dissected the tooth, the chemistry, and the product failures. It is time to synthesize all this information into a concrete, phase-by-phase action plan. This is not a casual suggestion list. This is a rigorous, fail-safe protocol for the most conservative, safety-conscious whitening you can perform at home. It is designed around the principle of minimal effective dose with maximal recovery.
Phase 1: The Pre-Whitening Fortification (7-10 Days)
Do not skip this. Before a single peroxide molecule touches your enamel, you are going to build up your enamel’s defenses and calm your nerves proactively. This is like insulating your house before winter.
- Sensitive Toothpaste as a Treatment: Purchase a high-quality desensitizing toothpaste containing 5% potassium nitrate (a common standard). Do not just use it to brush. After your twice-daily brushing, take a pea-sized amount on a clean finger and gently massage it into the sensitive areas, especially along the gumline and any exposed root surfaces. Let it sit for one to two minutes. Potassium nitrate works by bathing the nerve endings inside the dentin tubules in potassium ions, slowly depolarizing the nerve so it is less likely to fire a pain signal. It takes time to build up this neural block, hence the 7-10 day lead-in.
- Initiate a Remineralization Cycle: On alternating days during this lead-in phase, after your potassium nitrate massage, apply a thin layer of a nanohydroxyapatite remineralizing gel or a prescription-strength fluoride gel (like Prevident, from your dentist) to your teeth with a clean finger. Do not rinse it off. Let it sit for the manufacturer-recommended time, then spit out the excess. Go to sleep without rinsing, eating, or drinking. You are saturating the enamel pores with bio-available minerals, plugging the tubules, and strengthening the enamel’s crystal lattice before the oxidative assault begins. This “pre-loading” of the enamel is the single most effective step to prevent severe sensitivity.
Phase 2: The Application Ritual (The Whitening Day)
Every whitening session must be an intentional, distraction-free ritual. No scrolling through your phone.
- Mechanical Cleaning (Wait 30 Minutes): Brush your teeth gently with a soft brush and a non-whitening, non-abrasive toothpaste. Floss meticulously. This removes the proteinaceous pellicle and plaque that can block peroxide diffusion. Now, you must wait a full 30 minutes. Brushing creates micro-abrasions on the enamel and slightly dries the teeth. Applying gel immediately maximizes sensitivity. The waiting period allows the pellicle to begin re-forming a protective, bio-compatible layer and the tooth to rehydrate.
- Isolation and Barrier Placement: This is the single most important step for soft tissue safety. Use a new, dry cotton roll or a folded tissue to gently tuck between your lip and gums. This absorbs saliva and physically retracts the lips. If you have areas of gum recession, take a tiny amount of a protective dental barrier gel (or even plain petroleum jelly) and, with a cotton swab, paint a thick, continuous line precisely over the exposed root surface and the gum margin. Do not get it on the enamel you wish to whiten. This physical barrier will be your last line of defense against gel drips.
- Precision Placement and Timer Setting: Apply your strip, pen, or gel with surgical precision, using the techniques described earlier. Start a timer immediately. Do not estimate. Do not over-extend even by five minutes. The toxicological effect is a function of both concentration and time. The maximum recommended wear time is a safety limit derived from in-vitro cytotoxicity and clinical data, not an arbitrary suggestion.
- Post-Removal Rinse and Deactivation: When the timer goes off, remove the strip or tray. Rinse your mouth thoroughly with copious amounts of lukewarm water. Rinse, spit, and rinse again. Do a final swish with a non-acidic, pH-neutral mouthwash to help deactivate any residual peroxide in the oral nooks.
Phase 3: The Active Recovery and Rebuilding (The Off-Day)
The real magic happens on the days you are not whitening. This is not a passive rest day. This is a day of active biological repair.
- Immediate Post-Treatment Application: The dentin tubules are maximally open and receptive right after the strip comes off. Immediately apply your 5% potassium nitrate desensitizing gel with a clean finger and let it sit for 10-15 minutes.
- Mid-Day Remineralization: After lunch, brush with your nanohydroxyapatite toothpaste. After brushing, do not rinse. Just spit out the foam. The longer the hydroxyapatite crystals sit on your teeth in a concentrated film, the more they will integrate into the demineralized surface.
- Overnight Rebuilding: Before bed, apply a thick layer of a CPP-ACP (casein phosphopeptide-amorphous calcium phosphate) cream, like GC Tooth Mousse, or your fluoride gel. Wear it in a shallow, soft dental tray, or simply paint it on and go to sleep. CPP-ACP is a remarkable milk-derived protein that binds calcium and phosphate ions to the tooth surface, plaque, and pellicle, creating a bio-available reservoir of the exact minerals needed to rebuild hydroxyapatite. You are literally bathing your teeth in a recalcifying solution for eight hours. A protocol that alternates a whitening day with this level of aggressive, multi-modal remineralization is the gold standard for safely whitening even sensitive teeth.
Navigating the Landscape of Myths, Misinformation, and Marketing
The path to safe whitening is littered with half-truths and outright fabrications. Some are spread by well-meaning DIY enthusiasts, others by aggressive marketing. You need to be able to instantly identify and discard this misinformation to stay safe.
The Lemon Juice and Baking Soda Catastrophe
A persistent “natural” myth claims a paste of lemon juice and baking soda is a safe, effective whitener. This is profoundly dangerous and destructive advice. Lemon juice is incredibly acidic, with a pH of around 2. It is a citric acid solution. Baking soda is a mild, gritty abrasive. This paste works by having the citric acid chemically etch and dissolve the outer layer of your enamel, stripping away the stained surface. The baking soda then mechanically scrubs this softened, demineralized enamel away. You are not whitening your teeth; you are surgically removing the stained outer enamel layer. This process is called acid erosion. It leaves the teeth permanently dull, chalky, transparent at the biting edges, and hyper-sensitive as the dentin is exposed. The damage from a single application is immediate and cumulative, with every “treatment” dissolving more of your irreplaceable tooth structure. This is the polar opposite of safe peroxide whitening, which targets the stain molecules while leaving the mineral structure intact, especially at a neutral pH. You can never, under any circumstances, apply a mixture of a strong acid and an abrasive to your teeth.
The Charcoal and Oil Pulling Mirage
Activated charcoal toothpaste is wildly popular. It is a fine, black, highly abrasive powder. Like the lemon paste, its “whitening” mechanism is purely mechanical. It scrubs away surface stains and, unavoidably, a small layer of your enamel. Dental researchers use Relative Dentin Abrasivity (RDA) to measure the abrasiveness of a toothpaste. Many charcoal powders are extremely high on this scale and can cause significant, irreversible enamel wear with regular use. They are especially dangerous around gum recession, where they quickly gouge and erode the soft root dentin. There is no chemical whitening action.
Oil pulling, the ancient Ayurvedic practice of swishing oil (like coconut oil) in the mouth for an extended period, has benefits for oral hygiene by disrupting plaque biofilm and reducing bacterial load. This can make teeth feel smoother and look slightly shinier due to reduced plaque. However, the claim that it can intrinsically whiten teeth by pulling peroxide-deep stains through enamel pores has zero scientific support. Enamel is impermeable to large lipid molecules like oil. Oil pulling cannot bleach the tooth structure. Use it for gum health if you like, but it will not lighten the intrinsic color of your teeth.
The “Peroxide Destroys Enamel” Misconception
This myth stems from conflating acidic erosion with oxidative bleaching. It is true that very high concentrations of peroxide, especially when unbuffered and acidic, can cause surface demineralization and pitting on a microscopic scale. It is also true that dehydrated enamel temporarily loses its toughness, and whitening causes dehydration. However, the claim that a 10% carbamide peroxide gel used correctly on a healthy tooth “destroys” the enamel’s structural integrity is scientifically false. Controlled in-vitro studies consistently show that the mineral content (the calcium and phosphate ratio) of enamel is not significantly altered by a course of carbamide peroxide whitening when compared to unbleached controls, provided the enamel is healthy to begin with. The enamel’s micro-hardness, which does decrease slightly immediately post-treatment due to dehydration and slight protein breakdown, fully rebounds to near-baseline levels within 7 to 14 days post-treatment, provided the saliva’s natural remineralization is allowed to work. This recovery is precisely why a slow, spaced-out protocol with active remineralization is safe. The danger to enamel is not from a properly used peroxide gel. The danger is from the acidic, abrasive, and overuse protocols that surround it.
A 10,000-Hour User’s Repair Manual: Troubleshooting Your Treatment
Your protocol is set. But biology is complex, and reactions happen. Here is your field manual for when things don’t go perfectly.
Scenario 1: The “Lightning Strike” on a Single Tooth
During your 30-minute session, a sudden, sharp, electric jolt hits one specific tooth, often under an old filling or on a tooth with a history of trauma. This is the pain of micro-leakage. Action: Remove the product immediately. The risk of irreversible pulpitis is high. Rinse with lukewarm water. Apply a thick paste of desensitizing gel directly to that tooth. That single tooth is out of the whitening game until it can be clinically examined and the filling integrity checked. You can continue whitening your other teeth, but you must carefully trim the whitening strip or isolate that specific tooth with a protective barrier (like a custom-made dental block-out resin from your dentist) to prevent any gel contact. This is not a generalized reaction; it’s a localized structural failure you cannot override.
Scenario 2: Widespread, Burning Gum Pain
You pull the strips off and your gums, especially between the teeth, are stark white and stinging fiercely. This is a mucosal chemical burn. Action: Do not panic. This heals. Immediately rinse with a warm salt water solution (a half-teaspoon of salt in a cup of warm water). This is an isotonic, anti-inflammatory rinse that soothes and cleans. In future sessions, your isolation technique must be flawless. Apply a protective vitamin E gel or a hyaluronic acid oral gel to the burned areas to create a healing film. The tissue will slough off in a day or two, revealing healthy pink tissue underneath. If the pain persists or the tissue ulcerates deeply, pause all whitening until fully healed. Re-evaluate your product choice; a pen that gives you better manual control may be safer for your specific gingival anatomy.
Scenario 3: Zero Results After a Full Box
You’ve finished a full course of strips, followed the protocol, and your teeth look no different. This is frustrating and diagnostically important. It means your stain type is likely not oxidation-responsive. Action: Look critically in a mirror. Is the color a uniform yellow? This is often due to thin enamel revealing the yellow dentin beneath, which is a genetic, structural color, not a stain. Whitening will not make your enamel thicker. Does your tooth have a gray, blue, or brownish undertone? Tetracycline antibiotic staining or fluorosis staining is notoriously resistant to standard carbamide peroxide and often requires years of ultra-slow, low-concentration custom tray wear under a dentist’s supervision, sometimes combined with micro-abrasion techniques. Surface stains from iron supplements or chlorhexidine mouthwash may also be resistant. The failure to whiten is valuable diagnostic feedback. It tells you a lot about your tooth biology, and it means you should stop and seek a dentist’s diagnosis before wasting more money and chemically stressing your teeth for no reason.
The Final Perspective: A Lasting, Healthy Radiance
You began this journey asking a single, vital question: “Is Crest Teeth Whitening Safe?” You now have the knowledge to see that safety is not a passive guarantee stamped on a box. It is a dynamic, collaborative state you actively co-create with the chemistry. The active ingredients, carbamide and hydrogen peroxide, have a long, scientifically validated history of safety when they are used as a targeted, short-term therapy on a healthy, intact dental canvas. They are not poisons, but they are powerful oxidizers that demand respect.
The true risk has never really been in the molecule itself, but in the mistakes of its application. It lies in the strip left on the gums, the peroxide painted on an exposed root, the micro-leakage gap under an old filling that becomes a chemical express lane to the pulp, and the non-existent recovery day that slowly transforms transient demineralization into permanent enamel fatigue. By understanding your teeth as living, porous, responsive tissues—not indestructible tiles—you have shifted your identity from a passive consumer chasing a box’s promise to an active, informed guardian of your own health. You can now whiten your smile with the confidence that comes not from ignoring the warnings, but from masterfully engineering a protocol around them. Your path to a brighter smile is now paved with patience, precision, and an unshakeable foundation of biological safety.
Frequently Asked Questions About Crest Whitening Safety
Can I use Crest Whitestrips if I have a crown or veneers on my front teeth?
You can use them, but it is critical to manage your expectations. The hydrogen peroxide will whiten your natural tooth structure but will have zero effect on the color of porcelain crowns, veneers, or composite bonding. If your natural teeth were matched to your restoration, they could end up lighter, making the perfectly good restoration suddenly look dark and yellow in comparison. Safe usage dictates you must first discuss this aesthetic mismatch risk with your dentist.
Is it safe to swallow the gel from the strips?
You are not meant to swallow the gel, but swallowing a small amount of saliva and gel residue that seeps from the back of the strip is not a medical emergency for most people. The amount of peroxide is very small and rapidly broken down in the stomach. However, it can cause temporary, mild gastric irritation or nausea in some individuals. To minimize ingestion, do not use excessive saliva during wear, sit upright, and thoroughly rinse and spit multiple times after removing the strips.
Why do I get white spots on my gums after whitening and how can I prevent them?
The stark white, often painful spots are localized chemical burns (hydrogen peroxide epithelial blanching) from the gel making direct, sustained contact with your gum tissue. It’s a mild chemical burn that dehydrates and temporarily damages the outermost layer of cells. To prevent this, you must perfect your isolation technique. Before applying, tuck a dry tissue or cotton roll between your lip and gums. Use a cotton swab to paint a thin layer of petroleum jelly on your gums as a waterproof barrier. When applying the product, use a tool or your fingers to ensure the gel-laden strip or liquid stays on the tooth enamel, stopping a full millimeter short of the gumline.
How long should I wait to eat or drink after a Crest whitening treatment?
Your enamel is in a transiently dehydrated and porous state immediately after whitening. It is highly susceptible to re-staining. You should follow a strict “White Diet” protocol for the next 24 to 48 hours. Avoid all dark-pigmented foods and drinks: coffee, tea, red wine, dark sodas, colored sauces, berries, and tobacco. If you must drink something like coffee, use a straw to bypass your front teeth. The best post-treatment drink is plain water, and the best time to eat is right after the treatment, before the enamel has had hours to slowly re-absorb oral pigments.
Can Crest Whitestrips fix the yellow color from tetracycline antibiotics?
Tetracycline staining is one of the most difficult forms of intrinsic discoloration to treat because the antibiotic molecules are chemically bound deep within the dentin’s structure, not just in the enamel. Over-the-counter products like Whitestrips are generally too weak to produce a meaningful, cosmetically acceptable result. Long-term, slow-release, custom-fitted tray whitening under a dentist’s supervision is the only viable non-restorative option, and even then, results are slow and may not be complete. Using more and more Crest strips will not solve the problem and will only risk severe, irreversible nerve damage.
Additional Resource:
For a deep, unbiased dive into the chemical safety and efficacy of over-the-counter versus professionally dispensed whitening products, you can review the position paper from the American Dental Association (ADA) on Tooth Whitening/Bleaching. While the ADA’s consumer pages are helpful, the professional scientific review provides the most rigorous data. You can access their research summaries at ada.org.
Disclaimer:
This article is an extensive informational guide based on scientific literature and product analysis, designed for educational purposes only. It is not a substitute for a professional dental examination, diagnosis, or treatment plan. All whitening carries inherent risks, and only your personal dentist can determine if you are a safe candidate after evaluating your teeth, gums, and any existing restorations. Always seek the advice of your dentist with any questions you may have regarding a medical condition or cosmetic procedure. Never ignore professional dental advice or delay in seeking it because of something you have read here.