How to Use Teeth Whitening Pen Effectively
A teeth whitening pen promises a convenient, mess-free way to brighten your smile at home or on the go. The small tube fits in a purse or pocket, and the gel goes on directly without trays or strips. Yet many people finish their first pen feeling disappointed, not because the product failed, but because small application errors reduced its power.
This guide gives you a thorough, realistic breakdown of how to use a teeth whitening pen effectively. You will learn preparation steps, precise application techniques, timing strategies, post-care habits, and solutions to common problems. No exaggerated claims. No secret tricks that sound too good to be true. Just clear, actionable advice grounded in how whitening chemistry actually works.
Understanding the Teeth Whitening Pen
Before diving into technique, you need to understand exactly what sits inside that slim barrel. A teeth whitening pen contains a gel that typically relies on either hydrogen peroxide or carbamide peroxide as the active whitening agent. Some pens use non-peroxide alternatives like phthalimidoperoxycaproic acid (PAP) or sodium bicarbonate formulas for people with sensitive teeth.
The gel consistency matters. A quality pen holds a viscous gel that clings to enamel rather than running off onto gums and lips. The brush tip, sponge tip, or rollerball applicator releases a thin layer of product. Because the gel stays put, you get direct contact between the whitening agent and tooth surfaces without a bulky tray.
Most pens deliver a lower peroxide concentration than professional take-home kits. Typical pen formulas range from 3% to 9% hydrogen peroxide, while dentist-dispensed gels often reach 10% to 22% carbamide peroxide. The lower strength means you need more applications over consecutive days to see results, but it also reduces the risk of sharp gum irritation or prolonged sensitivity.
The pen format suits maintenance whitening and mild stain removal. It works best on surface stains from coffee, tea, red wine, and smoking. Deep intrinsic discoloration, such as tetracycline staining or fluorosis marks, will not respond dramatically to a pen. Setting realistic expectations protects you from frustration and wasted money.
Preparing for the Application
Proper preparation determines whether the gel bonds to your enamel or slides off uselessly. Many negative reviews of whitening pens trace back to skipped preparation steps rather than a faulty formula.
Start With Clean, Dry Teeth
The gel needs direct contact with enamel. Saliva, plaque, food residue, and even natural moisture create a barrier that weakens or blocks the whitening reaction. Think of painting a dusty, damp wall. The paint will not adhere properly, and the color will look patchy. The same principle applies to whitening gel.
Brush your teeth with a fluoride toothpaste before application. A clean toothbrush and thorough brushing remove the biofilm layer where bacteria and stain particles embed. Flossing clears debris from between teeth, which matters because gel that seeps into gaps works better when those gaps are empty.
After brushing, dry your teeth as much as possible. Tuck a clean tissue or paper towel over your finger and gently blot each tooth surface. You can also pull your cheeks away and let air reach your teeth for 30 to 60 seconds. Some people use a hairdryer on a cool, low setting for a few seconds, but a tissue works just as well and requires no extra tools.
Dry teeth create a thirsty surface that absorbs the gel. Moist teeth repel the gel. The difference in whitening impact between dry and wet application is noticeable after just a few sessions.
Check the Fit and Condition of the Pen
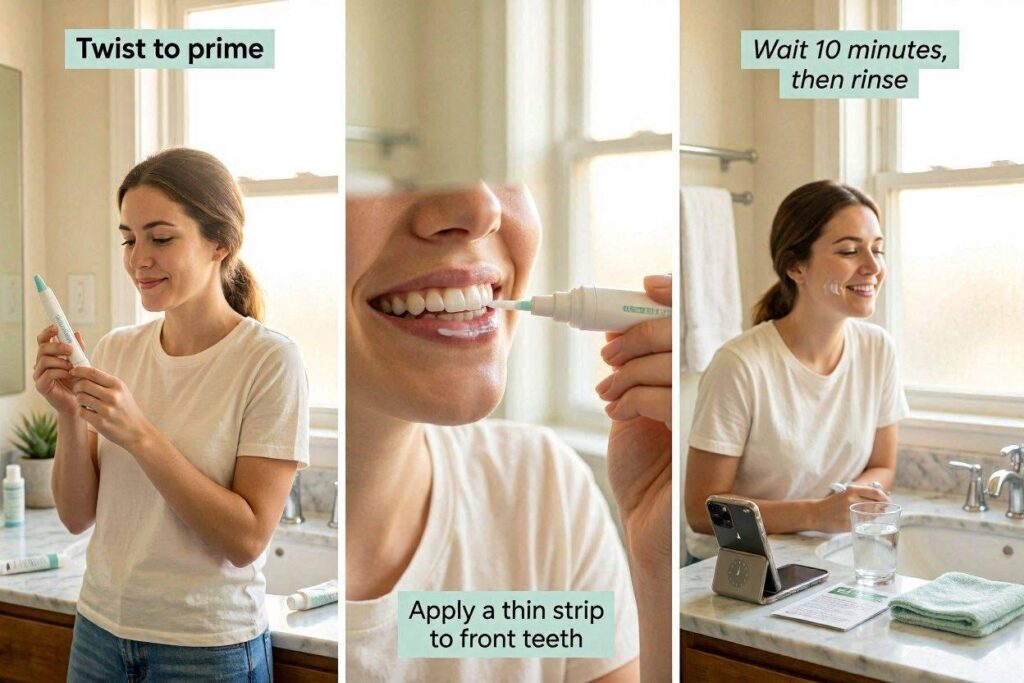
Twist the pen base slowly until you see a tiny bead of gel at the applicator tip. Do not twist aggressively. Too much gel floods the tip and drips onto your gums or lips. The first use often requires several twists to prime the mechanism. After that, a single half-turn usually dispenses enough product for one or two teeth.
Inspect the tip before each use. A crusted, hardened tip scratches your enamel and delivers gel unevenly. Wipe the tip gently with a clean tissue after every application and replace the cap tightly. If the gel inside thickens or changes color, the pen may have expired or been stored in heat, and you should replace it.
Protect Soft Tissues
Your gums, inner lips, and tongue do not need whitening. Contact with peroxide gel can cause temporary white patches or stinging. You can apply a thin layer of petroleum jelly to your gums before whitening, especially along the gumline where the pen tip most easily slips. Wipe away any excess jelly from tooth surfaces, or you recreate the barrier problem.
Keep a tissue handy to catch accidental drips. React quickly if gel lands on soft tissue. Wipe it away immediately and rinse the area with water. A brief moment of contact rarely causes harm, but prolonged exposure increases irritation.
Step-by-Step Application Technique
The following sequence turns the vague instruction “apply to teeth” into a precise, repeatable process. Follow these steps every time to build a habit that maximizes gel coverage and minimizes waste.
Position Yourself in Good Light
Stand in front of a mirror in bright, natural daylight or under a bathroom vanity light. You need to see the exact line where each tooth meets the gum. Shadows in a dim room hide the edges, and you risk painting gel onto gum tissue accidentally. A magnifying mirror helps if you normally wear reading glasses or struggle to see fine detail.
Smile Wide and Retract Your Lips
Pull your lips back with your free hand or use a cheek retractor if you own one. You want a dry, exposed canvas of teeth from canine to canine at minimum. The front six to eight teeth, the ones visible when you smile, receive the most attention because those surfaces create the bright smile effect that most people want.
Apply Gel in a Thin, Even Layer
Touch the pen tip to the center of the tooth and spread outward toward the edges. Use a gentle painting motion similar to applying nail polish. Cover the entire visible face of the tooth without overlapping heavily onto the gums. A thin film works best. Piling on thick layers does not speed up whitening. Excess gel slides off, wastes product, and irritates gums.
Start with the upper teeth. Work from the center front teeth outward to the canines. Many people naturally apply the most gel to the two front teeth and less to the laterals and canines. Make a conscious effort to distribute gel evenly across all visible teeth. Repeat the process for the lower arch.
Do Not Rinse, Do Not Salivate Excessively
Once the gel sits on your teeth, leave it alone. Keep your mouth slightly open and your lips away from your teeth. Saliva washes away the gel and neutralizes the peroxide. If you feel saliva pooling, lean forward slightly and let it dribble out into a sink. This sounds inelegant, but it preserves the gel layer better than swallowing or swishing saliva around.
Avoid running your tongue over your teeth. The instinct is automatic for most people, so staying conscious of it requires focus during the first few sessions. You might hum or listen to a podcast to distract yourself.
Respect the Recommended Wear Time
Each brand specifies a wear time, usually between 30 seconds and 30 minutes. Read the instructions. A 30-second formula polymerizes quickly and becomes saliva-resistant. A gel that requires 10 or 20 minutes must remain undisturbed. Shortening the time weakens the effect. Extending the time far beyond the recommendation does not boost whitening and may dehydrate or irritate your teeth.
Set a timer on your phone. Guessing leads to inconsistent exposure and uneven results.
Rinse or Wipe Off Gently
When the timer goes off, you can either rinse with water or wipe the gel off with a dry tissue. Some formulas dissolve on their own and instruct you to leave the residue. If the instructions say to rinse, use lukewarm water and swish gently. Avoid eating or drinking for at least 30 minutes afterward. Your enamel remains slightly porous from the treatment, and pigments from food or drinks can immediately stain the vulnerable surface.
Timing and Frequency: How Often Should You Use a Whitening Pen?
Overuse turns teeth translucent or increases sensitivity. Underuse produces no visible change. The sweet spot depends on the gel strength and your individual enamel condition.
Standard Recommendations by Formula Strength
| Peroxide Concentration | Typical Frequency | Expected Visible Results |
|---|---|---|
| 3% hydrogen peroxide or lower | Twice daily for 14 days | Gradual lightening over 2 weeks |
| 6% hydrogen peroxide | Once daily for 7 to 10 days | Noticeable change in 1 week |
| 9% hydrogen peroxide or carbamide equivalent | Once daily for 5 to 7 days, then maintain 2 to 3 times weekly | Faster initial change |
| PAP or non-peroxide formula | Once or twice daily for 2 to 3 weeks | Slower onset, lower sensitivity risk |
These intervals assume that you apply the gel correctly each time. Missed sessions delay results but do not ruin progress. Consistency counts more than intensity.
Signs That You Need a Break
Stop using the pen for 48 hours if you notice any of these signals:
- Tooth sensitivity to cold air or water that lingers for more than a few seconds
- Gum tissue appearing white or feeling raw after application
- Teeth looking chalky or overly matte when dry
- A tingling sensation that does not fade after rinsing
Rest days allow enamel to rehydrate and remineralize. You can use a fluoride rinse or sensitivity toothpaste during breaks to strengthen the outer layer. Returning to the pen at a reduced frequency, perhaps every other day instead of daily, often solves sensitivity while preserving progress.
Common Mistakes and How to Avoid Them
Even careful people make errors that reduce whitening efficiency. Identifying these pitfalls upfront saves product, time, and discomfort.
Applying to Wet Teeth
The number one mistake. Moisture stops gel adhesion instantly. Imagine spreading honey on a wet countertop. The honey slides and beads up. Whitening gel behaves the same way. Dry teeth grip the gel. This single habit change often transforms a “useless” pen into an effective tool.
Painting Gums Instead of Teeth
Gel on gums serves no purpose. The whitening agent only acts on tooth enamel. Gum contact also produces temporary whitening, which looks alarming but fades in a few hours, and may cause soreness. When you see gel encroaching on pink tissue, wipe it immediately with a clean fingertip or cotton swab.
Closing Lips Immediately After Application
Closing your mouth traps moisture and accelerates saliva flow. Even gel labeled as “saliva-resistant” works better when you give it a minute to set before relaxing your lips. Keep your mouth open for at least 60 seconds after application to let the gel tack up.
Eating or Drinking Staining Substances During Treatment
If you apply whitening gel every morning and then drink a black coffee 20 minutes later, you fight a losing battle. The pores in enamel stay open after whitening. Stains enter easily during this window. Save coffee, tea, red wine, berries, and tomato sauce for the end of the day or consume them through a straw placed far back in the mouth.
Expecting One Pen to Remove Years of Stains
A single pen contains roughly 2 to 4 milliliters of gel. That amount works for a full treatment course of one to two weeks, and the result typically lightens teeth by 1 to 4 shades. Deep, set-in stains from years of smoking or heavy coffee drinking may require multiple courses or professional cleaning first. Seeing the pen as a maintenance tool rather than a miracle eraser keeps your expectations healthy.
Using an Old or Improperly Stored Pen
Heat and light degrade peroxide. A pen left in a hot car or sunny bathroom windowsill may lose potency within days. Store the pen in a cool, dark place, ideally between 15 and 25 degrees Celsius. A bedside drawer works perfectly. Do not refrigerate the pen unless the manufacturer recommends it, because condensation can enter and dilute the gel.
Maximizing Whitening Results Safely
Beyond the basic application steps, several additional practices amplify the effect of a whitening pen without compromising oral health.
Pair With a Whitening Mouthwash
Using a hydrogen peroxide mouthwash before pen application clears away additional surface debris and preps the oral environment. Swish for 30 to 60 seconds, spit, and then dry your teeth thoroughly. Do not use mouthwash immediately after the pen, as the alcohol or other ingredients may interact with the gel residue.
Brush With a Soft-Bristled Toothbrush
Aggressive brushing with hard bristles abrades enamel over time. Thinned enamel exposes the yellowish dentin layer beneath, and no amount of whitening gel can fix that. A soft brush cleans effectively without scratching. Pair it with a low-abrasion toothpaste, and you protect your enamel investment.
Use the Pen After Your Evening Oral Care Routine
Nighttime application makes practical sense. You will not eat or drink for hours, and saliva flow naturally decreases during sleep. Apply the pen, wait the instructed time, gently wipe or rinse, and then go to bed. The extended stain-free window allows the whitening effect to set without interference.
Photograph Your Progress
The mirror can deceive you. Small daily changes go unnoticed until a friend remarks that your teeth look brighter. Take a close-up photo of your smile in consistent lighting before you begin the pen. Take another photo after 5 days and another after the full course. Side-by-side comparison reveals objective progress and motivates you to continue.
Stay Hydrated
A dry mouth promotes staining and bacterial growth. Drinking plain water throughout the day rinses food pigments from teeth and supports healthy saliva production. Saliva contains minerals that naturally restore enamel. Good hydration, therefore, indirectly supports your whitening efforts.
Managing Tooth Sensitivity During Whitening
Sensitivity is the most common side effect that causes people to abandon a whitening routine. Understanding the mechanism gives you control over the discomfort.
Why Whitening Causes Sensitivity
Peroxide penetrates enamel and dentin, oxidizing stain molecules inside the microscopic tubules of tooth structure. These tubules connect to nerve endings. When peroxide travels too deep or too fast, it stimulates those nerves, resulting in a short, sharp pain triggered by cold, heat, or air. The sensation mimics what you feel when enamel wears thin.
Preventing Sensitivity Before It Starts
Brush with a toothpaste containing potassium nitrate or stannous fluoride for two weeks before beginning any whitening regimen. These ingredients calm nerve endings by blocking the dentinal tubules. Research published in dental journals consistently supports that pre-treatment with desensitizing toothpaste reduces whitening-related sensitivity.
Responding to Sensitivity When It Occurs
At the first twinge of sensitivity, pause the whitening pen for a day. Continue brushing with desensitizing toothpaste. You can also apply a small amount of desensitizing toothpaste directly to sensitive areas and let it sit for 5 minutes before rinsing. This targeted treatment delivers relief faster than brushing alone.
Resume whitening at a reduced frequency. Instead of daily, use the pen every other day or every third day. The progress slows but does not reverse. Many people find that sensitivity fades as teeth acclimate, allowing a return to daily use by the end of the treatment.
When to Stop and Consult a Dentist
Severe pain that throbs without a trigger, sensitivity that lasts more than three days after stopping the pen, or gum tissue that blisters or peels indicates a problem that a professional should evaluate. You may have undiagnosed enamel defects, gum recession, or an allergy to an ingredient. Discontinue the pen and schedule a dental exam.
Comparing Teeth Whitening Pens With Other At-Home Methods
Understanding where pens fit in the broader landscape of whitening options helps you decide whether this tool matches your goals.
| Feature | Whitening Pen | Whitening Strips | Tray & Gel Kit | LED Light Kit | Whitening Toothpaste |
|---|---|---|---|---|---|
| Application Precision | High; direct spot application | Moderate; strips cover broad area | High; custom trays fit perfectly | Low to moderate | Low; spread across all teeth |
| Peroxide Strength | Low to moderate | Moderate | Moderate to high | Moderate | Very low or none |
| Convenience | Excellent; portable, no rinsing | Good; pre-cut, disposable | Low; mixing, loading, timing | Moderate; set-up required | Excellent; daily brushing |
| Whitening Speed | Gradual; 1 to 2 weeks | Moderate; 5 to 14 days | Fast; often visible in 3 days | Moderate; 1 to 2 weeks | Very slow; subtle polishing |
| Gum Irritation Risk | Low with careful application | Moderate; strip contact | Low with custom trays | Low to moderate | Very low |
| Cost per Treatment Cycle | $15 to $40 | $25 to $60 | $30 to $150+ | $40 to $200 | $5 to $15 |
| Best Suited For | Maintenance, mild stains, targeted whitening | General surface stains, budget-friendly | Significant staining, even shade across arch | Supplementary boost | Daily stain prevention |
The whitening pen excels as a precision touch-up instrument. Someone who completes a tray whitening course and wants to maintain their shade without repeating the full process every few months finds a pen ideal. It also suits people who only want to brighten the front six teeth rather than their entire arch.
Understanding Whitening Gel Chemistry and Its Realistic Limits
Misinformation circulates widely about how whitening gels work. A clear picture prevents unrealistic hopes and dangerous misuse.
Oxidation, Not Scrubbing
Whitening gels oxidize organic stain molecules embedded within enamel. They do not scrub or peel the surface. Peroxide breaks down into oxygen radicals that react with dark-colored carbon bonds, converting them into lighter, simpler molecules that reflect less visible light as color. This chemical reaction takes time. You cannot rush oxidation by applying more gel. Once the available peroxide in a thin film exhausts itself, adding more simply wastes product.
The Role of pH
Most effective whitening gels maintain a slightly acidic to neutral pH to stabilize the peroxide. However, prolonged exposure to acidic environments weakens enamel. Reputable brands balance pH carefully. Cheap, unregulated pens may be overly acidic and cause gradual mineral loss. If you notice a sour or harsh chemical taste that lingers, the pH may sit too low, and you should switch brands.
Stains That Pens Cannot Remove
- Intrinsic tetracycline stains: Gray or brown banding caused by childhood antibiotics resides deep in dentin. Topical gel cannot reach these depths in significant concentration.
- Dental restorations: Fillings, crowns, veneers, and bonding material do not whiten. If you have a visible front tooth filling, whitening your natural tooth around it creates a noticeable mismatch. A dentist must replace the restoration to match the new shade.
- Exposed dentin from gum recession: The yellowish root surface lacks enamel and whitens poorly. Aggressive gel use on exposed roots also triggers intense sensitivity.
- Fluorosis marks: Mild white spots may blend in as surrounding enamel brightens, but distinct brown or mottled discoloration remains unchanged without professional treatments like microabrasion or resin infiltration.
The Importance of Saliva and Remineralization
Between whitening sessions, your saliva works constantly to rebalance pH and deposit calcium and phosphate ions back into enamel. This natural remineralization process explains why spacing out treatments gives better long-term results than aggressive daily bleaching. Whitening opens the enamel pores. Remineralization fills them back in. A well-paced regimen respects this biological rhythm.
Detailed Daily Routine for a 14-Day Whitening Pen Course
The following schedule provides structure for someone using a moderate peroxide pen (around 6%) targeting general surface stains.
Day 1 to Day 3: Building the Habit
- Morning: Brush teeth with sensitivity toothpaste. Dry teeth thoroughly. Apply pen gel to upper and lower front six teeth. Keep mouth open for 60 seconds. Let gel set for the time specified (usually 10 to 20 minutes). Wipe or rinse. Wait 30 minutes before breakfast.
- Evening: Floss and brush. Dry teeth. Apply gel. Let set. Go to bed without eating or drinking further.
- Day 3 assessment: Take a photo. You may see minimal change yet. Sensitivity should be absent or very mild. If gums feel tender, apply petroleum jelly barrier more carefully tomorrow.
Day 4 to Day 7: Noticing Change
- Morning: Same routine. You may notice that the two front teeth look slightly brighter than the lateral incisors. This occurs because centrals are thicker and absorb more gel. Pay extra attention to evening out application.
- Evening: Same routine. If sensitivity begins, switch to applying only in the evening and skip morning sessions for two days.
- Day 7 assessment: Take a photo. Compare to Day 1. Most users see 1 to 2 shades of lightening.
Day 8 to Day 11: Deepening Effect
- Morning or evening (once daily): By now, your technique should feel natural. You dry teeth quickly, apply gel evenly, and avoid gum contact. The whitening reaction penetrates deeper and oxidizes older stain layers.
- Diet adjustment: Avoid dark-colored foods and drinks within 2 hours of treatment. Rinse with water after coffee or tea.
- Day 11 assessment: Teeth may look slightly translucent at the biting edges. This is normal and reverses during the rest period after the course.
Day 12 to Day 14: Final Push
- Once daily application: Focus on evening sessions to maximize overnight stain-free time.
- Final photo on Day 15: Compare all four photos. The progression should show a clear lightening trend. Teeth should appear naturally white, not unnaturally blue-toned or chalky.
Post-Course Maintenance
After completing 14 days, stop using the pen for at least one week. During this break, teeth rehydrate fully and sensitivity resolves. Then resume pen use two or three times per week to maintain your new shade. This maintenance phase makes the results last months instead of weeks.
Real-World Factors That Influence Whitening Speed
No two mouths respond identically. Several variables explain why your friend saw results in three days while you need ten.
Age and Enamel Thickness
Younger adults generally have thicker enamel with fewer microscopic cracks. The gel penetrates evenly and oxidizes stains smoothly. Older adults may have worn enamel, exposing the yellower dentin. The gel still lightens surface enamel, but the underlying dentin color limits the final shade. Realistic expectations matter here: a pen brightens natural tooth color but does not recreate the thick, opaque enamel of a teenager.
Stain Type and Duration
Fresh coffee and tea stains sit on the pellicle, a protein film on the tooth surface. Whitening gel removes these within days. Old, set-in stains from years of smoking or heavy red wine consumption penetrate deeper. Removing them requires more applications. Some may need professional removal before a pen can maintain the clean surface.
Diet During Treatment
You can undermine progress with every meal. If you use a whitening pen in the morning and drink three cups of black coffee, eat a bowl of berries, and enjoy a glass of red wine in the evening, you stain your teeth as fast as the gel lightens them. A whitening diet during the treatment period emphasizes white or light-colored foods: chicken, rice, potatoes, cauliflower, bananas, milk, and water.
Consistent Technique
Inconsistent drying, uneven gel application, and skipped sessions account for many “failed” whitening attempts. Review your mirror check. Are you truly painting every visible tooth surface? Are you waiting long enough? Honest self-assessment often reveals gaps that, once corrected, produce results.
Safety Guidelines and Warnings
Read the pen instructions completely before first use. Even if you have used similar products before, formulations differ.
- Do not swallow the gel. Ingredients like peroxide, glycerin, and stabilizers belong on teeth, not in your stomach. A small accidental swallow may cause mild stomach upset. Significant ingestion warrants a call to a poison control center.
- Keep pens away from children. The small, colorful tube looks like a toy or candy to a young child. A child biting into a pen can ingest the entire gel content, which is dangerous.
- Do not use on damaged or irritated gums. Whitening gel applied to cuts, sores, or inflamed tissue stings and delays healing. Wait until oral soft tissue is completely healthy.
- Discontinue use during pregnancy or breastfeeding. While no strong evidence proves topical whitening harms a fetus or infant, the safety of peroxide-based oral products during pregnancy remains under-studied. Most dentists recommend postponing elective cosmetic treatments until after breastfeeding ends.
- Avoid combining multiple whitening products. Using a pen, strips, and a whitening toothpaste all in one day overexposes enamel to chemical stress. Choose one primary method and supplement at most with a gentle whitening toothpaste.
“Peroxide-based whitening is safe when used as directed, but doubling the concentration or frequency does not double the result. It only doubles the irritation risk.” — Clinical consensus from dental professionals familiar with over-the-counter whitening trends.
Care and Storage of Your Whitening Pen
Treat the pen as a small investment. Proper storage preserves its potency and extends its usable life.
- Cap tightly after every use. Air exposure dries out the gel and clogs the applicator tip.
- Store upright with the tip down or horizontal, as recommended by the brand. Storing tip-up can cause gel to settle away from the applicator, requiring excessive twisting.
- Avoid temperature extremes. A bathroom that steams from hot showers experiences repeated temperature and humidity swings. A bedroom drawer or makeup bag in a climate-controlled room works better.
- Do not share your pen. Oral bacteria transfer between individuals via the applicator tip. A pen is a personal care item, just like a toothbrush.
- Mark the opening date on the pen with a permanent marker. Most pens have a shelf life of 12 to 24 months sealed, but once opened, they last 3 to 6 months before the gel degrades noticeably.
Troubleshooting Common Issues
Even with careful preparation, problems occasionally arise. Here are practical fixes for the most common complaints.
| Problem | Possible Cause | Solution |
|---|---|---|
| Gel slides off teeth | Moisture or too-thick application | Dry teeth more thoroughly; apply thinner layer |
| No visible results after 1 week | Insufficient wear time, diet interference, or older stains | Extend wear time within product limits; eliminate staining foods; take progress photos for objective comparison |
| White spots on gums | Gel contact with soft tissue | Apply petroleum jelly barrier; wipe excess immediately; reduce gel amount |
| Teeth look blotchy | Uneven gel application | Check mirror for missed spots; ensure tip spreads gel edge to edge |
| Sudden sharp pain | Excessive frequency or gel on exposed dentin | Pause treatment for 2 days; switch to sensitivity toothpaste; apply gel to enamel only |
| Gel dried in pen | Cap not tightened or pen beyond expiration | Soak tip in warm water to unclog; replace pen if gel inside hardened |
Professional Insights: What Dentists Say About Whitening Pens
Dental professionals acknowledge the convenience of whitening pens while cautioning against overreliance. A 2023 survey of cosmetic dentists found that most considered whitening pens suitable for maintenance but insufficient for initial whitening in patients with moderate to heavy staining.
“I tell patients to think of the pen like a touch-up paint for a car. It works great for small areas and upkeep, but if the whole car needs a new paint job, you need a professional spray booth. For teeth, that booth is either a custom tray system from the dentist or an in-office laser treatment.” — A practicing cosmetic dentist commenting on realistic expectations for over-the-counter whitening tools.
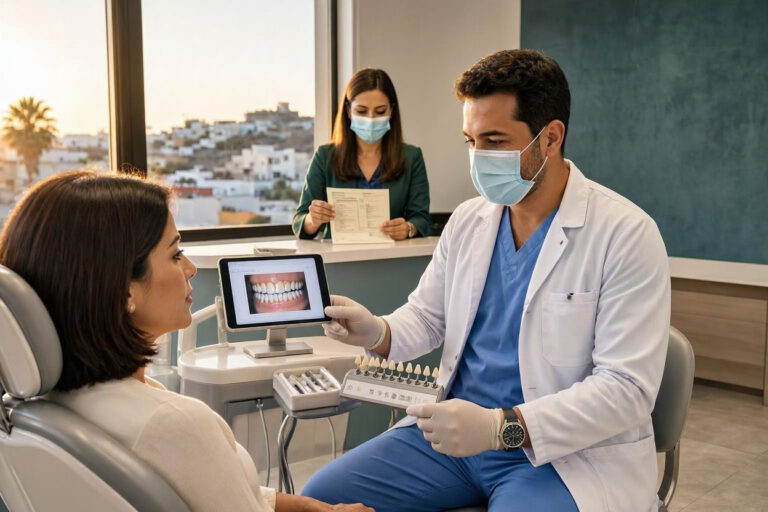
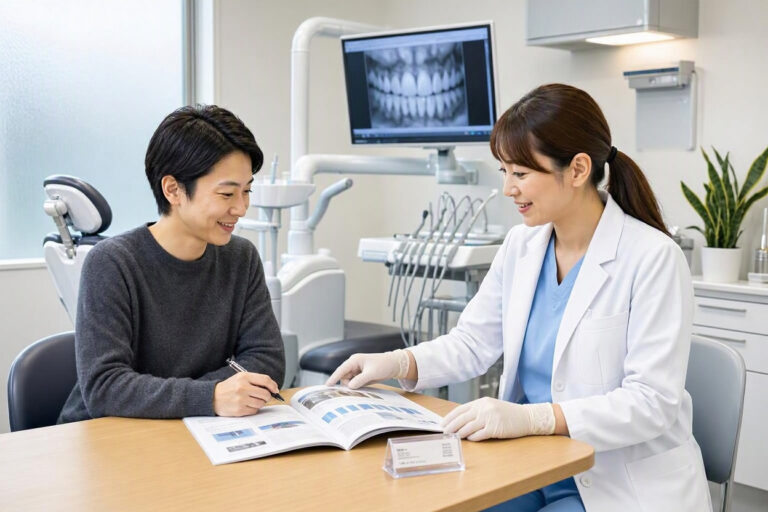
The same dentists emphasized that a pre-whitening exam matters. Undiagnosed cavities, leaky fillings, or gum disease create pathways for peroxide to reach the nerve. The resulting pain can be severe and entirely preventable. If you have not visited a dentist in over a year, schedule a check-up before starting any whitening regimen.
Combining a Whitening Pen With Other Whitening Methods
You may wonder if you can layer treatments for faster results. The answer is cautiously yes, but only with specific pairings and careful monitoring.
Pen as a Booster for Strips
Apply a thin line of pen gel directly onto the whitening strip before placing it on your teeth. This adds a higher-concentration spot treatment to areas that need extra attention. Limit this technique to once every three days, and watch for gum irritation from overlapping peroxide sources.
Pen After Professional Cleaning
A dental cleaning removes surface tartar and stains that block gel penetration. The period immediately after a cleaning represents an ideal window to begin a pen course. The freshly polished enamel surface accepts the gel evenly.
Pen With LED Devices
Some LED devices claim to accelerate whitening. The evidence on LED efficacy remains mixed, with some studies showing a slight acceleration and others showing no benefit beyond the gel itself. If you use an LED light, follow the device instructions strictly and do not extend exposure. The pen gel may not be formulated for light activation, and overheating could cause pulpal sensitivity.
Do Not Mix Peroxide Systems With Abrasive Whiteners
Charcoal powders, baking soda scrubs, and highly abrasive whitening toothpastes physically erode enamel. Pairing them with a peroxide pen creates a dangerous cycle of chemical softening and mechanical scraping. Choose one approach—chemical or mechanical—and stick with it.
Building Long-Term Whitening Maintenance
Achieving a bright shade feels rewarding. Maintaining it requires a sustainable, low-effort routine that fits your lifestyle.
Weekly Pen Touch-Ups
After completing an initial course, use the pen once or twice weekly on dry teeth before bed. This minimal frequency keeps new surface stains from settling while allowing enamel to remain strong and hydrated.
Daily Habit Adjustments
Small shifts in daily behavior compound over months. Rinse your mouth with water after drinking coffee or tea. Use a straw for dark beverages. Brush your teeth 30 minutes after eating staining foods. These habits do not require extra products or time; they simply integrate into your existing routine.
Regular Dental Cleanings
Professional cleanings every six months remove the calculus and extrinsic stains that a pen cannot budge. Schedule these appointments in advance. A clean tooth surface also whitens more evenly and quickly when you do use the pen.
Knowing When to Repeat a Full Course
Every 6 to 12 months, depending on your diet and habits, you may notice your shade darkening despite maintenance pen use. At that point, commit to another 7 to 14-day daily course. This cyclical approach mirrors how professionals structure treatment: intensive whitening, rest, maintenance, repeat.
Frequently Asked Questions
How long does one whitening pen last?
A standard 2 to 4-milliliter pen provides enough gel for 20 to 40 individual applications, which translates to a full 14-day course for upper and lower front teeth, with some gel remaining for maintenance. Heavy usage over a larger number of teeth naturally uses the pen faster.
Can I use a whitening pen on my bottom teeth?
Yes. The lower teeth, especially the canines and incisors, are highly visible during speech and smiling. Apply with the same technique, but note that lower teeth often have less enamel thickness and may become sensitive more quickly.
Will a whitening pen damage my enamel?
When used as directed, a regulated whitening pen does not permanently damage healthy enamel. The temporary softening effect reverses within hours as saliva remineralizes the surface. Problems arise only from overuse, highly acidic unregulated formulas, or combining multiple whitening treatments simultaneously.
Can I use a whitening pen while wearing braces?
No. The gel will whiten the exposed enamel but leave a dark square beneath each bracket. When braces come off, your teeth will look polka-dotted. Wait until orthodontic treatment is complete and any bonded attachments have been removed.
Why does my whitening pen burn my gums?
Peroxide irritates soft tissue. The burning sensation usually means you applied too much gel and it spread onto the gumline, or your gums are already sensitive due to aggressive brushing or gingivitis. Wipe away the excess immediately and apply a thinner layer next time.
Can I speak while the gel sets?
Minimal movement of lips and tongue is fine, but talking pulls air and moisture over the teeth and may disturb the gel. A quiet 10 or 20 minutes works best. If you must speak, keep it brief and try not to touch your teeth with your tongue.
How soon after using the pen can I brush my teeth?
Wait at least 30 minutes. Brushing too soon spreads the residual peroxide around and may push gel into gum pockets. Once the waiting period has passed, you can resume normal brushing.
Does teeth whitening gel expire?
Yes. Check the packaging for an expiration date. Expired gel loses whitening power and may separate chemically, increasing the risk of uneven application or irritation.
Will the pen whiten my dental crown or veneer?
No. Porcelain, composite resin, and ceramic restorations do not respond to peroxide. If your natural teeth whiten and the restoration no longer matches, you will need to have the restoration replaced to match the new shade.
Additional Resource
For readers who want to explore the clinical evidence supporting whitening ingredients and their safety, the American Dental Association provides a comprehensive overview of tooth whitening treatments, including the role of peroxide concentrations and product regulation:
Conclusion
Using a teeth whitening pen effectively comes down to dry, clean teeth, a thin and even gel layer, and disciplined timing that allows the peroxide to oxidize stains without interference from saliva or food. Avoiding common mistakes, such as applying to wet enamel or closing the lips too soon, transforms the pen from a gimmick into a genuinely useful tool for gradual shade improvement. Paired with realistic expectations, proper sensitivity management, and a consistent maintenance schedule, the whitening pen earns its place as a portable, low-cost companion for keeping your smile bright between professional treatments.
Disclaimer
This article provides general educational information and does not replace professional dental advice. Consult a licensed dentist before starting any whitening regimen, especially if you have existing dental work, gum disease, tooth sensitivity, or medical conditions that may affect treatment safety. Product results vary based on individual enamel characteristics, stain type, and adherence to instructions. The author and publisher assume no liability for adverse effects resulting from the use or misuse of information presented. Always follow the specific instructions included with your whitening pen.