How LED Lights Boost Teeth Whitening Results
A bright smile communicates confidence before you even say a word. You have probably noticed the explosion of LED whitening kits on social media and in drugstores. Maybe you have wondered if that glowing blue mouthpiece is a legitimate tool or just a marketing gimmick. The truth lies in chemistry, physics, and a clever invention that changed cosmetic dentistry.
This guide walks you through the science, the practical steps, and the safety precautions behind light-accelerated whitening. You will learn exactly why that little light makes a measurable difference. You will also discover how to avoid sensitivity, how to pick the right product, and how to maintain your results for months.
Sit down with a cup of coffee—just kidding, not if you want white teeth—and let’s unpack everything you need to know about LED-accelerated teeth whitening.
Understanding the Basics of Tooth Discoloration
To appreciate how light accelerates whitening, you must first understand why teeth lose their brilliance. Tooth discoloration falls into two broad categories. Knowing which type you face helps you predict how well LED whitening will work for you.
Extrinsic Stains
Extrinsic stains sit on the outer layer of the tooth, the enamel. Think of enamel as a tightly packed crystal fortress made primarily of hydroxyapatite. Despite its hardness, enamel contains microscopic pores and ridges. Pigments from food, drinks, and lifestyle habits seep into these tiny imperfections over time.
Common culprits include coffee, tea, red wine, dark berries, cola, and tobacco. Curry and tomato-based sauces also deposit stubborn yellowish compounds. These stains range from light yellow to dark brown. They respond very well to whitening treatments because the bleaching agent does not need to travel far.
Intrinsic Stains
Intrinsic stains lurk deeper, within the dentin layer underneath the enamel. Dentin naturally has a yellowish hue. When enamel thins with age or erosion, that yellow dentin shows through more prominently. Intrinsic discoloration can also result from certain antibiotics like tetracycline taken during childhood, excessive fluoride ingestion during tooth development, or trauma that causes internal bleeding inside the tooth.
These stains prove more challenging to remove. They may require longer treatment courses or higher concentrations of whitening agents. LED light can still help here, but patience becomes essential.
Age-Related Changes
As you age, two things happen simultaneously. Enamel wears down gradually through decades of chewing and exposure to acidic foods. At the same time, dentin continues to form secondary layers, becoming thicker and more yellow. This combination creates the dull, darkened smile many people notice by their forties and fifties.
Understanding your specific type of staining sets realistic expectations. A quick test: if your teeth look brighter after a professional cleaning, you mostly have extrinsic stains. LED whitening will likely work beautifully. If deep, grayish discoloration persists regardless of surface cleaning, you may need a longer, more intensive approach.
The Chemistry Behind Whitening Gels
Every whitening product, whether a strip, a pen, or a syringe gel, contains an active ingredient: hydrogen peroxide or carbamide peroxide. The LED light does not whiten teeth by itself. It acts as a catalyst that supercharges the chemical reaction already underway in the gel.
Hydrogen Peroxide as the Workhorse
Hydrogen peroxide (H₂O₂) is a small, reactive molecule. When it contacts tooth enamel, it breaks down into water (H₂O) and a highly reactive oxygen free radical. These free radicals act like tiny scrubbing bubbles on a molecular level. They penetrate the porous enamel and attack long-chain pigment molecules trapped inside. The oxidation reaction snaps those long, dark-colored molecular chains into shorter, colorless fragments. The stain literally disappears through chemical breakdown.
Concentration matters greatly. Drugstore strips might contain 6% to 10% hydrogen peroxide. Professional gels used in dental offices can reach 25% to 40%. Higher concentrations deliver faster, more dramatic results but require careful isolation of the gums to prevent chemical burns. LED lights can speed up even lower concentrations, making at-home treatments more effective without aggressive chemical loads.
Carbamide Peroxide: The Slow-Release Alternative
Carbamide peroxide breaks down into hydrogen peroxide and urea. A 10% carbamide peroxide gel yields roughly 3.5% hydrogen peroxide. The reaction happens more gradually, which means the gel stays active longer on the tooth surface. Many at-home LED kits use carbamide peroxide because it offers a safer, extended-release bleaching effect. The LED light helps compensate for the lower initial peroxide concentration by accelerating the breakdown into active oxygen radicals.
Why Light Makes a Difference
The peroxide breakdown reaction requires activation energy. Without external energy input, the reaction proceeds slowly at body temperature. Heat provides one form of activation energy. Light provides another. An LED light tuned to specific blue wavelengths delivers targeted energy directly to the gel. This energy excites the peroxide molecules, pushing them over the activation barrier faster. More free radicals get generated per minute. More stain molecules get destroyed per session. The gel’s effective working time shrinks, reducing the risk of saliva contamination and gel dehydration. This chemistry is the core answer to “How LED Lights Boost Teeth Whitening Results.”
Important Note: The light alone, without the gel, will not change your tooth shade. Do not shine a blue LED into your mouth expecting a miracle. The gel remains the essential ingredient.
What Is an LED Whitening Light?
Walk down the oral care aisle and you will see mouth trays with built-in blue lights, standalone handheld lamps, and even smartphone-connected devices. All these share a common technology: Light Emitting Diodes, or LEDs.
The Physics of LED Light
An LED generates light when electrons move through a semiconductor material. Unlike old-fashioned incandescent bulbs, LEDs produce very little heat. They can emit specific, narrow wavelength bands without wasteful infrared radiation. For teeth whitening, manufacturers select blue LEDs in the 400 to 500 nanometer range. This cool blue light effectively activates peroxide-based whitening gels without raising the tooth’s internal temperature to dangerous levels.
Why Blue Light?
Blue light photons carry more energy than red or green photons within the visible spectrum. When a blue photon strikes a peroxide molecule, that molecule absorbs the energy and shifts into an excited state. In this excited state, the peroxide bond breaks more readily, releasing active oxygen radicals. Red light, by contrast, carries less energy per photon and proves less effective at driving this particular photochemical reaction. This explains the universal adoption of blue LED technology across whitening products.
Design Variations
LED whitening devices come in several form factors. Some look like a mouthguard connected by a wire to a small battery pack. You bite down, the light illuminates your entire arch, and you wait. Others look like a smartphone accessory with a light attached to a silicone tray. High-end home kits feature built-in timers that automatically shut off after a preset session. Dental office lights are much larger, often mounted on articulating arms, and deliver much higher intensity across the full arch simultaneously.
Regardless of design, the principle remains identical: deliver a consistent, safe blue light flux to the peroxide gel covering your teeth.
How LED Lights Boost Teeth Whitening Results: The Detailed Mechanism
You have already glimpsed the basic chemistry. Now let’s explore the full mechanism in detail. Understanding exactly how this technology works empowers you to use it correctly and avoid false promises.
Photochemical Activation
The process hinges on photolysis, or light-induced decomposition. Hydrogen peroxide molecules naturally decompose into water and oxygen radicals at room temperature. This spontaneous decomposition happens slowly. When you introduce photons of the correct energy, you dramatically increase the rate of this decomposition. Imagine a room full of mousetraps, each loaded with a ping-pong ball. Drop one ball and a slow chain reaction starts. Now imagine shaking the whole room. That shake is what the LED light does to the peroxide molecules. The reaction accelerates, generating a burst of whitening radicals exactly where you want them.
Heat Versus Photochemistry: An Important Distinction
Early whitening lights, and some still used in dental offices, employed halogen or plasma arc technology. These produced significant heat. In the past, researchers debated whether the whitening acceleration came from the light or simply from the heat warming the gel. Heat certainly speeds chemical reactions. However, modern LED lights generate minimal heat. Studies now confirm that the photochemical effect—direct electronic excitation by photons—is real and measurable. LED lights enhance whitening through genuine photo-catalysis, not just thermal warming. This makes the process safer for the tooth pulp, which can become painfully inflamed when overheated.
Deeper and Faster Stain Breakdown
Without light, the active oxygen radicals tend to react first with stains near the enamel surface. The gel’s working time remains limited because saliva gradually dilutes the peroxide and the gel dries out. With LED acceleration, a high concentration of radicals gets generated within the first few minutes. This surge penetrates deeper into the enamel micro-porosities before the gel loses potency. The result is a more thorough removal of both surface and subsurface stains in a single session.
Reduced Total Contact Time
Because the reaction proceeds faster, you can achieve similar shade improvement in shorter sessions. This has significant clinical implications. Shorter sessions mean less time for the peroxide to diffuse through the enamel into the pulp chamber, which reduces sensitivity risk. Shorter sessions also minimize gum irritation from gel contact. The LED light, by making the gel more efficient, actually improves the safety profile of whitening when used correctly.
Clinical Evidence Snapshot
Numerous controlled studies have compared peroxide gel with and without LED activation. A 2016 randomized clinical trial published in the Journal of Esthetic and Restorative Dentistry found that LED activation produced significantly greater shade change than gel alone after a single 45-minute session. Another study in Operative Dentistry (2018) confirmed that while the initial boost was notable, the long-term difference between LED and non-LED groups narrowed after multiple treatments. This suggests that LED primarily provides a faster route to the final shade, rather than an unattainably whiter endpoint. In practical terms, you get to your bright smile quicker with light.
Summary of Action Mechanism:
| Step | Process | LED Role |
|---|---|---|
| 1 | Peroxide gel applied to teeth | No direct role; gel sits on enamel |
| 2 | Blue light emitted from LED | Photons penetrate the gel layer |
| 3 | Peroxide molecules absorb photons | Excitation to higher energy state |
| 4 | Peroxide bond cleavage accelerates | Burst of oxygen free radicals released |
| 5 | Radicals oxidize organic stain pigments | Stain molecules broken into invisible fragments |
| 6 | Enamel appears whiter | Treatment complete in less time |
“LED light acts as a catalyst, not a primary whitener. It shaves time off the bleaching process by making the peroxide gel work harder and faster during its limited effective window.”
Comparing LED Whitening to Other Methods
To judge the value of LED technology, you need to see it alongside alternatives. Not every approach suits every person or budget. Here is an honest breakdown.
Whitening Toothpastes
Whitening toothpastes rely on mild abrasives like silica, calcium carbonate, or activated charcoal. They mechanically scrub surface stains. Some also contain low concentrations of hydrogen peroxide or polyphosphates to break down stains chemically.
Effectiveness: They remove only extrinsic, superficial stains. Expect a shade improvement of maybe one or two VITA shades after weeks of use. They cannot touch intrinsic discoloration. Speed: Very slow. LED comparison: LED kits work on a completely different level, penetrating deep into enamel. Toothpaste is maintenance, not transformation.
Whitening Strips
Strips coated with peroxide gel adhere directly to teeth. They work without a light source, relying on prolonged contact time—usually 30 minutes daily for two weeks.
Effectiveness: Good for mild to moderate extrinsic staining. They provide noticeable results for many users. Speed: Gradual improvement over days to weeks. LED comparison: Adding LED technology to a strip-like gel often yields equivalent results in fewer sessions. Strips can slip, and saliva can dilute the gel unevenly. A tray and LED setup offers more controlled delivery.
Whitening Pens
Pens dispense a thin gel film directly onto teeth. The gel dries and gets left on, sometimes overnight.
Effectiveness: Useful for spot-treating isolated dark teeth or quick touch-ups. Less effective for full-arch dramatic whitening. Speed: Convenient, but patchy coverage limits overall result quality. LED comparison: Pens lack the intense, even gel layer and light activation that drive fast, uniform results.
Custom Tray Whitening from a Dentist
Your dentist takes impressions, fabricates tight-fitting trays, and prescribes a take-home peroxide gel. You wear the trays for several hours a day or overnight over one to two weeks.
Effectiveness: Excellent. The custom fit prevents gel from leaking onto gums and keeps it in intimate contact with enamel. Speed: Predictable, steady lightening over a week. LED comparison: Some dentists now offer LED lights as an adjunct to custom tray therapy. The light can shorten nightly wear time, making the regimen more convenient.
In-Office Power Bleaching (with or without Light)
This is the gold standard. A dental professional applies high-concentration peroxide (up to 40%), carefully protects your gums, and may activate the gel with a powerful light.
Effectiveness: Maximum possible whitening in a single visit. Often 6 to 10 shades lighter in an hour. Speed: Immediate. LED comparison: In-office systems frequently use advanced LED, plasma, or laser lights to drive the rapid reaction needed for chairside results. This represents the most intense application of the light-acceleration principle.
Comparative Table of Whitening Methods:
| Method | Active Agent | Use of Light | Shade Improvement (Typical) | Time to Visible Result | Risk of Sensitivity |
|---|---|---|---|---|---|
| Whitening Toothpaste | Abrasives, low H₂O₂ | None | 1-2 shades | Weeks | Very Low |
| Strips | 6-10% H₂O₂ | None | 2-4 shades | 5-14 days | Low-Medium |
| Whitening Pen | 3-10% H₂O₂ | None | 1-3 shades, spotty | Days | Low |
| Custom Trays (Home) | 10-22% Carbamide | None | 4-8 shades | 7-14 days | Medium |
| At-Home LED Kit | 9-22% Carbamide or H₂O₂ | Blue LED | 4-8 shades | 5-10 days | Medium |
| In-Office Power Bleach | 25-40% H₂O₂ | LED/Laser/Plasma | 6-12 shades | 1 hour | Medium-High |
Professional In-Office LED Treatments
Stepping into a dental office for LED whitening represents the highest level of controlled, predictable outcome. Knowing what happens during the procedure removes anxiety and helps you decide if the investment makes sense.
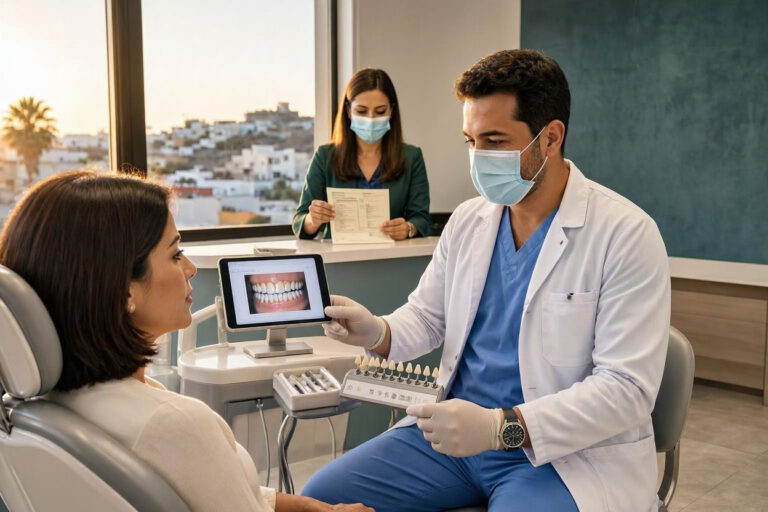
The Consultation Phase
Your dentist begins by examining your teeth and gums. They identify restorations: crowns, veneers, fillings. Whitening gel does not change the color of ceramic, composite, or metal. If you have prominent front restorations that match your current tooth shade, whitening the natural teeth will create a mismatched appearance. Your dentist will discuss this honestly. They may recommend replacing restorations after whitening to match the new, lighter shade.
The dentist also assesses the cause of your discoloration. If deep intrinsic staining has a strong genetic or medication-related component, they may temper expectations. A shade guide captures your starting point with photographs. This baseline allows objective comparison at the end.
The Procedure Step by Step
A thorough professional cleaning often precedes whitening. Plaque and tartar block gel contact. Clean enamel absorbs gel evenly.
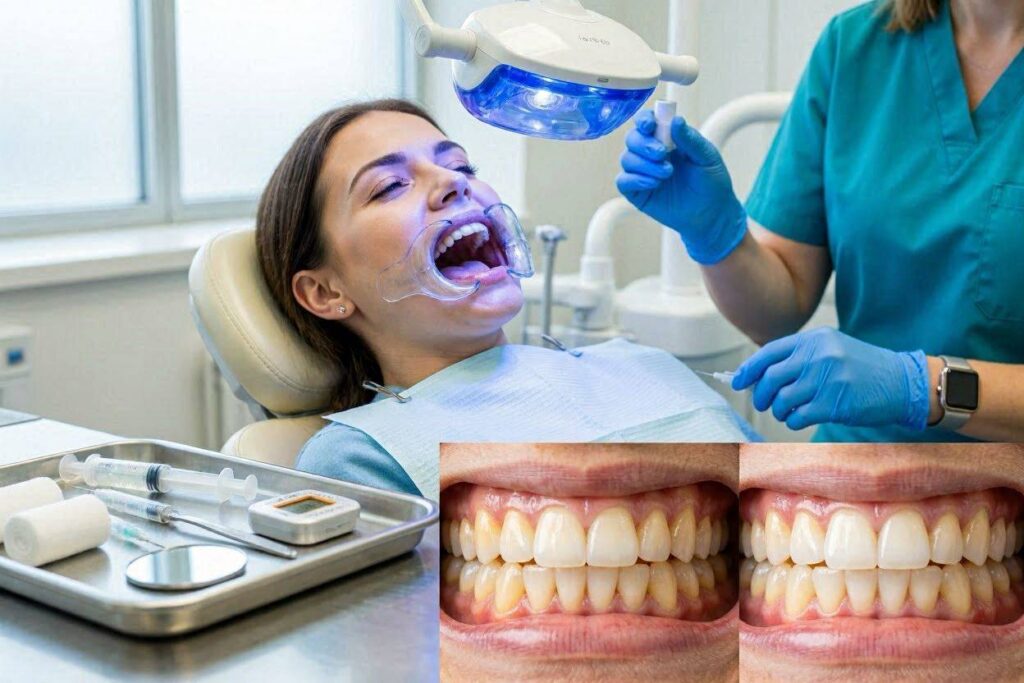
Next comes protection. The dentist or hygienist inserts a cheek retractor to keep lips and cheeks away from the teeth. Liquid rubber dam or a light-cured resin barrier gets painted onto the gums along the gumline. This protective layer prevents the powerful gel from causing chemical burns.
The dentist then mixes or dispenses the high-concentration peroxide gel, typically 35% to 40% hydrogen peroxide. They paint it carefully onto the facial surfaces of the teeth, keeping a safe distance from the gum barrier. Once all visible enamel in the smile zone is coated, the LED light gets positioned.
Professional LED units are powerful, often emitting light in the 400-500 nanometer range with irradiance levels significantly higher than home devices. The light remains on for 15 to 20 minutes. During this period, the patient relaxes, often watching a show or listening to music. The dental team monitors continuously for any signs of sensitivity or barrier leakage.
After the cycle, the dentist suctions off the gel, inspects the teeth, and assesses shade change. Depending on the desired result and the patient’s comfort, they may repeat the cycle one or two more times in the same visit. Between cycles, they may apply desensitizing agents containing potassium nitrate or fluoride to calm the nerves.
Immediate Aftercare
Once the final shade is achieved, all barriers come off. The teeth often appear slightly dehydrated immediately after the procedure, looking unnaturally white. The true, stable shade reveals itself within 24 to 48 hours as the enamel rehydrates. The dentist provides post-care instructions: avoid staining foods and drinks for at least 48 hours, use a sensitive-formula toothpaste, and possibly wear a take-home touch-up kit.
“Professional LED whitening gives you instant transformation, but the truly smart patients follow the aftercare rules religiously to lock in their investment.”
At-Home LED Whitening Kits: A Buyer’s Guide
The market overflows with choices, from budget generic trays to sophisticated systems with customizable mouthpieces. Discerning quality from junk determines your results and safety.
What to Look For
Clear Ingredient Disclosure: Reputable brands state the exact percentage of hydrogen peroxide or carbamide peroxide. Avoid kits that vaguely list “whitening gel” without concentration. If they won’t tell you the active ingredient percentage, walk away.
FDA or Equivalent Clearance: Look for kits with FDA 510(k) clearance or CE marking (in Europe). This indicates the manufacturer followed medical device quality standards. The LED mouthpiece, wiring, and battery must be safe for oral use.
Wavelength Specification: Quality kits specify that the LED emits light in the 460-490 nanometer blue wavelength band. If the product page only mentions “blue light” without spectral data, the engineering may be sloppy. Inconsistent wavelength means inconsistent activation.
Tray Design: Flexible, one-size-fits-most silicone trays work for many people but can leave gaps. Better kits include a moldable tray that you soften in hot water and then bite into for a semi-custom fit. This ensures even gel distribution and prevents light leakage onto gums.
Safety Features: Automatic shut-off timers protect you from overexposure. Short circuit protection and low-heat design matter more than maximum brightness. A 10-minute or 16-minute auto-off cycle matches clinical protocols and prevents the lazy mistake of falling asleep with the light on.
The Temptation of Bargain Kits
A $15 LED kit from an unknown brand may use a cheap purple LED that looks blue to the naked eye but emits the wrong spectrum. The gel may contain acids or abrasives rather than peroxide. The mouthpiece may have sharp edges or poorly insulated electronics. The cost of professional whitening seems high partly because you pay for safety engineering and liability insurance. A bargain kit that burns your gums or fails to whiten wastes more money than the premium product.
Recommended At-Home Kit Specifications:
| Feature | What to Seek | What to Avoid |
|---|---|---|
| Active Ingredient | Carbamide peroxide 10-22% or H₂O₂ 6-10% | Unspecified “whitening agent” |
| LED Wavelength | 460-490 nm (blue) | No wavelength info or UV claims |
| Tray Material | Medical-grade silicone, BPA-free | Harsh plastic with chemical smell |
| Timer | Auto shut-off at 10-16 minutes | Manual only, risk of overuse |
| Power Source | USB rechargeable with safety cut-off | Non-replaceable batteries in cheap trays |
| Brand Transparency | Clear website, published lab tests, responsive support | No address, no clinical data, stock photos only |
Step-by-Step Protocol for Safe At-Home Use
Using an LED kit correctly makes the difference between a stunning smile and throbbing gums. Follow this protocol exactly, especially for the first few sessions.
1. Prepare Your Mouth
Brush your teeth gently 30 minutes before whitening. Do not brush immediately before, as this can cause tiny enamel abrasions that increase sensitivity. Floss to remove any food debris that could block gel contact. Dry your teeth with a clean tissue or cotton pad. Peroxide gel works best on dry enamel, where saliva does not dilute it.
2. Protect Your Gums
Most kits come with a gel syringe. Apply a thin line of gel along the inner edge of the tray where it will contact your front teeth. Avoid overfilling. Excess gel squeezes onto gums, causing chemical burns. Some users also apply a thin layer of petroleum jelly to their gums as an additional barrier, but check your kit instructions—some manufacturers advise against this because petroleum jelly can deactivate the gel.
3. Insert the Tray and Activate
Seat the tray firmly but not painfully. The light should face your teeth. Turn on the LED. The timer starts. Use this time productively—lie down, listen to a podcast, but do not talk. Talking introduces saliva and breaks the gel seal. Stay still and let the chemistry happen.
4. Monitor Sensation
Mild tingling is normal and indicates active gel penetration. Sharp, stabbing pain in a specific tooth or burning on gums signals trouble. If you feel burning, stop immediately, remove the tray, and rinse thoroughly with water. Do not push through pain. You can damage your enamel and pulp if you ignore warning signs.
5. Complete the Session and Clean Up
When the light turns off, remove the tray. Rinse your mouth thoroughly with lukewarm water. Use your finger or a soft toothbrush to gently remove any residual gel from teeth. Do not re-apply gel and go for a second session immediately. The enamel needs time to rehydrate and remineralize.
6. Post-Treatment Soothing
Apply a fluoride rinse or a desensitizing gel containing potassium nitrate if your kit includes one. Avoid any food or drink for at least one hour. The enamel pores remain slightly open and vulnerable to immediate re-staining. Water is fine.
Recommended Session Frequency
Most manufacturers recommend one 10-16 minute session per day for 7 to 14 days. Some aggressive protocols allow twice-daily sessions, but the risk of sensitivity rises sharply. Consistency works better than intensity. A daily session for 10 days beats three sessions a day for three days, both in safety and final shade.
Managing and Preventing Tooth Sensitivity
Sensitivity is the number one reason people abandon whitening. Understanding its cause and deploying countermeasures will keep you on track.
Why Sensitivity Happens
Peroxide radicals are small enough to diffuse through enamel and dentin. Eventually, some reach the pulp chamber where nerves and blood vessels reside. These radicals trigger a mild, transient inflammatory response. The nerves become temporarily hypersensitive to temperature and touch. This mechanism is similar to what happens when a cavity gets deep, though whitening-induced sensitivity typically resolves completely within 24 to 48 hours.
Pre-Treatment Strategies
Start using a desensitizing toothpaste containing potassium nitrate or stannous fluoride two weeks before beginning your whitening course. Potassium nitrate penetrates the dentin tubules and calms nerve endings. Stannous fluoride forms a protective barrier over exposed dentin. Building up this defense before the peroxide assault reduces sensitivity dramatically.
During Treatment Adjustments
If sensitivity develops midway through the course, do not quit. Simply insert a rest day between sessions. Instead of consecutive daily treatments, go every other day. The whitening still works; it just takes slightly longer. You can also shorten the session from 16 minutes to 10 minutes. The LED light remains effective with shorter exposure, just to a slightly lesser degree.
Post-Treatment Soothing Protocols
Apply a desensitizing gel immediately after each session. Some kits include this in the packaging. If yours does not, buy a separate product like GC Tooth Mousse or a similar casein phosphopeptide-amorphous calcium phosphate (CPP-ACP) cream. These products supply the enamel with bioavailable calcium and phosphate, rapidly plugging open dentin tubules and soothing nerves.
Avoid extremely cold drinks and ice cream for the duration of your whitening course. Lukewarm everything becomes your temporary mantra.
When to Stop
If pain persists for more than 48 hours after a session, or if you feel a sharp, electric jolt when consuming hot liquids, you may have overdone it. Stop whitening. Switch to a high-fluoride remineralization regimen for a week. Consult a dentist if the sensitivity does not subside. Permanent nerve damage from whitening is exceedingly rare but possible with gross overuse.
The Myth of UV Versus LED: Safety Explained
Misinformation about “UV teeth whitening” still circulates. Let’s set the record straight clearly and permanently.
Old Technology: UV and Halogen Lamps
Decades ago, some whitening systems used ultraviolet (UV) lamps to activate bleaching gels. UV radiation carries enough energy to break chemical bonds, but it also damages living tissue. UV exposure is linked to skin cancer, cataracts, and mucosal damage. Applying UV light inside the mouth is an unacceptable risk by modern standards. These devices have largely disappeared from legitimate dental practice, replaced by safer technology.
Modern Standard: Blue LED
Modern LED whitening lights emit light exclusively in the visible spectrum, primarily 460-490 nanometers. This blue light is non-ionizing. It does not cause DNA damage like UV. It produces negligible heat. You can safely use LED devices according to directions without the cancer or burn risks associated with UV.
Check Your Device Specifications
If you encounter an older or imported product, check the labeling. If it says “UV whitening” or includes UV in the spectral output, do not use it. Stick to visible-spectrum blue LED devices from known manufacturers. Responsible companies prominently state that their products contain no UV light. This is a key safety feature, not just marketing.
Duration, Frequency, and Long-Term Maintenance
Whitening is not permanent. Teeth continue to accumulate new stains from daily life. Maintaining your result requires a realistic, low-effort plan.
How Long Does One Treatment Course Last?
Results from a complete 7-14 day course of LED whitening generally last between six months and two years. The variation depends almost entirely on your habits. A non-smoker who drinks coffee through a straw and brushes after dark beverages can enjoy bright teeth for years. A heavy smoker who drinks three cups of black coffee daily may see noticeable re-staining within six months.
Touch-Up Protocols
Most brands recommend a one- or two-session touch-up every two to three months, or whenever you notice dullness creeping back. A full intensive course of daily sessions is usually only needed once initially, and then perhaps every 12 to 18 months if you let things slide.
Nighttime Maintenance
Using a whitening toothpaste for maintenance once or twice a week makes a noticeable difference. Adding a whitening mouthwash with a low peroxide concentration helps oxidize surface stains before they set. However, avoid daily use of abrasive whitening toothpaste, which can wear down enamel over years.
Professional Maintenance
If you had professional chairside whitening, your dentist will likely provide custom trays and low-concentration gel for touch-ups at home. Using these every few months, optionally with your LED light if compatible, keeps your smile looking professionally polished without repeat expensive visits.
Maintenance Schedule Example:
| Time After Initial Course | Action | Use of LED? |
|---|---|---|
| 1 week | Resume normal oral hygiene; avoid staining foods 48h | No |
| 2 weeks | Begin stain-prevention habits (straw, rinsing) | No |
| 1 month | Assess shade; compare with post-treatment photo | No |
| 3 months | 1-session touch-up | Yes, if kit supports single session |
| 6 months | 1-2 session touch-up | Yes |
| 12 months | Evaluate if full 7-day re-treatment needed | Possibly |
Dietary Habits That Support Whitening
Your fork and glass shape how long your whitening investment lasts. Strategic eating does not mean deprivation; it means timing and simple substitutions.
The Critical 48-Hour Window
Immediately after whitening, the enamel exhibits slightly increased porosity. This is the highest-risk period for re-staining. Any deeply pigmented substance that enters the mouth during this window can penetrate deeper than usual. For 48 hours after completing your whitening course, commit to a “white diet.” Eat foods that would not stain a white shirt. Think chicken, turkey, white fish, rice, pasta with cream sauce, cauliflower, bananas, and egg whites. Drink water, milk, or clear soda. Avoid coffee, tea, red wine, berries, beets, curry, soy sauce, and tomato sauce.
The Straw Strategy
When you inevitably return to coffee and tea, use a straw positioned far back in the mouth. This simple physical bypass minimizes direct contact between staining liquid and front teeth. It feels slightly ridiculous with hot coffee, but iced coffee through a reusable straw works naturally. This habit alone can double the longevity of your whitening results.
Rinsing and Brushing
After consuming staining foods or drinks, swish water immediately. This dilutes and physically removes pigments before they settle into enamel pores. Wait at least 30 minutes before brushing after acidic drinks like wine or soda. Acid temporarily softens enamel, and immediate brushing can erode it. The rinse-now, brush-later rule protects both whiteness and enamel thickness.
Crunchy Vegetables as Natural Cleaners
Raw carrots, celery, apples, and broccoli function as gentle abrasives. Chewing them produces saliva, the mouth’s natural cleanser, and their fibrous texture mechanically disrupts biofilm and surface stains. End a meal with a crunchy raw vegetable or an apple for a natural polishing effect.
Limiting Chromogens and Tannins
Chromogens are intensely pigmented molecules that stick to enamel. Tannins, found in tea, red wine, and some berries, enhance the binding of chromogens to teeth. White wine, despite its light color, contains acids and tannins that make teeth more susceptible to subsequent staining from other foods. Drink it with food, not alone. Green tea, though lighter, still contains tannins but has a less intense staining profile than black tea. Matcha tea, suspended finely in water, can deposit greenish-yellow residues.
This dietary awareness does not mean you cannot enjoy life’s pleasures. It means you make conscious choices: perhaps red wine on Saturday night, but with a water chaser and brushing before bed. Your teeth will reward you with lasting brightness.
Who Should Avoid LED Whitening
LED whitening is safe for most adults, but certain groups should abstain or consult a professional first.
Pregnant and Nursing Women
No definitive studies prove harm to fetuses or nursing infants from peroxide-based whitening. However, the absence of proof of safety prompts a conservative approach. Dental associations generally recommend postponing elective cosmetic procedures, including whitening, until after pregnancy and breastfeeding. The hormonal shifts of pregnancy can also make gums more sensitive and prone to inflammation, complicating the process.
Children and Adolescents
Young patients have larger pulp chambers relative to tooth size. The pulp sits closer to the enamel surface, increasing the risk of painful stimulation and potential damage. Furthermore, whitening a child’s teeth while the smile still contains baby teeth creates an aesthetic mismatch when permanent teeth erupt in their natural, often slightly yellower shade. Most dentists advise waiting until at least age 16 to 18, when all permanent teeth are fully erupted and pulp chambers have receded.
Individuals with Extensive Restorations
If your anterior teeth have multiple composite fillings, crowns, or veneers, whitening natural tooth structure will create a patchwork smile. The restorations remain their original shade while surrounding enamel lightens. Evaluate the cost of replacing restorations post-whitening before starting. Sometimes the better aesthetic plan involves redoing the restorations in a lighter shade without whitening the natural teeth at all.
Active Gum Disease or Decay
Whitening gel inflames already irritated gums. Open cavities allow peroxide to penetrate directly toward the pulp, causing excruciating pain and potential nerve damage. Complete all necessary restorative treatment and achieve periodontal health before considering any whitening.
Known Peroxide Allergy
True allergy to hydrogen peroxide is rare but possible. Symptoms include swelling, rash, and blistering of oral soft tissues. If you suspect an allergy, a patch test inside the lower lip with a tiny amount of diluted gel can be performed by an allergist or dentist.
Severe Enamel Erosion or Exposed Dentin
If you have significant erosion from acid reflux, bulimia, or aggressive brushing, whitening may cause disproportionate pain. The sparse enamel layer over sensitive dentin cannot block the peroxide effectively. Treatment of the underlying condition and extensive remineralization therapy should precede any whitening attempt.
Common Mistakes That Sabotage Results
Even the best LED kit underperforms if you use it incorrectly. Here are the most frequent errors and exactly how to avoid them.
Applying Gel Over Wet Teeth
Saliva dilutes peroxide and creates an uneven barrier between gel and enamel. Always dry your teeth thoroughly with a clean tissue before inserting the tray. This simple step can increase whitening efficiency by 30% or more per session.
Overfilling the Tray
More gel does not equal faster whitening. Excess gel merely spills onto your gums, causing chemical burns and wasted product. A thin, continuous bead along the front face of the tray suffices. The gel expands slightly under the light as it foams, so you need less than you think.
Inconsistent Schedule
Skipping three days and then attempting a marathon session with multiple applications in one afternoon wreaks havoc on your enamel and nerves. The teeth need recovery time between sessions. Stick to the prescribed daily or every-other-day rhythm without piling on extra treatments to catch up.
Ceasing Too Early
Many people stop after four or five sessions because they see noticeable improvement and think they’ve reached maximum whiteness. In reality, deeper oxidation continues with subsequent sessions. Complete the full recommended course before judging final results. Stopping halfway often leads to relapse within weeks.
Mixing Treatments
Using whitening strips in the morning and an LED kit at night, or layering a whitening pen under the tray gel, constitutes chemical overkill. You will burn your gums and trigger searing sensitivity. Pick one regulated system and follow its protocol exclusively.
Ignoring the Gum Barrier
Some home kits include a rubber dam or gum protector. Others do not. If you feel the gel consistently pooling on your gums, apply a thin layer of protective balm or even coconut oil along the gumline before inserting the tray. This mechanical barrier prevents most irritation.
Using Expired Gel
Peroxide degrades over time, especially if stored in warm conditions. Expired gel loses potency and may have broken down into water and inactive byproducts. Check expiration dates. Store syringes in a cool, dark place. Do not buy whitening gel from clearance bins or questionable online liquidators.
Frequently Asked Questions (FAQ)
Can I use an LED whitening kit if I have braces?
No. The gel will whiten exposed enamel around the brackets. When the braces come off, you will have small dark squares where the brackets were bonded. Wait until orthodontic treatment is complete.
Does LED whitening work on crowns or veneers?
No. Peroxide does not change the color of porcelain, ceramic, or composite resin. If you plan whitening and restoration work, whiten first, then match the new restorations to your lighter natural teeth.
How soon before a wedding or event should I whiten?
Complete your full LED whitening course at least two to three weeks before the event. This allows sensitivity to fully subside, teeth to rehydrate to their natural translucent appearance, and any gingival irritation to heal. Avoid whitening the day before a wedding.
Can I swallow during the session?
Try not to swallow excessively with the tray in. The motion can dislodge the gel seal. A small amount of saliva buildup is normal. Tilt your head forward slightly if you feel saliva pooling; this keeps it away from the tray.
Is LED whitening permanent?
No. All peroxide-based whitening is reversible to some degree as new stains accumulate. A long-term maintenance routine preserves results.
Why do my teeth look blotchy after whitening?
Blotchiness, or a “splotchy” appearance, can result from uneven gel distribution, dehydration differences across enamel, or pre-existing hypocalcified spots that respond differently to bleaching. This usually resolves within a few days as enamel rehydrates. Persistent white spots should be evaluated by a dentist.
Can I reuse leftover gel from a session?
No. Once gel has been activated by light and contaminated by saliva, its chemical properties are spent and it is full of oral bacteria. Discard all excess. Use a fresh syringe for each session.
Does the light hurt my eyes?
The LED is bright. Close your eyes or wear the provided protective glasses if the kit includes them. Direct prolonged staring into a bright blue LED can cause temporary afterimages and eye strain.
Additional Resources
For further authoritative information on teeth whitening safety and efficacy, visit the American Dental Association’s page on Whitening:
https://www.ada.org/en/resources/ada-library/oral-health-topics/whitening
This resource provides independent, science-based guidance on both professional and over-the-counter whitening options, helping you make informed decisions about your oral care.
Conclusion
LED light technology transforms teeth whitening from a slow, passive process into a fast, efficient one. By providing targeted photo-activation energy, the blue LED accelerates the breakdown of peroxide into active oxygen radicals, cutting session times and reducing sensitivity risk. A well-chosen at-home kit, used consistently with proper gum protection and aftercare, can deliver dramatic, professional-grade results. Maintaining those results requires simple dietary awareness and occasional touch-ups. The light does not work miracles on its own, but paired with a quality gel and a careful protocol, it remains the most reliable accelerator in aesthetic dentistry.
Disclaimer: This article provides general educational information and does not constitute medical or dental advice. Always consult a qualified dental professional before starting any new whitening regimen, especially if you have pre-existing oral conditions, are pregnant, or are under 18. Individual results vary based on stain type, compliance, and genetic factors.