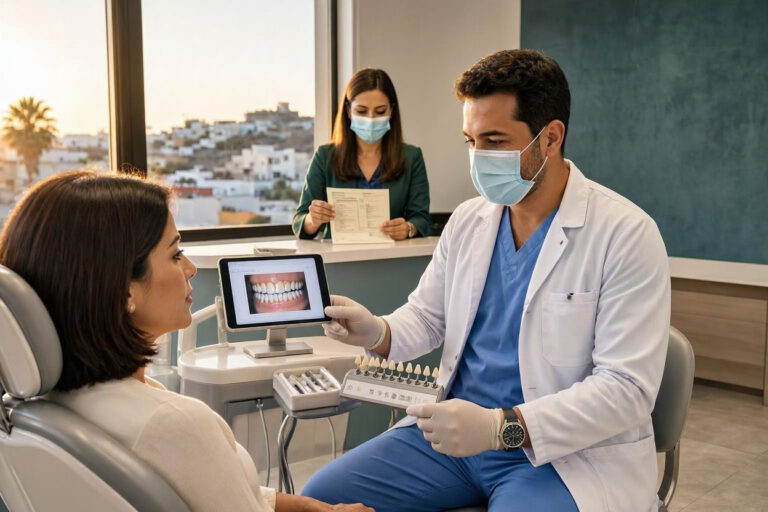
How Long Should You Wait Between Teeth Whitening Sessions?
Whitening your teeth feels like a project with momentum. You see results after the first few sessions, and the temptation to keep going is strong. You want faster progress, more dramatic change, the brilliant smile now rather than later. But whitening is not like painting a wall, where additional coats can be applied as quickly as they dry. Your teeth are living tissue that needs recovery time between chemical treatments.
Waiting the right amount of time between sessions determines whether your whitening experience is comfortable and successful or painful and disappointing. Rush the process, and you risk sensitivity, gum irritation, and enamel stress. Space sessions too far apart, and you lose momentum, allowing stains to re-accumulate between treatments.
We will cover every aspect of whitening session timing. You will learn what happens biologically during the rest period, how to determine your ideal interval, and how to recognize when your teeth need more time.
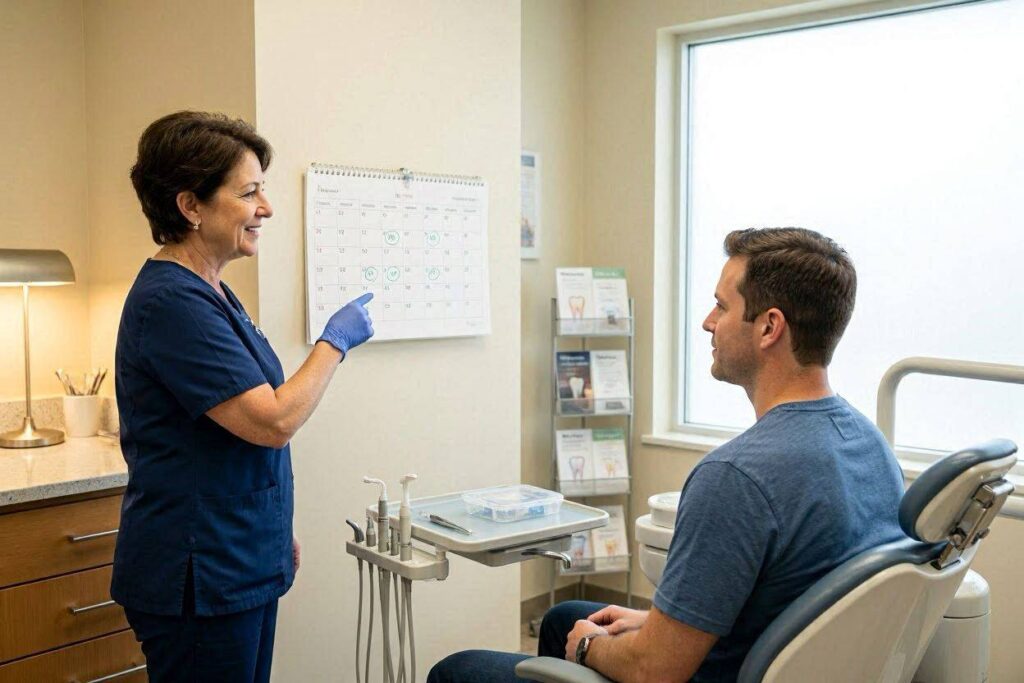
Why Waiting Between Sessions Matters
The rest period between whitening sessions is not empty time. Important biological processes occur that determine both your comfort and your results.
The Remineralization Window
During a whitening session, peroxide slightly demineralizes the outermost enamel surface. This is a normal, temporary effect. After you remove the gel, your saliva begins repairing this demineralization. Calcium and phosphate ions in saliva re-deposit into the enamel matrix. Fluoride from toothpaste or rinses incorporates into the rebuilding crystal structure.
This remineralization takes time. Applying more peroxide before the process completes compounds the mineral loss. The enamel becomes progressively more porous, and sensitivity increases accordingly.
Pulp Recovery Time
Peroxide penetrates through enamel and dentin, eventually reaching the dental pulp. This chemical exposure triggers mild, transient inflammation. The pulp needs time to recover, clear inflammatory mediators, and return to its normal state.
If you whiten again while the pulp is still inflamed from the previous session, you add chemical insult to already irritated tissue. The inflammation can escalate from mild and reversible to more significant and prolonged.
The Stain Oxidation Cycle
Peroxide breaks down stain molecules through oxidation. This chemical reaction produces byproducts that slowly diffuse out of the tooth structure. The clearance of these byproducts takes time. Whitening again before byproducts clear does not accelerate whitening; it simply adds more chemicals to an already saturated environment.
Gum Tissue Healing
Even with careful application, some gel inevitably contacts gum tissue. Peroxide causes mild, usually unnoticeable irritation to gingival tissue. The gums need time to repair any microscopic damage. Repeated exposure without adequate recovery can cause visible irritation, redness, and sensitivity in the soft tissues.
Recommended Wait Times by Whitening Method
Different whitening approaches require different recovery intervals. The concentration, delivery method, and exposure duration all influence the ideal spacing.
Over-the-Counter Whitening Strips
Standard strips containing 6-10% hydrogen peroxide are designed for daily use. Most manufacturers recommend one session per day for 10-14 days. The 24-hour interval between applications provides sufficient recovery time for most users with healthy teeth.
If you experience sensitivity with daily use, switch to every other day. The total treatment course takes longer, but comfort improves dramatically, and the final result is the same.
Tray-Based Home Whitening with Carbamide Peroxide
Gels containing 10-22% carbamide peroxide break down more slowly than hydrogen peroxide. They release active oxygen over several hours. This extended release means the teeth experience a longer chemical exposure per session.
For 10-16% carbamide peroxide, daily application is usually well-tolerated. For 20-22% concentrations, many dentists recommend spacing sessions 48 hours apart to allow fuller pulp recovery.
Professional In-Office Whitening
In-office treatments use the highest peroxide concentrations, typically 25-40% hydrogen peroxide. These powerful sessions create significant chemical stress on teeth. The standard recommendation is to complete a single in-office treatment as a standalone procedure, not to repeat it for at least 6-12 months.
Some dentists offer combination treatments: a single in-office session followed by at-home maintenance with lower-concentration gel. The home sessions typically start one to two weeks after the in-office procedure.
Whitening Pens
Pens apply a thin film of gel that dries on teeth. The peroxide concentration varies but typically falls in the moderate range. Because the application is lighter than trays or strips, pens are often designed for twice-daily use.
However, twice-daily application still means sessions should be separated by at least 8-12 hours. Applying pen gel immediately before bed and again first thing in the morning does not allow adequate recovery.
| Whitening Method | Typical Concentration | Standard Interval | Minimum Safe Interval | Signs You Need More Time |
|---|---|---|---|---|
| Whitening Strips (OTC) | 6-10% hydrogen peroxide | 24 hours | 24 hours | Sensitivity lasting past next scheduled session |
| Tray Gel (low %) | 10-16% carbamide peroxide | 24 hours | 24-36 hours | Lingering sensitivity, gum irritation |
| Tray Gel (high %) | 20-22% carbamide peroxide | 48 hours | 48 hours | Any pain during or after sessions |
| In-Office Treatment | 25-40% hydrogen peroxide | 6-12 months | 6 months | N/A (single session) |
| Whitening Pens | Varies (moderate) | 12 hours | 12 hours | Dryness, irritation, sensitivity |
| Pre-Filled Trays (OTC) | 10-15% carbamide peroxide | 24 hours | 24-48 hours | Gum burning, tooth throbbing |
Important Note: These intervals represent general guidelines based on common formulations. Your specific product may have different recommendations. Always defer to the manufacturer’s instructions. Individual sensitivity may require longer intervals than those listed above.
The Science Behind Recovery Time
Understanding the biological timeline helps you appreciate why waiting matters and how to recognize when you are ready for the next session.
Hour 0-2: Immediate Post-Session
Peroxide residual remains in enamel pores. The whitening reaction continues at a diminishing rate. Saliva begins neutralizing any acidic components of the gel. Enamel starts rehydrating. Sensitivity, if present, typically peaks during this window.
What to do: Avoid eating, drinking anything except water, and brushing during this period. Let saliva do its work.
Hour 2-6: Early Recovery
Saliva flow washes away residual peroxide. Remineralization begins in earnest. Calcium and phosphate ions deposit into enamel surface. Pulp inflammation starts subsiding. Gum tissue begins repairing microscopic peroxide damage.
What to do: You can eat and drink, but avoid acidic, hot, or cold items if sensitivity persists. Gentle brushing with desensitizing toothpaste is appropriate.
Hour 6-24: Active Repair
Enamel remineralization continues. Dentin tubule fluid stabilizes. Pulp inflammation resolves in most cases. The tooth approaches its pre-session state. Staining byproducts continue diffusing out of the tooth.
What to do: Normal oral hygiene. Use fluoride rinse before bed if desired. Assess whether sensitivity has completely resolved before the next scheduled session.
Hour 24-48: Full Recovery
For most people using standard OTC products, this window represents complete recovery. Enamel remineralization is substantially complete. Pulp tissue has returned to baseline. Any residual sensitivity should be minimal or absent. The tooth is ready for another whitening session.
Hour 48-72: Extended Recovery
For higher-concentration products or sensitive individuals, this extended window provides margin for complete recovery. Teeth that still feel sensitive at 24 hours usually resolve by 48-72 hours. This is the recommended minimum interval for aggressive whitening protocols.
Factors That Influence Your Personal Wait Time
Standard recommendations provide a starting point. Your individual biology and circumstances may require longer intervals.
Natural Tooth Sensitivity
Some people have inherently more sensitive teeth due to thinner enamel, more permeable dentin, or genetic factors. If you typically feel discomfort from cold beverages, ice cream, or cold air, you likely need longer intervals between whitening sessions.
Start with the standard interval. If you experience sensitivity that has not fully resolved by the next scheduled session, extend the wait by 12-24 hours and reassess.
Age and Enamel Condition
Older adults generally have thinner enamel and more exposed dentin. Decades of wear, acid exposure, and normal aging reduce enamel thickness. Thinner enamel means faster peroxide penetration to dentin and pulp. Longer intervals between sessions allow the deeper tooth structures more recovery time.
Pre-Existing Dental Conditions
Several conditions demand extended intervals:
- Active decay allows direct peroxide access to dentin and pulp
- Cracked teeth provide pathways for deep peroxide penetration
- Gum recession exposes root surfaces that lack protective enamel
- Erosion from acid reflux or diet thins enamel significantly
- Bruxism wears enamel, reducing its protective thickness
Address these conditions before whitening. If you proceed anyway, use lower concentrations and longer intervals.
Product Concentration
Higher peroxide concentrations require longer recovery. A 22% carbamide peroxide gel creates more profound chemical changes in tooth structure than a 10% product. Respect the concentration-interval relationship. Do not use high-concentration professional products at the same frequency as mild OTC strips.
Session Duration
Longer sessions deliver more total peroxide exposure. Wearing trays for 2 hours requires more recovery than wearing strips for 30 minutes, even at the same concentration. Calculate total exposure time per session when determining your interval.
Diet and Lifestyle During Treatment
Consuming acidic foods and beverages between sessions stresses enamel that is already working to remineralize. Smoking introduces new stains while the tooth is still porous from the last session. A supportive diet and avoidance of staining substances allow you to maintain the standard interval. Poor diet and continued stain exposure may not require longer intervals, but they certainly reduce the effectiveness of each session.
Signs You Are Ready for the Next Session
Rather than blindly following a calendar, learn to read your teeth.
The Sensitivity Test
Before applying the next round of whitening, take a moment to check in with your teeth. Breathe in through your mouth. Does the air feel uncomfortable on any teeth? Sip room-temperature water. Do you feel any zing or ache? Run your tongue over your teeth. Do they feel smooth and comfortable?
No discomfort in any of these tests suggests you are ready. Any lingering sensitivity means you should wait longer.
Gum Health Check
Examine your gums in good light. They should appear pink and firm, not red, swollen, or white. Run a clean finger along the gumline. There should be no tenderness. If your gums show any sign of irritation from the previous session, delay the next one.
The Plateau Signal
As you progress through a whitening course, you may notice results slowing. This is normal as teeth approach their natural whitening limit. Slower results do not mean you should decrease the interval between sessions. Stick to the recommended spacing even when progress seems to slow.
What Happens If You Whiten Too Frequently
Ignoring recommended intervals produces predictable consequences.
Progressive Sensitivity
The first too-close session might cause mild, transient sensitivity. The next builds on that, creating more intense and longer-lasting discomfort. Eventually, every session becomes painful, and the sensitivity persists between sessions. This pattern can take weeks to fully reverse.
Enamel Surface Changes
Insufficient recovery time between sessions results in cumulative demineralization. Enamel that never fully remineralizes becomes progressively more porous and rough. This roughness attracts new stains more readily, paradoxically making teeth appear less white over time despite more frequent whitening.
Diminishing Returns
Whitening too frequently does not speed up results. The oxidation reaction requires stain molecules that have not yet been broken down. Once the available stain molecules in the accessible enamel layers have been oxidized, additional peroxide has little to act upon. You are applying chemical stress without cosmetic benefit.
Gum Tissue Breakdown
Repeated peroxide exposure without recovery time causes progressive gingival irritation. What started as mild redness becomes noticeable burning and sloughing. The gum tissue loses its protective barrier function, making subsequent sessions even more irritating.
Designing Your Whitening Schedule
A thoughtful schedule balances efficacy, safety, and lifestyle considerations.
The Standard Protocol
For most people using OTC strips or moderate-concentration tray gel:
- Session 1: Day 1 evening
- Session 2: Day 2 evening (24-hour interval)
- Continue daily for 10-14 days
- If sensitivity develops, switch to every other day
- Complete the full course even if results appear early
The Conservative Protocol
For sensitive individuals or higher-concentration products:
- Session 1: Day 1 evening
- Rest Day: Day 2 (no whitening)
- Session 2: Day 3 evening
- Continue every other day for 14-20 days
- Extend to every third day if sensitivity persists
This protocol takes longer to complete but dramatically reduces side effects. The final results are identical to the standard protocol; they simply take more calendar days to achieve.
The Accelerated Protocol (Professional Only)
Some professional systems allow two sessions in one day, typically separated by several hours. This approach is only appropriate under direct dental supervision with professional isolation and concentration control. Do not attempt accelerated protocols with OTC products at home.
The Maintenance Schedule
After completing an initial whitening course, maintenance sessions preserve your results:
- One session every 1-3 months, depending on diet and habits
- Use the same product at the same concentration
- Single sessions are sufficient; full courses are not needed for maintenance
- Space maintenance sessions at least 2 weeks apart
Special Considerations for Different Life Stages
Certain life circumstances affect whitening timing decisions.
During Orthodontic Treatment
Do not whiten while wearing braces or aligners. Brackets cover portions of teeth, creating uneven whitening. Aligners trap gel against teeth for extended periods without the controlled design of whitening trays. Wait until orthodontic treatment is complete, then whiten for uniform results.
Pregnancy and Nursing
No direct evidence proves whitening harms fetal or infant development. However, most dental professionals recommend postponing elective cosmetic procedures during pregnancy and nursing. Hormonal changes during pregnancy also increase gum sensitivity, making whitening more uncomfortable. Wait until after nursing concludes.
After Dental Procedures
Timing whitening around other dental work matters:
- After cleaning: Wait 1-2 days for gum tissue to settle
- After fillings: Wait 2 weeks for the restoration to fully set
- After crowns: Wait 2 weeks for cement to mature
- After extractions: Wait until the socket fully heals, typically 4-6 weeks
- After gum surgery: Wait until tissue heals completely, as directed by your periodontist
During Illness
If you have a cold, flu, or any condition causing dry mouth or dehydration, pause whitening. Reduced saliva flow compromises remineralization. Illness also lowers your tolerance for discomfort. Resume whitening when you are fully recovered and well-hydrated.
Maximizing Recovery Between Sessions
What you do during the wait period significantly affects how ready your teeth are for the next session.
Active Remineralization Strategies
Support your body’s natural repair processes:
- Use fluoride toothpaste twice daily
- Apply fluoride mouth rinse before bed
- Chew xylitol-containing gum to stimulate saliva
- Consider remineralizing pastes containing casein phosphopeptide-amorphous calcium phosphate
- Stay well-hydrated to maintain optimal saliva production
The White Diet Principle
During your entire whitening course, not just during sessions, minimize exposure to staining substances. Every stain molecule deposited between sessions is one more molecule the next session must remove. Avoid:
- Coffee, black tea, red wine
- Dark berries, beetroot, tomato sauce
- Dark sodas, sports drinks
- Curry, soy sauce, balsamic vinegar
If you consume any of these, rinse with water immediately and brush after 30 minutes.
Temperature Management
Teeth recovering from whitening are more sensitive to temperature extremes. Avoid very hot and very cold foods and beverages during the treatment course. Lukewarm is your friend.
Avoiding Additional Chemical Stress
Do not use other potentially harsh oral products during a whitening course:
- Avoid highly abrasive whitening toothpastes
- Skip alcohol-based mouthwashes that can dry oral tissues
- Do not use charcoal products
- Postpone any other cosmetic dental treatments
Frequently Asked Questions
Can I whiten twice in one day?
For most OTC products, no. The teeth need recovery time between sessions. Two sessions in one day doubles the chemical exposure without allowing for remineralization. Some professional protocols under dental supervision allow same-day multiple sessions, but this uses controlled conditions not replicable at home.
What if I miss a day during my whitening course?
Missing a day is not a problem. Simply resume your schedule the next day. Do not double up sessions to “catch up.” The course may take one extra day to complete, but the results will be the same.
How do I know if I am waiting long enough?
Your teeth should feel normal before the next session. No lingering sensitivity to air, water, or pressure. Gums should look and feel healthy. If you have any doubt, wait another day.
Can I whiten every other day indefinitely?
No. Whitening courses are designed for a finite period, typically 10-14 days for initial whitening. Continuous every-other-day whitening indefinitely overexposes teeth to peroxide. Complete your course, then shift to a maintenance schedule of one session every 1-3 months.
Does waiting longer between sessions reduce the final result?
No, as long as you complete the recommended total number of sessions. Spacing sessions further apart extends the calendar time to complete the course but does not diminish the cosmetic outcome. Your teeth will reach the same endpoint regardless of whether it takes 10 days or 20 days.
Should I wait longer between sessions if I use a higher concentration product?
Yes. Higher concentrations create more chemical stress and require more recovery time. A 22% carbamide peroxide gel might need 48 hours between sessions, while a 10% product is fine with 24 hours. Follow the specific product recommendations.
Can I use sensitivity toothpaste between sessions?
Absolutely, and it is encouraged. Desensitizing toothpaste containing potassium nitrate or stannous fluoride helps calm nerve endings and supports remineralization. Use it throughout your whitening course.
Additional Resource
For more information on whitening protocols and managing sensitivity, visit the American Dental Association’s Mouth Healthy page:
https://www.mouthhealthy.org/en/az-topics/w/whitening
Conclusion
The ideal wait time between teeth whitening sessions balances chemical effectiveness with biological recovery. For most over-the-counter products, 24 hours provides adequate time for enamel remineralization and pulp recovery, while higher-concentration professional products require 48 hours or more. Listening to your body, watching for sensitivity signals, and supporting recovery with fluoride and good hydration ensures you complete your whitening course comfortably and successfully.
Frequently Asked Questions (FAQ)
Q: What is the minimum time I must wait between whitening sessions?
A: For standard OTC strips and moderate-concentration tray gels, wait at least 24 hours. For high-concentration products (20%+ carbamide peroxide), wait at least 48 hours. Never whiten more than once per day with home products.
Q: Can I whiten my teeth every day?
A: Yes, daily whitening with OTC products is the standard protocol for initial whitening courses lasting 10-14 days. If sensitivity develops, switch to every other day. Daily whitening is for short courses only, not as an ongoing routine.
Q: How long should I wait between whitening courses?
A: After completing a full whitening course, wait at least 6 months before starting another full course. Maintenance sessions (single applications) can be done every 1-3 months as needed.
Q: What happens if I do not wait long enough between sessions?
A: Insufficient recovery time leads to cumulative sensitivity, enamel surface changes, gum irritation, and diminishing returns on whitening effectiveness. The teeth need the rest period to remineralize and recover.
Q: Can I speed up whitening by doing sessions closer together?
A: No. Whitening too frequently does not accelerate results and significantly increases the risk of pain and sensitivity. The chemical reaction requires recovery time; pushing past this biological limit causes harm without cosmetic benefit.
Disclaimer: This article provides general information about spacing between teeth whitening sessions. It does not constitute dental or medical advice. Always follow the specific instructions provided with your whitening product and consult your dentist if you have concerns about sensitivity, timing, or oral health conditions.
continue
Meta Description: Find out the minimum age for teeth whitening, why age restrictions exist, and how to safely approach whitening for teens and young adults.
How Old Do You Have to Be for Teeth Whitening?
A teenager looks in the mirror, unhappy with the color of their teeth. They see celebrities and influencers with brilliantly white smiles. They ask their parents for whitening strips or gel. The parents wonder: Is this safe? Is there even a legal age for teeth whitening? Will it damage developing teeth?
These questions matter more than many people realize. Teeth whitening is not simply a cosmetic choice like applying makeup or styling hair. It involves applying reactive chemicals to living tissue that is still developing in young people. The age at which whitening becomes appropriate depends on dental development, legal regulations, and individual maturity.
We will examine every aspect of age and whitening, from the biology of developing teeth to the legal landscape across different countries. You will learn why age restrictions exist, what could go wrong with whitening too young, and how to make a responsible decision for yourself or your child.
The Legal Age for Teeth Whitening
No single universal law sets a global minimum age for teeth whitening. Regulations vary by country and sometimes by region within countries. Understanding the legal framework provides a starting point.
European Union Regulations
The EU has some of the strictest cosmetic regulations in the world. Under the EU Cosmetics Regulation, over-the-counter whitening products may contain no more than 0.1% hydrogen peroxide. This concentration is too low to create meaningful whitening.
Products containing higher concentrations, up to 6% hydrogen peroxide, are available only through dental professionals. The EU directive specifies that whitening products with more than 0.1% hydrogen peroxide must not be used on persons under 18 years of age. This effectively sets the legal minimum age for real whitening at 18 across EU member states.
Dentists in the EU must verify a patient’s age before providing whitening treatment. They face professional sanctions if they whiten the teeth of minors.
United States Regulations
The United States takes a different regulatory approach. The FDA classifies whitening products as cosmetics when sold over the counter and as medical devices when used professionally. No federal law explicitly prohibits whitening for people under a specific age.
However, the American Dental Association and the American Academy of Pediatric Dentistry strongly recommend against whitening for children and young adolescents. Most reputable manufacturers voluntarily label their products “not recommended for use by persons under 12” or “under 16.” Some set the bar at 18.
Dentists in the US generally refuse to whiten patients under 14-16, and many decline patients under 18. This reflects professional consensus rather than legal prohibition.
Other Regions
Australia and New Zealand follow similar patterns to the EU, with restrictions on peroxide concentrations and recommendations against whitening for minors. Canada aligns more closely with US standards, with professional guidelines discouraging whitening before the mid-teens. Most Asian countries regulate whitening products as cosmetics with varying age recommendations.
The Practical Reality
Regardless of what the law technically allows in your jurisdiction, responsible dental professionals follow the biological evidence. The law may permit something that biology and ethics argue against. The question should not be “what is the legal minimum?” but “when is it developmentally safe?”
| Region | OTC Peroxide Limit | Professional Limit | Minimum Age (Legal) | Professional Recommendation |
|---|---|---|---|---|
| European Union | 0.1% hydrogen peroxide | 6% hydrogen peroxide | 18 years | 18 years |
| United States | Varies by product | Up to 35-40% hydrogen peroxide | No federal age limit | 14-18 years, case-by-case |
| Canada | Varies | Regulated by province | No national age limit | 14-18 years |
| Australia | Low OTC limits | Professional use regulated | 18 years recommended | 18 years |
| United Kingdom | 0.1% OTC | 6% professional | 18 years | 18 years |
Important Note: Regulations change over time and vary by specific jurisdiction. Always check current local laws and consult a dental professional. The table above reflects general regulatory frameworks as of the current period and may not capture every nuance of regional law.
The Biology of Developing Teeth
The most important reason for age restrictions on whitening is the biological reality of tooth development. Children and teenagers do not simply have smaller versions of adult teeth. Their teeth are structurally and biologically different.
Enamel Maturation
When permanent teeth first erupt into the mouth, the enamel is not fully mature. The enamel crystals continue to mineralize and harden over several years after eruption. This post-eruptive maturation involves incorporation of minerals from saliva and completion of the crystal structure.
Immature enamel is more porous and more permeable than mature enamel. This means peroxide penetrates more deeply and more rapidly into young teeth. The peroxide reaches the dentin and pulp in higher concentrations, increasing the risk of sensitivity and pulp irritation.
Dentin Thickness in Young Teeth
Newly erupted permanent teeth have thinner dentin layers than mature teeth. The pulp chamber is larger because secondary dentin has not yet deposited on its walls. Over decades, dentin slowly thickens as odontoblasts continue producing secondary dentin internally.
Thinner dentin and a larger pulp chamber mean the nerve tissue is physically closer to the enamel surface. Peroxide traveling through enamel pores has a shorter distance to cover before reaching sensitive pulp tissue. Young teeth are anatomically less protected against chemical penetration.
Pulp Size and Vascularity
The dental pulp in young teeth is not only closer to the surface but also more vascular and more cellular than in older teeth. Young pulp tissue has a richer blood supply and more active metabolic processes. This heightened biological activity makes young pulp more reactive to chemical irritants.
Peroxide reaching the pulp of a young tooth triggers a more intense inflammatory response than the same exposure would in an older tooth. The pain is often more severe, and the recovery takes longer.
The Open Apex Concern
In very young permanent teeth, the root apex may not be fully closed. The root continues developing for several years after the crown erupts. An open apex provides a direct communication channel between the pulp and the surrounding bone and blood supply.
Whitening an immature tooth with an open apex risks peroxide entering the periapical tissues, causing inflammation beyond just the tooth itself. This is a significant safety concern that argues against whitening before root development is complete, typically around age 14-16 for most permanent teeth.
What Dental Organizations Recommend
Professional dental organizations base their guidelines on the biological realities described above. Their recommendations carry weight even where laws are silent.
American Academy of Pediatric Dentistry
The AAPD explicitly states that teeth whitening should be deferred until all permanent teeth have fully erupted and enamel maturation is complete. They recommend against whitening for children and young adolescents. Their guidance emphasizes that the developing dentition requires protection from unnecessary chemical exposure.
American Dental Association
The ADA advises that whitening products are intended for adults and should not be used on children or adolescents without professional consultation. They encourage parents to discuss concerns about tooth color with a dentist rather than purchasing OTC products for their children.
British Dental Association
The BDA supports the EU age restriction of 18 years for whitening products containing more than 0.1% hydrogen peroxide. They emphasize that whitening is an elective cosmetic procedure, not a health necessity, and that the precautionary principle should apply to developing teeth.
European Academy of Paediatric Dentistry
The EAPD recommends against any form of peroxide whitening for children and adolescents under 18. They note that no evidence supports the safety of whitening in developing dentitions, and the potential for harm, while not fully quantified, justifies a conservative approach.
Why Young People Want Whiter Teeth
Understanding the motivation behind whitening requests helps parents and dentists address concerns appropriately.
Social Media and Celebrity Influence
Young people consume media filled with images of perfect, bright white smiles. Many of these smiles are achieved through veneers, professional whitening, and digital editing, not natural tooth color. Teens comparing their normal, healthy teeth to these artificial standards perceive a problem where none exists.
Normal Tooth Color in Youth
Permanent teeth naturally appear more yellow than primary teeth. The thicker dentin of permanent teeth, combined with the contrast against smaller, whiter baby teeth still present in the mixed dentition, makes young permanent teeth look darker by comparison.
This is normal and healthy. The apparent yellowness reflects the natural color of dentin showing through translucent enamel. It is not a cosmetic defect requiring treatment.
Orthodontic Treatment and Whitening
Many teenagers undergo orthodontic treatment. Brackets and wires make thorough cleaning difficult. After braces removal, teeth often show decalcification spots, uneven coloration, and accumulated surface staining.
The desire to whiten after braces is understandable. However, teeth immediately after orthodontic treatment are more vulnerable. The enamel around former bracket sites is often demineralized. Whitening at this stage can cause significant sensitivity and uneven results.
Peer Pressure and Self-Esteem
Adolescence involves intense focus on appearance and social acceptance. A teenager who feels their teeth are yellow may experience genuine distress. Dismissing their concerns as vanity does not help. Acknowledging their feelings while explaining the biological reasons to wait offers a better approach.
Risks of Whitening Too Young
The risks of whitening developing teeth extend beyond the temporary sensitivity that adults experience.
Severe and Prolonged Sensitivity
Young teeth, with their thinner dentin and larger pulps, experience more intense pain from peroxide penetration. The sensitivity may not resolve as quickly as it does in adults. Some young patients report pain lasting weeks after a single whitening session.
Pulp Inflammation and Potential Damage
The inflammatory response in young, vascular pulp tissue can be robust. While most cases resolve without permanent damage, severe inflammation can theoretically compromise pulp health. The long-term consequences of peroxide exposure on developing pulp tissue have not been adequately studied.
Uneven Whitening Due to Mixed Dentition
Children and young teens often have a mix of primary and permanent teeth. Whitening affects all teeth it contacts. Permanent teeth may whiten while remaining primary teeth do not match. The result can look more cosmetically problematic than the original color.
Enamel Surface Changes on Immature Enamel
Immature enamel is not only more permeable but also more susceptible to surface changes from acidic or chemically active products. The long-term effects of repeated peroxide exposure on enamel that has not completed post-eruptive maturation remain unknown.
Gum Sensitivity and Chemical Burns
Young gum tissue is more delicate and more reactive than adult gingiva. Contact with whitening gel can cause more significant irritation, inflammation, and chemical burns in young mouths.
Establishing Problematic Cosmetic Expectations
Introducing chemical whitening at a young age can establish unrealistic beauty standards and create a pattern of seeking cosmetic fixes for normal variation. Young people benefit from learning to distinguish between natural, healthy appearance and artificially altered aesthetics.
When Is Whitening Appropriate?
The question of “how old” does not have a single answer, but a set of conditions that should be met.
Dental Maturity Milestones
All permanent teeth should have erupted fully, including second molars, which typically occurs by age 12-14. Root development should be complete, with closed apices, which may take until age 14-16 for some teeth. Enamel post-eruptive maturation takes an additional 1-3 years after eruption.
Considering these developmental milestones, the earliest most dental professionals would consider whitening is age 16, and many prefer to wait until 18 or older.
Individual Assessment Factors
Chronological age alone does not determine appropriateness. Dental age, assessed through examination and possibly radiographs, provides more relevant information. A 15-year-old with fully matured dentition may be a more suitable candidate than a 17-year-old with delayed dental development.
The Role of a Dental Examination
Before any whitening, a dentist should:
- Confirm all permanent teeth have erupted
- Verify root development is complete
- Assess enamel condition and thickness
- Check for decay, cracks, or other vulnerabilities
- Evaluate gum health and recession
- Determine the cause of discoloration
- Discuss realistic expectations
Professional vs. Over-the-Counter for Young Patients
If whitening is deemed appropriate for an older teen, professional supervision is far safer than OTC products. A dentist can:
- Use custom trays that minimize gum exposure
- Select appropriate, lower peroxide concentrations
- Control treatment duration precisely
- Monitor for adverse reactions
- Apply protective gingival barriers
- Provide desensitization protocols
OTC products lack these safeguards and should not be used by anyone under 18.
Alternatives to Whitening for Young People
When a young person wants whiter teeth but is too young for peroxide whitening, several alternatives can improve tooth appearance safely.
Professional Cleaning
Many young people who think they need whitening actually need a thorough professional cleaning. Surface stains from diet, poor brushing technique, and plaque accumulation create a dull, yellowed appearance. A dental hygienist can remove these deposits, revealing the natural tooth color beneath. The improvement often surprises patients and their parents.
Improved Oral Hygiene
Better brushing and flossing technique removes the biofilm that dulls tooth appearance. Electric toothbrushes can improve cleaning effectiveness. Flossing removes interproximal stain that makes the overall smile appear darker. These simple interventions require no chemicals and produce genuine cosmetic improvement.
Whitening Toothpaste Without Peroxide
Some whitening toothpastes use mild abrasives or enzymes to remove surface stains without peroxide. They cannot change intrinsic tooth color, but they can remove extrinsic stains that dull the smile. These products are generally safe for teenagers when used as directed.
Dietary Changes
Reducing consumption of staining foods and beverages prevents new discoloration. Rinsing with water after consuming pigmented items limits their staining effect. These habits established in youth provide lifelong cosmetic benefits without any chemical exposure.
Acceptance and Education
Sometimes the best approach is helping a young person understand that their natural tooth color is normal and healthy. Education about the range of natural tooth shades, the influence of genetics on tooth color, and the artificial nature of media images can reduce cosmetic anxiety.
Microabrasion for Specific Defects
For white spots or brown patches caused by fluorosis or decalcification, microabrasion can remove superficial enamel defects without peroxide. This technique uses a mild acid and abrasive mixture applied by a dentist. It is appropriate for some teenagers when performed professionally.
How to Talk to a Teen About Whitening
Parents facing pressure to provide whitening products need strategies for constructive conversation.
Validate Their Feelings
Tell them you understand why they want whiter teeth. Acknowledge that appearance matters and that wanting to look your best is normal. Dismissal creates conflict. Validation opens dialogue.
Explain the Biology
Teens are old enough to understand the science. Explain that their teeth are still developing, that young teeth are more sensitive, and that whitening now could cause unnecessary pain. Frame the waiting period as a biological necessity, not an arbitrary restriction.
Offer a Timeline
Rather than saying no indefinitely, provide a specific timeline. “Your dentist says your teeth will be mature enough for whitening at 17” gives a clear endpoint. The waiting has a purpose and a conclusion.
Schedule a Dental Conversation
Let a professional reinforce the message. A dentist or hygienist can explain the reasons for waiting and can assess when whitening becomes appropriate. Teens often hear information more readily from a neutral expert than from parents.
Focus on What They Can Do Now
Offer alternatives that improve smile appearance immediately: professional cleaning, better brushing habits, whitening toothpaste, dietary changes. They can take action now while waiting for the right time for peroxide whitening.
Special Cases and Exceptions
Some situations present unique considerations regarding age and whitening.
Intrinsic Staining from Medical Conditions
Children who took tetracycline antibiotics during tooth development may have significant intrinsic staining that affects their social functioning and psychological well-being. Severe fluorosis can also create cosmetically concerning discoloration.
These cases require individualized assessment by a pediatric dentist and possibly a dental specialist. The psychosocial harm of the staining must be weighed against the biological risks of early whitening. Such decisions should never be made without comprehensive professional guidance.
Dental Trauma Discoloration
A tooth that suffered trauma may darken due to internal bleeding or pulp death. This single-tooth discoloration can be distressing, especially in a front tooth. Treatment options include internal bleaching after root canal therapy, which is a different procedure from external whitening and may be appropriate for younger patients when medically indicated.
White Spot Lesions After Braces
Decalcification spots after orthodontic treatment are common. These are not stains to be bleached but areas of mineral loss. Whitening can actually make them more prominent by lightening the surrounding enamel. Treatments like resin infiltration or microabrasion may be more appropriate than peroxide whitening.
Genetic Conditions Affecting Enamel
Conditions like amelogenesis imperfecta or dentinogenesis imperfecta affect tooth color and structure. Whitening may or may not be appropriate depending on the specific condition and its severity. Management requires a dental specialist familiar with the condition.
The Role of Parents and Guardians
Parents make the ultimate decision for minors in their care. That decision should be informed.
Do Your Research
Understand the biology, the regulations, and the professional recommendations before making a decision. Do not rely on marketing materials from whitening companies. Seek information from dental professional organizations.
Consult a Dentist
A dental examination provides essential information about your child’s dental development and the cause of any discoloration. The dentist can explain the risks and benefits specific to your child’s situation.
Resist Social Pressure
Just because your child’s friends are whitening does not mean it is safe or appropriate. Peer behavior does not determine biological readiness. Be willing to be the parent who says “not yet” based on science rather than social trends.
Model Healthy Attitudes
Your own approach to cosmetic procedures influences your children. If you pursue endless whitening and express dissatisfaction with your natural appearance, your children absorb those values. Model comfort with healthy, natural tooth color.
What Dentists Wish Parents Knew
Dental professionals share common frustrations about whitening and age.
Yellow Teeth Are Often Healthy Teeth
Yellowish permanent teeth in children and teens usually indicate thick, well-mineralized enamel over healthy dentin. This is a sign of good dental development, not a cosmetic problem. The cultural preference for blue-white teeth is an aesthetic choice, not a health indicator.
Once You Start Whitening, You Keep Whitening
Whitening is not a one-time treatment. Results fade, and maintenance sessions are required. Starting whitening at a young age commits to decades of repeated chemical exposure. The cumulative effect of this long-term exposure has not been studied.
The Best Cosmetic Dentistry Is Prevention
Preventing stains through good hygiene and diet produces better long-term cosmetic outcomes than repeated whitening. Teach young people to care for their teeth rather than reaching for chemical fixes.
Natural Tooth Color Varies Widely
The range of normal, healthy tooth color is broader than media images suggest. Many young people who think their teeth are abnormally yellow fall well within the normal spectrum. A dentist can provide objective shade assessment and reassurance.
Frequently Asked Questions
Can a 12-year-old use whitening strips?
No. At age 12, many permanent teeth are still erupting, enamel is immature, and the pulp is large and sensitive. Whitening strips can cause significant pain and may damage developing teeth. Professional organizations strongly discourage whitening at this age.
Why is the legal age 18 in Europe but not in the US?
The EU applies the precautionary principle to cosmetic regulation. Without evidence proving safety in minors, products are restricted. The US regulatory framework allows broader access unless evidence of harm compels restriction. The difference reflects regulatory philosophy, not scientific disagreement about development.
Can a dentist whiten a 15-year-old’s teeth?
Some dentists may consider it after thorough examination confirming complete dental development. Many will decline until age 16 or 18. Professional judgment, guided by examination findings and ethical considerations, determines the decision. No reputable dentist whitens without first assessing dental maturity.
Does whitening hurt more for teenagers?
Generally, yes. Young teeth with larger pulps, thinner dentin, and more permeable enamel transmit more peroxide to nerve tissue. The inflammatory response is stronger. Sensitivity tends to be more intense and longer-lasting in younger patients.
What can a teenager do to whiten teeth safely?
Professional cleaning, improved oral hygiene, whitening toothpaste without peroxide, and dietary changes can improve tooth appearance without chemical risk. These approaches address extrinsic staining without exposing developing teeth to peroxide.
At what age are teeth fully developed enough for whitening?
Most dental professionals consider age 16-18 the window when dental development completes sufficiently for safe whitening. Individual variation exists. A dentist can confirm whether a specific patient’s teeth have matured adequately through examination and possibly X-rays.
Is whitening toothpaste safe for children?
Non-peroxide whitening toothpastes are generally safe for teenagers when used as directed. They rely on mild abrasives or enzymes and do not change intrinsic tooth color. Children under 12 should use toothpaste formulated for their age group. Always supervise young adolescents to ensure they do not swallow toothpaste.
Additional Resource
For more information about pediatric dental health and cosmetic treatments, visit the American Academy of Pediatric Dentistry’s parent resource page:
https://www.aapd.org/resources/parent/
Conclusion
The appropriate age for teeth whitening is determined by dental development rather than a single calendar number, with most dental professionals recommending waiting until at least 16-18 years old when enamel has matured, roots have completed development, and the pulp has receded sufficiently. Whitening immature teeth risks severe sensitivity, pulp inflammation, and uneven results due to mixed dentition. Young people concerned about tooth color should first pursue professional cleaning, improved hygiene, and dietary changes while waiting for their teeth to reach developmental maturity for safe whitening.
Frequently Asked Questions (FAQ)
Q: How old do you have to be to use teeth whitening strips?
A: Most manufacturers recommend their whitening strips for ages 18 and older. Some products state 16 as a minimum. No reputable product is recommended for children under 12-14 due to the risks to developing teeth.
Q: Can a 14-year-old get professional teeth whitening?
A: Most dentists will decline to whiten a 14-year-old’s teeth because dental development is typically incomplete at this age. Permanent teeth are still maturing, roots may not be fully formed, and the risk of sensitivity and pulp irritation is elevated.
Q: Why can’t children whiten their teeth?
A: Children and young adolescents have immature enamel that is more porous, thinner dentin, larger pulp chambers closer to the tooth surface, and often incomplete root development. These factors make whitening more painful and potentially more harmful than in adults.
Q: Is there a law about teeth whitening age?
A: In the European Union, whitening products with more than 0.1% hydrogen peroxide cannot be used on anyone under 18 by law. In the United States, no federal age restriction exists, but professional guidelines strongly discourage whitening for minors.
Q: What alternatives to whitening are safe for teenagers?
A: Professional dental cleaning, improved brushing and flossing, non-peroxide whitening toothpastes, dietary changes to avoid staining foods and drinks, and microabrasion for specific enamel defects are safer alternatives for teens concerned about tooth color.
Disclaimer: This article provides general information about age considerations for teeth whitening based on current dental science and regulations. It does not constitute dental or medical advice. Regulations vary by jurisdiction and change over time. Always consult a qualified dental professional regarding cosmetic treatments for minors and verify current local laws before pursuing any whitening treatment.
continue
Meta Description: Master the art of applying the perfect amount of teeth whitening gel. Avoid waste, prevent gum irritation, and achieve even, professional-level results at home.
How Much Gel to Use for Teeth Whitening
Squeeze too little gel, and your teeth whiten unevenly. Squeeze too much, and you waste expensive product while burning your gums. Getting the quantity right matters more than most people realize. Yet whitening kit instructions often provide vague guidance: “Apply a thin layer” or “Use a small amount.” What does that actually mean in practice?
We will eliminate the guesswork. You will learn exactly how much gel to use for every common whitening method, how to apply it correctly, and how to recognize when you have used too much or too little. This precision transforms your whitening experience from frustrating trial-and-error to predictable, comfortable, and effective treatment.
Why Gel Quantity Matters
The amount of gel you apply directly affects three critical outcomes: whitening effectiveness, gum safety, and product economy.
The Effectiveness Connection
Whitening gel must contact every visible tooth surface evenly. Gaps in coverage leave areas untouched by peroxide. These untreated areas remain stained while surrounding enamel lightens, creating a patchy, uneven appearance that draws attention to the very discoloration you wanted to eliminate.
Too little gel creates thin spots where the peroxide depletes before the session ends. The whitening reaction stops prematurely in those areas. You waste time wearing trays or strips without getting the full benefit.
The Safety Imperative
Excess gel does not stay politely on your teeth. It oozes onto gum tissue. Peroxide on gums causes chemical burns, inflammation, and significant discomfort. The white, blanched patches that appear on gum tissue after whitening represent actual chemical injury to the soft tissue.
Gel that overflows onto gums also tends to spread to the tongue, inner cheeks, and throat. Swallowing peroxide gel, even in small amounts, can cause throat irritation and stomach upset.
The Economic Calculation
Whitening gel is the expensive component of any kit. The trays, strips, lights, and packaging cost little. The peroxide formulation drives the price. Every drop of gel that squeezes out of the tray and onto your gums or down the drain represents money wasted.
Using the correct amount stretches your kit to complete the full treatment course. Using too much means running out before finishing, requiring an expensive refill purchase or abandoning treatment with incomplete results.
General Principles for All Whitening Methods
Before we get into specific quantities, certain principles apply regardless of your whitening method.
The Continuous Thin Layer Principle
Gel should form an unbroken, thin layer covering the entire facial surface of each tooth. There should be no bare spots and no thick globs. Think of painting a wall with a roller, not applying frosting to a cake.
The gel layer needs enough thickness to maintain peroxide availability throughout the wear time. Too thin, and the reaction exhausts itself early. Too thick, and excess gel spills onto gums without improving whitening.
The Half-Tooth Rule for Trays
For tray-based systems, a useful guideline: gel should cover the facial surface from gumline to about halfway up the tooth when the tray is seated. The tray’s pressure spreads the gel across the full surface. If you see gel covering the entire tooth before inserting the tray, you have used too much.
The No-Overflow Standard
After seating your tray, strip, or applying your pen, no gel should visibly overflow onto gums. A tiny bead at the gumline is acceptable if it does not spread. Any gel that drips, runs, or pools indicates overapplication.
Adjusting for Tooth Size
People with larger teeth need more gel than people with smaller teeth. A one-size-fits-all instruction cannot account for individual anatomy. A person with broad, tall central incisors requires a longer bead of gel than someone with narrow, short teeth. Learn to adjust based on your own dentition.
How Much Gel for Syringe and Tray Systems
Tray-based whitening using gel from a syringe represents the most common at-home method. Getting the quantity right here makes the biggest difference.
The Standard Bead Method
For each tooth in the tray, dispense a continuous bead of gel approximately the size of a grain of rice. Not a short, fat grain. A standard long-grain rice kernel. This bead should run horizontally across the middle of where the tooth will sit in the tray.
For an average adult tray covering six to eight front teeth on one arch, you will dispense six to eight small beads. The total amount for one full arch tray should roughly equal the volume of a small pea when combined.
Upper vs. Lower Arch Quantity
Upper teeth are generally larger and broader than lower teeth. Adjust accordingly. Upper trays receive slightly more gel per tooth. Lower trays receive slightly less. The difference is modest, perhaps 10-15%, but consistent attention to this detail improves results.
Syringe Dispensing Technique
Hold the syringe at a 45-degree angle to the tray surface. Apply steady, gentle pressure to the plunger. Move the tip smoothly along the tray channel as the bead emerges. Do not pause and start, which creates thick spots and gaps.
Practice on a paper towel first if you are unsure. Dispense a bead, observe its size, and adjust your pressure until you can consistently produce a grain-of-rice-sized line.
Common Syringe Mistakes
The most frequent error is dispensing a continuous thick line rather than individual beads per tooth. This wastes enormous amounts of gel and guarantees overflow. Another common mistake is dispensing gel only at the tray edges rather than where the teeth actually sit.
Remember: gel in the tray where no tooth exists does nothing except burn your gums and waste product.
Adjusting for Tray Type
Custom trays from a dentist fit precisely. They require less gel because the tight fit spreads a thin layer evenly. Boil-and-bite trays and one-size-fits-all trays have looser fit. They require slightly more gel to fill the gaps between tray and tooth, but not dramatically more. The difference is perhaps 20%, not double.
| Tooth Type | Gel Bead Size | Visual Reference | Common Error |
|---|---|---|---|
| Large central incisor | Long grain of rice (7-8mm) | Standard rice grain | Two beads stacked |
| Lateral incisor | Short grain of rice (5-6mm) | Half a standard grain | Same amount as central |
| Canine | Long grain of rice (7-8mm) | Standard rice grain | Missing the curved surface |
| Premolars | Short grain of rice (5-6mm) | Half a standard grain | Extending too far back |
| Full upper arch (6-8 teeth) | Small pea total volume | Green pea size combined | Double this amount |
| Full lower arch (6-8 teeth) | Slightly less than upper | Smaller pea | Same as upper arch |
Important Note: These measurements assume standard adult tooth sizes. Adjust upward for unusually large teeth and downward for unusually small teeth. The goal is coverage without overflow, not precise adherence to a measurement that may not fit your anatomy.
How Much Gel for Whitening Strips
Pre-coated strips eliminate the dispensing guesswork, but some systems use strips you coat yourself. If you apply gel to strips, precision still matters.
Pre-Coated Strips
These come with gel already applied by the manufacturer. No decision required. However, inspect the strip before application. If the gel layer looks patchy or thin in spots, the product may be defective or expired. The coating should appear uniform across the entire strip surface that contacts teeth.
Self-Coated Strip Systems
If your kit provides blank strips and a gel syringe, apply a thin, even layer across the entire tooth-contact area of the strip. Use approximately the same total volume as you would for a tray system, spread over the strip rather than in individual beads.
Apply the gel to the strip, not directly to your teeth. The strip ensures even distribution. Direct tooth application for strip systems often results in uneven coverage.
Strip Coverage Check
After applying the strip to your teeth, press it gently against all visible surfaces. Run a finger along the strip from outside your mouth to feel for gaps or bubbles. If you feel areas where the strip is not in contact with tooth surface, you may need slightly more gel in that area next time, or better adaptation technique.
How Much Gel for Whitening Pens
Whitening pens apply gel differently from trays or strips. The quantity per application is smaller, but the frequency is often higher.
The Single Click or Twist
Most pens dispense gel through a brush tip with each click or twist of the base. One full click or twist typically delivers enough gel for one to two teeth. Apply the gel by painting it directly onto the tooth surface in a thin, even coat.
Coverage Per Application
A standard pen application for a full smile (visible teeth when smiling) typically requires 3-5 clicks or twists. Paint each tooth systematically: central incisors, lateral incisors, canines, then premolars if visible. Work from one side to the other to avoid missing teeth.
The Drying Film Principle
Pen gel is formulated to dry into a thin film that adheres to teeth and continues releasing peroxide. You want enough gel to form a continuous film but not so much that it drips, pools, or stays wet for more than a minute. If gel remains visibly wet after 60 seconds, you have applied too much.
Multiple Applications Per Day
Some pen systems recommend two or three applications daily. Each application should be a fresh, complete coating. Do not layer new gel over partially dried old gel. Brush or rinse away residual film before reapplication.
How Much Professional In-Office Gel
When a dentist whitens your teeth, they control the quantity precisely. Understanding what they do helps you appreciate the precision involved and informs your at-home technique.
Professional Application Technique
The dentist or hygienist applies gel using a syringe with a fine tip, painting it precisely onto each tooth surface. They avoid the gumline by a millimeter or two. The gel layer is thick enough to remain active throughout the treatment session, typically 15-20 minutes before replenishment.
Quantity Per Tooth
Professionals use more gel per tooth than at-home systems because they have absolute gum isolation. A rubber dam or liquid gingival barrier protects gum tissue completely. This allows a thicker gel application for faster, more aggressive whitening without soft tissue risk.
Do not attempt to replicate professional gel quantities at home without comparable gum protection. The burns are not worth the marginal speed improvement.
Recognizing Overapplication
Your body provides clear signals when you have used too much gel. Learn to recognize them immediately.
Visual Signs
After inserting your tray, look in a mirror. Do you see gel oozing beyond the tray edges onto gums? This indicates overapplication. A thin, transparent film at the very edge may be acceptable. Opaque, thick overflow is not.
Gel visible between teeth, forming little bubbles or strands as you remove the tray, also suggests excess quantity.
Sensation Signs
Burning, stinging, or tingling on gum tissue during the session indicates gel contact. Remove the tray immediately and rinse. The quantity was too high, or the placement was imprecise.
Excessive salivation during treatment sometimes indicates gel overflowing into the mouth. Your saliva glands react to the chemical presence.
After-Effect Signs
White patches on gums after tray removal are chemical burns from peroxide. They indicate significant overapplication or poor tray fit. The burns heal, but the experience is unpleasant and entirely avoidable.
Correction for Next Session
After an overapplication episode, reduce your gel quantity by approximately 25-30% for the next session. Observe the results. Continue adjusting until you achieve coverage without overflow.
Recognizing Underapplication
Using too little gel creates different but equally frustrating problems.
Visual Signs During Application
If you can see dry, uncoated areas on your teeth through the tray, you have not used enough gel. The entire visible tooth surface should have gel contact.
After removing the tray, look at your teeth. If some areas appear identical to pre-whitening while adjacent areas look lighter, the untreated areas received insufficient gel.
Sensation Signs
Underapplication rarely causes physical sensation. This makes it harder to detect than overapplication. You must rely on visual inspection and results monitoring.
Results Monitoring
After 3-4 sessions, your teeth should show some uniform lightening. If you notice patchy results, with some teeth or parts of teeth whitening more than others, uneven gel distribution is the likely cause. Increase quantity slightly and focus on even placement.
The Relationship Between Gel Quantity and Sensitivity
Many people do not realize that gel quantity directly affects sensitivity levels.
Excess Gel Increases Sensitivity
More gel means more peroxide in contact with teeth. The additional peroxide does not improve whitening beyond a certain point, but it does increase the amount penetrating to the pulp. Overapplication is a common cause of unnecessary sensitivity.
The Minimum Effective Dose
The ideal quantity is the smallest amount that produces even coverage. This “minimum effective dose” approach maximizes whitening while minimizing side effects. Finding this sweet spot for your specific anatomy takes a session or two of careful observation.
Gel on Gums Compounds Discomfort
Gum irritation from overflow adds to the overall discomfort of whitening. Even if tooth sensitivity is mild, burning gums make the experience unpleasant. Correct quantity prevents this compounding effect.
Gel Quantity and Tray Fit
The relationship between how much gel you use and how well your trays fit is inseparable.
Custom Trays
Well-made custom trays from a dentist fit intimately against teeth. They require the least gel of any tray type. The close adaptation spreads a thin layer evenly across all surfaces. If you use custom trays and experience overflow, you are using significantly too much gel.
Boil-and-Bite Trays
These semi-custom trays fit better than one-size-fits-all but not as precisely as custom trays. They require slightly more gel than custom trays to fill minor gaps. The difference is modest, perhaps 10-20% more. If you need double the gel to get coverage, your trays do not fit well enough.
One-Size-Fits-All Trays
Generic trays have the poorest fit. They require the most gel to bridge gaps between tray and tooth. Unfortunately, they also have the most potential for overflow because gaps exist at the gumline. These trays represent the most challenging application scenario and the greatest risk of gum irritation.
When to Replace Rather Than Compensate
If you find yourself using large amounts of gel to achieve coverage with generic trays, the solution is not more gel. It is better trays. Custom trays pay for themselves through reduced gel waste and superior comfort.
Step-by-Step Application Guide
Follow this sequence for consistent, correct gel application every session.
Preparation
Gather your materials: gel syringe, clean dry trays, mirror, tissue. Wash and dry your hands. Brush your teeth gently 30 minutes before whitening, not immediately before. Dry your teeth with a clean tissue if possible; dry teeth accept gel better.
Dispensing
Hold the syringe at 45 degrees to the tray. Starting at one end of the arch, dispense a grain-of-rice-sized bead for each tooth position. Work systematically from one side to the other. Keep beads centered in the tray channel where teeth will sit. Do not connect the beads into a continuous line.
Insertion
Place the tray over your teeth starting from the front and pressing backward. Do not wiggle or slide the tray, which smears gel unevenly. Press firmly to seat the tray. The pressure spreads each bead into a thin layer covering the tooth.
Overflow Check
Immediately after seating, look in a mirror. Use a clean finger wrapped in tissue to wipe away any gel that has overflowed onto gums. Work quickly; peroxide acts fast on soft tissue.
During Wear
Do not eat, drink, or smoke. Minimize talking, which moves the tray and can pump gel onto gums. Sit upright or stand. Lying down can cause gel to run backward toward your throat.
Removal
Remove trays carefully. Peel them away from teeth rather than pulling straight off, which creates suction that can irritate gums and pulp. Rinse your mouth with lukewarm water. Do not swallow the rinse water.
Post-Session Assessment
Look at your teeth. They should appear uniformly coated with a thin film. Check gums for any white spots. Note any sensitivity level. Use these observations to adjust quantity for the next session.
Special Situations Requiring Quantity Adjustments
Certain circumstances call for modifying the standard quantities.
Severe Staining
If your teeth have heavy staining, you might be tempted to use more gel. Resist this impulse. The solution to heavy staining is completing the full treatment course, not overloading each session. Standard quantities applied consistently over more sessions produce better results than heavy single sessions that irritate gums and cause sensitivity.
Sensitive Teeth
If you know your teeth are sensitive, use slightly less gel per tooth, perhaps 75% of the standard amount. The thinner layer still whitens, albeit possibly requiring an extra session or two to reach the same endpoint. The reduction in sensitivity makes the extended course worthwhile.
Crowded Teeth
Crowded teeth create overlapping surfaces where gel can pool. Use slightly less gel and ensure the tray seats fully. Pay attention to wiping away gel that may squeeze into interproximal areas during insertion.
Missing Teeth
If you are missing teeth, do not place gel in the tray where the missing tooth would be. That gel contacts gum tissue directly and serves no purpose. Only dispense gel for tooth positions that actually have teeth.
Veneers, Crowns, and Bonding
Do not apply whitening gel to restorations. It does not whiten them, and the peroxide can potentially affect the bond strength or marginal seal over repeated exposures. If your tray covers restorations, place gel only on natural tooth positions.
Frequently Asked Questions
How do I know if I am using enough whitening gel?
After your session, your teeth should appear uniformly coated, and you should see incremental lightening every few sessions. If results are patchy or absent, you may be using too little. If you have gum irritation or gel everywhere in your mouth, you are using too much.
Can I reuse gel that squeezes out of the tray?
Never. Gel that has contacted your mouth is contaminated with saliva and bacteria. Attempting to scoop it back into the tray or save it for later introduces oral bacteria into your gel supply and compromises the sterility of future applications.
How much gel is in one syringe?
A standard whitening syringe contains 3-5 milliliters of gel, sufficient for approximately 10-20 arch applications depending on how much you dispense per session. If you run through a syringe in 4-5 sessions, you are using far too much.
Should I use more gel for longer wear times?
No. The gel quantity is determined by coverage needs, not session duration. Longer wear requires that the initial gel quantity be sufficient to maintain activity, but standard amounts properly applied remain active for the recommended wear period. Adding more gel does not extend active time; it just causes overflow.
How much gel should I use for touch-up sessions?
Touch-up sessions use the same quantity per tooth as regular sessions. The difference is frequency, not amount per application. One properly dosed touch-up session every 1-3 months maintains results.
What if I swallow a small amount of whitening gel?
A tiny amount swallowed incidentally during treatment is unlikely to cause harm beyond possible mild stomach upset. Rinse your mouth thoroughly. If you swallow a significant quantity, or if you experience nausea, vomiting, or throat pain, contact a healthcare provider or poison control center.
Can I use less gel and whiten for longer to compensate?
This approach can work if you use a slightly reduced amount, perhaps 75-80% of standard, and extend the total treatment course by a few sessions. Do not extend individual session wear time beyond the recommended maximum. The total course duration extends, not the per-session duration.
Additional Resource
For more information on the proper use of whitening products and gel application, visit the American Dental Association’s whitening resource page:
https://www.ada.org/resources/ada-library/oral-health-topics/whitening
Conclusion
The correct amount of teeth whitening gel is a thin, continuous layer covering each tooth surface without overflowing onto gums, typically achieved by dispensing a grain-of-rice-sized bead per tooth in tray systems or painting a thin film with pens. Using too much gel wastes product, burns gum tissue, and increases sensitivity without improving whitening, while using too little creates uneven, patchy results. Careful observation of coverage and adjustment based on your individual tooth size and tray fit transforms your whitening experience from guesswork to predictable success.
Frequently Asked Questions (FAQ)
Q: How much whitening gel should I put in each tray?
A: For each tooth, dispense a bead of gel approximately the size of a grain of rice. For a full arch tray covering 6-8 front teeth, the total gel volume should roughly equal a small pea. Adjust slightly based on your tooth size.
Q: What happens if I use too much whitening gel?
A: Excess gel overflows onto gums, causing chemical burns, irritation, and discomfort. It also wastes expensive product and increases the amount of peroxide you may swallow. Using more gel than needed does not improve whitening results.
Q: Can I use too little whitening gel?
A: Yes. Too little gel results in incomplete tooth coverage, uneven whitening, and patchy results. Some teeth or parts of teeth lighten while others remain stained. The goal is even, thin coverage across all visible tooth surfaces.
Q: Should I adjust gel amount for sensitive teeth?
A: Yes. Use approximately 75% of the standard amount per tooth if you know your teeth are sensitive. This reduces peroxide exposure while still providing enough gel for whitening. The treatment course may require a few extra sessions to reach the same final shade.
Q: How do I apply gel to a whitening tray correctly?
A: Hold the syringe at a 45-degree angle. Dispense individual beads of gel (grain-of-rice size) for each tooth position in the tray. Keep beads centered where teeth will sit. Do not connect beads into a continuous line. Insert the tray and press firmly to spread the gel evenly.
Disclaimer: This article provides general guidance on teeth whitening gel application based on common product designs. Specific products may have different instructions. Always read and follow the manufacturer’s directions for your particular whitening kit. Consult your dentist with questions about whitening technique or if you experience persistent gum irritation or tooth sensitivity.