Teeth Whitening Trays: How Long to Wear for Optimal Results
You have your custom or over-the-counter whitening trays. You have your gel. You insert the trays, start a timer, and then face the critical question: exactly how long should these stay in? Wear them for too brief a period, and the peroxide barely begins its oxidative work before you rinse it away. The result after weeks of diligent daily sessions is a disappointingly subtle shade shift. Wear them for too long, and you cross the threshold from therapeutic whitening into the territory of acute pulpitis, chemical gingival burns, and a rebound effect that can leave your teeth looking chalky and feeling exquisitely sensitive for days.
The optimal wear time is not a single, universally correct number printed on a box. It is a calculated variable that depends on the specific chemistry of your whitening gel, the concentration of the peroxide, the precision of your tray fit, and your individual pulpal sensitivity threshold. This article provides a detailed, chemistry-driven guide to whitening tray wear times. We will translate the pharmacokinetics of peroxide into practical, actionable protocols that maximize the shade change while scrupulously protecting the health of your dental pulp and gingiva.
The Chemistry Clock: Carbamide Peroxide vs. Hydrogen Peroxide Wear Times
The fundamental determinant of wear time is the chemical identity of the active agent in your gel. Carbamide peroxide and hydrogen peroxide have profoundly different release kinetics, and treating them as interchangeable leads to either under-treatment or over-exposure.
Carbamide Peroxide: The Extended-Release Formulation
Carbamide peroxide (CP) is a chemical adduct of hydrogen peroxide and urea. It is not directly active as a whitening agent. Upon contact with water in the gel base and saliva, the carbamide peroxide molecule undergoes solvolysis, breaking down to release free hydrogen peroxide and urea. This breakdown is not instantaneous; it is a gradual, sustained release that occurs over a period of hours.
A 10% carbamide peroxide gel releases approximately 3.5% hydrogen peroxide equivalents. The release profile shows an initial burst of hydrogen peroxide within the first 30 to 60 minutes, followed by a slow, tapering release that can continue for 6 to 8 hours. Because of this prolonged release, carbamide peroxide gels are designed for extended wear. The standard clinical protocol for 10% CP is an overnight wear time of 6 to 8 hours, or a daytime wear time of 2 to 4 hours for those who prefer not to sleep with trays. A 15-16% CP gel releases approximately 5.2% hydrogen peroxide equivalents and is typically worn for 2 to 4 hours during the day, or 4 to 6 hours overnight. A 20% CP gel, yielding around 7% hydrogen peroxide, is generally prescribed for a strict 2-hour daytime wear window.
The extended wear time is not merely tolerable with carbamide peroxide; it is necessary. Because the hydrogen peroxide is released gradually, a short 30-minute wear time would capture only the initial burst, wasting the majority of the gel’s oxidative potential. You must wear the tray for the full prescribed duration to receive the complete therapeutic dose.
Hydrogen Peroxide: The Immediate-Release Formulation
Direct hydrogen peroxide (H2O2) gels deliver the active oxidative species in its fully available form from the moment the gel contacts the tooth. There is no breakdown delay, no reservoir conversion. The free radicals are present at peak concentration immediately upon application.
A 6% hydrogen peroxide gel achieves its maximum oxidative flux within the first 15 to 20 minutes. The reaction consumes the available peroxide, and by 45 to 60 minutes, the gel is largely spent. The chemical activity has plateaued. Hydrogen peroxide gels are therefore designed for short, intense wear periods. The standard protocol for a 6% H2O2 tray gel is 30 to 45 minutes. A 9-10% H2O2 gel is worn for 20 to 30 minutes.
Critically, extending the wear time of a hydrogen peroxide gel beyond its chemically active window provides no additional whitening benefit. The peroxide is exhausted. The prolonged contact serves only to macerate the gingiva in the inert gel base, increasing the risk of soft tissue irritation and mechanical friction without contributing a single additional shade tab of lightening. Disciplined adherence to the shorter, timed endpoint is essential for hydrogen peroxide formulations.
The Tray Fit Factor: Custom vs. Boil-and-Bite Wear Time Reliability
The recommended wear time on the gel syringe assumes a specific delivery environment: a well-fitting tray that maintains intimate, undiluted gel contact with the enamel. The precision of your tray fit directly affects whether that recommended time translates to effective whitening.
Custom-Fabricated Trays:
A tray fabricated from a dental impression fits precisely. The scalloped margins follow the gingival contour within a fraction of a millimeter. The reservoir space between the tray and the tooth is thin (0.5-1.0mm) and uniform. When you load a rice-grain-sized droplet of gel into each tooth chamber and seat the tray, the gel spreads into a thin, continuous film that is held in constant apposition to the enamel. The tight marginal seal minimizes salivary ingress, which would otherwise dilute the peroxide and flush it away.
In a custom tray, the labeled wear time is reliable. If the instructions say 4 hours for 15% CP, you can be confident that the enamel is receiving an effective, undiluted peroxide dose for the full 4 hours.
Boil-and-Bite or Stock Trays:
These semi-custom or universal trays are thicker, bulkier, and fit loosely. There are gaps between the tray wall and the tooth, and the margins sit away from the gum line rather than sealing against it. When you load these trays, excess gel is required to fill the void space. Saliva circulates freely under the tray, diluting the peroxide from the moment of insertion.
The effective oxidative contact time in a boil-and-bite tray is significantly shorter than the nominal wear time. You might wear the tray for 60 minutes as directed, but the peroxide at the enamel surface may be diluted to sub-therapeutic levels within the first 20 minutes. The temptation to compensate by extending the wear time is dangerous because it prolongs gum exposure to the diluted, leaking gel. With ill-fitting trays, never exceed the recommended maximum wear time. If whitening is inadequate, the solution is not longer wear; it is better trays.
The Sensitivity Protocol: Listening to Your Dental Pulp
The wear times provided by manufacturers are population averages derived from clinical trials. Your individual neurophysiology may require a shorter, personalized duration. The dental pulp’s response to oxidative stress is the ultimate biological governor of safe wear time.
The Graded Sensitivity Signal:
Mild, diffuse warmth or a faint, dull ache that develops gradually over the course of the wear period is a common and generally acceptable side effect, particularly during the first few sessions of a treatment cycle. It indicates a low-grade, reversible pulpitis that will resolve after tray removal.
A sharp, sudden, electrical “zing”—a lancinating pain triggered by a breath of cool air, a sip of room-temperature water, or the pressure of the tray itself—is a different category of signal entirely. This sensation indicates that a significant flux of peroxide has reached the A-delta nerve fibers within the pulp horn. The inflammatory cascade has crossed a threshold. This is an absolute signal to terminate the session immediately, regardless of the remaining time on the clock.
The Titration Strategy for Sensitive Individuals:
If you have a history of dental sensitivity, do not blindly follow the label’s maximum wear time from day one. Adopt a titration protocol. Start with half the recommended wear time for the first two sessions. If you experience zero sensitivity, advance to three-quarters of the recommended time for the next two sessions. If you remain comfortable, proceed to the full recommended time. If sensitivity occurs at any stage, drop back to the previous comfortable duration and maintain that for the remainder of the treatment cycle.
You may need to extend the total number of treatment days to achieve the same cumulative oxidative dose when using shorter per-session wear times. A 14-day cycle with full-length sessions might become a 21-day cycle with shorter sessions. The final shade outcome will be identical; the only difference is the calendar time required to reach it safely and comfortably.
Daytime vs. Overnight Wear: Physiological Differences
Choosing between daytime and overnight tray wear involves more than personal schedule preference. The oral environment is physiologically distinct during sleep, and these differences have safety and efficacy implications.
Daytime Wear (Recommended for Higher Concentrations and Beginners):
During wakefulness, salivary flow is normal and continuous. This provides a natural buffering and diluting mechanism for any gel that leaks from the tray. You are upright, and you can consciously manage your head position to pool leaked gel in the front of the mouth rather than allowing it to drain into the pharynx. Critically, you are conscious and can detect the early warning signs of gingival burning or severe sensitivity and remove the tray before significant tissue damage occurs.
Daytime wear is the safer protocol for higher concentration gels (15-20% CP, or any direct H2O2 gel) and for first-time users who have not yet mapped their personal sensitivity response. It provides a controlled environment with an immediate abort capability.
Overnight Wear (Appropriate Only for Low-Concentration CP in Custom Trays):
During sleep, the salivary flow rate drops to near zero. The oral environment becomes stagnant. Any gel that has extruded onto the gingiva remains in concentrated, undiluted contact with the delicate sulcular epithelium for hours. You are unconscious and will not be awakened by the initial tingling or whitening of a gingival burn until the damage is established. Furthermore, in a supine sleeping position, gel from the upper tray can drain posteriorly, coating the soft palate and pharyngeal wall, leading to a chemical pharyngitis and sore throat upon waking.
Overnight wear should be strictly limited to 10% carbamide peroxide gel (releasing only 3.5% H2O2 slowly over hours) in impeccably fitting custom trays with a minimal, precisely placed volume of gel. Even under these optimized conditions, a prudent approach is to test the gel and tray combination during a daytime 2-hour supervised session before committing to a full 8-hour unsupervised overnight exposure. If any gingival sloughing or tenderness is observed upon waking, the gel volume must be reduced, or the overnight protocol abandoned in favor of daytime use.
The Dangers of Exceeding the Maximum Recommended Wear Time
The “more is better” fallacy is the root cause of most whitening-related dental injuries. Exceeding the prescribed maximum wear time unleashes a cascade of progressively severe consequences.
Chemical Gingivitis and Epithelial Sloughing:
Peroxide is a potent oxidizing agent. Prolonged contact with the non-keratinized gingival epithelium causes oxidative desquamation. The superficial layers of the gum tissue turn white, become soft and friable, and slough off in sheets, exposing the raw, tender basal layers underneath. This is a chemical burn. The area is painful, bleeds readily, and takes 3 to 5 days to re-epithelialize sufficiently for whitening to resume.
Acute Reversible Pulpitis:
As the peroxide contact time extends, the cumulative dose of free radicals reaching the pulp chamber increases. The confined, rigid pulp space cannot accommodate the inflammatory edema. Pressure builds against the nerve fibers, resulting in a spontaneous, throbbing toothache that persists even after tray removal. The teeth become hypersensitive to any thermal change. This acute pulpitis can take 1 to 2 weeks to resolve fully, during which all whitening must cease.
The Dehydration-Rebound Cycle:
Over-worn teeth become profoundly dehydrated. They appear stark, chalky, and unnaturally white immediately after tray removal—a deceptive optical effect that some users misinterpret as success. Over the following 48 hours, the teeth desperately rehydrate with inflammatory exudate and salivary fluids. The color rebounds, and the teeth can appear temporarily darker and more yellow than they were at the midpoint of the correct treatment cycle. The panicked user, believing the whitening is “fading,” resumes over-whitening, entering a destructive cycle of dehydration and inflammation that yields no further genuine whitening and risks permanent pulpal damage.
The “Less Is More” Gel Loading Principle
Wear time and gel volume are intimately linked. Overloading the tray with a thick, continuous ribbon of gel does not accelerate or enhance whitening. It simply forces excess gel beyond the tray margins onto the gingiva, palate, and tongue, increasing soft tissue exposure and the amount of peroxide inadvertently swallowed.
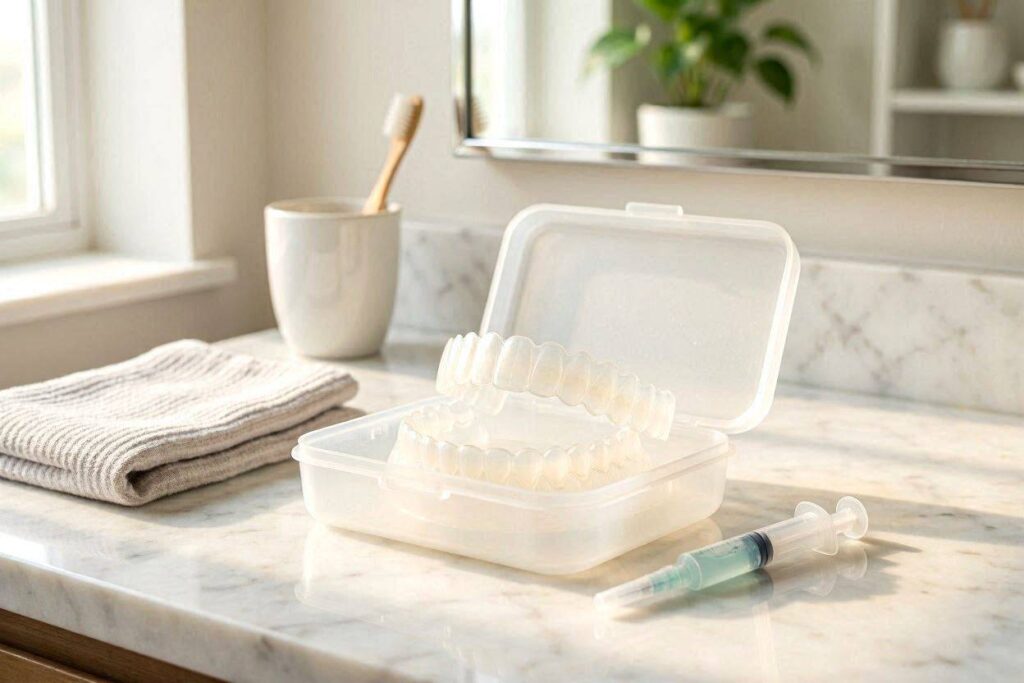
The optimal loading technique, particularly for custom trays, is a single, tiny droplet of gel—no larger than a grain of rice—placed on the facial (front-facing) wall of each tooth chamber, approximately halfway up the inner surface. When the tray is seated, this droplet compresses and spreads into a thin, uniform film across the facial enamel. The total gel volume for an entire arch should not exceed 0.5 milliliters. If you taste peroxide strongly, feel gel oozing onto your tongue, or see significant extrusion beyond the tray margins after seating, you have overloaded the tray. Wipe the excess away immediately with a clean fingertip or cotton swab before starting the wear timer.
Optimized Wear Time Reference Table
| Gel Type and Concentration | Single Wear Time (Optimal) | Maximum Safe Duration | Session Frequency | Recommended Tray Type | Best Time of Day |
|---|---|---|---|---|---|
| 10% Carbamide Peroxide | 6-8 hrs (overnight) / 2-4 hrs (day) | 8 hours | Once daily | Custom (mandatory for overnight) | Night (sleep) |
| 15-16% Carbamide Peroxide | 2-4 hours | 4 hours | Once daily | Custom | Daytime |
| 20% Carbamide Peroxide | 2 hours | 2.5 hours | Once daily | Custom | Daytime |
| 6% Hydrogen Peroxide | 30-45 minutes | 45 minutes | Once or twice daily | Custom or quality boil-and-bite | Daytime |
| 9-10% Hydrogen Peroxide | 20-30 minutes | 30 minutes | Once daily | Custom (professional supervision) | Daytime |
| 3-4% Hydrogen Peroxide (Gentle) | 45-60 minutes | 60 minutes | Once daily | Custom or boil-and-bite | Daytime |
Post-Wear Protocol: The First 30 Minutes After Tray Removal
What you do immediately after removing the trays significantly influences both comfort and enamel health.
- Remove Trays Gently: Break the seal at the posterior edge with a fingertip and lift carefully. Do not rip the tray out, as the sudden pressure change can cause a sharp zing in sensitive teeth.
- Rinse, Do Not Brush: Rinse your mouth gently with lukewarm water to remove residual gel and saliva. Do not immediately brush your teeth with toothpaste. The enamel surface is transiently porous and slightly softened from the oxidative session. Abrasive toothpaste scrubbing at this moment will microscopically wear the surface.
- Apply Desensitizer (If Needed): If you have a desensitizing gel or a potassium nitrate/fluoride mouthwash, apply or rinse with it immediately after the water rinse. Allow it to sit on the teeth for the recommended time.
- Wait 30 Minutes: Allow a 30-minute window for the enamel to begin rehydrating and for the pulpal inflammation to start settling. After 30 minutes, you may brush normally with a soft-bristled brush and a low-abrasion fluoride or hydroxyapatite toothpaste.
- Clean and Dry Your Trays: Rinse the trays with cool water and brush them gently with a soft toothbrush (no toothpaste) to remove any gel residue. Dry them thoroughly before storing them in their ventilated case. Trapped moisture breeds bacteria.
Conclusion
- The optimal wear time for whitening trays is dictated first by the peroxide chemistry: carbamide peroxide gels (10-20%) require extended wear of 2 to 8 hours due to their gradual hydrogen peroxide release, while direct hydrogen peroxide gels (6-10%) require short, intense wear of 20 to 45 minutes after which they are chemically spent.
- A well-fitted custom tray ensures the labeled wear time translates to effective, undiluted peroxide contact, whereas loose boil-and-bite trays suffer rapid salivary dilution, making the effective whitening window much shorter than the nominal wear time.
- Individual pulpal sensitivity must override generic timing recommendations; a sharp, electrical zing is the absolute biological signal to end the session, and a titration strategy beginning with half the recommended time is the safest approach for sensitive individuals.
Frequently Asked Questions
Can I wear my whitening trays for longer than recommended to get faster results?
No. For carbamide peroxide, exceeding the maximum wear time saturates the enamel and dramatically increases pulpal peroxide flux and gum exposure without meaningfully increasing the final shade. For hydrogen peroxide, the gel is chemically exhausted after 45-60 minutes, so extended wear merely macerates your gums in an inert, watery base.
What should I do if I fall asleep while wearing daytime trays?
Remove the trays immediately upon waking. Rinse gently with warm water. Do not brush for 30 minutes. Inspect your gums for white, sloughing patches. Apply a fluoride desensitizer if available. Expect some gum tenderness and tooth sensitivity for 24-48 hours. Skip your next scheduled session to allow the soft tissues and pulp to recover fully.
Is it normal for my teeth to feel slightly “loose” after wearing trays?
A transient sensation of altered bite or slight mobility is not true periodontal ligament loosening. It is a proprioceptive illusion caused by the teeth being slightly dehydrated and the periodontal ligament being compressed by the tray. This sensation resolves within an hour after tray removal. If true, demonstrable mobility persists, discontinue use and consult your dentist.
Can I talk while wearing my whitening trays?
Minimal, quiet speaking is possible, but extended talking pumps the trays, forcing gel out and saliva in, which dilutes the peroxide and irritates the gums. It is best to remain quiet and still during the wear period to maintain the sealed peroxide environment.
Why do my teeth look whiter immediately after tray removal but then darken a few hours later?
This is the dehydration effect. Dehydrated enamel scatters light differently and appears artificially bright and chalky. As the enamel rehydrates with saliva over the following hours, the true, stable hydrated shade reveals itself. This rebound is normal and amounts to 1-2 shade tabs darker than the immediate post-removal appearance.