How Dentists Confirm Bone Fusion to Implant?
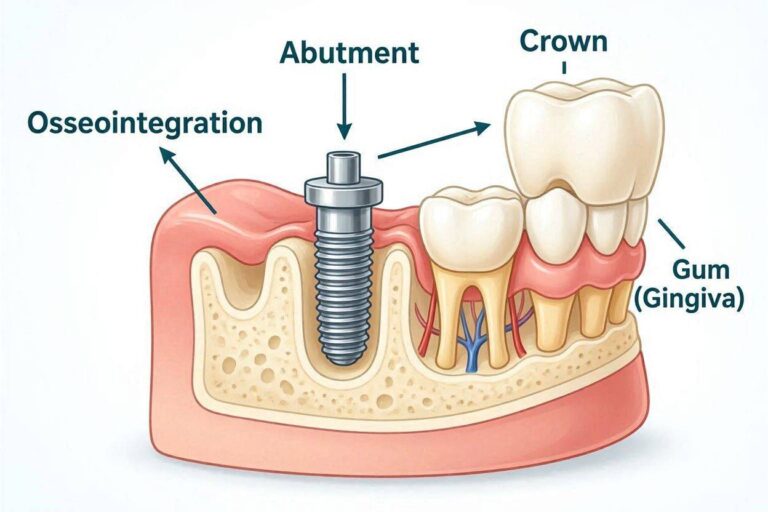
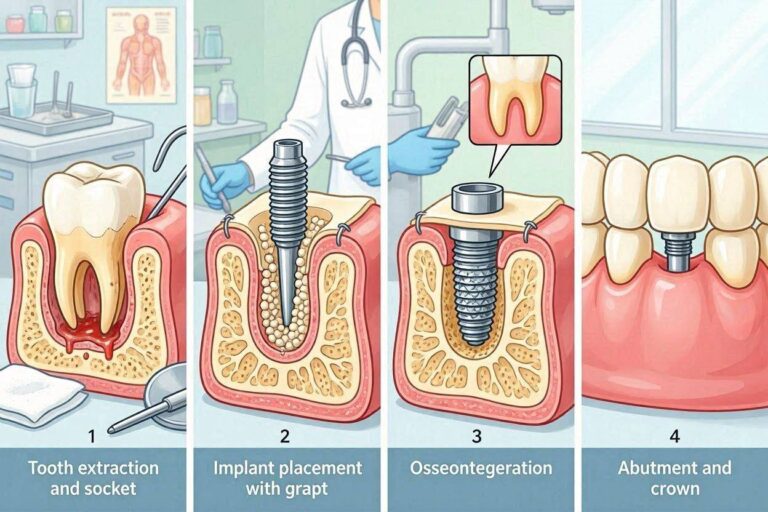
A dental implant’s success hinges on a silent, hidden process. Osseointegration, the direct fusion of living bone to the implant surface, occurs beneath the gum, out of sight. You cannot see it happening. You often cannot feel it. Yet, the moment when a dentist decides an implant is ready to receive a tooth is one of the most critical judgment calls in restorative dentistry. Move too early, and the fragile bone-implant interface can be overloaded and fail. Wait unnecessarily long, and the patient endures extended treatment time. So how do dentists peek beneath the gum to confirm this fusion? They use a sophisticated blend of clinical skill, diagnostic technology, and scientific instruments. This article reveals the exact methods your dentist uses to confirm that your implant post has successfully fused to your jawbone.
The Diagnostic Challenge of Osseointegration
Confirming bone fusion is not like checking if a broken arm has healed. With a broken arm, a doctor removes the cast, takes an X-ray, and sees a callus bridging the fracture gap. With a dental implant, there is no gap to bridge. The goal is the absolute absence of a gap. The bone must be in direct, molecular-level contact with the implant surface. The challenge is that the implant is radiopaque—it appears brilliant white on an X-ray and blocks what’s directly behind it. A thin layer of fibrous tissue, which would signify failure, can be invisible on a standard radiograph if it is perfectly parallel to the X-ray beam. Dentists, therefore, never rely on a single test. They assemble a diagnostic puzzle, using multiple pieces of evidence that all point to the same conclusion.
Why This Confirmation Step Is Non-Negotiable
Skipping the confirmation step and proceeding to take an impression for a crown based on a calendar date alone is reckless. Premature loading is a primary cause of early implant failure. When an implant is loaded too soon, the micro-motion disrupts the delicate activity of osteoblasts. Instead of forming bone, the body forms a non-adherent fibrous scar capsule around the implant. This is a biological dead end. The implant will feel loose. It will show a radiolucent halo on an X-ray. It must be removed. The time spent confirming readiness is an insurance policy against this outcome.
Method 1: Clinical Biomechanical Assessment
The simplest, most direct assessment is a hands-on clinical examination. This is performed by the restoring dentist or the surgeon at an uncover appointment or a pre-impression check.
The Percussion Test: The Sound of Stability
This is a classic, low-tech test that is surprisingly informative. The dentist uses the blunt end of a metal instrument, like a mouth mirror or a dental explorer handle, and gently taps the implant’s healing abutment or cover screw. They are listening to the resulting sound.
- A high-pitched, clear, crystalline ring is the hallmark of a successfully osseointegrated implant. The sound indicates a solid structure that is tightly coupled to an equally solid material (the bone). There is no energy-dampening layer in between.
- A low-pitched, dull, muffled thud is a major red flag. This sound indicates that the implant is encased in a soft, energy-absorbing material, which is the fibrous tissue of a failed osseointegration. The difference is distinct to a trained ear, like tapping a solidly glued tile versus a loose one.
Mobility Testing: The Absolute Standard
The single most important clinical criterion for success is the absence of mobility. A healthy, osseointegrated implant has absolutely zero clinical mobility. It is ankylosed to the bone. Even a fraction of a millimeter of movement constitutes failure. The dentist tests this with a controlled, delicate technique. They place two rigid instrument handles on opposite sides of the implant abutment or healing cap. They alternately push and pull with a small, controlled force. They are feeling for any visible movement or any tactile sensation of give.
- No perceived mobility means the implant is clinically osseointegrated.
- Any mobility, rocking, or dampened movement means the implant has a fibrous encapsulation and is failing.
It is critical that the dentist use a controlled, gentle force. An excessive load during this test could theoretically damage a partially integrated interface, though a healthy interface can withstand the forces.
Soft Tissue Health Evaluation
The peri-implant soft tissue is the window to the underlying bone. The dentist inspects the gum surrounding the implant meticulously. The color must be a healthy pink. The tissue must be firm, with a stippled texture. There must be no redness, no swelling, and no suppuration (pus). Bleeding on gentle probing with a plastic periodontal probe is a sign of peri-implant mucositis or inflammation. While mucositis can exist around a still-integrated implant, it represents a risk factor that must be managed before final loading. If the probing depth is significantly increased and bleeding is profuse, combined with exudate, it could signal a deep infection and a compromised bone interface.
Method 2: Radiographic Interpretation
Radiographs provide the visual evidence that complements the clinical feel. The dentist cannot directly see osseointegration, but they can see the signs of its failure and the health of the surrounding bone architecture.
The Periapical Radiograph: The Gold Standard Image
A periapical (PA) X-ray is the image of choice for a single implant. It is a high-resolution image taken using a parallel technique, where the film or sensor is placed parallel to the long axis of the implant. This minimizes distortion. The dentist looks at the interface. A successful implant will show the bone appearing to directly contact the entire implant surface with no intervening radiolucent (dark) line. The bone level should be at or very near the top of the implant’s rough surface or the first thread. There must be no signs of a continuous dark halo surrounding the entire implant body. A thin, dark line encircling the implant parallel to its body is the radiographic hallmark of a fibrous encapsulation, meaning total failure. The dentist also examines the bone adjacent to the implant. The trabecular pattern of the bone should be normal and well-defined. Any area of diffuse radiolucency around the apex could indicate an infection from an adjacent tooth or a failing implant.
The Panoramic Radiograph: The Big Picture View
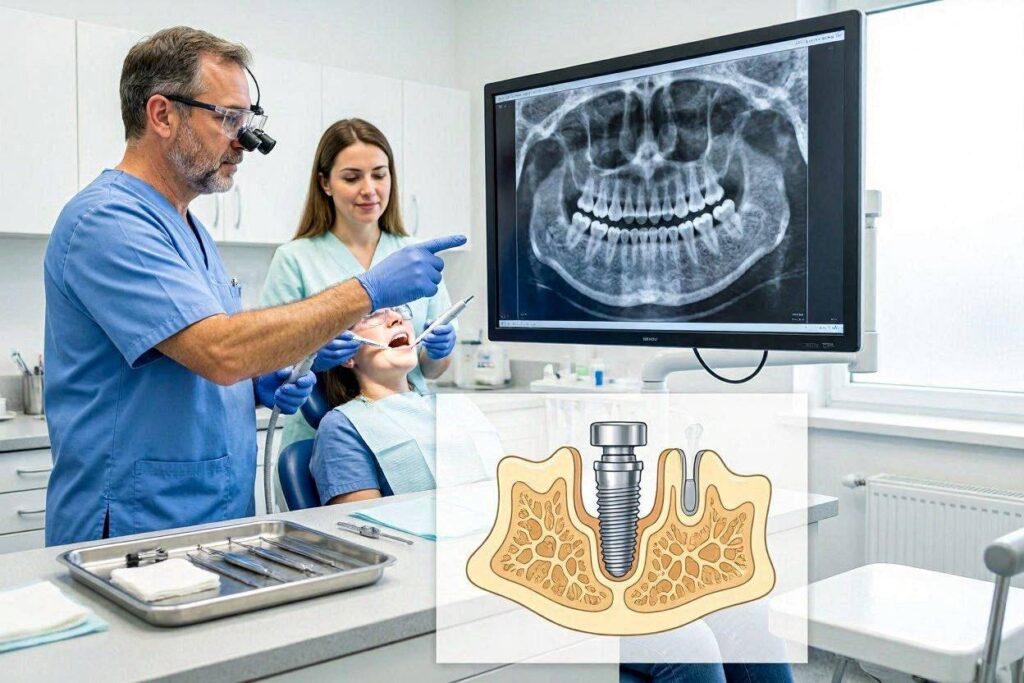
A panoramic X-ray (Panorex) is a useful screening tool, especially for multiple implants or full-arch restorations. It shows the entire jaw in one image. However, its resolution is lower than a PA, and there is more geometric distortion. A dentist will not rely solely on a panoramic X-ray to confirm osseointegration on a critical single implant in the aesthetic zone. It is excellent for viewing the relationship of the implant to the mandibular nerve canal or the maxillary sinus floor. It can confirm the implant’s general alignment and rule out any gross pathology.
The Baseline Comparison: The Key to Early Detection
An X-ray is only as good as its comparison. The standard of care is to take a baseline radiograph at the time of implant placement or the second-stage uncover surgery. When the dentist takes a new X-ray at the confirmation appointment, they place the old and new images side-by-side on a view box or screen. They are looking for change. Marginal bone loss around the implant neck is expected to some degree in the first year. A loss of 0.5mm to 1.5mm during the healing and first year of loading is considered normal crestal bone remodeling. The dentist is looking for any progressive, saucer-shaped radiolucency around the implant neck that exceeds this normal remodeling. A rapid loss of bone between two time points is a hallmark of an infection or overload.
Method 3: Resonance Frequency Analysis (RFA)
This is the most objective, quantitative tool available. Resonance Frequency Analysis (RFA) provides a numerical value for implant stability, removing some of the subjectivity of the percussion and mobility tests. The most common commercial device for this is the Osstell system.
How RFA Works
A small magnetic peg, called a SmartPeg, is screwed onto the implant or healing abutment. The SmartPeg is calibrated for each implant system. A handheld probe emits a magnetic pulse, exciting the SmartPeg. The SmartPeg vibrates, bending in two directions. The probe then picks up the resonance frequency of this vibration. The physics are simple: the stiffer the implant-bone interface, the higher the resonance frequency. Imagine a tuning fork held loosely in your fingers versus clamped tightly in a vise. The vice-held fork vibrates at a higher frequency because its stiffness is greater. The RFA device translates this frequency into an Implant Stability Quotient (ISQ) scale, which ranges from 1 to 100. The higher the ISQ, the more stable the implant.
Interpreting ISQ Values
There is no single magic ISQ number for all implants at all times. The trend is more important than the absolute value.
- An implant with an ISQ below 55 is generally considered at high risk. It has low stability and should not be loaded.
- An ISQ between 55 and 65 is a caution zone. Loading is possible but needs careful force control.
- An ISQ above 65-70 is a marker of a stable, successfully integrating implant.
However, dentists watch for the ISQ trajectory. A baseline ISQ value is taken at implant placement. This reflects primary mechanical stability. Over the first few weeks, primary stability can dip as the bone remodels and the initial compression is relieved, while secondary biologic stability (osseeintegration) is still ramping up. This dip is normal. What the dentist wants to see is an ISQ value that drops, then climbs steadily back up, ending at a value equal to or, ideally, higher than the initial placement ISQ. A continuously dropping ISQ that never climbs is a sign of failing osseointegration. RFA is non-invasive, painless, and offers a quantifiable, recordable metric that is invaluable for communication with the patient and for documenting a case.
Method 4: Reverse Torque Testing
This is a definitive, but invasive, test that was historically more common. It involves applying a specific unscrewing torque to the implant to prove it is locked in bone.
The Procedure and Rationale
A torque wrench is attached to the implant. The dentist applies a torque in the counter-clockwise direction. A predetermined value, typically between 20 Ncm and 35 Ncm, is set. If the implant does not rotate and withstands this torque without moving, it is deemed successfully integrated. If the implant unscrews under this force, it was a failure.
Why It’s Less Favored Today
The reverse torque test is controversial. Applying a twisting force to an implant interface that is still immature could cause irreparable damage. Even if the implant survives, the test itself might fracture the fragile bone spicules that are in the process of bridging to the implant surface. It introduces a micro-trauma at a critical phase. With the advent of reliable, non-invasive RFA technology and the high predictability of modern implant surfaces, the reverse torque test is now reserved for specific situations where confirmation is uncertain or for protocols like immediate loading, where a minimum insertion torque (often 35-45 Ncm) must be confirmed at the time of surgery. It is no longer a routine verification step at the restorative phase.
Method 5: CBCT Imaging as a Secondary Tool
Cone Beam Computed Tomography (CBCT) offers a three-dimensional view. It is not used as a routine, primary verification of osseointegration due to higher radiation dose and the scattering artifacts produced by the metal implant. However, in complex cases, it can provide invaluable information.
What CBCT Can Reveal
CBCT can visualize the implant in 3D slices. The dentist can examine the buccal (cheek-side) and lingual (tongue-side) bone plates, which are invisible on a 2D periapical X-ray. This is critical in the aesthetic zone. A 2D PA might show perfect bone on the mesial and distal sides of the implant, but the implant could have no buccal bone at all, a condition called dehiscence. CBCT identifies this. It can also assess the proximity of the implant to the inferior alveolar nerve canal or the maxillary sinus floor in 3D. Metal artifacts, which appear as star-like streaks radiating from the implant, obscure the immediate interface. Therefore, CBCT cannot resolve the cellular-level osseointegration, but it confirms the volume and integrity of the supporting bone envelope.
Normal Marginal Bone Loss vs. Pathologic Loss
A critical part of the confirmation process is interpreting the bone level on the X-ray. Dentists must differentiate between expected, stable remodeling and pathologic destruction.
The Physiologic Remodeling of Crestal Bone
After an implant is uncovered and exposed to the oral environment, or after it is loaded with a crown, the crestal bone around the implant platform remodels. This phenomenon establishes a “biologic width” for the implant, a minimum dimension of soft tissue attachment needed for a healthy seal. The bone typically resorbs apically to form this seal. A loss of 0.5mm to 1.5mm below the implant platform in the first year is a universally accepted norm. It is a one-time event. The bone then stabilizes and should not lose more than 0.2mm annually thereafter. When a dentist confirms integration and sees a well-defined, stable 1mm of bone loss that matches the baseline, they are satisfied.
The Signs of Peri-Implant Pathology
Pathologic bone loss is different. It is progressive. It appears as a V-shaped or crater-like radiolucency around the implant neck, not a flat horizontal line. It is often accompanied by clinical signs of infection: bleeding on probing, suppuration, and deep probing depths. An implant with these signs is not healthy, even if it is currently rigid. The osseointegration is actively being resorbed. This implant is not ready for a final crown until the disease is treated and the bone is stable.
The Integrated Diagnostic Confirmation Protocol
No single method stands alone. The modern dental professional uses a definitive protocol, a checklist, to confirm osseointegration.
- Clinical Assessment: Zero mobility upon bimanual testing. A clear ringing sound on percussion. Healthy, firm, non-bleeding peri-implant mucosa.
- Radiographic Assessment: A periapical X-ray compared to the baseline showing intimate bone-to-implant contact. Any crestal bone loss is within normal limits (≤1.5mm) and has a stable pattern.
- Quantitative Assessment (Optional but optimal): An ISQ value from RFA that is stable or has risen from the post-surgery baseline and is above 65.
- Patient Comfort: The patient reports no discomfort, pain, or sensation of movement in the implant site.
When all these criteria align, the dentist can confidently move to the restorative phase.
Important Note: The confirmation of osseointegration is a professional diagnosis. As a patient, you should expect your dentist to conduct a thorough check, including taking an X-ray and performing a tactile examination, before taking an impression for your crown. If your dentist simply looks in your mouth and says, “Looks good, let’s start the crown,” without any of these systematic steps, advocate for yourself and ask how they are confirming the bone is fused.
What Happens When Integration Is Not Confirmed?
If the diagnostic tests reveal a failure, the path forward is straightforward but requires patience.
Early Diagnosis and Implant Removal
If an implant is found to be mobile or has a radiographic halo at the uncover or confirmation appointment, it is a failed osseointegration. There is no rescuing it. The implant must be removed atraumatically. The goal is to preserve as much of the remaining bone as possible. The site is then debrided to remove all granulation and fibrous tissue.
Analyzing the Cause and Planning for a Replacement
A failure analysis is crucial. Was the bone overheated during drilling? Was there insufficient primary stability? Did the patient smoke or have uncontrolled diabetes? Was there an infection? The site is allowed to heal completely. This usually takes 3-4 months, during which the bone defect from the failed implant fills in with new bone. A new CBCT scan is often taken to re-assess the healed site. A replacement implant can then be planned, often with a slightly wider diameter to engage fresh, healthy bone, and the placement protocol is adjusted to mitigate the previous cause of failure. The success rate for a replacement implant, when the cause is addressed, remains very high.
Conclusion
Dentists confirm bone fusion to a dental implant through a methodical combination of tactile mobility tests, percussion sound analysis, comparative radiographs, and often quantitative Resonance Frequency Analysis. This diagnostic confirmation ensures the implant has achieved a rigid, stable bond with the jawbone and is ready to safely support a tooth for decades. Skipping this crucial step risks premature loading and catastrophic failure.
FAQ
1. Can an implant feel fine but not be fully fused on the X-ray?
Yes. An implant can have clinical rigidity from a tight fibrous encapsulation, especially in dense bone, but the X-ray will reveal the tell-tale radiolucent line of a non-fused interface. This implant is failing and should not be restored.
2. How long after the confirmation appointment does it take to get the final tooth?
Typically, once osseointegration is confirmed, the impression or digital scan is taken. The laboratory fabricates the custom abutment and crown, which usually takes 2-3 weeks. The final delivery appointment then schedules the fitting.
3. Is the confirmation process painful?
No. The tests like percussion, palpation, and RFA measurement are non-invasive and do not cause pain. Even gentle probing around the implant is usually not felt, as the implant has no periodontal ligament nerve fibers.
Additional Resource
For more on the science of implant stability assessment, explore resources from the Academy of Osseointegration: https://osseo.org/