How To Make Acrylic Partial Denture?
An acrylic partial denture replaces missing teeth with an appliance that restores your smile, improves your ability to chew, and prevents the remaining natural teeth from shifting out of position. Unlike cast metal partial dentures, acrylic partials are made primarily from denture acrylic resin, which makes them lighter, more affordable, and easier to adjust. For dental professionals and technicians, understanding the fabrication process is essential to producing a comfortable, functional, and aesthetic prosthesis.
Making an acrylic partial denture involves a sequence of precise clinical and laboratory steps. Each stage builds on the previous one, and cutting corners at any point compromises the final result. This guide walks through the complete process from the initial patient examination to the final delivery appointment, explaining the purpose and technique behind each step.
Overview of the Acrylic Partial Denture
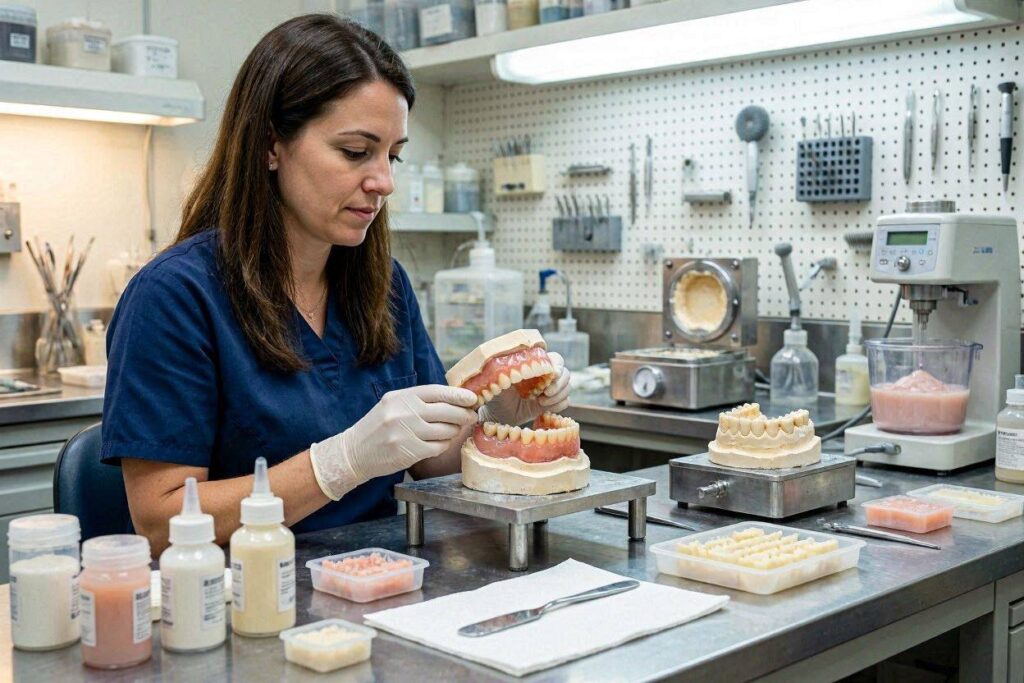
An acrylic partial denture consists of a pink acrylic base that rests on the oral tissues, acrylic teeth that replace the missing natural teeth, and wrought wire clasps that engage the remaining natural teeth to retain the appliance. The entire prosthesis is fabricated from heat-cured or self-cured polymethyl methacrylate, commonly called denture acrylic.
These prostheses serve as definitive replacements for missing teeth, as interim prostheses while implants heal, or as transitional appliances while the mouth adjusts to changes. Their advantages include lower cost compared to cast metal frameworks, easier relining and repair, and lighter weight. The trade-off is that they are bulkier than metal-based partials and may be more prone to fracture under heavy chewing forces.
Required Materials and Equipment
Fabricating an acrylic partial denture requires specific materials and equipment available in a dental laboratory or a well-equipped dental office.
Impression Materials
Alginate irreversible hydrocolloid serves as the primary impression material for capturing the dental arches. It is mixed with water, loaded into a tray, and seated in the patient’s mouth where it sets to a rubbery consistency. For the final impression, a more accurate material such as polyvinyl siloxane or polysulfide rubber base may be used.
Dental Stone and Plaster
Dental stone, specifically Type III dental stone or Type IV die stone, is used to pour the definitive cast on which the denture is fabricated. Plaster is used for mounting casts on the articulator and for flasking procedures.
Denture Base Materials
Heat-cured polymethyl methacrylate in powder and liquid form is the standard material for the denture base. The powder consists of pre-polymerized acrylic beads, and the liquid is methyl methacrylate monomer. When mixed, they form a dough that is packed into a mold and cured. Self-cured acrylic is available for repairs and certain clinical procedures but is generally less color-stable and more porous than heat-cured material.
Acrylic Denture Teeth
Pre-manufactured acrylic teeth are selected to match the shade, size, and shape appropriate for the patient. These teeth bond chemically with the denture base acrylic during processing.
Wrought Wire
Pre-formed or custom-bent stainless steel wire is used to fabricate clasps. The wire gauge is typically 18 or 19 gauge, providing a balance of flexibility and retention.
Laboratory Equipment
A dental articulator holds the upper and lower casts in the correct relationship. A wax knife, Bunsen burner or electric waxing instrument, and baseplate wax are used for the wax try-in setup. A dental flask, clamp or press, and boiling water bath or curing unit are required for processing. A dental lathe with pumice and polishing compounds finishes the denture.
Step One: Clinical Examination and Treatment Planning
Before any laboratory work begins, the patient must be thoroughly evaluated. The dentist assesses the remaining dentition, the health of the supporting soft tissues and bone, and the patient’s specific needs and expectations.
Oral Examination
Each remaining tooth is evaluated for caries, periodontal health, mobility, and its ability to support a clasp. Teeth that will serve as abutments for clasps must be periodontally sound and free of active decay. The edentulous ridges are examined for contour, undercuts, and the quality of the overlying mucosa.
Radiographic Evaluation
X-rays reveal bone levels, the presence of pathology, and the condition of the roots of remaining teeth. Impacted teeth, retained root tips, or cysts in the edentulous areas are identified and addressed.
Treatment Plan
The decision is made regarding which teeth will be replaced, which teeth will serve as abutments, and the design of the partial denture. The number and placement of clasps are planned to provide adequate retention without overloading the abutment teeth.
Step Two: Preliminary Impressions
The first appointment that involves laboratory procedures begins with taking impressions of the upper and lower arches.
Tray Selection
Stock impression trays are selected for the upper and lower arches. The tray should cover the entire arch and provide adequate clearance for the impression material without impinging on the tissues. If a stock tray does not fit well, a custom tray can be fabricated from the preliminary cast.
Alginate Impression
Alginate powder is mixed with room-temperature water according to the manufacturer’s ratio. The mix should be creamy and bubble-free. The tray is loaded, and the material is smoothed over the surface. For the upper impression, the tray is seated from posterior to anterior. For the lower impression, the patient is asked to lift their tongue as the tray is seated, then relax it.
The tray is held passively without movement while the material sets. Once set, the impression is removed with a quick, firm motion. The impression is rinsed under cool water to remove saliva and blood, disinfected, and wrapped in a damp paper towel to prevent syneresis and shrinkage.
Step Three: Pouring the Study Cast
The preliminary impression is used to pour a study cast, which allows the dentist and technician to plan the case in detail.
Mixing and Pouring
Type III dental stone is mixed with water according to the manufacturer’s specifications, typically 30 milliliters of water per 100 grams of powder. The mixture is vibrated into the impression slowly, starting from one posterior area and allowing the stone to flow around the arch. This prevents air entrapment.
The cast base is built up to a thickness of approximately ten to fifteen millimeters. After the stone sets, typically forty-five to sixty minutes, the cast is separated from the impression.
Trimming and Finishing
The cast base is trimmed on a model trimmer to create smooth, flat surfaces. The art portion of the cast, the area that reproduces the oral anatomy, is preserved without alteration. The cast is checked for bubbles, tears, or distortions that would compromise its accuracy.
Step Four: Custom Tray Fabrication and Final Impressions
For a more accurate master cast, custom impression trays are fabricated on the study casts. These trays fit the patient’s arch precisely and allow an even thickness of impression material.
Custom Tray Construction
The study cast is outlined to indicate the tray borders, which should extend to the full depth of the vestibular and lingual sulci but stop short of the frenal attachments. A spacer material, typically baseplate wax one to two millimeters thick, is adapted over the edentulous areas. Stops are created by removing small windows of spacer wax, which will allow the tray to seat against the teeth and maintain the correct position.
Tray acrylic or light-cured tray resin is adapted over the cast and spacer. A handle is attached to the anterior. The tray is trimmed and smoothed after curing.
Border Molding
At the next clinical appointment, the custom tray is tried in the mouth. The borders are molded using a thermoplastic compound or an elastomeric border molding material to capture the functional depth of the sulci. This step ensures that the final impression records the full denture-bearing area.
Final Impression
The final impression is taken using an elastomeric material such as polyvinyl siloxane, polyether, or polysulfide. The material is loaded into the custom tray, and the tray is seated firmly. The patient performs border movements such as pulling the lips, sucking the cheeks, and moving the tongue to record the functional extensions.
The impression is inspected for accuracy. All teeth should be sharply defined, the edentulous ridges should be fully captured, and the muscle attachments should be clearly recorded.
Step Five: Master Cast Fabrication
The master cast is the definitive working cast on which the partial denture is fabricated.
Pouring the Master Cast
The final impression is boxed if necessary, and Type IV die stone is poured. The same careful vibration technique used for the study cast is employed. The cast is allowed to set completely before separation.
Cast Evaluation
The master cast is inspected under magnification. The teeth should be reproduced in sharp detail with no bubbles along the finish lines. The edentulous ridges should show the full extent of the impression without tears or voids. Any defects that affect the accuracy of the final prosthesis require a new impression.
Step Six: Framework Design and Clasp Fabrication
The acrylic partial denture does not have a cast metal framework, but it does incorporate wrought wire clasps that must be carefully designed and positioned.
Surveying
The master cast is placed on a dental surveyor, an instrument that identifies the path of insertion and the location of undercuts. The cast is tilted to establish the ideal path, which minimizes tissue undercuts while providing adequate undercuts for clasp retention.
Clasp Bending
Wrought stainless steel wire, typically 18 or 19 gauge, is bent to form the clasps. The wire is contoured using orthodontic pliers to create a retentive arm that engages the undercut on the abutment tooth, a reciprocal arm for stability, and an occlusal rest that seats on a prepared rest seat on the tooth.
The clasp must be passive when seated on the cast. An active clasp that exerts continuous pressure will cause tooth movement or discomfort. The retentive terminal should engage approximately 0.25 to 0.5 millimeters of undercut, sufficient for retention without making insertion and removal difficult for the patient.
Rest Seat Preparation
The abutment teeth require rest seats to support the occlusal rests. These shallow depressions are prepared in the enamel or existing restorations of the abutment teeth. In the laboratory, these preparations are transferred to the master cast and refined.
Step Seven: Baseplate and Occlusion Rim Construction
With the clasps fabricated, the next step is to construct a temporary baseplate and wax occlusion rims. These will be used at the clinical try-in appointment to record jaw relationships and arrange the artificial teeth.
Baseplate Fabrication
A baseplate is made from self-cured or heat-cured acrylic adapted to the master cast. The baseplate covers the edentulous ridges and the palate for upper dentures. It provides a stable base for the wax rims and, later, for the artificial teeth during the try-in.
Occlusion Rim Construction
Wax rims are built up on the baseplates in the approximate position of the missing teeth. The rims are contoured to support the lips and cheeks appropriately. For the upper rim, the anterior-posterior position and inclination are established to provide adequate lip support and to position the anterior teeth in the correct relationship to the lip line and the phonetic requirements.
Bite Registration
At the clinical appointment, the baseplates and occlusion rims are tried in the patient’s mouth. The vertical dimension of occlusion is established, and the centric relation record is taken. The dentist records the midline, the high lip line during smiling, and the canine lines. These marks guide the selection and arrangement of the artificial teeth.
Step Eight: Tooth Selection and Arrangement
The artificial teeth are selected and arranged in wax on the master cast according to the records obtained at the try-in appointment.
Tooth Selection
Anterior teeth are selected based on shade, size, and mold. Shade is matched to the patient’s remaining natural teeth. Size is determined by the available space and the facial proportions. The mold or shape is chosen to harmonize with the patient’s facial form and the morphology of any remaining teeth.
Posterior teeth are selected for shade and occlusal scheme. Anatomic teeth with defined cusps are typically used when opposing natural teeth. Zero-degree or monoplane teeth are used when the opposing arch is a complete denture or when a non-anatomic occlusal scheme is desired.
Arranging the Teeth
The anterior teeth are arranged first, positioned according to the marked midline and lip line. They are set in a slight curve that follows the arch form. The angulation of each tooth is adjusted to create a natural appearance with slight rotation and variation in position.
The posterior teeth are arranged in occlusion with the opposing dentition. The buccal and lingual cusps are positioned to provide balanced occlusion or group function, depending on the opposing arch. The teeth are set over the ridge crest whenever possible to provide stability.
Wax Contouring
After the teeth are arranged, the baseplate wax is contoured to simulate the natural gingival contours. The wax is carved to create root prominences, interdental papillae, and a smooth transition from the teeth to the denture border. The palate is given appropriate thickness and contour.
Step Nine: Clinical Try-In
The wax setup on the baseplate is tried in the patient’s mouth. This critical appointment confirms that the aesthetics, phonetics, and occlusion are acceptable before the denture is processed.
Aesthetic Evaluation
The patient evaluates the appearance of the teeth in terms of shade, size, position, and the amount of tooth displayed at rest and during smiling. Adjustments are made based on the patient’s preferences and the dentist’s clinical judgment.
Phonetic Evaluation
The patient is asked to speak, particularly to produce sounds like “f,” “v,” “s,” and “th,” which reveal the relationship of the teeth to the lips and tongue. The vertical dimension and the anterior tooth position are adjusted if speech is affected.
Occlusal Verification
The occlusion is checked to ensure that the patient can close into the predetermined centric relation position without interference. The vertical dimension is verified. Any discrepancies are corrected in the wax.
Step Ten: Flasking and Boil-Out
Once the try-in is approved, the denture is processed. The wax must be replaced with acrylic resin through the flasking procedure.
Flasking
The master cast with the wax setup is invested in the lower half of a dental flask using dental stone or plaster. The teeth are covered to their incisal edges and occlusal surfaces. The stone is allowed to set and is then coated with a separating medium.
The upper half of the flask is filled with stone, and the flask is closed and placed under pressure until the stone sets.
Wax Elimination
The flask is placed in boiling water for approximately four to five minutes to soften the wax. The flask halves are separated, and the softened wax is removed. The mold is thoroughly cleaned with boiling water and detergent to remove all wax residue. The stone surfaces are coated with a tinfoil substitute or an alginate-based separating medium to prevent acrylic from adhering to the stone and to allow water to be removed from the acrylic during curing.
Step Eleven: Packing and Curing Acrylic
The mold is now ready to receive the acrylic resin.
Mixing the Acrylic
Heat-cured polymethyl methacrylate powder and liquid are mixed in a ratio specified by the manufacturer, typically three parts powder to one part liquid by volume. The mixture passes through several stages: sandy, stringy, dough-like, and rubbery. The dough stage is the optimal time for packing, when the material is cohesive and pliable but no longer sticky.
Packing
The acrylic dough is placed into the mold in the flask. A trial packing is performed using a sheet of polyethylene or cellophane between the flask halves to express excess material. The flask is placed in a press and gradually closed. The trial pack is opened, excess is trimmed, and the process is repeated until no further excess is expressed.
For the final closure, the cellophane is removed, and the flask halves are brought into direct contact and held under pressure.
Curing
The flask is placed in a curing bath. The recommended curing cycle for heat-cured acrylic is to bring the water temperature to 165°F (74°C) and hold it for eight to ten hours, or to use a shorter cycle at higher temperature. Rapid heating causes the monomer to boil within the acrylic, creating porosity that weakens the denture base.
After curing, the flask is allowed to bench cool slowly to room temperature. Rapid cooling introduces internal stresses that can cause warpage.
Step Twelve: Deflasking and Initial Finishing
The cooled flask is opened, and the denture is carefully removed from the stone.
Deflasking
The stone is gently broken away from the denture using a plaster knife and gentle taps with a mallet. Care is taken to avoid damaging the denture base or the teeth. The clasps are protected during this process.
Trimming Flash
Excess acrylic, known as flash, extends beyond the intended denture borders. This flash is trimmed away using an acrylic bur or a carbide trimming bur on a straight handpiece. The borders are shaped to match the recorded extensions.
Step Thirteen: Remounting and Occlusal Adjustment
Processing inevitably introduces minor changes in the occlusion. A clinical remount procedure corrects these discrepancies.
Remounting
The processed denture is placed back on the articulator using new interocclusal records obtained at the delivery appointment. The cast and denture are remounted on the articulator with mounting stone.
Selective Grinding
The occlusion is refined using articulating paper to mark premature contacts. These contacts are selectively ground using small stones or carbide burs. The goal is to achieve simultaneous, even contacts in centric relation and smooth, interference-free excursions.
Step Fourteen: Final Polishing and Finishing
The denture surface must be smooth and non-porous to resist staining and bacterial accumulation.
Smoothing
The denture base is smoothed using progressively finer abrasives. Pumice slurry on a rag wheel or felt cone removes scratches and creates a smooth surface. All surfaces are addressed, including the tissue side, but care is taken not to remove material from the critical intaglio surface.
High Polish
A high shine is achieved using a soft muslin wheel charged with a polishing compound such as tripoli, followed by a high-luster compound. The polished surface resists plaque accumulation and feels comfortable against the oral tissues.
The clasps are polished with a separate wheel to avoid contaminating the acrylic polishing wheels with metal particles.
Step Fifteen: Delivery and Patient Instructions
The finished denture is delivered to the patient with thorough instructions.
Insertion and Adjustment
The denture is inserted, and the fit is evaluated. Pressure-indicating paste reveals areas where the base contacts the tissue too firmly, and these areas are relieved. The clasps are checked for appropriate retention and adjusted if necessary. The borders are evaluated for overextension, which causes soreness, or underextension, which compromises retention.
Patient Education
The patient receives instructions on inserting and removing the denture, cleaning techniques, and the importance of removing the denture at night. They are advised about the initial adjustment period and the possibility of sore spots that will need adjustment. A follow-up appointment is scheduled within twenty-four to seventy-two hours.
The patient should understand that the acrylic partial is a replacement for missing teeth but does not function identically to natural teeth. Expectations regarding chewing ability and comfort are addressed realistically.
Conclusion
Making an acrylic partial denture involves a systematic sequence of clinical and laboratory procedures: preliminary impressions and study casts, custom tray fabrication and final impressions, master cast production, clasp bending and framework design, baseplate and occlusion rim construction, tooth arrangement and wax try-in, flasking and acrylic processing, deflasking and finishing, and finally delivery with occlusal adjustment. Precision at each stage produces a prosthesis that restores function and aesthetics while preserving the health of the remaining oral structures.
FAQ
How long does it take to make an acrylic partial denture?
The entire process from initial impressions to delivery typically requires four to six clinical appointments spread over three to six weeks. The laboratory work between appointments consumes most of this time.
What is the difference between an acrylic partial and a cast metal partial?
An acrylic partial has an acrylic base with wrought wire clasps. It is lighter and less expensive but bulkier and less durable. A cast metal partial has a thin, strong metal framework with cast clasps and rests. It is more retentive, more durable, and less bulky but costs more.
Can an acrylic partial denture be repaired if it breaks?
Yes. Acrylic partials can be repaired using self-cured acrylic, though heat-cured repairs are stronger. A broken clasp can be replaced, and a fractured base can be reassembled and reinforced. The repairability of acrylic is one of its advantages.
How do you clean an acrylic partial denture?
Clean the denture over a basin of water or a soft towel to prevent breakage if dropped. Use a soft denture brush and non-abrasive denture cleaner or mild soap. Avoid toothpaste, which scratches the acrylic. Soak overnight in water or a denture cleaning solution to keep the acrylic hydrated.
Why would an acrylic partial be chosen over a metal partial?
Acrylic partials are chosen for cost considerations, for patients with acrylic allergies to metal, as interim prostheses while implants integrate, or when the remaining dentition is questionable and may be lost, as the acrylic partial is easier to add teeth to than a metal framework.
How long does an acrylic partial denture last?
With proper care, an acrylic partial can last five to eight years. However, they are more prone to fracture and wear than metal partials. Regular dental visits allow monitoring of the fit and condition of both the denture and the remaining natural teeth.
Can an acrylic partial be relined?
Yes. When the base becomes loose due to ridge resorption, the tissue side can be relined with new acrylic to improve fit. This is a simpler and less expensive procedure than replacing the entire denture.
Is an acrylic partial denture comfortable to wear?
Acrylic partials are typically bulkier than metal partials, which some patients find less comfortable initially. However, when properly fabricated and adjusted, most patients adapt well. The lighter weight of acrylic compared to metal is an advantage for some.
Additional Resource
For professional standards and guidelines on removable partial denture fabrication, visit the American College of Prosthodontists at gotoapro.org. The organization provides resources for dental professionals and information for patients about tooth replacement options.