How Are Implant Supported Dentures Made?
The journey from missing teeth to a fully restored smile is a fascinating blend of surgery, technology, and artistry. When a patient chooses an implant-supported denture (also known as an overdenture), they are opting for a solution that combines the stability of dental implants with the affordability of a removable denture.
This is a popular choice for patients who have lost all their teeth in an arch (upper or lower) and are tired of the slipping and discomfort of traditional dentures. But how does this hybrid restoration come to life? How are implant-supported dentures made?
The process is a multi-step journey that requires collaboration between the surgeon, the restorative dentist, and a dental laboratory. This guide will walk you through the entire process, from the initial surgery to the final fitting.
The Concept: Anchoring a Denture
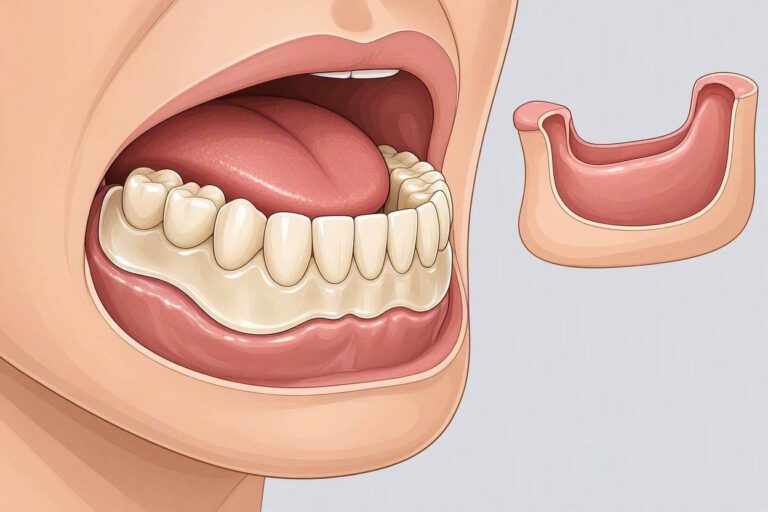
A traditional denture rests solely on the gums. It relies on suction and muscle control to stay in place. An implant-supported denture is different. It is a removable appliance that clips or snaps onto dental implants that have been placed in the jawbone.
The implants provide anchor points. The denture has special attachments on its underside that correspond to these anchors. When you push the denture into place, it locks onto the implants. This provides exceptional stability. You can eat, talk, and laugh without fear of the denture moving.
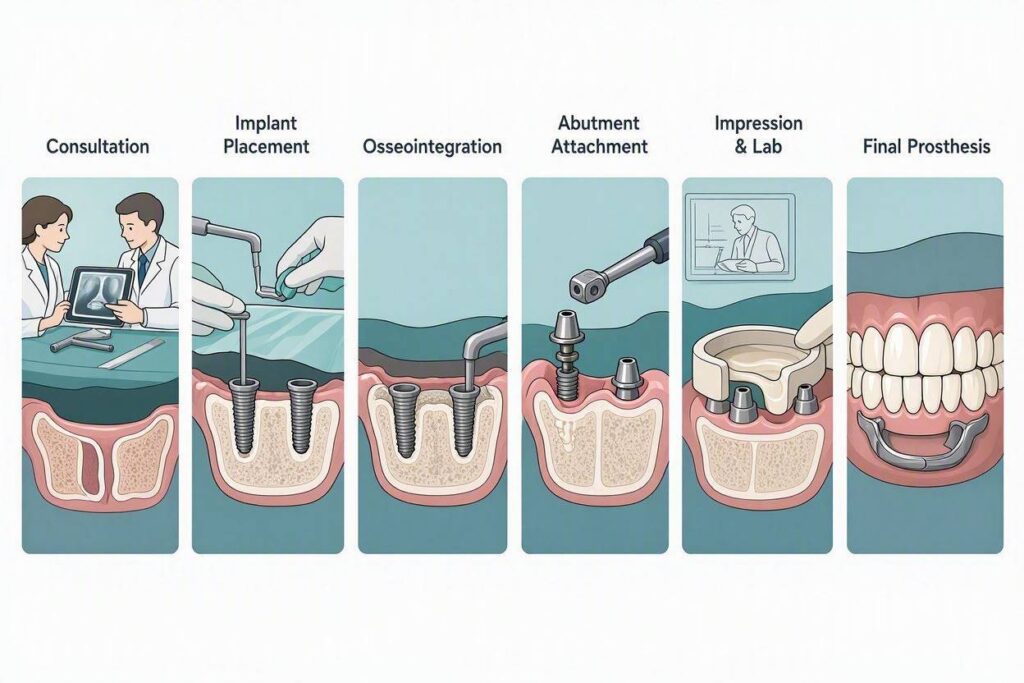
Step 1: The Surgical Phase (Placing the Implants)
The first step is the surgical placement of the dental implants. This is performed by an oral surgeon, a periodontist, or a highly trained general dentist.
- The Number of Implants: For a lower implant-supported denture, a minimum of two implants is the standard. For an upper denture, four or more implants are usually recommended due to the softer bone in the upper jaw.
- The Procedure: The surgeon makes an incision in the gum, drills precise holes into the jawbone, and screws the titanium implants into place. The gum is then stitched closed over the implants.
- Healing Time: The patient must wait for the bone to fuse to the implants. This process, called osseointegration, takes 3 to 6 months. During this time, the patient continues to wear their old denture (which is often modified with a soft liner to fit over the healing implants).
Step 2: The Uncovering and Attachment of Abutments
Once the bone has healed, the implants are firmly fused to the jaw. A second, minor surgical procedure is needed to uncover them.
- The Procedure: The surgeon makes a small incision to expose the top of the implant. A healing collar (a small metal cap) is placed on the implant to shape the gum tissue. After a few weeks, the healing collar is removed.
- The Abutment: The healing collar is replaced with the final attachment system. This is the piece that connects the implant to the denture. The two most common systems are:
- Locator Abutments: These are low-profile studs that stick out slightly from the gum. The denture has a corresponding nylon insert that snaps over the stud.
- Ball Abutments: These are small, ball-shaped attachments. The denture has a rubber O-ring that fits over the ball.
Step 3: The Impression (Capturing the Detail)
This is a critical step for the restorative dentist. To make a denture that fits perfectly, they need an exact replica of your mouth, including the position of the implants.
- The Procedure: The dentist attaches special “impression copings” to the abutments. An impression material is then used to take a mold of your entire arch. The impression captures the exact angle and position of the implants. This mold is sent to the dental laboratory.
Step 4: The Laboratory Phase (Crafting the Denture)
This is where the art and science of dentistry meet. A skilled dental lab technician uses the impression to fabricate your custom denture.
The process involves several steps:
- Pouring the Model: The lab pours a stone mixture into the impression to create a precise model of your mouth. The model includes “replicas” of the implants in their exact positions.
- Creating the Framework: A metal framework is often incorporated into the denture for strength. This framework holds the attachment housings (the sockets or inserts that snap onto the abutments).
- Wax Try-In: The lab sets artificial teeth in a wax base. The patient comes in for a “try-in” appointment. The dentist checks the fit, the bite, and the appearance of the teeth. Adjustments are made at this stage before the final product is made.
- Processing: The wax is replaced with pink acrylic, which is cured and hardened under pressure and heat. The acrylic forms the “gum” part of the denture.
- Finishing and Polishing: The denture is trimmed, polished, and prepared for delivery.
Step 5: The Delivery and Adjustment
The final appointment is the moment of truth.
- The Procedure: The dentist seats the denture onto the abutments. It should snap into place with a satisfying click. The dentist checks the bite, makes any necessary adjustments, and ensures the fit is comfortable.
- Instructions: The dentist will teach you how to insert and remove the denture. You will learn how to clean it and how to care for the attachments.
The Final Product: Removable but Secure
The result is a denture that is far superior to a traditional one. It is stable, comfortable, and functional.
- Stability: The denture will not rock or slip during chewing.
- Comfort: The denture can be made with a smaller, more streamlined base because it does not need to rely on suction to stay in place. This is especially beneficial for the upper denture, as it can be made without covering the entire palate.
- Removability: The patient can still remove the denture for easy cleaning and sleeping.
The Maintenance Factor
It is important to remember that the nylon or rubber parts inside the denture (the inserts or O-rings) wear out over time. They lose their grip. You will need to see your dentist periodically (usually every 6-12 months) to have these replaced. This is a quick, inexpensive procedure that keeps the denture fitting securely.
Conclusion
The creation of an implant-supported denture is a sophisticated process that combines surgical precision with the craftsmanship of a dental lab. The result is a removable restoration that offers a level of stability and comfort that a traditional denture simply cannot match. It is a journey that takes time, but for the patient suffering from loose dentures, the destination is life-changing.
Frequently Asked Questions (FAQ)
Q: How long does it take to make an implant-supported denture?
A: The entire process takes several months, primarily due to the healing time. The surgical phase requires 3-6 months of healing. Once healing is complete, the fabrication of the denture (impressions, try-in, delivery) takes another 4-8 weeks.
Q: Can I sleep with my implant-supported denture in?
A: You should remove it at night. Taking it out allows the gum tissue to rest and breathe. It also gives you the opportunity to clean the denture and the attachments thoroughly.
Q: Can my existing denture be converted into an implant-supported denture?
A: Sometimes. If your current denture is in good condition and fits well, the dentist may be able to retrofit it by adding the attachments to its underside. This is a good way to save money. If the denture is old, it is better to make a new one.
Q: What happens if I drop my implant-supported denture?
A: The denture can crack or break. Do not try to glue it back together with super glue. Contact your dentist. They may be able to send it to the lab for repair.
Q: Is an implant-supported denture better than a fixed bridge (All-on-4)?
A: It depends on your priorities. A fixed bridge is not removable and feels most like natural teeth. An implant-supported denture is removable but is much more affordable. Both are excellent solutions for different budgets and needs.
Additional Resource:
To see visual examples of how these dentures are made and how they work, you can visit the official Locator attachment system website: https://www.zestdent.com/