Advanced Teeth Whitening Strips: How to Use Them Safely and Effectively
A bright, confident smile can transform the way you feel in social situations, professional settings, and everyday life. You have probably seen countless products promising dramatic results, but few deliver the balance of convenience and real whitening power that modern strips provide. This guide walks you through everything you need to know about advanced teeth whitening strips, from the science behind the formulas to the precise steps that protect your enamel. You will learn how to choose the right product, avoid common pitfalls, manage sensitivity, and keep your results looking fresh for months. No exaggerated claims. No recycled marketing copy. Just honest, practical information written for real people who want a better smile without guesswork.
Understanding the Evolution of At-Home Whitening
The landscape of dental aesthetics has shifted dramatically over the past two decades. Professional in-office treatments once dominated the market, requiring multiple appointments and significant financial investment. Today, advanced teeth whitening strips offer a compelling middle ground. They combine professional-grade ingredient concentrations with a delivery system you control from your own bathroom.
From Basic Peroxide Gels to Advanced Delivery Systems
Early whitening strips relied on low-concentration hydrogen peroxide gels that slipped around on the teeth. Results were often patchy, and wear times stretched to an hour or more. Modern formulations solve these problems through several key innovations.
Manufacturers now use layered strip architectures. The outer layer blocks moisture from saliva, while the inner adhesive layer holds the gel tightly against the enamel. This design prevents the active ingredients from diluting prematurely. The gel itself has changed too. Many advanced strips use a more viscous, non-slip formula that stays exactly where you place it. Some incorporate desensitizing agents directly into the whitening layer, addressing comfort before the first twinge appears.
“The difference between early whitening strips and today’s advanced versions is comparable to the leap from flip phones to smartphones. The core function remains, but the execution has been completely reimagined.” — Aesthetic Dentistry Quarterly, 2025
Why Strip Technology Continues to Improve
Consumer demand drives rapid innovation. People want faster results, less sensitivity, and easier application. Laboratories respond by experimenting with new adhesive technologies, buffering agents, and accelerator compounds. LED accelerator lights, once exclusive to dental offices, now appear in home kits that pair with advanced strips. These lights claim to speed up the peroxide reaction, though the clinical evidence remains mixed.
Another significant shift involves the recognition that one-size-fits-all strips leave gaps. Newer products feature flexible, thin materials that conform better to individual tooth shapes. Some brands offer upper and lower strips cut differently to match the natural arch of each jaw. This attention to fit improves both comfort and coverage.
Advanced Teeth Whitening Strips: How to Use Them Safely and Effectively
You want a brighter smile, but you also want to protect your teeth. That balance sits at the heart of this entire guide. Advanced teeth whitening strips can deliver impressive results when you respect the instructions and understand what happens at the enamel level. Misuse, on the other hand, leads to disappointment, discomfort, or even damage. This section establishes the foundational principles that will carry through every recommendation that follows.
Defining What Makes a Strip “Advanced”
Not every product labeled “advanced” deserves that designation. True advanced strips share specific characteristics that set them apart from standard drugstore options.
Key Features of Truly Advanced Strips
| Feature | Standard Strips | Advanced Strips |
|---|---|---|
| Active Ingredient Concentration | 6%–10% hydrogen peroxide | 10%–15% hydrogen peroxide (buffered) |
| Adhesive Technology | Single-layer, prone to slipping | Dual-layer, non-slip grip |
| Desensitizing Agents | Rarely included | Often contains potassium nitrate or amorphous calcium phosphate |
| Wear Time | 30–60 minutes | 15–30 minutes |
| Strip Material | Thin, easily torn plastic | Flexible, micro-thin polymer with moisture barrier |
| Enamel Safety Certification | Basic | Often clinically tested with published enamel safety data |
Advanced strips also frequently incorporate stain-removing ingredients beyond peroxide. Some add sodium hexametaphosphate to break down surface stains while the peroxide penetrates deeper. Others include fluoride to support remineralization during or after treatment.
The Science of Whitening Without Damage
Hydrogen peroxide whitens teeth through oxidation. The molecule breaks down into water and reactive oxygen species that penetrate the porous enamel structure. These oxygen molecules attack the long-chain, dark-colored chromophores trapped inside the enamel rods. By breaking those chains into smaller, colorless fragments, the peroxide effectively “erases” the stain without physically scrubbing the tooth surface.
Carbamide peroxide, another common ingredient, breaks down more slowly into hydrogen peroxide and urea. This slower release makes it gentler for overnight treatments but less common in advanced strip formulations, which prioritize speed.
The safety concern arises when peroxide concentrations overwhelm the enamel’s natural defenses. Enamel is not a solid, impermeable barrier. It contains microscopic channels that allow ions to pass through to the dentin layer beneath. When peroxide reaches the dentin too aggressively, it irritates the nerve endings inside the pulp chamber. That irritation manifests as the sharp, zinging sensation you might associate with whitening treatments.
Advanced strips address this through buffering. Manufacturers adjust the pH of the gel to stay close to neutral, reducing the acidic assault that can temporarily soften enamel. They also incorporate ingredients that plug those microscopic channels, physically blocking the pathway that leads to sensitivity.
Preparing for Your Whitening Journey
Success with advanced teeth whitening strips begins long before you peel open the first packet. The preparatory phase sets the stage for even results, minimal discomfort, and maximum longevity of your new smile.
Assessing Your Candidacy: Who Should and Should Not Use Strips
Whitening strips work best on yellowish stains caused by extrinsic factors like coffee, tea, red wine, and tobacco. Brownish or grayish intrinsic stains, often caused by certain antibiotics, trauma, or excessive fluoride exposure during childhood, respond less predictably to over-the-counter whitening.
Good Candidates for Advanced Whitening Strips
- Adults with healthy teeth and gums
- People with yellowish surface stains from diet or lifestyle habits
- Individuals who have completed orthodontic treatment and want to brighten the final result
- Those who maintain regular dental checkups and have no active decay
Who Should Exercise Caution or Avoid Strips
- Pregnant or nursing individuals (limited safety data exists)
- Children and teenagers under 16 (pulp chambers are larger, increasing sensitivity risk)
- People with exposed dentin, worn enamel, or untreated gum recession
- Anyone with active cavities, cracked teeth, or leaking dental restorations
- Individuals allergic to peroxide or any strip adhesive components
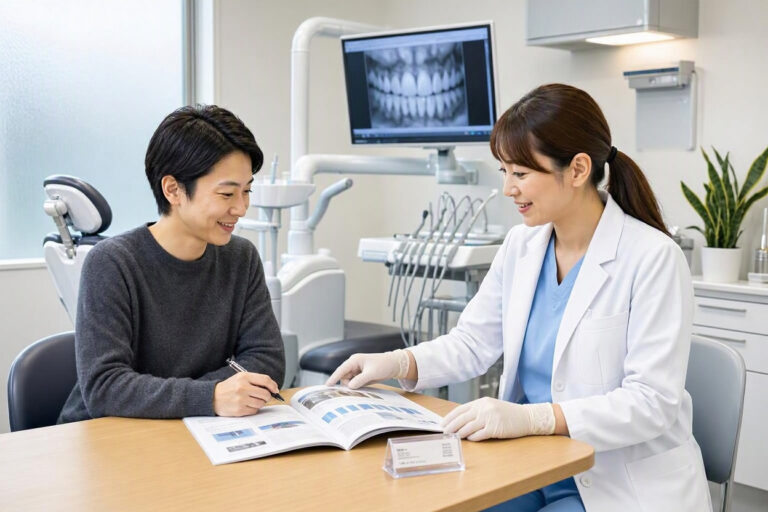
If you fall into a gray area, consult your dentist. A quick exam can identify potential problems that make whitening inadvisable for you right now. Sometimes a fluoride treatment or a few weeks of desensitizing toothpaste use can prepare your mouth for successful whitening.
The Essential Pre-Whitening Dental Checkup
I strongly recommend scheduling a cleaning and checkup before starting any whitening regimen. Here is why this step matters so much.
Plaque and tartar create a physical barrier between the whitening gel and your enamel. The peroxide cannot penetrate buildup effectively, so results appear uneven. Areas with heavy tartar remain darker while clean areas lighten, creating a patchy appearance that frustrates users who assume the strips are defective.
More importantly, whitening gel leaking into a cavity or a crack in your tooth can cause intense pain. The peroxide travels directly to the nerve, bypassing the protective enamel layer entirely. No buffering agent can prevent that kind of sensitivity. A dentist can spot small cavities and compromised restorations that you might not notice. Getting those fixed first protects you from a genuinely painful experience.
“I always tell my patients that whitening should be the final step in their cosmetic dental plan, not the first. You wouldn’t paint a wall with peeling plaster underneath. The same logic applies to your teeth.” — Dr. Rebecca Torres, DDS, Cosmetic Dentistry Specialist
Gathering Your Supplies and Setting a Schedule
Advanced whitening does not require a laboratory full of equipment, but a few simple tools improve the experience significantly.
Basic Whitening Kit Additions
- A soft-bristled manual toothbrush (avoid electric brushes immediately after whitening)
- Desensitizing toothpaste containing potassium nitrate (start using this at least one week before treatment)
- A small dental mirror for checking strip placement
- Clean tissues or cotton rolls for drying teeth before application
- Petroleum jelly or lip balm to protect sensitive lips from prolonged gel contact
- A timer (your phone works perfectly)
Recommended Treatment Schedule
| Treatment Phase | Duration | Purpose |
|---|---|---|
| Pre-treatment with desensitizing toothpaste | 7–14 days | Build resistance to sensitivity |
| Active whitening (once daily) | 7–14 days | Achieve target shade |
| Rest period | 3–5 days | Allow teeth to rehydrate and stabilize |
| Evaluation and possible touch-up | 1–2 days | Address any missed spots |
| Maintenance | Once monthly or quarterly | Preserve results |
This schedule acknowledges that whitening is a process, not an event. Rushing through daily treatments without breaks increases sensitivity without meaningfully accelerating results. The rest period allows the natural remineralization process to catch up.
The Complete Step-by-Step Application Guide
Applying advanced teeth whitening strips seems straightforward, and it is, but small technique adjustments make a significant difference in results. The following steps reflect current best practices endorsed by dental professionals and refined through years of user experience.
Pre-Application Tooth Preparation
What you do to your teeth immediately before applying strips directly affects how well the peroxide works.
Step 1: Brush, But Not Right Before
Brush your teeth with a non-whitening, fluoride toothpaste at least 30 minutes before applying strips. Brushing immediately beforehand creates micro-abrasions on the enamel surface and opens dentinal tubules, which can amplify sensitivity. The 30-minute buffer allows your saliva to form a thin protective pellicle over the enamel, a natural barrier that moderates peroxide penetration.
Use a soft-bristled brush and gentle pressure. The goal is cleanliness, not aggressive scrubbing. Pay special attention to the area near the gumline where plaque tends to accumulate.
Step 2: Floss Thoroughly
Flossing removes debris from between teeth where the strip cannot make direct contact. Whitening gel that cannot reach interproximal spaces due to trapped food particles creates uneven results. Unwaxed floss or floss picks both work. Be gentle, especially if your gums tend to bleed. Inflamed gums will not appreciate prolonged contact with whitening gel.
Step 3: Dry Your Teeth Completely
This step separates average results from professional-quality outcomes. Use a clean tissue or cotton roll to blot each tooth surface until it feels dry to the touch. The adhesive on advanced strips bonds far better to dry enamel than to wet enamel. Moisture dilutes the gel on contact, reducing its effective concentration before the strip even settles into place.
Work quickly once your teeth are dry. The strips adhere best within the first few seconds of contact with a clean, dry surface.
Perfecting Strip Placement and Adhesion
Now comes the technique that makes or breaks your treatment session.
Step 4: Remove the Strip Correctly
Peel the strip from its backing slowly and deliberately. Fast, jerky motions can cause the gel layer to separate unevenly. Hold the strip by the small tabs at each end, the areas without active gel. Avoid touching the gel surface with your fingers. The oils from your skin can interfere with adhesion and introduce bacteria to the treatment area.
Step 5: Align with the Gumline, Not the Edge of the Teeth
Place the strip with the gel side against your teeth, aligning the straight edge of the strip just slightly above your gumline for uppers, or just slightly below for lowers. Do not push the strip into the gums themselves. The strip should cover the entire visible surface of each tooth, wrapping slightly over the biting edge.
Fold the excess strip material behind your teeth. This fold helps anchor the strip and prevents it from sliding during the wear period. The folded portion should not cause significant discomfort against your tongue or the inside of your lips.
Step 6: Press and Mold
Use your fingertip to press the strip firmly against each tooth, working from the center outward. Feel for any air bubbles trapped between the strip and the enamel. These bubbles create spots where the gel cannot maintain contact, leading to uneven whitening. Pay special attention to the edges. Loose edges allow saliva to seep underneath, diluting the gel and reducing effectiveness.
Managing Wear Time and Discomfort
Step 7: Set a Timer and Resist the Urge to Extend
Follow the manufacturer’s recommended wear time precisely. For most advanced strips, this ranges from 15 to 30 minutes. Longer is not better. Peroxide activity plateaus after a certain period, but enamel dehydration and soft tissue irritation continue to increase. Respect the recommended duration.
If the strip you are using includes an LED accelerator light, activate it according to the instructions. Keep the light positioned correctly and do not use it for longer than directed.
Step 8: Stay Still and Breathe Through Your Nose
Movement during the wear period shifts the strips. Try to sit calmly, read, watch a show, or do something that keeps your head relatively still. Mouth breathing introduces air that dries out the strips and reduces contact quality. Nose breathing keeps humidity stable inside your mouth.
Accumulating saliva is normal. Resist the urge to spit repeatedly, as this action disturbs the strips. Instead, let saliva pool naturally and swallow gently when necessary.
Step 9: Remove and Rinse Immediately, Not Gradually
When the timer sounds, remove the strips immediately. Peel them off slowly, starting from the back edge. Discard them where pets and children cannot access them. Rinse your mouth thoroughly with lukewarm water. Do not use hot or cold water. Extreme temperatures can trigger sensitivity in teeth that have just undergone peroxide exposure.
Gently wipe any residual gel from your gum tissue with a damp tissue. Do not brush your teeth immediately after removal. Wait at least an hour before brushing, and use a soft-bristled brush with desensitizing toothpaste.
Managing and Preventing Sensitivity
Sensitivity remains the most common side effect of teeth whitening and the primary reason people abandon treatment before achieving their desired results. Advanced strips include design features that mitigate this issue, but your behavior plays an equally important role.
Why Sensitivity Happens and How Advanced Formulas Address It
The mechanism of whitening sensitivity involves the movement of peroxide through enamel into the dentin layer. Dentin contains thousands of microscopic tubules, each connected to the nerve within the pulp. When peroxide molecules reach these tubules, they create an osmotic imbalance that stimulates the nerve endings. The result is the sharp, transient pain triggered by temperature changes, sweet foods, or even air.
Advanced whitening strips combat this process in three ways. First, many include potassium nitrate, which penetrates the tubules and calms the nerve endings directly. Second, buffering agents keep the gel pH from dropping too low, preventing the acid etching that opens tubules wider. Third, some formulations now incorporate amorphous calcium phosphate or nano-hydroxyapatite, minerals that physically occlude the tubules during treatment.
Pre-Treatment Strategies That Reduce Sensitivity Risk
Start Desensitizing Toothpaste Early
Begin using a toothpaste formulated for sensitive teeth at least one week, and ideally two weeks, before your first whitening session. Look for products containing potassium nitrate or stannous fluoride. These ingredients require consistent use to build up their protective effect. Brush twice daily as usual, but consider also applying a small amount of sensitive toothpaste directly to your teeth with your finger and leaving it for 60 seconds before rinsing.
Avoid Acidic Foods and Beverages Before Treatment
Acidic foods and drinks temporarily soften enamel by demineralizing the surface layer. Applying peroxide to already-weakened enamel amplifies sensitivity dramatically. For 24 hours before each whitening session, skip citrus fruits, sodas, vinegar-based dressings, and sports drinks. This simple dietary adjustment costs nothing and provides meaningful protection.
Consider a Fluoride Rinse
Using an over-the-counter fluoride rinse for a week before whitening strengthens enamel and reduces permeability. Choose a product without alcohol, which can dry out oral tissues and cause irritation during prolonged strip contact.
What to Do When Sensitivity Strikes Mid-Treatment
Even with perfect preparation, some sensitivity can occur. How you respond determines whether you can complete your whitening series comfortably.
Immediate Relief Measures
- Remove the strip immediately if pain becomes sharp or distracting. Do not try to tough it out.
- Rinse with lukewarm water, then with a sensitive-teeth mouthwash if available.
- Apply a small amount of sensitive toothpaste directly to the most affected teeth and leave it for 60 to 90 seconds before rinsing.
- Take a standard dose of over-the-counter anti-inflammatory medication if your doctor has approved that use for you. Ibuprofen can reduce the inflammatory response in the pulp.
Adjusting Your Schedule
Skip at least 24 hours between sessions when sensitivity appears. Some individuals find that alternating days produces the same final shade with far less discomfort. The peroxide effect continues working even after you remove the strip, so you lose very little progress by adding a rest day.
If sensitivity persists despite these measures, switch to a lower-concentration product or consult your dentist about professionally dispensed desensitizing agents. There is no shame in acknowledging that your teeth require a gentler approach.
Nutrition and Lifestyle Considerations During Treatment
The foods and drinks you consume during your whitening series directly affect both your comfort and your results. Enamel becomes temporarily more porous after peroxide exposure, making it more susceptible to staining and acid damage during the treatment period.
The First 48 Hours: Critical Stain Protection Window
Immediately after whitening, the enamel rods are slightly more open than usual. This state, while temporary, means that dark pigments from food and drink can penetrate more deeply than they would under normal conditions. Dental professionals often refer to a “white diet” during active whitening and for two days afterward.
Foods and Beverages to Avoid Completely
- Coffee and black tea (even a single cup can introduce significant staining pigments)
- Red wine and dark grape juice
- Cola and other dark sodas
- Soy sauce, balsamic vinegar, and dark condiments
- Tomato-based sauces, including ketchup and pasta sauce
- Berries, cherries, pomegranates, and their juices
- Curry, turmeric, and deeply colored spices
- Beets and foods containing strong food dyes
- Tobacco products of any kind
Foods and Beverages You Can Enjoy Freely
- Plain water (still or sparkling, though still is gentler)
- Milk and plain yogurt
- White rice, plain pasta, and potatoes without dark sauces
- Chicken, turkey, and white fish
- Cauliflower, parsnips, and peeled apples
- Bananas and pears
- Clear or light-colored broths
- White cheese and cottage cheese
This restricted period lasts only a few days, but adhering to it closely protects the investment you are making in your smile.
Hydration and Its Role in Whitening Success
Well-hydrated enamel resists sensitivity better than dehydrated enamel. Drink plenty of plain water throughout the day, especially in the hours following strip removal. Water helps rehydrate the enamel and rinse away any residual peroxide that might linger on the tooth surface.
Avoid using a straw for cold water immediately after whitening if cold sensitivity is present. Room-temperature water is your friend during treatment weeks.
Supplements and Habits That Support Enamel Health
While no supplement replaces good oral hygiene, certain nutrients support the remineralization process that keeps enamel strong.
- Calcium and phosphate: Found in dairy products, these minerals are the literal building blocks of enamel repair.
- Vitamin D: Helps the body absorb calcium effectively. Many people benefit from supplementation, especially during winter months.
- Vitamin K2: Emerging research suggests this vitamin helps direct calcium into bones and teeth rather than soft tissues.
Chewing sugar-free gum containing xylitol between whitening sessions stimulates saliva flow, which naturally helps remineralize enamel and maintain a neutral oral pH.
Comparing Advanced Whitening Strips: What to Look For
The marketplace contains dozens of products making similar claims. Breaking down the variables helps you choose wisely.
Ingredient Analysis: What Each Component Actually Does
| Ingredient | Function | Typical Concentration | Notes |
|---|---|---|---|
| Hydrogen Peroxide | Primary whitening agent | 10%–15% | Works faster than carbamide peroxide; more likely to cause sensitivity |
| Carbamide Peroxide | Slower-releasing whitening agent | 15%–35% (breaks down to about one-third H2O2) | Gentler; suitable for sensitive users |
| Potassium Nitrate | Desensitizing agent | 3%–5% | Requires consistent use for full effect |
| Sodium Fluoride | Remineralization support | 0.05%–0.15% | Strengthens enamel; standard in many toothpastes |
| Amorphous Calcium Phosphate | Tubule occlusion and remineralization | Varies | Relatively newer addition; promising clinical support |
| Sodium Hexametaphosphate | Surface stain removal | Varies | Helps break down extrinsic stains during treatment |
| PVP (Polyvinylpyrrolidone) | Adhesive and gel matrix | Included in most strip formulations | Generally recognized as safe; helps gel stay in place |
| Carbomer | Thickening agent | Small percentage | Creates the gel consistency that holds peroxide in place |
Strip Material and Design Considerations
The physical strip itself matters more than most consumers realize. Thin, flexible materials conform better to tooth contours. A moisture-resistant outer layer prevents saliva from diluting the gel. Tapered edges reduce the risk of gum irritation by creating a smoother transition from strip to soft tissue.
Comparison of Strip Design Features by Category
| Design Element | Budget Strips | Mid-Range Strips | Advanced Strips |
|---|---|---|---|
| Material Thickness | 0.1–0.2 mm, rigid | 0.08–0.12 mm, semi-flexible | 0.05–0.08 mm, highly flexible |
| Adhesive Layer | Single, uniform | Dual, with edge-sealing | Multi-layer with moisture-blocking outer coat |
| Upper/Lower Differentiation | None | Basic | Anatomically shaped per arch |
| Gum Protection Design | None | Slight edge curve | Contoured edges with gum guard technology |
| Pack Size for Full Treatment | 14–20 strips | 14–28 strips | 14–28 strips, often with bonus touch-up strips |
Reading Reviews Critically and Spotting Red Flags
Online reviews provide valuable insight but require careful interpretation. Look for reviewers who mention the specific concerns that matter to you, such as sensitivity levels, fit on crooked teeth, or results on tetracycline stains. Disregard reviews that sound overly promotional without specific detail, as well as those that are excessively negative without explaining what went wrong.
Legitimate complaints often center on manufacturing inconsistencies, such as strips that arrived dried out or gel that had shifted during shipping. Products with numerous complaints about chemical burns or extreme pain deserve caution. No whitening product should cause tissue damage when used correctly.
Daily Routines and Hygiene Practices During Whitening Treatment
Integrating whitening strips into your existing oral care routine requires minor adjustments. These changes protect your progress and keep your mouth healthy.
Morning vs. Evening Application: Which Timing Works Best
Both timings have advocates, but the evidence slightly favors evening application for most people.
Advantages of Evening Application
- You have more control over what you consume afterward. Going to sleep eliminates the temptation of coffee or snacks that might stain vulnerable enamel.
- Saliva production decreases during sleep, which means less dilution of any residual peroxide remaining in the enamel pores.
- Sensitivity that does occur may be less bothersome when you are asleep than during daytime activities.
Advantages of Morning Application
- Some people find it easier to stick to a morning routine.
- If you use an LED accelerator device, natural morning alertness makes the session more convenient.
Choose the timing you can maintain consistently. Consistency matters more than the specific hour.
Brushing, Flossing, and Mouthwash Protocols
During Active Treatment Weeks
- Brush with desensitizing toothpaste twice daily.
- Floss once daily, ideally in the evening.
- Avoid whitening toothpastes entirely during treatment. Combining peroxide strips with abrasive whitening toothpaste dramatically increases sensitivity.
- Skip alcohol-based mouthwashes. They dry out oral tissues and can increase discomfort. If you want to use a mouthwash, choose an alcohol-free, fluoride-containing product.
After Completing Treatment
- Wait one week before resuming any abrasive whitening toothpaste.
- Continue desensitizing toothpaste for at least two more weeks to support enamel recovery.
- Resume normal mouthwash use.
Dealing with Common Application Challenges
Uneven Strip Contact on Crooked Teeth
If your teeth overlap or angle inward, the strip may not make full contact with every surface. After placing the strip, use a clean fingertip to press the material into the recessed areas. Small, vertical cuts in the strip between teeth can allow it to fold and conform better. This technique requires care to avoid cutting the strip entirely.
Excess Saliva During Wear
Some people salivate heavily when foreign objects sit in their mouths. Drying your teeth thoroughly before application helps. Tilting your head slightly forward allows saliva to pool at the front of your mouth rather than seeping under the strips. A folded paper towel tucked between your lower lip and gums can absorb excess moisture, but this feels awkward and takes practice.
Gum Whitening or Irritation
If gel consistently contacts your gums, you may notice temporary whitening (blanching) or mild irritation. This reaction is usually harmless and resolves within hours. To prevent it, place the strip slightly below the gumline for uppers, or use a cotton swab to apply a thin layer of petroleum jelly to your gums before strip placement. The jelly creates a protective barrier that resists the gel.
Long-Term Maintenance and Touch-Up Strategies
Finishing a two-week whitening series feels satisfying, but the work is not over. Maintaining your results requires a plan. Without one, stains gradually return as you resume normal eating and drinking habits.
Understanding Shade Stabilization and Color Rebound
Immediately after your final treatment, your teeth may appear slightly whiter than their true stabilized shade. This temporary dehydration effect fades over the next few days as your enamel rehydrates fully. Do not panic if your teeth seem slightly less bright on day three post-treatment. That is normal and expected.
The true stabilized shade appears about one week after your final session. That shade is the real result you are maintaining. Some color rebound over the following months is also normal. The rate of rebound depends on your diet, oral hygiene, and the original depth of your staining.
Creating a Maintenance Schedule That Works
Monthly Touch-Up Protocol
Using the same advanced strips, apply a single session once per month. This frequency counteracts gradual surface staining without subjecting your teeth to the cumulative sensitivity of daily treatment. Mark it on your calendar. Consistency prevents the need for another full treatment series.
Quarterly Deep Maintenance
Every three months, use strips for three consecutive days. This mini-series addresses any staining that has accumulated despite monthly maintenance. It is particularly useful if you enjoy coffee, tea, or red wine regularly.
Annual Full Assessment
Once per year, evaluate your smile honestly. Compare it to the shade you achieved at the end of your initial treatment. If you notice significant darkening, consider another full treatment series. Some people benefit from an annual one-week refresh.
Complementary Products That Preserve Whiteness
- Whitening toothpaste with gentle abrasives: Use no more than twice weekly to polish surface stains without damaging enamel.
- Whitening mouthwash with low-concentration peroxide: Daily use helps maintain shade between strip sessions.
- At-home enamel strengthening treatments: Products containing nano-hydroxyapatite or CPP-ACP (casein phosphopeptide-amorphous calcium phosphate) support remineralization.
- Tongue cleaning: Bacteria and pigment particles accumulate on the tongue and can transfer to teeth. Daily tongue scraping is a small habit that pays aesthetic dividends.
Special Considerations for Different User Groups
Whitening strips are not one-size-fits-all. Specific life circumstances and dental conditions require tailored approaches.
Whitening with Dental Restorations
Fillings, crowns, veneers, and bonding material do not whiten. Peroxide has no effect on porcelain, composite resin, or metal. If you have visible restorations on front teeth, understand that those restorations will remain their original shade while your natural tooth structure around them lightens.
Mismatch Scenarios and Solutions
- Small fillings on front teeth: The difference may be subtle enough to live with, or your dentist can replace them with lighter shades after whitening.
- Large fillings or crowns on front teeth: Consider whitening first to your desired shade, then having the restorations replaced to match.
- Multiple restorations visible when you smile: Professional in-office whitening with custom tray maintenance often makes more sense than strips, since your dentist can coordinate shade matching throughout the process.
Whitening While Pregnant or Nursing
The safety data on whitening during pregnancy and lactation is limited. Most dental professionals recommend postponing elective cosmetic treatments until after delivery and the nursing period. The peroxide in whitening strips acts locally and in very small quantities, but no researcher has conducted controlled studies on systemic absorption during pregnancy. Out of an abundance of caution, waiting is the standard recommendation.
If you choose to proceed, discuss the decision with both your dentist and your obstetrician. Use the lowest available peroxide concentration and minimize the treatment frequency.
Whitening for Older Adults
Teeth darken naturally with age as enamel thins and the yellowish dentin beneath shows through more prominently. Older adults can certainly benefit from advanced whitening strips, but they should be aware of a few age-related factors.
Receding gums expose more root surface. Root surfaces lack protective enamel and are covered only by cementum, which is much thinner. Peroxide applied to exposed roots causes rapid, intense sensitivity. Older adults with gum recession should position strips carefully to avoid root contact, or consider custom-tray whitening through their dentist.
Years of acid exposure and wear may have thinned enamel significantly. If enamel is extremely thin, the risk of sensitivity and damage increases. A dentist can measure enamel thickness and advise on whitening suitability.
Understanding the Limitations and Managing Expectations
Honest information builds trust. Whitening strips are effective tools, but they are not magic. Understanding what they cannot do helps you avoid disappointment and make informed decisions.
Realistic Shade Improvement Expectations
Most users with yellowish stains can expect a shade improvement of two to eight shades on a standard dental shade guide over a full two-week treatment. Results at the upper end of that range typically occur in younger individuals with healthy enamel and primarily extrinsic staining. Older adults, those with intrinsic staining, and people with naturally darker tooth shades generally fall toward the lower end.
Factors That Limit Results
- Deep intrinsic staining from antibiotics like tetracycline (often appears as gray or brown banding)
- Fluorosis stains (white or brown mottling from excessive fluoride during childhood)
- Enamel hypoplasia (developmental defects in enamel formation)
- Extremely dark natural dentin shade (genetic, not environmental)
Advanced strips can sometimes improve these conditions, but complete resolution is unlikely. Dentists can offer alternatives like microabrasion, resin infiltration, or porcelain veneers for cases that strips cannot address.
What Strips Cannot Do
- Change the color of restorations: Crowns, fillings, veneers, and bonding remain their original shade.
- Whiten from the inside out on non-vital teeth: A tooth that has had root canal treatment and darkened internally requires internal bleaching, not surface strips.
- Straighten teeth: Whitening makes teeth brighter, not straighter. Crooked teeth will still be crooked after whitening.
- Fix structural damage: Chips, cracks, and worn edges remain unchanged.
- Eliminate the need for professional cleanings: Strips do not remove tartar or address gum disease.
The Emotional Side of Whitening
Changing your smile can be surprisingly emotional. Some people feel a boost in confidence that affects their social interactions and professional demeanor positively. Others may feel self-conscious during treatment or disappointed if results do not match their expectations. Both reactions are valid. Give yourself grace during the process. A brighter smile is a wonderful thing, but it does not define your worth.
Safety, Side Effects, and When to Call a Professional
The overwhelming majority of whitening strip users experience no serious complications. Mild sensitivity and minor gum irritation are common and self-limiting. Recognizing the line between normal side effects and problems requiring professional attention keeps you safe.
Normal vs. Concerning Side Effects
| Symptom | Normal? | Management |
|---|---|---|
| Mild, transient tooth sensitivity | Yes, very common | Desensitizing toothpaste; skip a day between sessions |
| Temporary gum blanching (white spots) | Yes, harmless | Resolves within hours; protect gums with petroleum jelly |
| Slightly uneven results initially | Yes, normalizes with full treatment | Complete the series; spots usually even out |
| Persistent, throbbing pain hours after removal | No | Stop treatment; consult your dentist |
| Gum bleeding or tissue sloughing | No | Discontinue immediately; seek professional evaluation |
| Pain that wakes you from sleep | No | Emergency dental consultation warranted |
| Visible enamel changes (roughness, transparency) | No | Stop all whitening; professional assessment needed |
Allergic Reactions and Chemical Burns
True peroxide allergy is rare but possible. Signs include swelling, redness, hives, or difficulty breathing. Remove the strips immediately and seek emergency care if you experience these symptoms. A less severe localized reaction, such as burning or itching confined to the gums, may indicate sensitivity to the adhesive rather than the peroxide. Note the brand and ingredients and discuss alternative products with your dentist.
Chemical burns from improperly placed strips typically affect the gums and appear as white patches that peel within a day or two. While uncomfortable, these burns usually heal without intervention. Prevent them by careful placement and the petroleum jelly barrier technique described earlier.
Drug Interactions and Medical Conditions to Disclose
Peroxide-based whitening products can interact with certain photosensitizing medications, making oral tissues more susceptible to irritation during treatment. Common photosensitizing drugs include some antibiotics, diuretics, and non-steroidal anti-inflammatory medications. If you take prescription medications regularly, ask your dentist or pharmacist about potential interactions before starting whitening treatment.
Individuals undergoing chemotherapy or radiation to the head and neck should not use whitening products without explicit approval from their oncologist. Oral tissues may be compromised and more vulnerable to damage.
Building Your Personalized Whitening Plan
Generic advice serves as a starting point. The best results come from adapting the general principles to your unique circumstances.
Self-Assessment Questionnaire
Answer these questions honestly to guide your approach.
- What is your primary whitening goal? (subtle brightening vs. dramatic transformation)
- How much time can you realistically dedicate to daily treatment?
- Do you have a history of sensitive teeth? How severe?
- When was your last dental checkup? Any outstanding issues?
- What staining habits do you have? (coffee, tea, smoking, etc.)
- Do you have visible restorations on front teeth?
- What is your budget for initial treatment and ongoing maintenance?
Sample Personalized Plans
The Cautious Beginner
- Start with desensitizing toothpaste for two full weeks.
- Choose an advanced strip with built-in desensitizing agents at a lower peroxide concentration (10%).
- Treat every other day for two weeks.
- Strictly follow the white diet.
- Evaluate after one week of rest.
The Experienced User Seeking Maximum Brightness
- Standard one-week desensitizing prep.
- Use maximum-strength advanced strips (14%–15%) daily for two weeks.
- Combine with LED accelerator if desired.
- Full white diet compliance.
- Monthly touch-ups scheduled for the next year.
The Busy Professional with Limited Time
- Choose advanced 15-minute strips.
- Apply in the evening after dinner.
- Extend treatment period to three weeks if needed to compensate for occasional missed days.
- Prioritize stain avoidance over perfection.
- Quarterly three-day mini-refreshes.
Product Selection and Where to Purchase
The market offers whitening strips through dental offices, drugstores, online retailers, and direct-to-consumer brands. Each channel has advantages and drawbacks.
Dental Office vs. Over-the-Counter vs. Direct-to-Consumer
| Source | Pros | Cons | Best For |
|---|---|---|---|
| Dental Office | Professional guidance; higher concentrations; custom-fit trays available | Highest cost; requires appointment | Complex cases; users with significant sensitivity |
| Drugstore (OTC) | Convenient; immediate availability; established brands | Limited ingredient transparency; generic fit | Users wanting a trusted, accessible option |
| Direct-to-Consumer Online | Often includes desensitizing extras; detailed ingredient info; subscription convenience | Cannot see product before purchase; shipping time | Users comfortable researching brands online |
What to Look For on the Label
Legitimate advanced whitening strips disclose their active ingredient concentration clearly. Vague claims like “professional strength” without a specific percentage should raise skepticism. Look for the percentage of hydrogen peroxide or carbamide peroxide listed on the packaging or the brand’s website.
Check for safety certifications or seals from dental associations, though note that these seals indicate the product has met certain standards, not that the association endorses it above all others. Look for clear usage instructions, contraindication warnings, and a customer service contact.
Environmental and Ethical Considerations
As consumers become more environmentally conscious, the waste generated by single-use whitening strips deserves attention. Each treatment session produces plastic backing, strip material, and outer packaging that typically ends up in landfills.
Minimizing Environmental Impact
Some brands now use recyclable packaging or offer take-back programs. The strips themselves remain difficult to recycle due to the combination of materials and peroxide residue. Reduce your environmental footprint by purchasing only what you need, using strips to completion rather than abandoning half-used kits, and choosing brands that demonstrate environmental responsibility through their packaging choices.
Cruelty-Free and Vegan Options
Peroxide and other common whitening ingredients are synthetic and do not involve animal products in their core chemistry. However, some brands test finished products on animals or use animal-derived components in their adhesive formulations. If these issues matter to you, look for brands that explicitly state their cruelty-free status and vegan formulation. Third-party certifications from organizations like Leaping Bunny or PETA’s Beauty Without Bunnies program add credibility to these claims.
Common Myths About Teeth Whitening Strips
Misinformation spreads easily online. Separating fact from fiction helps you make decisions based on evidence rather than marketing hype or fear-mongering.
Myth: Whitening strips permanently damage enamel.
When used as directed, studies consistently show no permanent enamel damage from peroxide-based whitening strips. The temporary softening that occurs reverses through natural remineralization. Misuse, such as wearing strips overnight when not designed for that purpose, can cause harm.
Myth: Higher peroxide concentration always means better results.
Concentration and contact time work together. A 10% gel with perfect contact and full wear time often outperforms a 15% gel applied poorly and removed early. Technique consistency matters more than chasing the highest percentage.
Myth: You can whiten your teeth with lemon juice and baking soda.
This dangerous home remedy exposes enamel to extreme acidity and abrasion simultaneously. The “whitening” effect comes from enamel erosion, which is permanent and damaging. Never attempt this.
Myth: Whitening strips work on all types of tooth discoloration equally.
Yellowish extrinsic stains respond best. Grayish, bluish, or brownish intrinsic stains show less improvement. Set realistic expectations based on your specific discoloration pattern.
Myth: Once whitened, your teeth stay that color forever.
Teeth naturally accumulate new stains over time through diet and aging. Maintenance is part of the whitening commitment, just like maintaining a healthy weight or clear skin.
Tracking Your Progress: A Simple Documentation System
Keeping a simple log during your whitening journey serves multiple purposes. It helps you identify patterns in sensitivity, ensures you stay on schedule, and provides an objective record of your results.
What to Record Each Day
- Date and treatment session number
- Wear time completed
- Any sensitivity level (rate 1–10, with notes on triggers)
- Adherence to white diet (yes/no)
- Shade guide comparison (if you purchased an inexpensive guide)
Using Photos Effectively
Take a before photo in consistent lighting before your first treatment. Use natural daylight or the same artificial light source each time. Include a plain white piece of paper in the frame as a reference point for true color comparison. Take a progress photo after every five treatments and a final after photo one week after your last session. The camera often captures changes your eyes miss day to day.
The Dentist’s Perspective: Quotes and Insights
Dental professionals see the outcomes, both good and bad, of at-home whitening. Their insights carry weight.
“I can always tell when a patient has used advanced strips correctly. The results are even, the gum tissue looks healthy, and they know exactly what shade they achieved. The problems I see come from patients who ignored the instructions, used strips every day for a month straight, and then came in with teeth so sensitive they couldn’t drink room-temperature water.” — Dr. Michael Okonkwo, General and Cosmetic Dentistry
“The biggest mistake I see is people whitening over decay. If you have even a small cavity, that peroxide is going straight to the nerve. Get a checkup first. It’s not about gatekeeping whitening. It’s about keeping you out of pain.” — Dr. Sarah Lindstrom, DMD
Conclusion
Advanced teeth whitening strips offer a legitimate, effective path to a brighter smile when used with knowledge and respect for the process. Success depends on honest self-assessment, careful preparation, precise application, and a realistic maintenance plan. This guide has equipped you with the science, the step-by-step techniques, and the troubleshooting strategies to make informed choices. You now understand how to protect your enamel, manage sensitivity, and preserve your results over the long term. A confident smile is achievable—proceed thoughtfully, and enjoy the transformation.
Frequently Asked Questions
Can I use advanced whitening strips on my bottom teeth only?
Yes. If your lower teeth are the only ones that concern you, treating them alone is perfectly acceptable. Just be aware that your upper teeth will not change shade, so the difference between arches may become more noticeable.
How long should I wait after getting a filling before whitening?
Dental professionals generally recommend waiting at least two weeks after any restoration placement before starting whitening treatment. This allows the bond to fully cure and any post-procedure sensitivity to resolve.
Will whitening strips work if I have braces?
No. Strips cannot make even contact with teeth covered by brackets. Whitening around braces also creates a two-tone effect when the brackets are removed. Wait until orthodontic treatment is complete.
Can I cut the strips to fit smaller teeth?
Yes, as long as you cut them before removing the backing. Use clean scissors and avoid touching the gel surface. Trimming helps customize fit for people with smaller dental arches.
Is it safe to swallow the gel residue?
Small amounts of peroxide gel residue are not harmful when swallowed occasionally, but you should minimize ingestion. Rinse thoroughly after removal and spit out the rinse water. If you accidentally swallow a significant amount, contact a poison control center for guidance.
Additional Resource:
For more information on oral health and whitening safety, visit the American Dental Association’s consumer resource page at ADA.org/MouthHealthy. This site offers dentist-reviewed information on a wide range of dental topics, including cosmetic whitening options.