Dental Front Office Design: Creating a Welcoming First Impression
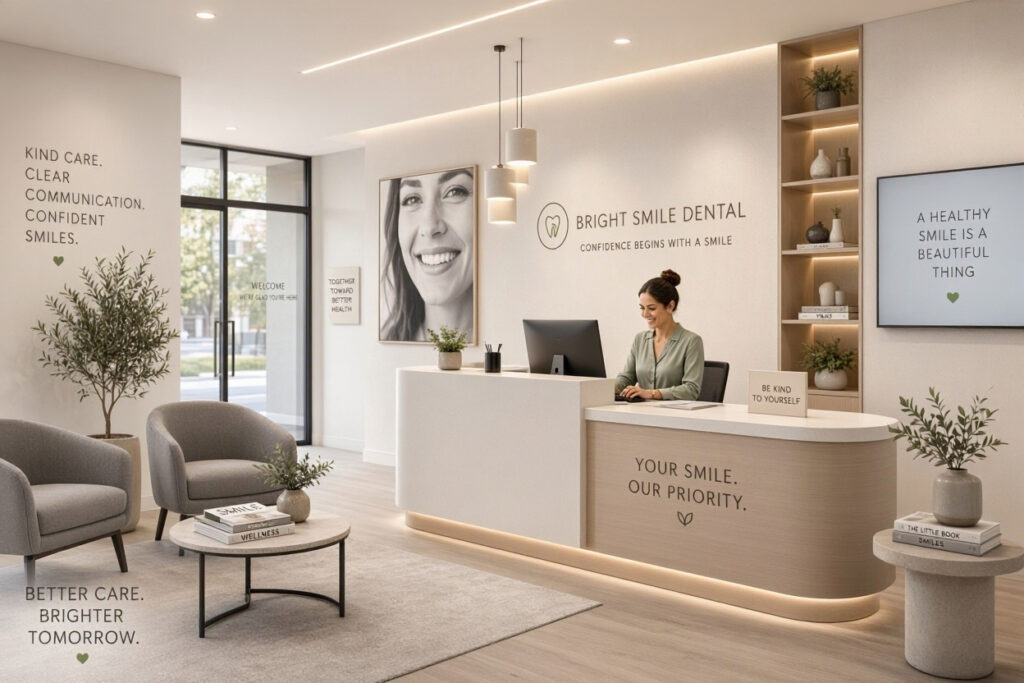
The front office is the first thing patients see when they walk in. It is also the last thing they see on their way out. That makes it one of the most important spaces in your practice. A well-designed dental front office sets the tone for the entire visit. It communicates professionalism, warmth, and efficiency before a single word is spoken. This guide covers everything you need to know about designing a front office that works for patients and staff alike.
Why Front Office Design Matters
The front office is your practice’s handshake. It greets patients, answers questions, and manages the flow of the day. If the space feels cluttered, chaotic, or cold, patients notice. If it feels organized, warm, and welcoming, they relax.
Front office design also affects staff performance. A poorly planned workspace creates bottlenecks, stress, and errors. A well-planned one supports focus, efficiency, and good customer service.
“The front desk is the nerve center of the practice. Design it for the people who work there, and patients will feel the difference.” — Dental Office Design Consultant
Key Goals of Front Office Design
- Welcome patients: Create a warm, professional first impression.
- Support staff: Provide an efficient, comfortable workspace.
- Manage flow: Keep patient check-in and check-out smooth.
- Protect privacy: Ensure conversations and screens stay confidential.
- Reinforce brand: Reflect your practice identity through colors, materials, and signage.
Layout and Flow
The layout of your front office determines how smoothly patients move through your practice. A good layout separates patient areas from staff work areas while keeping communication easy.
Key Zones
1. Reception Desk
The centerpiece. It should be visible immediately upon entry. The desk needs space for computers, phones, card readers, and paperwork. It also needs a clear sightline to the waiting room and the entrance.
2. Patient Check-In Area
A standing-height counter or kiosk where patients sign in. Keep it separate from the main desk to avoid congestion.
3. Check-Out Area
A dedicated spot for scheduling follow-ups and taking payments. Ideally separate from check-in to prevent lines from crossing.
4. Staff Work Area
Behind the desk, staff need space for computers, files, phones, and private conversations. This area should be screened from patient view.
5. Waiting Area Transition
The space between the front desk and the waiting room should feel open and inviting. Avoid barriers that make patients feel separated from staff.
Layout Comparison Table
| Layout Style | Best For | Pros | Cons |
|---|---|---|---|
| Open desk | Modern practices | Welcoming, transparent | Less privacy for staff |
| Semi-enclosed desk | Most practices | Balance of access and privacy | Requires careful design |
| Fully enclosed desk | High-privacy practices | Maximum confidentiality | Can feel unwelcoming |
| Split check-in/check-out | High-volume practices | Reduces congestion | Needs more space |
Important Note: Check local accessibility codes. Counters should have a lowered section for wheelchair users, and pathways must be wide enough for mobility devices.
Reception Desk Design
The reception desk is the focal point of your front office. It deserves careful attention.
Size and Shape
- Straight desk: Classic and space-efficient. Works in most offices.
- L-shaped desk: Provides more workspace and allows staff to face different directions.
- Curved desk: Softens the space and feels more welcoming.
- Standing-height sections: Allow patients to sign in without leaning down.
Materials
- Solid surface (Corian, quartz): Durable, easy to clean, professional look.
- Laminate: Affordable and available in many finishes.
- Wood: Warm and inviting, but requires more maintenance.
- Glass: Modern and open, but shows fingerprints and clutter.
Desk Height Considerations
| Height | Use | Notes |
|---|---|---|
| 28–30 inches | Seated work | Standard desk height for staff |
| 36–39 inches | Standing transaction | Good for patient interactions |
| 42–48 inches | Privacy screen | Blocks view of screens and paperwork |
Tip: Include a mix of heights. Staff can sit for focused work and stand to greet patients.
Privacy and Confidentiality
Dental front offices handle sensitive information. Patients discuss appointments, insurance, and health details at the desk. Privacy must be built into the design.
Design Strategies for Privacy
- Screen height: A counter or partition at least 42 inches high blocks casual view of screens.
- Sound control: Use acoustic panels or soft materials to absorb sound.
- White noise: A small speaker or water feature masks conversations.
- Separate huddle space: A small private area for sensitive conversations.
- Screen placement: Angle monitors away from patient view.
Important Note: HIPAA requires reasonable safeguards for patient information. A front desk that exposes screens or allows overheard conversations can create compliance risks.
Color and Materials
The front office sets the color tone for the entire practice. Choose colors that feel welcoming and professional.
Color Suggestions
- Warm neutrals: Beige, soft gray, warm white. Safe and calming.
- Soft blues and greens: Trustworthy and soothing.
- Brand colors: Use as accents on one wall or in signage.
- Wood tones: Add warmth and natural texture.
Materials That Work
| Material | Best Use | Maintenance |
|---|---|---|
| Quartz countertop | Reception desk | Easy to clean |
| Laminate cabinetry | Storage | Wipe with damp cloth |
| Vinyl flooring | High-traffic areas | Sweep and mop |
| Glass partitions | Privacy screens | Fingerprint-prone |
| Acoustic panels | Sound control | Dust regularly |
Lighting
Good lighting in the front office serves two purposes: it helps staff work comfortably and makes patients feel welcome.
Lighting Layers
- Ambient: Overhead fixtures for general brightness.
- Task: Under-cabinet lights or desk lamps for paperwork and computer work.
- Accent: Wall sconces or picture lights for warmth and visual interest.
- Natural: Windows if available. Use sheer blinds to control glare.
Lighting Tips
- Avoid harsh fluorescent lights directly above the desk.
- Use warm bulbs (2700K–3000K) in patient-facing areas.
- Add dimmers to adjust brightness throughout the day.
- Light the desk surface evenly to reduce eye strain.
Technology Integration
Modern front offices rely on technology. Design the space to accommodate it cleanly.
Must-Have Tech Features
- Cable management: Hide wires behind desks and in cable trays.
- Multiple monitors: Staff often need two screens. Plan desk space accordingly.
- Card readers: Integrated into the desk for easy patient payment.
- Tablets for check-in: Mounted or handheld for patient forms.
- Phone system: Headsets and a clear phone zone to reduce noise.
Tech Organization Tips
- Label cables for easy troubleshooting.
- Use cable sleeves to keep wires tidy.
- Mount monitors on arms to free desk space.
- Plan for future upgrades with extra outlets and data ports.
Important Note: Keep patient-facing screens visible only to staff. Turn monitors away from the waiting room or use privacy filters.
Storage and Organization
Clutter kills efficiency. The front office needs smart storage for files, supplies, and personal items.
Storage Solutions
- Under-desk drawers: For personal items and frequently used supplies.
- Overhead cabinets: For files and less-used items.
- Locking cabinets: For sensitive documents and patient records.
- Mail slots: For organizing incoming and outgoing mail.
- Supply closet nearby: Keeps bulk items out of the main workspace.
Organization Tips
- Use drawer dividers to keep supplies sorted.
- Label everything so anyone can find what they need.
- Clear the desk daily to prevent pileups.
- Go paperless where possible to reduce file storage needs.
Accessibility and Comfort
Every patient should feel welcome and able to use your front office comfortably.
Accessibility Features
- Lowered counter section at 36 inches or less for wheelchair users.
- Clear pathways at least 36 inches wide.
- Automatic door openers if possible.
- Seating in the check-in area for patients who cannot stand for long.
- Clear signage with large, readable text.
Staff Comfort
- Ergonomic chairs with adjustable height and lumbar support.
- Anti-fatigue mats for staff who stand often.
- Footrests for seated staff.
- Temperature control that considers the front desk area.
Budgeting for Front Office Design
Costs vary widely based on the scope of the project. Here is a rough guide.
| Item | Typical Cost | Notes |
|---|---|---|
| Reception desk (custom) | $2,000 – $8,000 | Size and materials vary |
| Reception desk (stock) | $800 – $2,500 | Limited customization |
| Flooring (per sq ft) | $3 – $12 | Material-dependent |
| Lighting fixtures | $500 – $3,000 | Layered lighting adds up |
| Paint and finishes | $500 – $2,000 | Includes labor |
| Technology and wiring | $1,000 – $5,000 | Cable management, outlets |
| Signage | $200 – $1,500 | Interior branding |
Note: Prioritize the reception desk and lighting. These have the biggest impact on patient perception and staff comfort.
Common Mistakes to Avoid
- Too much clutter: Papers, supplies, and personal items visible to patients.
- Poor privacy: Screens visible or conversations overheard.
- Inadequate storage: Everything piles up on the desk.
- Harsh lighting: Fluorescents that make everyone look tired.
- Ignoring accessibility: Counters too high or pathways too narrow.
- No separation of check-in and check-out: Creates congestion and confusion.
Frequently Asked Questions
What is the ideal height for a dental front desk?
Use a mix. A seated work surface at 28–30 inches for staff, and a standing transaction counter at 36–42 inches for patients.
How can I add privacy to my front office?
Raise the counter height, add acoustic panels, angle screens away from patients, and use a white noise machine.
What colors work best for a dental front office?
Warm neutrals, soft blues, and greens create a welcoming feel. Use brand colors as accents.
How much does a front office redesign cost?
A full redesign ranges from $5,000 to $25,000 depending on size, materials, and scope. Phased updates cost less.
Do I need a separate check-in and check-out area?
For high-volume practices, yes. It reduces congestion and improves flow. Smaller practices can combine them with careful planning.
Additional Resource
For healthcare design standards and accessibility guidelines, visit the Americans with Disabilities Act (ADA) website for compliance resources.
Conclusion
Dental front office design shapes the patient experience from the first hello to the final goodbye. Plan the layout for smooth flow, build in privacy, choose warm colors and materials, and invest in staff comfort. A thoughtful front office welcomes patients and supports your team every day.