Dental Office Design Floor Plans: A Practical Guide to Planning Your Space
A floor plan is the blueprint of your practice. It decides how patients move, how staff work, and how your space feels. Get it right, and everything flows. Get it wrong, and you live with the consequences every day. This guide explains how to plan dental office design floor plans that support efficiency, comfort, and growth.
Why Floor Plans Matter
A dental office is a complex space. It must handle patient flow, staff workflow, equipment needs, privacy, and safety. A good floor plan addresses all of these at once. A bad one creates bottlenecks, wasted space, and daily frustration.
Floor plans also affect your bottom line. Efficient layouts allow you to see more patients without adding square footage. Poor layouts waste money on renovations that do not solve the real problem.
“The floor plan is the most important decision in your office design. Everything else follows from it.” — Dental Office Design Consultant
Key Goals of a Good Floor Plan
- Patient flow: Smooth movement from entry to treatment to exit.
- Staff efficiency: Short travel distances and clear work zones.
- Privacy: Confidential conversations and treatments stay private.
- Safety: Clear exits, accessible pathways, and proper equipment placement.
- Flexibility: Room for future growth or service changes.
Understanding the Core Zones
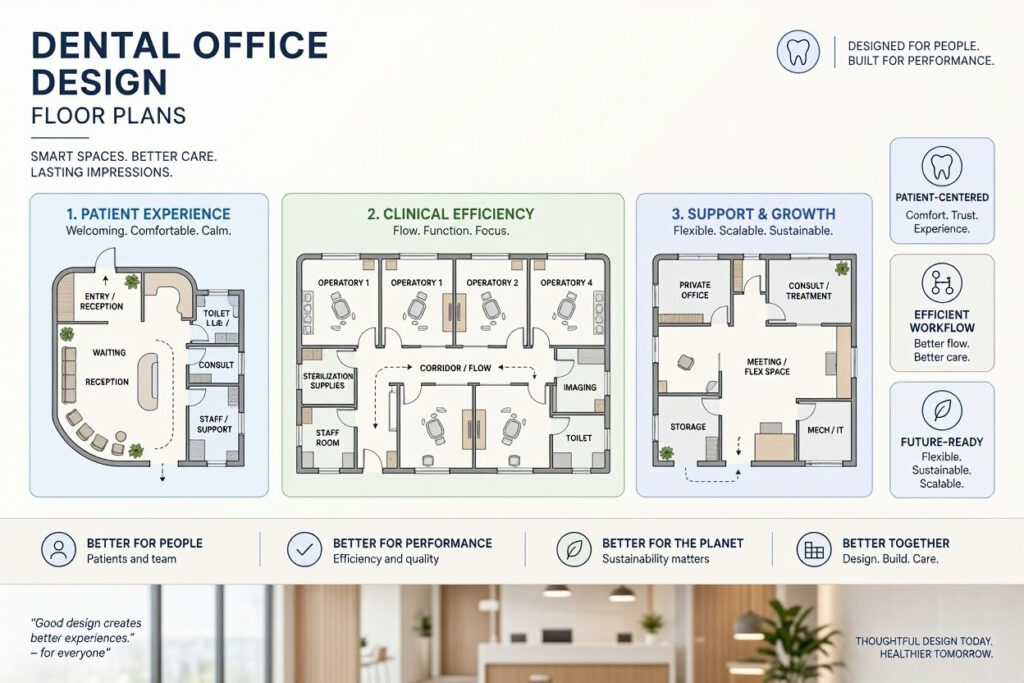
Every dental office has five core zones. A good floor plan separates them while keeping them connected.
1. Public Zone
The area patients see first and use most. It includes:
- Entrance and vestibule
- Reception and front desk
- Waiting room
- Restrooms for patients
This zone should feel welcoming and calm. It should be easy to find and navigate.
2. Clinical Zone
Where treatment happens. It includes:
- Treatment rooms (operatories)
- X-ray and imaging areas
- Sterilization room
- Laboratory
This zone needs privacy, efficiency, and easy access to supplies.
3. Staff Zone
Where your team works and rests. It includes:
- Break room
- Staff restroom
- Private office or admin area
- Staff lockers
This zone should be separate from patient areas but close enough for quick access.
4. Support Zone
The behind-the-scenes spaces that keep the practice running. It includes:
- Supply storage
- Mechanical and electrical rooms
- IT and server closet
- Waste management area
5. Transition Zone
The spaces that connect the other zones. It includes:
- Hallways
- Doorways
- Corridors
Good transition zones prevent bottlenecks and keep patient and staff traffic separate.
Comparison Table: Zone Priorities
| Zone | Priority | Key Consideration |
|---|---|---|
| Public | Welcoming, clear | First impression, accessibility |
| Clinical | Private, efficient | Equipment needs, infection control |
| Staff | Comfortable, separate | Morale, breaks, privacy |
| Support | Functional, hidden | Storage, maintenance access |
| Transition | Smooth, wide | Flow, safety, accessibility |
Patient Flow vs. Staff Flow
Patients and staff move through the office differently. A good floor plan keeps these paths separate where possible.
Patient Flow
The ideal patient journey:
- Entrance: Clear, welcoming, easy to find.
- Reception: Check in, wait comfortably.
- Treatment room: Escorted by staff, private path.
- Check-out: Pay and schedule next visit.
- Exit: Clear path out, no confusion.
Staff Flow
Staff move constantly between treatment rooms, sterilization, supplies, and the front desk. Their paths should be short and unobstructed.
Designing for Separation
- Separate hallways for staff and patients where possible.
- Staff entrance separate from the patient entrance.
- Back-of-house corridor connecting sterilization, lab, and treatment rooms.
- Front desk placement that allows staff to see patients without blocking flow.
Important Note: In small offices, full separation is not always possible. In those cases, use clear signage and designated paths to reduce crossing traffic.
Treatment Room Planning
Treatment rooms (operatories) are the heart of your practice. Their size, number, and layout directly affect your capacity.
Minimum Size Guidelines
| Operatory Type | Minimum Size | Recommended Size |
|---|---|---|
| Standard hygiene | 100 sq ft | 120 sq ft |
| General dentistry | 120 sq ft | 140 sq ft |
| Surgical/specialty | 150 sq ft | 180+ sq ft |
| Pediatric | 120 sq ft | 150 sq ft |
Operatory Layout Tips
- Chair position: Place the chair so the patient faces away from the door for privacy.
- Equipment access: Ensure the delivery system, light, and suction are within easy reach.
- Cabinetry: Store frequently used items within arm’s reach.
- Sink placement: Near the entrance for easy handwashing.
- X-ray access: Place rooms near imaging areas to reduce patient travel.
How Many Operatories Do You Need?
A simple formula: one operatory per dentist, plus one per hygienist, plus one flexible room for overflow or special procedures.
| Practice Type | Suggested Operatories |
|---|---|
| Solo dentist, part-time hygienist | 2–3 |
| Solo dentist, full-time hygienist | 3–4 |
| Two dentists, two hygienists | 5–6 |
| Growing practice | Plan for 1–2 extra rooms |
Tip: Build extra shell space if your budget allows. It costs less to finish a room later than to expand the building.
Sterilization and Lab Placement
Sterilization is the engine room of a dental practice. It must be central, efficient, and compliant.
Sterilization Room Requirements
- Central location: Close to all treatment rooms.
- Separate dirty and clean zones: One area for instrument cleaning, another for sterilization and packaging.
- Proper ventilation: Exhaust fans for chemical vapors.
- Durable surfaces: Stainless steel counters and wipeable walls.
- Adequate space: Minimum 80–100 sq ft for a small practice.
Lab Placement
If you have an in-house lab, place it near sterilization and treatment rooms. It needs good ventilation, water access, and space for equipment.
Reception and Waiting Area Planning
The waiting area is your first impression. It should be comfortable, visible from the front desk, and sized for your patient volume.
Waiting Room Size Guidelines
| Patients per Hour | Suggested Waiting Area |
|---|---|
| 1–3 | 150–200 sq ft |
| 4–6 | 200–300 sq ft |
| 7+ | 300+ sq ft |
Layout Tips
- Seating arrangement: Avoid rows facing each other. Use clusters or angled seating.
- Clear sightlines: The front desk should see the waiting area.
- Accessible seating: Include seats with arms for patients with mobility needs.
- Kids’ corner: A small play area if you serve families.
- Restroom access: Visible and easy to find.
Hallway and Doorway Standards
Hallways connect everything. They must be wide enough for equipment, wheelchairs, and staff passing each other.
Minimum Widths
- Main corridors: 5–6 feet
- Secondary corridors: 4 feet
- Doorways: 36 inches minimum for accessibility
Important Note: Check local building codes for exact requirements. ADA standards require 36-inch clear width for accessible routes.
Planning for Growth and Flexibility
Your practice will change. A good floor plan anticipates that.
Flexibility Strategies
- Shell space: Finish extra rooms as your practice grows.
- Convertible rooms: Design rooms that can switch between hygiene and general dentistry.
- Modular furniture: Moveable cabinetry and equipment.
- Expandable reception: Space to add staff or technology.
- Extra plumbing and electrical: Rough-in for future operatories.
Budgeting for Floor Plan Design
Floor plan design costs vary based on complexity and whether you hire an architect.
| Service | Typical Cost | Notes |
|---|---|---|
| Architect (full service) | 8–15% of construction cost | Includes design and oversight |
| Dental-specific design firm | $5,000 – $30,000 | Specialized in dental offices |
| Draftsperson | $2,000 – $8,000 | Basic plans only |
| Space planning consultation | $1,000 – $5,000 | Layout advice without full plans |
Note: A dental-specific designer is worth the investment. They understand equipment needs, workflow, and compliance requirements that general architects may miss.
Common Floor Plan Mistakes
- Too many operatories, not enough support space: Sterilization and storage get squeezed.
- Narrow hallways: Create bottlenecks and accessibility issues.
- Front desk facing away from the door: Staff cannot greet patients.
- No separation of patient and staff flow: Constant crossing and confusion.
- Ignoring equipment dimensions: Rooms are too small for chairs and cabinetry.
- Forgetting future growth: No space to expand.
Frequently Asked Questions
How much space does a dental office need?
A small practice needs about 1,500–2,000 sq ft. A larger practice with four to six operatories needs 2,500–4,000 sq ft.
How many operatories should a new dental office have?
Start with two to three operatories and plan shell space for future growth. This balances cost with capacity.
Should I hire a dental-specific designer for my floor plan?
Yes, if your budget allows. They understand equipment needs, workflow, and compliance better than general architects.
What is the ideal patient flow in a dental office?
Entry, reception, treatment room, check-out, and exit. Keep these steps clear and separate from staff traffic.
How wide should dental office hallways be?
Main corridors should be 5–6 feet wide. Secondary corridors should be at least 4 feet. Doorways need 36 inches of clear width.
Additional Resource
For dental office planning standards and equipment guidelines, visit the American Dental Association (ADA) for practice management resources.
Conclusion
Dental office design floor plans shape how your practice operates every day. Plan the core zones carefully, separate patient and staff flow, size operatories properly, and build in flexibility for growth. Invest in professional design help if you can. A thoughtful floor plan saves time, money, and stress for years to come.