Dental Office Headshots: A Practical Guide to Professional Team Photos
Professional headshots are one of the most overlooked marketing tools in dentistry. Patients see your team’s faces online before they ever call your office. A clean, consistent set of dental office headshots builds trust and makes your practice feel human. This guide walks you through why headshots matter, how to plan a shoot, what to wear, and how to use the photos effectively.
Why Dental Office Headshots Matter
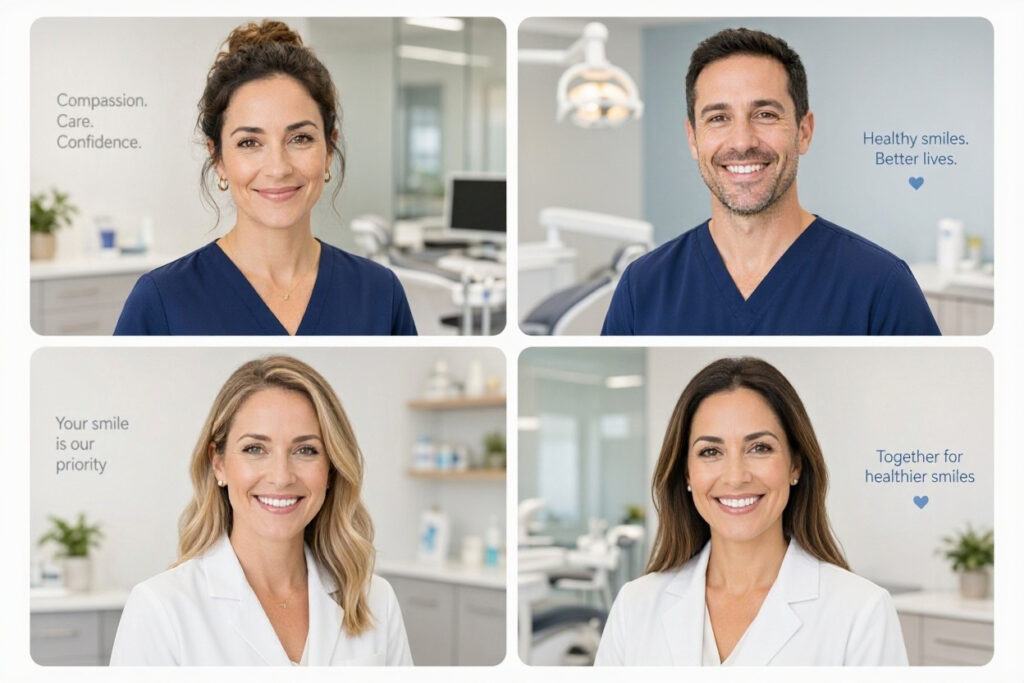
A patient choosing a new dentist often visits your website first. They scan your team page. They look for friendly faces. Blurry phone photos or outdated snapshots can create doubt. Sharp, well-lit headshots signal professionalism and care.
Headshots also help with staff recognition. Patients remember faces better than names. When they see the same photo online and then meet that person at the front desk, the experience feels seamless.
“Patients want to know who will be caring for them. A good headshot says, ‘I’m here, I’m professional, and I’m ready to help.'” — Dental Marketing Specialist
Key Benefits of Consistent Headshots
- Trust building: Real faces reduce anxiety about dental visits.
- Brand consistency: A unified look across your website and social media.
- Team pride: Staff feel valued when the practice invests in their image.
- Recruitment: Strong team photos attract better job candidates.
Planning Your Headshot Session
A successful shoot starts with a plan. You do not need a Hollywood budget. You need clear goals and a few simple rules.
Step 1: Choose a Photographer
You have two main options: hire a professional or take a DIY approach. Professional photographers understand lighting, posing, and retouching. DIY photos can work for small practices with tight budgets, but consistency is harder to achieve.
Professional photographer: Best for teams of three or more. Expect higher quality and faster editing.
DIY with a smartphone: Best for solo practices or very small teams. Use natural light and a clean background.
Step 2: Pick a Location and Background
Consistency is the goal. Choose one background for all team members. Options include:
- A plain white or light gray wall
- A subtle branded backdrop with your logo
- Your office reception area (blurred slightly)
- An outdoor setting with soft natural light
Avoid busy backgrounds. Avoid windows with harsh shadows. Keep it simple.
Step 3: Schedule Smart
Book the shoot during a low-patient day or after hours. Give each person a 15-minute slot. Rushing creates tense expressions and awkward poses.
What to Wear for Dental Office Headshots
Clothing should look professional but comfortable. The goal is a polished version of what your team wears every day.
General Guidelines
- Solid colors: Navy, black, gray, or soft pastels work well.
- Avoid loud patterns: Stripes and busy prints distract from faces.
- Keep it neat: Ironed shirts, clean collars, no wrinkles.
- Match your brand: If your office wears scrubs, wear scrubs. If you wear business casual, wear that.
- Limit jewelry: Simple pieces are fine. Dangling earrings or noisy bracelets can distract.
- No sunglasses or hats: Faces should be clear and unobstructed.
For Clinical Staff
Scrubs are perfect. Choose a clean, pressed set. Add a lab coat if that is standard for your role. Avoid wearing gloves or masks in the photo.
For Front Office Staff
Business casual works best. A blouse or button-down shirt in a solid color looks professional and approachable.
Comparison Table: Clothing Do’s and Don’ts
| Do | Don’t |
|---|---|
| Solid, muted colors | Neon or overly bright shades |
| Ironed, clean clothing | Wrinkled or stained shirts |
| Simple necklines | Deep V-necks or off-shoulder tops |
| Closed-toe shoes (if full-body) | Flip-flops or sneakers |
| Minimal jewelry | Large, distracting accessories |
Poses and Expressions
You do not need to be a model. Natural is better than stiff. Here are a few simple tips.
- Relax your shoulders: Tension shows in the neck and jaw.
- Turn slightly: A three-quarter angle looks more dynamic than facing straight on.
- Smile naturally: Think of something funny or pleasant. Fake smiles look forced.
- Keep hands busy: Hold a clipboard, rest a hand on a desk, or cross arms lightly.
- Look at the camera: Not at the photographer. The camera is your patient.
The “Three-Second Rule” for Expressions
Hold your pose for three seconds after the photographer says “hold.” This prevents blinking and gives the photographer time to capture a genuine expression.
Technical Tips for DIY Headshots
If you are taking photos yourself, follow these rules.
- Use natural light: Stand near a large window, but not in direct sunlight.
- Avoid overhead lighting: It creates shadows under the eyes.
- Use a plain background: A white wall or a light gray sheet works.
- Shoot at eye level: Do not shoot down or up at your subject.
- Take many shots: Ten good photos come from fifty attempts.
- Use portrait mode: On most smartphones, this blurs the background nicely.
Important Note: Avoid heavy filters. Patients want to see what you actually look like. Natural retouching (removing blemishes, softening shadows) is fine. Changing your face shape is not.
Consistency Across the Team
A team page with mismatched photos looks chaotic. One photo might be a dark outdoor shot, another a bright indoor selfie. That inconsistency undermines trust.
Set a standard before the shoot. Agree on:
- Background color
- Lighting style (bright and even)
- Cropping (head and shoulders, same size)
- Editing style (natural, no heavy filters)
If you hire a photographer, ask for a batch edit that applies the same color correction and crop to every photo.
Using Headshots on Your Website and Social Media
Your headshots have many uses. Do not let them sit in a folder.
- Team page: Pair each photo with a short bio and role.
- Instagram: Post individual headshots with a fun fact or quote.
- Facebook: Use team photos for cover images or announcements.
- Google Business Profile: Add photos to build credibility.
- Email signatures: Small headshots add a personal touch.
- Waiting room slideshow: Display team photos on a screen.
Headshot Sizes and Formats
| Use | Recommended Size | Format |
|---|---|---|
| Website team page | 500 x 500 pixels | Square |
| Instagram post | 1080 x 1080 pixels | Square |
| Facebook cover | 820 x 312 pixels | Landscape |
| Email signature | 100 x 100 pixels | Square |
Budgeting for Headshots
Costs vary based on location and photographer experience.
| Option | Typical Cost | Best For |
|---|---|---|
| Professional photographer (half day) | $400 – $1,500 | Teams of 4+ |
| Professional photographer (per person) | $100 – $250 | Small teams |
| DIY with smartphone | $0 – $50 | Solo practices |
| Retouching service | $5 – $20 per photo | DIY shoots |
Note: Some photographers charge extra for retouching or high-resolution files. Ask about all fees upfront.
Legal and Ethical Considerations
You need permission to use an employee’s photo. Ask each team member to sign a simple photo release form. This protects your practice and respects their privacy.
Also, update photos when someone leaves the practice. Old headshots on your website confuse patients and look careless.
Frequently Asked Questions
How often should we update dental office headshots?
Every two to three years, or whenever a team member’s appearance changes significantly (new hairstyle, glasses, etc.).
Can we use the same photographer for multiple years?
Yes, but ask for consistent editing. Styles change, so review the final images against your existing set.
What if a team member hates having their photo taken?
Offer a private session with fewer people around. Keep it short. Show them a few shots on the camera screen to build confidence.
Should we include full-body shots or just headshots?
Headshots are standard for team pages. Full-body shots can work for social media but are not necessary.
Do we need a professional makeup artist?
Not required. Simple grooming (neat hair, clean face) is enough. A makeup artist can help with shine control for large teams.
Additional Resource
For tips on posing and lighting for professional portraits, visit the Professional Photographers of America resource library.
Conclusion
Dental office headshots are a small investment with a big return. They humanize your practice, build trust, and create a consistent brand image. Plan ahead, keep clothing and backgrounds simple, and prioritize natural expressions. Whether you hire a pro or do it yourself, the goal is the same: show your patients the friendly, professional faces they will meet.