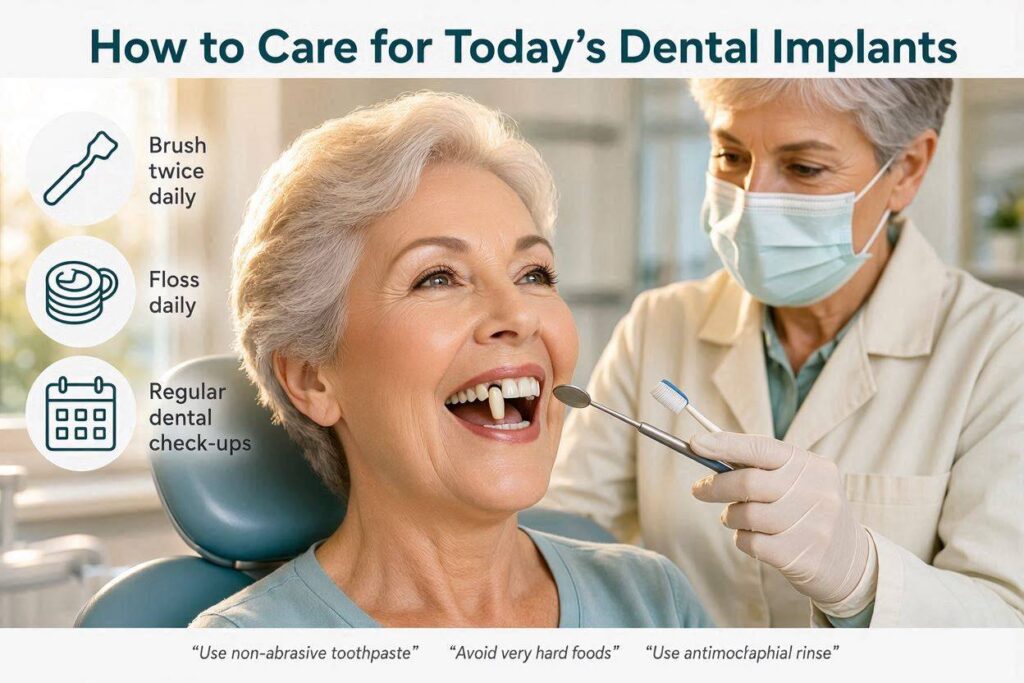
How to Care for Today’s Dental Implants
Your dental implants represent a significant investment in your health, appearance, and quality of life. They look, feel, and function like natural teeth, and they deserve a care routine that protects that investment for decades to come. Many implant recipients mistakenly believe that because titanium and porcelain cannot decay, maintenance is less critical than with natural teeth. This is a dangerous misconception. This comprehensive guide provides you with a complete, realistic, and practical blueprint for caring for your modern dental implants. We will dispel myths, introduce the essential tools, and walk you through the daily, monthly, and professional routines that will keep your implant smile healthy, functional, and beautiful for a lifetime.
The Critical Difference: Caring for Implants vs. Natural Teeth
Your natural teeth connect to your jawbone through a complex biological system called the periodontal ligament. This ligament is a network of tiny collagen fibers that act as a shock absorber and a seal against bacteria. Your natural tooth has this biological gasket. Your dental implant does not. The implant post is anchored directly to the bone through a rigid fusion called osseointegration. There is no periodontal ligament. This fundamental difference changes everything about how you must care for the implant and the tissues surrounding it.
The absence of a periodontal ligament means the seal between the oral environment and the underlying bone is less robust around an implant. Around a natural tooth, the gum fibers insert perpendicularly into the root surface, creating a strong cuff. Around an implant, the gum fibers run parallel or circular to the smooth titanium surface, forming a weaker attachment. This makes the peri-implant tissues more vulnerable to bacterial invasion. The enemy of your implant is a condition called peri-implantitis. This is an inflammatory process, driven by bacterial biofilm, that destroys the gum and, crucially, the bone supporting the implant. Unlike gingivitis around a natural tooth, peri-implantitis can progress rapidly and painlessly, often without obvious symptoms until significant bone damage has occurred. Your entire home care routine is a daily defensive battle against this threat.
Understanding the Biofilm Threat
The sticky, colorless film you feel on your teeth at the end of the day is a biofilm. It is a highly organized community of bacteria encased in a protective slime matrix. This biofilm forms on implant surfaces just as readily as it forms on natural teeth. If it is not mechanically disrupted daily, it matures and becomes more virulent. The bacteria in a mature biofilm produce toxins and acids that inflame the gum tissue. Around an implant, this inflammation is called peri-implant mucositis, and it is fully reversible with improved hygiene. If the biofilm is allowed to calcify into tartar, it creates a rough, irritating surface that extends inflammation deeper, and it cannot be removed with a toothbrush.
If left untreated, the inflammatory process advances into the underlying bone, and the diagnosis becomes peri-implantitis. The bone begins to resorb away from the implant surface. Because the implant has no nerve supply, this bone destruction can occur without any pain. You may notice bleeding when you brush, a bad taste, or, in advanced stages, gum recession exposing the dark metal of the implant or loosening of the restoration. The goal of your home care is to prevent the mature biofilm from ever establishing a foothold. Daily, meticulous, mechanical disruption of the biofilm at the gumline and in the hidden spaces around your implant restoration is non-negotiable for long-term success.
Essential Tools for Your Implant Care Arsenal
A standard toothbrush and regular string floss are not optimal for the unique challenges of implant care. You need a curated set of tools designed to access the specific contours and hard-to-reach areas around an implant-supported crown, bridge, or denture. Investing in these tools and using them correctly is the most cost-effective way to protect your implant investment. The following tools are not optional extras; they are the core components of a professional-grade home hygiene protocol for implant patients.
Your power toothbrush is your primary weapon. An oscillating-rotating or sonic brush with a soft or extra-soft brush head is superior to a manual brush for disrupting biofilm. The mechanical action of thousands of brush strokes per minute, combined with a careful technique aimed at the gumline, is highly effective. Avoid medium or hard bristles, which can traumatize the delicate gum tissue around the implant and cause recession. You also need a low-abrasive toothpaste. The porcelain or zirconia of your implant crown is highly stain-resistant, but some over-the-counter whitening and tartar-control toothpastes contain harsh abrasives that can scratch and dull the surface of your crown over time, making it more plaque-retentive.
The Indispensable Interproximal Aids
The area where the implant crown meets the gum and the space between the implant and its adjacent teeth are the danger zones. This is where biofilm flourishes and where your brush cannot reach. You need specialized tools to clean these critical areas effectively.
- Implant-Specific Floss: This is not standard floss. It has a unique, three-component design. One end is a stiff, plastic threader tip. The middle section is a wide, fuzzy, sponge-like floss. The other end is standard thin floss. You use the threader to guide the fuzzy floss under the bridge or through the contact point, and then you use a back-and-forth shoeshine motion to scrub the sides of the implant and the under-surface of the restoration. This is the gold standard for single implants.
- Water Flosser with a Non-Metal Tip: A water flosser is a game-changer for implant care. The pulsating stream of water is exceptionally effective at flushing out food debris and loosely adherent biofilm from deep gum pockets, around implant posts, and under implant-supported bridges and overdenture bars. Always use a soft, rubber-tipped irrigation tip, not a metal one, to avoid scratching the implant. Use the device on a low-to-medium pressure setting to avoid forcing bacteria into the tissues.
- Interdental Brushes: These small, bristled brushes, sometimes called proxy brushes, are indispensable for cleaning the embrasure spaces—the triangular gaps between the implant crown and adjacent teeth. You must select the correct size to pass through the space without forcing or bending the wire core. The brush should fit snugly and pass back and forth against the implant abutment surface. Many implant patients need a set of differently sized brushes for different spaces in their mouth.
The Daily and Weekly Implant Hygiene Protocol
Consistency is the key to a healthy implant. A meticulous routine performed every day, without exception, will prevent the insidious build-up of destructive biofilm. Your routine should be systematic and unhurried. You should allocate a specific amount of time for your oral hygiene, treating it as a non-negotiable part of your self-care, just like showering or taking prescribed medication. The following protocol, executed in this order, provides a comprehensive defense.
Begin your evening routine with the water flosser. Fill the reservoir with warm water. Lean over the sink and place the soft tip at a 90-degree angle to the gumline of your implant. Trace the entire circumference of the implant crown, pausing briefly at the front and back to flush the pocket. If you have an implant bridge, direct the stream under the pontic (the false tooth) and along the entire length of the gingival margin. The water flosser removes loose food debris and a significant portion of the loosely attached plaque, preparing the surfaces for more direct mechanical cleaning. This should take at least 30 seconds per implant site.
The Step-by-Step Implant Cleaning Sequence
Follow the water flosser with implant-specific floss. Thread the stiff plastic tip under your implant crown or bridge from the cheek side to the tongue side. Gently guide the wider, fuzzy section of the floss into the space. Once in position, wrap the fuzzy floss into a C-shape around the implant abutment and, using a gentle back-and-forth “shoeshine” motion, scrub the side of the implant. You are physically wiping the biofilm off the smooth titanium or zirconia abutment surface. Then, gently slide the floss along the underside of the crown to clean the area where the crown meets the gum. This is the most critical zone. Do not snap the floss in and out, as this can injure the fragile gum attachment.
Next, use your interdental brush. Dip it in a non-alcoholic antimicrobial mouth rinse and pass it gently through the space between the implant and the adjacent tooth. Move it in and out several times, ensuring the bristles make contact with the abutment surface. Rinse the brush and repeat. Do not use this brush on the gum tissue itself, only on the restorative surfaces. Finally, complete the routine with your power toothbrush. Hold the brush head at a 45-degree angle, half on the crown and half on the gumline. Use light pressure and let the brush do the work. Brush for a full two minutes, systematically covering all surfaces of your implants and natural teeth. Spit out the excess toothpaste, but do not rinse with water. Leaving a small amount of fluoride toothpaste residue on your teeth is beneficial, though its primary benefit is for your natural teeth.
Caring for Implant-Supported Overdentures and Full-Arch Bridges
If you have an implant-supported overdenture, commonly called a snap-on denture, your care routine has two components: cleaning the prosthetic and cleaning the implant attachments in your mouth. The denture must be removed daily. This is non-negotiable. You must give your gum tissues a rest and allow them to be bathed by your natural saliva. Sleeping with an overdenture in place traps bacteria against the gums and the implant abutments, dramatically increasing the risk of fungal infections and peri-implant inflammation.
Remove your overdenture and brush it with a denture-specific brush and a non-abrasive denture cleanser. Do not use regular toothpaste on the denture, as the abrasives will scratch the acrylic and make it more porous and stain-retentive. Soak the denture in a denture cleaning solution according to the manufacturer’s instructions. While the denture is soaking, focus on your mouth. Use a soft manual or power toothbrush to gently but thoroughly clean the implant abutments that protrude through your gums. These are the small metal or tooth-colored attachments. Use an interdental brush to circle each abutment, cleaning the small groove under the lip of the attachment. A water flosser can also be used very effectively to flush around the abutments. Never soak your overdenture in hot water, which can warp the acrylic and ruin its precise, custom fit.
Cleaning Fixed Full-Arch Restorations
A fixed full-arch restoration, like an All-on-4 bridge, is not removed by you at home. It is permanently screwed into your implants and only removed by your dentist. Caring for this type of prosthesis requires a high level of diligence and the right tools. Food and debris will inevitably collect under the bridge and between the bridge and your gum tissue. Your primary tools are the water flosser, implant-specific floss threaders, and very fine, specialized brushes designed to pass under the bridge superstructure.
Use the water flosser on a low setting, directing the stream along the entire junction where the bridge meets the gum. Tilt the tip to aim the water under the bridge to flush out debris. Use the fuzzy floss threader to pass under the bridge and scrub the hidden surfaces. Your dentist or hygienist will show you the specific entry points for these cleaning aids. An electric toothbrush with a soft head is used to clean all the accessible front and chewing surfaces of the bridge. If you are unable to maintain adequate hygiene around a fixed bridge due to dexterity issues, you must have more frequent professional maintenance cleanings, perhaps every three months, to prevent complications.
Professional Maintenance: The Indispensable Partner
Your home care routine is your primary defense, but it is not a complete defense. You will develop some tartar deposits. You cannot reach every microscopic niche. Professional maintenance is a mandatory, non-optional component of long-term implant success. You should schedule a professional implant maintenance visit with your dentist or a hygienist specifically trained in implant care at least every six months. If you have a history of periodontal disease, a complex implant reconstruction, or dexterity challenges, your recall interval may be every three to four months.
The professional implant maintenance appointment is distinctly different from a traditional dental cleaning. The instruments and techniques used on your implants must be specialized and gentle to avoid damaging the highly vulnerable implant surfaces. The titanium abutment and the implant collar are precision-engineered, smooth surfaces. Any scratch or roughening of these surfaces will create a haven for biofilm attachment and accelerate the disease process. A competent implant clinician will never use conventional metal scalers or ultrasonic tips on your implants.
What a Proper Professional Implant Cleaning Entails
The hygienist will begin with a thorough assessment. They will probe gently around each implant using a flexible plastic or titanium periodontal probe. This records the depth of the gum pocket and checks for bleeding or pus, which are signs of inflammation. They will compare these findings to your baseline records to detect any changes. The cleaning itself is performed with instruments that are softer than titanium. Gold, copper alloy, or titanium scalers are used because they clean effectively without scratching. The ultrasonic scaler, if used, will have a specialized non-metal or plastic tip designed for implant use.
The hygienist will meticulously scale all exposed implant surfaces, the abutments, and the prosthetic components. They will remove any tartar deposits with a gentle touch. They will also polish your implant crown or bridge with a special, ultra-fine, non-abrasive polishing paste applied with a soft rubber cup. After the cleaning, they will irrigate the gum pockets around your implants with an antimicrobial solution to flush out any remaining dislodged bacteria. Finally, they will review your home care technique, re-instruct you on the use of your specific cleaning aids, and answer any questions you have. This visit is your safety net. It is the early warning system that catches problems when they are small, simple, and reversible.
Lifestyle Choices That Affect Implant Longevity
Your daily habits have a direct and powerful impact on the lifespan of your dental implants. Smoking and the use of any tobacco products are the single greatest modifiable risk factor for implant failure and peri-implantitis. The chemicals in tobacco constrict blood vessels in the gum tissue, reducing the oxygen supply and impairing the immune response. Smokers have a significantly higher rate of bone loss around implants and a dramatically higher risk of developing peri-implantitis. If you have invested in dental implants and you use tobacco, pursuing a cessation program is the most impactful action you can take to protect your investment and your overall health.
Excessive alcohol consumption can also compromise your oral environment. Alcohol is dehydrating. A dry mouth lacks the protective buffering and cleansing effects of saliva, creating an environment where biofilm thrives. Heavy alcohol use is also associated with poor nutrition and neglect of oral hygiene routines. Additionally, you must be mindful of parafunctional habits. Clenching or grinding your teeth, a condition known as bruxism, places extreme lateral and rotational forces on your implants. While the implant itself will not decay, the excessive, off-axis forces can lead to mechanical failure of the prosthetic components. You may fracture the porcelain on your crown, loosen the abutment screw, or even, in severe cases, fracture the implant itself. If you know you grind your teeth, or if your sleeping partner tells you that you grind, you must speak to your dentist about a custom-fitted night guard.
The Importance of a Balanced Diet for Implant Health
What you eat matters for your implants, not because the implant material is affected by food, but because the bone and soft tissue supporting the implant are living tissues that require proper nutrition. A diet rich in calcium and vitamin D is essential for maintaining the density and remodeling capacity of the jawbone that surrounds your implant. Dairy products, leafy green vegetables, almonds, and fortified foods are excellent sources of calcium. Vitamin D, obtained from sensible sun exposure and foods like fatty fish, is necessary for your body to absorb that calcium. Your dentist may recommend a vitamin D supplement if your levels are low.
A diet high in refined sugars and simple carbohydrates fuels the bacteria in the biofilm, leading to a more aggressive inflammatory response in your gums. Minimizing sugary snacks and drinks, especially sticky ones, reduces the fuel supply for the harmful bacteria around your implants. Crunchy, fibrous fruits and vegetables like apples and carrots act as natural cleaners, stimulating saliva flow and helping to mechanically wipe the smooth surfaces of your crowns. Chewing on ice, unpopped popcorn kernels, or hard candies is a risk for any dental restoration. These hard objects can cause catastrophic fracture of the porcelain on your implant crown. Treat your implant restoration as a precious, functional work of art, and do not test its physical limits with destructive habits.
Recognizing the Early Warning Signs of Trouble
Peri-implant diseases are insidious because they are often painless in their early, reversible stages. You cannot rely on pain to alert you to a problem. You must become a vigilant observer of the subtle, visible signs of inflammation. The earliest and most consistent sign of a problem is bleeding. If you see blood when you brush, floss, or water floss around your implant, something is wrong. Healthy peri-implant tissue does not bleed. It is pale pink and firm, like healthy gum around a natural tooth. Bleeding indicates the presence of an inflammatory infiltrate. It is the equivalent of a dashboard warning light on your car. Do not ignore it. Immediately intensify your home care on that specific site and make a note to mention it to your dental professional.
Swelling, redness, or a persistent bad taste or pus discharge from around the implant are signs of a more established infection. If you notice that the gum tissue around your implant appears to be receding, exposing the dark metal of the implant post, this is a serious warning sign of bone loss. If you ever perceive the slightest movement or a change in the feel of the implant crown when you chew or push on it with your finger, contact your implant dentist immediately. A healthy, integrated implant has absolutely no movement. Any mobility is a cardinal sign of a failed osseointegration and requires urgent professional evaluation. Early detection of peri-implant mucositis can be treated and fully resolved with a professional cleaning and improved home care. Once bone loss has occurred, the damage is permanent, and treatment is far more complex.
Conclusion
Caring for today’s dental implants demands a deliberate, multi-tool hygiene protocol that recognizes the unique vulnerability of the peri-implant seal against bacterial biofilm. Your daily commitment to water flossing, specialized interproximal cleaning with implant-specific floss and brushes, and professional maintenance with non-abrasive instruments forms an unbroken defense against peri-implantitis. This vigilance, combined with healthy lifestyle choices and prompt attention to any signs of bleeding or tissue change, secures the health of your implant and ensures your smile remains functional and beautiful for decades.
Frequently Asked Questions
Can I use an electric toothbrush on my dental implant?
Absolutely. An electric toothbrush with a soft or extra-soft bristle head is highly recommended. The oscillating or sonic action provides superior biofilm disruption at the gumline without damaging the implant or surrounding tissue when used with gentle pressure.
Is it normal for the gums around my implant to bleed a little when I floss?
No. Healthy peri-implant tissue does not bleed. Any bleeding is a sign of inflammation, likely peri-implant mucositis. You should not ignore it. Improve your cleaning technique in that area, and if it persists for more than a week, see your dentist for an evaluation.
Can dental implants get cavities?
No, the implant itself and the porcelain crown are inorganic materials that cannot decay. However, the tissues around the implant are susceptible to bacterial infection, making hygiene just as critical as it is for preventing cavities on natural teeth.
How do I clean under my implant-supported bridge?
You must use specialized tools like a water flosser with a soft tip, super floss with a fuzzy section, and fine interproximal brushes to thread under the bridge. Your dentist or hygienist will demonstrate the specific path these cleaning aids should take.
What is the single most important tool for home implant care?
If you had to choose one tool beyond a toothbrush, it would be a water flosser. Its ability to flush debris and biofilm from the deep, hidden crevices around implant abutments and under bridges is unmatched and essential for long-term health.
Additional Resource
The American College of Prosthodontists offers excellent patient education resources on the care and maintenance of dental implants and implant-supported restorations. You can access their comprehensive guides at: https://www.gotoapro.org/