How To Remove Dried-On Plaque From Dental Implants
The battle against plaque is a daily, microscopic war that every dental implant patient must wage. Plaque is a sticky, colorless biofilm of bacteria that constantly forms in the mouth. On natural teeth, it causes cavities. On dental implants, it causes something far more insidious: peri-implant mucositis, which, if left unchecked, progresses to peri-implantitis, a destructive infection that dissolves the supporting bone. When plaque is not thoroughly removed daily, it mineralizes, hardening into a rough, tenacious deposit called calculus or tartar. This dried-on, hardened plaque cannot be removed by a toothbrush alone. It is cemented to the surface of the implant crown, the abutment, and if it is a removable prosthesis like an overdenture, to the intaglio surface and the metal housings. This guide will teach you how to safely and effectively remove dried-on plaque from your dental implants and their associated prosthetics, and, critically, what to avoid to prevent permanently damaging your costly restoration.
The Fundamental Difference: Why Implant Plaque Is More Dangerous
Before discussing removal, you must understand why plaque on an implant is a more serious threat than plaque on a natural tooth. A natural tooth has a defense mechanism that an implant lacks. The periodontal ligament, which attaches the tooth root to the bone, contains a rich network of blood vessels and immune cells. It can mount a robust defense against the bacterial toxins in the gum crevice. A dental implant, by contrast, is fused directly to the bone. There is no periodontal ligament. The gum tissue around an implant has a weaker, more permeable seal, with collagen fibers that run parallel to the implant surface, not perpendicular as they do on a natural tooth. This parallel orientation creates a less effective barrier.
When plaque dries and calcifies on an implant surface, it forms a rough, irregular layer. This roughness is a biological catastrophe. It creates a vastly increased surface area for bacteria to colonize, like a microscopic coral reef of infection. The bacteria in this mature calculus are protected by a mineralized shell, making them resistant to mouthwash and antibiotics. The body’s inflammatory response to this entrenched bacterial infection is what drives the bone loss of peri-implantitis. The stakes of removing dried-on plaque from an implant, therefore, are not cosmetic. They are about preserving the bone that holds the implant in your jaw. The battle is not for a clean smile; it is for the survival of the implant itself.
The First Rule: What Never to Use on Dental Implants
The most catastrophic mistake a patient can make is to approach their dental implant with the same abrasive, scraping tools they might use on household tiles or natural teeth. The materials of a dental implant and its restoration are precision-engineered and highly susceptible to scratching. A scratched implant surface is a permanently damaged implant surface, because the scratch becomes a new niche for bacteria to colonize.
Stainless steel scalers and curettes, the standard tools used by a hygienist on natural teeth, must never be used on a titanium implant abutment or the implant body. Steel is harder than titanium. A single pass with a steel scaler will gouge deep, irreversible scratches into the polished, smooth titanium collar. This transforms a pristine, bacteria-resistant surface into a rough, plaque-retentive one, paradoxically accelerating the very disease you are trying to prevent.
Abrasive toothpastes containing silica, baking soda, or calcium carbonate are equally damaging to the implant crown and the acrylic portions of a hybrid bridge or overdenture. These gritty pastes will micro-scratch the glazed surface of the porcelain or zirconia, causing it to lose its polish and become dull and more stain-prone. On an acrylic denture, abrasive toothpaste acts like sandpaper, wearing away the fine surface details and creating microscopic grooves for plaque to hide in.
Household cleaners, bleach, and boiling water are poisons to dental implant prosthetics. Bleach can corrode the metal components and chemically degrade the acrylic, causing it to become brittle and crack. Boiling water will warp and distort a removable prosthesis, destroying its precision fit. The only cleaning solutions that should touch your implant restoration are those specifically formulated for dental prosthetics or plain warm water. The rule is absolute: if you would not put it on an expensive camera lens, do not put it on your implant.
“I have seen a patient take a wire brush to a $30,000 full-arch zirconia implant bridge. The damage was catastrophic. The smooth, polished surface looked like a scratched CD. That bridge had to be sent back to the lab to be re-glazed, at a significant cost. The rule I teach every patient is simple: nothing harder than a soft toothbrush and nothing more abrasive than a liquid soap or a specific denture cleaning solution. Ever.” — A Dental Implant Prosthodontist
The Professional Standard: The Gold Standard of Calculus Removal
The single most important piece of advice for removing dried-on, hardened plaque from a dental implant is to have it done professionally. Your implant dental hygienist has specialized instruments and training that are specifically designed for this task. This is not a standard dental cleaning. The instruments used on implants are fundamentally different.
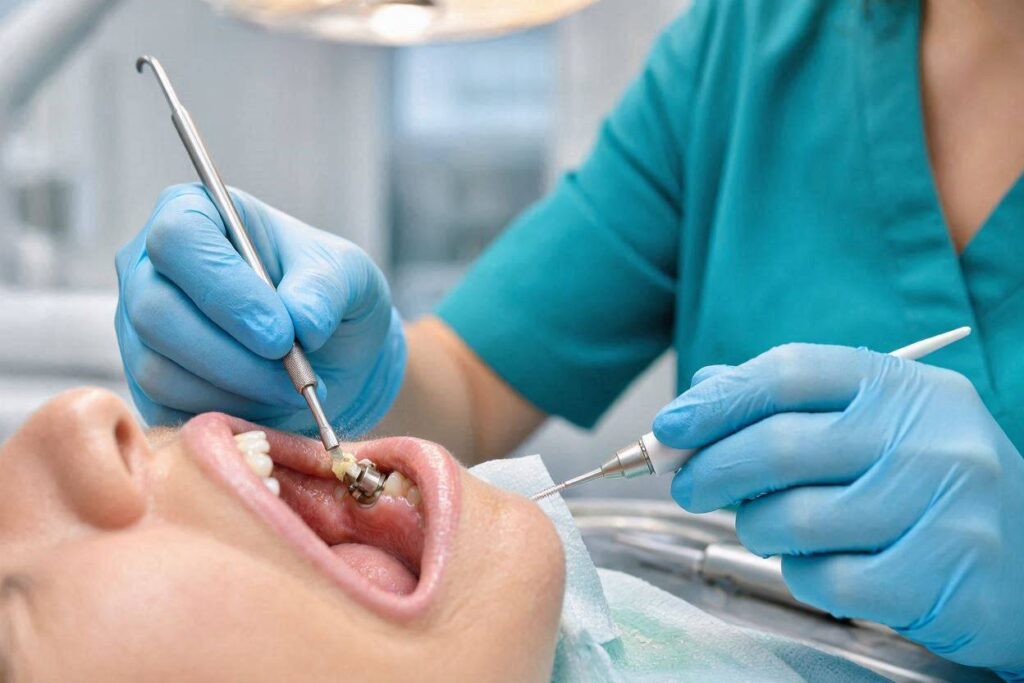
The hygienist will use instruments made of materials that are softer than titanium but hard enough to fracture calculus. These include plastic scalers, which are disposable and designed to be gentle on titanium and zirconia; graphite scalers, which are stiff and effective at debriding; gold-tipped scalers, which have a soft gold coating that will not scratch the implant; and PEEK (polyether ether ketone) instruments, which are a high-performance polymer that is extremely durable and biocompatible. These non-metal instruments are used to carefully and methodically chip away the hardened calculus, leaving the underlying implant surface smooth and polished.
In addition to hand instruments, the hygienist may use an ultrasonic scaler with a specialized, non-metal tip. A standard metal ultrasonic tip is forbidden on implants. A plastic or PEEK-coated tip, however, can be used at a very low power setting with copious water irrigation to gently shatter the calculus without damaging the implant. The professional maintenance appointment also includes a thorough assessment of the health of the peri-implant tissues, probing of the gum cuff, and a review of the patient’s home care technique. This visit is not optional. It is the cornerstone of implant survival, and it should be scheduled at an interval recommended by your dentist, typically every three to six months.
Safe At-Home Techniques for Daily Biofilm Disruption
Your daily job is not to remove hardened, dried-on calculus. That is the hygienist’s job. Your daily job is to prevent the soft, immature plaque biofilm from ever mineralizing into that hardened state. This is a manageable, daily ritual using specific, non-abrasive tools.
For Single Implant Crowns and Implant-Supported Bridges:
A soft-bristled manual toothbrush or a sonic electric toothbrush with a soft head is your primary tool. The technique is gentle, circular motions at a 45-degree angle to the gumline. The critical area is the gum cuff, where the abutment meets the gum. A sonic toothbrush creates a secondary fluid dynamic action, agitating the water and saliva mixture to disrupt biofilm just beyond the reach of the bristles. After brushing, you must clean the interproximal spaces. A Proxabrush with a plastic-coated wire is inserted into the space between the implant crown and the adjacent tooth, scrubbing the round abutment surface. The wire must be plastic-coated to avoid scratching the abutment. Superfloss or a floss threader with a spongy section is then passed under the bridge pontic, and the spongy section is drawn back and forth in a shoeshine motion to scrub the underside. A water flosser with a non-metal tip is the final power wash, flushing out the debris and leaving the sulcus clean.
For Removable Implant Overdentures:
A removable overdenture, which snaps onto locator abutments, must be removed daily for cleaning. The denture should be taken out and brushed over a sink filled with water or lined with a soft towel to prevent damage if dropped. Use a soft denture brush and a specifically formulated, non-abrasive denture cleaning gel or liquid soap. Never use toothpaste. The dried-on plaque that accumulates on the intaglio (the underside) of the denture and around the metal or plastic housings can be softened by soaking the denture in a solution of warm (not hot) water and a denture cleaning tablet for the manufacturer’s recommended time, usually 10 to 15 minutes. After soaking, the softened debris is brushed away. A water flosser with a specialized tip can be used to hydraulically blast debris out of the housings. The locator abutments in the mouth must also be brushed gently with a soft toothbrush and a non-abrasive gel.
Here is a summary of the safe cleaning tools and their specific uses.
| Tool | Safe For Use On | Purpose | Critical Precaution |
|---|---|---|---|
| Soft/Sonic Toothbrush | All implant crowns, abutments, acrylic gums | Daily plaque removal at the gumline | Use only non-abrasive gel or toothpaste formulated for implants |
| Plastic-Coated Proxabrush | Implant abutment surfaces; between implant crown and natural tooth | Clean vertical abutment surfaces | Ensure the wire core is fully plastic-coated; never use bare wire |
| Superfloss (Spongy Section) | Underside of implant bridges | Mechanically scrub the intaglio surface | Use gentle shoeshine motion; do not snap against the gum |
| Water Flosser | Intaglio of bridges, around abutments, denture housings | Hydraulic flush of loose debris and biofilm | Use low-to-medium pressure; non-metal specialized tip |
| Denture Cleaning Tablet | Removable full and partial overdentures | Chemical softening of dried-on plaque on acrylic and metal housings | Dissolve in warm, never hot, water; do not exceed recommended soak time |
The Specific Challenge: Dried-On Plaque on Locator Abutments
A common and frustrating problem for overdenture wearers is the accumulation of dried-on, hardened plaque on the exposed metal locator abutments. These are the small, ball-shaped or cylindrical attachments screwed into the implants that the denture snaps onto. Because they sit proud of the gum tissue, they are constantly bathed in saliva and are a prime target for calculus formation.
To safely clean a locator abutment at home, you must first soften the deposit. A warm, wet washcloth or a gauze pad soaked in warm water can be held against the abutment for a few minutes. This will not dissolve the calculus, but it can hydrate and slightly soften the top layer of biofilm. Then, use a very soft toothbrush with a gentle, circular motion directly on the abutment. A water flosser on a low setting can then be used to flush around the abutment. The goal is to prevent the hard, tenacious layer from forming. If a hard, yellow or brown deposit has already calcified and cannot be wiped away, it is time to see the hygienist. Do not attempt to scrape it off with a fingernail, a metal tool, or a toothpick. You will scratch the precision-machined surface of the abutment, and the scratch will ensure that plaque accumulates there even faster in the future. The locator abutment is a highly polished medical device; its smoothness is its defense against plaque. Preserve that smoothness.
Important Note: If you notice a persistent bad taste, a foul odor, bleeding, or pus around any of your implants, these are signs of active peri-implantitis. Dried-on plaque is not just an aesthetic problem; it is a medical one. Do not simply “clean harder.” Schedule an immediate appointment with your implant dentist or periodontist for a professional evaluation and treatment.
Conclusion
The safe and effective removal of dried-on, hardened plaque from dental implants is a two-part responsibility: you must prevent its formation through daily, meticulous disruption of soft biofilm using a soft toothbrush, non-abrasive gel, plastic-coated interdental brushes, superfloss, and a water flosser; and your implant hygienist must professionally remove any calcified calculus that has formed using specialized instruments made of plastic, gold, graphite, or PEEK that are softer than titanium and will not scratch the abutment surface. At home, you must never use a stainless steel scaler, an abrasive toothpaste, bleach, or boiling water on an implant prosthesis, as scratching or chemically damaging the precision surface will permanently compromise its biocompatibility and accelerate the very disease you are trying to prevent.
Frequently Asked Questions (FAQ)
Q: Can I use baking soda to clean my dental implants?
A: No. Baking soda is an abrasive crystal. When mixed with water, it forms a gritty paste that will microscopically scratch the polished surfaces of porcelain, zirconia, acrylic, and titanium abutments. This damage is permanent and will cause the surface to become a plaque trap.
Q: What is the best tool to clean the underside of my All-on-4 implant bridge?
A: A combination of Superfloss, used in a shoeshine motion, and a water flosser with a rubber-tipped irrigator is the gold standard. The Superfloss mechanically scrubs the intaglio surface, and the water flosser hydraulically flushes out the loosened debris and biofilm.
Q: How often should I have my implant bridge professionally cleaned?
A: Most implant dentists and periodontists recommend a professional maintenance cleaning every three to six months. The exact interval depends on your home care effectiveness and your individual risk profile (history of periodontitis, smoking status, etc.).
Q: Will an ultrasonic jewelry cleaner work to remove dried-on plaque from my metal denture housings?
A: It is not recommended unless specifically advised by your dentist. The high-frequency vibrations of a jewelry cleaner could potentially loosen the precision-machined fit of the metal housing in the acrylic denture. A simple soak in a warm water and denture cleaning tablet solution, followed by gentle brushing, is the safest method.
Additional Resource:
For more information on the care of implant-supported dentures, the American College of Prosthodontists provides expert patient education: ACP – Dental Implant Care.