How To Treat A Dental Implant Infection At Home
That little pinch near your implant. The strange taste in your mouth. A bit of redness on your gum that just won’t go away.
If you are reading this, you are probably feeling a little worried. And that is completely understandable. Dental implants are a big investment—in your health, your smile, and your confidence. The idea that something might be wrong with them can be stressful.
Here is the good news: most early-stage implant infections (a condition often called peri-implant mucositis) can be managed at home if you catch them quickly. You do not need to panic. You do not need to rush to an emergency room. You need a calm, clear plan.
This guide will walk you through exactly how to treat a dental implant infection at home. We will cover what is safe, what is not, when home care is enough, and when you absolutely must pick up the phone.

First, Let Us Understand What You Are Dealing With
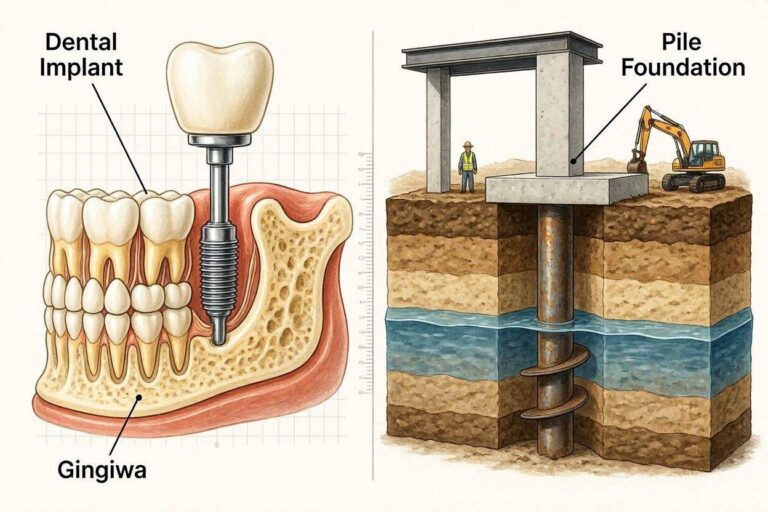
Before we talk about treatment, we need to talk about honesty. A dental implant is not a natural tooth. It is a titanium post surgically placed into your jawbone. Because it is metal, it does not get cavities. But the gum tissue around it is 100% natural—and that tissue can get infected.
There are two levels of infection around an implant.
Peri-Implant Mucositis (The Early Stage)
Think of this like a mild sunburn on your gums. The tissue is angry, red, and may bleed when you brush or floss. But the bone underneath is still healthy. At this stage, home treatment works very well.
Peri-Implantitis (The Advanced Stage)
This is more serious. The infection has moved deeper, affecting the bone that holds your implant in place. You might notice gum recession, pus, or a feeling that your implant is loose. At this stage, home care is not enough. You need a dentist.
A critical note: This article focuses on the early stage—peri-implant mucositis. If you have severe pain, swelling spreading to your face, fever, or a loose implant, stop reading and call your dentist now. Home remedies are not for emergencies.
Signs You Can Safely Treat At Home
Not every red gum is a disaster. Here are the symptoms that suggest you are in the safe zone for home care:
- Mild redness around the implant crown
- Bleeding when you brush or floss (but no spontaneous bleeding)
- Slight tenderness when you press on the gum
- No bad smell or taste (or only a very mild one)
- No visible pus
- Implant feels solid and stable
If this sounds like your situation, you can absolutely learn how to treat a dental implant infection at home with confidence.
What Causes The Infection In The First Place?
Understanding the “why” helps you treat the problem and stop it from coming back. The number one cause is simple: plaque buildup.
Around a natural tooth, your gums attach with fibers. Around an implant, the attachment is different—it is weaker and less organized. Bacteria can sneak into tiny spaces more easily. Add in food particles, poor flossing technique, or an ill-fitting crown, and you have a recipe for inflammation.
Other common causes include:
- Not cleaning the area under the implant bridge
- Using a toothbrush that is too hard (causing gum injury)
- Smoking or tobacco use (reduces healing blood flow)
- Uncontrolled diabetes
- Grinding your teeth (puts pressure on the gum seal)
A Realistic Look At What Home Treatment Can Do
Let us be very clear about expectations. Home treatments do not “kill” a deep infection. Antibiotics do that. What home care does is reduce the bacterial load, calm inflammation, and create an environment where your body can heal itself.
Think of it like weeding a garden. You pull the weeds (bacteria) and water the soil (gums). Your body does the rest.
With consistent care for 5 to 7 days, most early mucositis will resolve completely. If you do not see improvement in one week, the infection may be deeper than it looks. That is your signal to see a professional.
Your Step-By-Step Home Treatment Protocol
This is the practical section you came for. Follow these steps exactly as written.
Step 1: Upgrade Your Brushing Technique
Throw away any medium or hard-bristle toothbrush. Buy a soft or extra-soft brush. Hard bristles injure the gum collar around the implant, making inflammation worse.
How to brush correctly around an implant:
- Hold the brush at a 45-degree angle toward the gumline
- Use very gentle, small circles—no scrubbing back and forth
- Spend a full 30 seconds on the implant area
- If you use an electric toothbrush, let the brush do the work. Do not press down.
What to avoid: Whitening toothpastes with gritty particles. They scratch the implant surface and create hiding spots for bacteria. Use a plain, non-abrasive fluoride toothpaste.
Step 2: Master Implant Flossing (It Is Different)
Flossing around an implant is not the same as flossing a natural tooth. Natural teeth have a ligament that acts like a shock absorber. Implants do not. If you snap floss down hard against the implant gum, you can actually break the seal.
The correct method:
- Use waxed floss (unwaxed shreds too easily)
- Gently slide the floss down until you feel slight resistance
- Curve the floss into a “C” shape against the side of the implant crown
- Move the floss up and down, not sawing back and forth
- Never pop the floss out—pull it through the contact point gently
Alternatively, use a water flosser on the lowest pressure setting. Aim the tip at a 90-degree angle to the gumline. This is often easier and more effective for people with bridges or multiple implants.
Step 3: The Salt Water Rinse Protocol
This is the most underrated home remedy for implant infections. Salt water is not an antibiotic, but it does something just as important: it changes the pH in your mouth, making it harder for bacteria to grow. It also reduces inflammation and draws out fluid from swollen tissues.
Recipe:
- 1 teaspoon of non-iodized salt (sea salt or pink Himalayan salt is best)
- 1 cup of warm (not hot) water
- Stir until dissolved
How to use it:
Rinse gently for 30 seconds, four times per day. Do not swish aggressively—that can irritate the gum further. Let the water flow around the implant area. Spit, and do not rinse with plain water afterward. You want the salt residue to stay on the tissue.
Do this for 7 days straight. You should notice less redness by day 3.
Step 4: Consider A Chlorhexidine Rinse (But Read This First)
Chlorhexidine gluconate is a prescription mouthwash that kills bacteria on contact. Some dentists recommend it for implant infections. Others warn against long-term use because it can stain your teeth and implant crown.
If you already have a bottle from your dentist:
- Use it for 5 days maximum
- Rinse for 30 seconds, twice per day
- Do not eat or drink for 30 minutes afterward
- Dilute it with equal parts water if your gums feel burned
Do not buy over-the-counter “chlorhexidine alternatives.” They are not the same. They use essential oils, which are milder and fine for maintenance but not strong enough for an active infection.
Step 5: Apply A Cold Compress For Swelling
If your gum looks puffy but there is no pus, a cold compress can reduce the fluid buildup.
Wrap an ice pack in a thin towel. Hold it against your cheek, right over the implant area, for 10 minutes. Remove for 10 minutes. Repeat three times. Do this twice per day for the first 48 hours.
Never put ice directly on your gum tissue. That causes more damage than it helps.
What Natural Remedies Actually Work?
You will find many blogs listing clove oil, tea tree oil, turmeric, and hydrogen peroxide. Here is the honest truth about each one.
| Remedy | Effectiveness | Safety | Recommendation |
|---|---|---|---|
| Salt water rinse | High for early inflammation | Very safe | Recommended |
| Clove oil | Moderate (numbing effect only) | Can burn gums if undiluted | Use with caution |
| Tea tree oil | Low against oral bacteria | Toxic if swallowed | Not recommended |
| Turmeric paste | Low (stains severely) | Safe but messy | Skip it |
| Hydrogen peroxide (3%) | Moderate but risky | Damages healthy tissue | Only if diluted 1:1 with water, max 3 days |
| Warm compresses | High for pain relief | Very safe | Recommended |
Here is a hard truth: natural does not mean harmless. Tea tree oil kills bacteria, but it also kills the protective layer of your gum cells. Hydrogen peroxide foams satisfyingly, but it delays healing by damaging new cell growth.
Stick with salt water. It has been used for centuries because it works safely.
The 7-Day Home Treatment Schedule
To help you stay on track, here is a simple daily plan. Print this out or save it to your phone.
| Time | Action | Duration |
|---|---|---|
| Morning (after breakfast) | Salt water rinse | 30 seconds |
| Mid-morning | Water flosser (low setting) | 1 minute |
| After lunch | Salt water rinse | 30 seconds |
| Afternoon | Cold compress (if swollen) | 10 minutes |
| Evening (before brushing) | Gentle flossing | 2 minutes |
| Night (after brushing) | Salt water rinse | 30 seconds |
Repeat this schedule for 7 days. On day 7, evaluate yourself using this checklist:
- Redness has decreased by at least 50%
- No bleeding when flossing
- No bad taste or odor
- Gum looks pink and firm, not purple or shiny
If you checked all four boxes, congratulations—the home treatment worked. Continue the maintenance routine below to prevent recurrence.
If you missed any box, call your dentist. You need a professional cleaning and possibly an antibiotic.
What You Should Never Do At Home
I want to protect you from dangerous advice circulating online. Some “home remedies” can destroy your implant.
Never do these things:
- Do not use a needle or sharp tool to “drain” the gum. You will introduce more bacteria and cause permanent scar tissue.
- Do not apply undiluted essential oils directly to the gum. They cause chemical burns.
- Do not use apple cider vinegar as a rinse. Its acidity erodes the gum attachment.
- Do not take leftover antibiotics from your medicine cabinet. Using the wrong antibiotic or the wrong dose makes bacteria resistant.
- Do not scrub the area with a toothpick. You will open a pocket that traps more food.
I have seen patients lose implants because they tried to “fix” a minor infection with a safety pin. Please. Do not be that person. Your implant is worth more than a five-minute internet hack.
When Home Care Is Not Enough
You need to know the red flags. If any of these appear, your infection has moved beyond home treatment:
- Fever over 100.4°F (38°C)
- Swelling that spreads to your cheek, jaw, or neck
- Pus that drains when you press on the gum (yellow or green)
- The implant feels like it moves even slightly
- Pain that wakes you up at night
- No improvement after 7 full days of consistent home care
These are signs of peri-implantitis, which can lead to bone loss and implant failure. Do not wait. Do not try “one more remedy.” Call a dentist the same day.
What Will The Dentist Do?
Knowing what to expect can reduce fear. For an early infection that did not respond to home care, your dentist will likely:
- Take an X-ray to check bone levels
- Use a plastic scaler to clean the implant surface (metal scalers scratch)
- Irrigate the pocket with chlorhexidine
- Prescribe a 7-day course of antibiotics like amoxicillin or metronidazole
- Recommend a special implant brush for home use
For advanced peri-implantitis, they may refer you to a periodontist for a procedure called “implant debridement and surface decontamination.” This is done with local anesthetic. It saves most implants.
Less than 5% of implants actually fail from infection when caught early. The odds are in your favor.
How To Prevent Future Implant Infections
Once you learn how to treat a dental implant infection at home, the next skill is preventing it from coming back. Prevention is easier than treatment every single time.
Buy The Right Tools
Do not guess. Get these specific products:
- A Sulcabrush (small, pointed brush designed for implant grooves)
- Super floss (has a stiff end to thread under bridges)
- A water flosser with a perio tip (the standard tip is too harsh)
- Non-abrasive toothpaste (look for “low RDA value” online)
Create A Nightly Implant Care Ritual
Every night before bed:
- Floss the implant area first (while plaque is still loose)
- Water floss on low pressure
- Brush everywhere else, then brush the implant last using fresh toothpaste
- Do not rinse after spitting—leave a thin layer of fluoride on the gum
- Sleep on the opposite side of your face for the first week after any flare-up
This takes 4 minutes. That is 0.2% of your day. Worth it.
Visit Your Dentist Every 6 Months For Implant Maintenance
Regular cleanings are not optional. Your hygienist needs to use plastic or titanium instruments. Steel scalers scratch implants, and scratched implants collect bacteria forever. Call ahead and confirm that your dental office has “implant-safe instruments.”
What About Antibiotics? Can I Get Them Online?
Some tele-dentistry services will prescribe antibiotics after a video visit. This is safer than using old prescriptions, but it is still not ideal for a simple mucositis.
Antibiotics kill bacteria, but they do not remove the biofilm (the sticky layer of plaque) that caused the infection. If you take antibiotics without physically cleaning the implant surface, the infection will return in 2 to 4 weeks.
Use antibiotics only when:
- Your dentist examines you in person and confirms a bacterial infection
- You have signs of spreading infection (swelling, fever)
- You have a weakened immune system (diabetes, chemotherapy, autoimmune disease)
For everyone else, mechanical cleaning (brushing, flossing, rinsing) is the real cure.
A Note For Smokers And Vapers
I need to be direct with you. Smoking is the single biggest risk factor for implant infections. Nicotine constricts blood vessels, reducing oxygen flow to your gums. That means your body cannot fight bacteria effectively.
If you smoke and you develop an implant infection, home treatments will be significantly less effective. Your healing time doubles or triples. The infection is more likely to return.
Vaping is not better. The propylene glycol in vape juice irritates gum tissue and changes your oral microbiome.
If you can cut back by even 50% during treatment, you will see better results. If you can quit entirely, your implant will outlive you. That is not an exaggeration.
The Emotional Side Of Implant Infections
Let me validate something for you. It is scary to think your implant might fail. You paid a lot of money. You went through surgery. You imagined never worrying about that tooth again.
And now here you are, worried.
That feeling is normal. But here is what I want you to know: most implant infections are not failures. They are maintenance issues. Like changing the oil in a car. Like weeding a garden. Your implant is not broken. It just needs a little attention.
Stop catastrophizing. You caught it early. You are reading this article and learning what to do. That already puts you ahead of most people. You will fix this.
Frequently Asked Questions (FAQ)
Q: Can a dental implant infection heal on its own without treatment?
No. Unlike a small cut in your mouth, an implant infection will not heal without intervention. The implant surface does not shed bacteria like a natural tooth does. You must actively clean it.
Q: Is it safe to use mouthwash with alcohol on an implant infection?
No. Alcohol dries out gum tissue and kills good bacteria along with bad. It often makes inflammation worse. Stick to salt water or alcohol-free chlorhexidine.
Q: How long does it take to see results from home treatment?
Most people notice less redness and bleeding by day 3. Full resolution takes 5 to 7 days. If you see zero improvement by day 4, call your dentist.
Q: Can I use baking soda to clean my infected implant?
Baking soda is abrasive. It will scratch the implant surface. Do not use it. Salt water is the only kitchen ingredient safe for implants.
Q: My gum is sore but not red. Is that an infection?
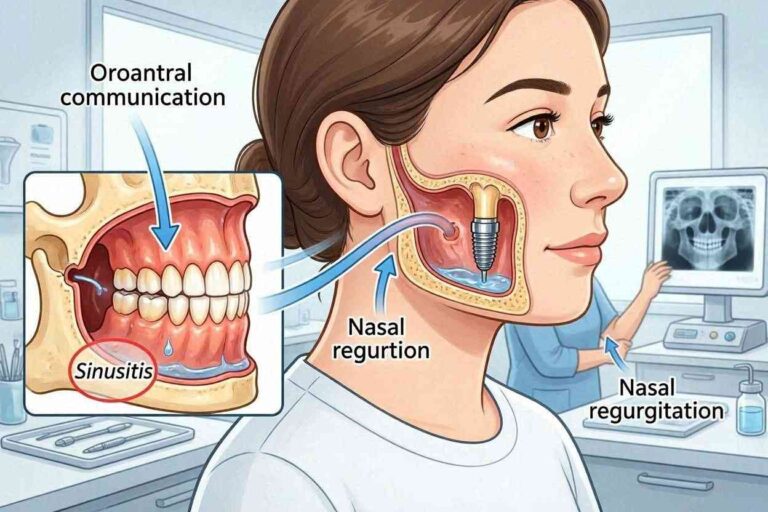
Not necessarily. Soreness without redness can be from clenching your teeth, a food impaction, or even a sinus issue (for upper implants). Try salt water rinses for 2 days. If soreness persists, see your dentist.
Q: Will my dental implant smell bad if it is infected?
Yes, often. Anaerobic bacteria (the kind that live deep in gum pockets) produce sulfur compounds that smell like rotten eggs. A bad taste or odor is a strong sign that you need professional cleaning.
Q: Can I use my water flosser on the highest setting to really clean deep?
No. High pressure can force bacteria deeper into the gum pocket. Always use the lowest effective setting—usually 2 or 3 out of 10 on most machines.
Q: What is the difference between peri-implant mucositis and gingivitis?
Gingivitis is around natural teeth. Peri-implant mucositis is around implants. They look similar, but mucositis progresses to bone loss faster because implants lack the protective ligament that teeth have.
Q: I finished my antibiotics but the redness came back. Why?
Because the biofilm (plaque) was never physically removed. Antibiotics kill active bacteria but do not dissolve the sticky matrix they live in. You need a professional cleaning to scrape that biofilm off.
Q: How do I know if my implant is loose or just moving with my gum?
Gently press on the top of the implant crown with a spoon handle. A healthy implant does not move at all—not even a millimeter. If you feel any movement, see a dentist immediately. Do not chew on that side.
Additional Resource
For a detailed video demonstration of proper implant flossing technique and a list of dentist-approved home care products, visit the American Academy of Periodontology’s patient education page:
👉 perio.org/patient-resources/implant-care (open in a new tab)
This resource includes downloadable instructions you can give to your hygienist and a tool-finder for implant-safe brushes and floss.
A Final Word Of Encouragement
You made it to the end of this guide. That tells me you care about your health and your implant. You are not ignoring the problem or hoping it goes away. You are taking action.
And that action—calm, informed, consistent—is exactly what will save your implant.
Remember the simple protocol: soft brushing, gentle flossing, salt water rinses four times a day, and seven days of patience. Most early infections will surrender to that routine.
If it does not work, that is not a failure. It is information. It tells you to call your dentist. And that call might save your implant from a much more serious problem down the road.
You have the knowledge now. You have the plan. Go take care of that implant. You have got this.
Conclusion
To summarize, you can safely treat early dental implant infections at home using consistent salt water rinses, gentle flossing, and soft brushing over a 5–7 day period. If you see redness, bleeding, or mild tenderness but no pus or looseness, home care is appropriate. However, if you have fever, spreading swelling, or no improvement after one week, see your dentist immediately to prevent bone loss and implant failure.
Disclaimer: This article is for informational purposes only and does not constitute medical advice. Dental implant infections can progress quickly in some individuals. Always consult with a licensed dentist before starting any home treatment, especially if you have a medical condition like diabetes, a weakened immune system, or a history of implant complications. The author and publisher are not responsible for any adverse effects resulting from the use of information in this guide.