Should My Dental Implant Be Exposed?
After dental implant surgery, patients often have questions about what the implant site should look like during healing. One common concern is whether the implant should be exposed or covered by gum tissue. The answer depends on the stage of treatment and the specific technique used by your dentist.
This guide explains the difference between a healing abutment and an exposed implant, what is normal during each stage, and when exposure indicates a problem.
Understanding Dental Implant Stages
To understand implant exposure, it helps to know the different stages of treatment.
The Two-Stage Approach
Traditional implant treatment often involves two surgical stages.
Stage 1: Implant Placement
The implant post is placed into the jawbone and completely covered by gum tissue. Nothing is visible above the gum line.
Stage 2: Implant Exposure
After healing (3 to 6 months), a second minor surgery exposes the implant and places a healing abutment.
The One-Stage Approach
Some cases use a one-stage approach.
What Happens:
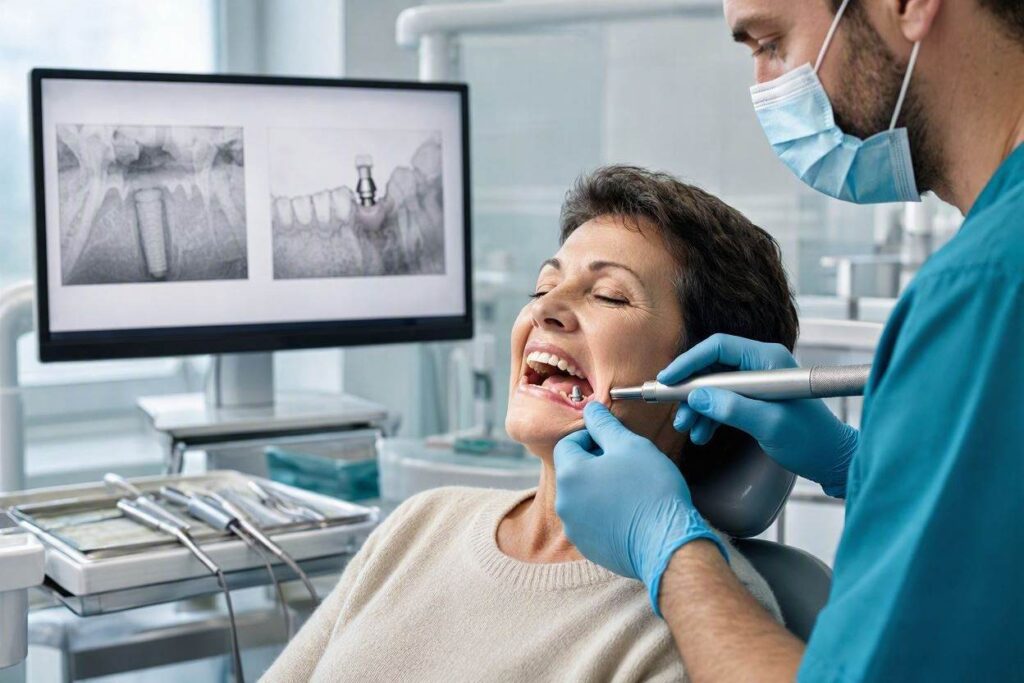
The implant is placed, and a healing abutment is attached immediately. The healing abutment protrudes through the gum.
Why This Approach:
- Eliminates the need for a second surgery
- Shorter total treatment time
- Often used when primary stability is excellent
What Is Normal During Healing?
Understanding normal healing helps you know what to expect.
Two-Stage Approach: Stage 1
After the first surgery, the implant is completely buried.
What You Should See:
- Gum tissue closed over the implant site
- Stitches may be visible initially
- No metal or implant components visible
- Swelling and bruising are normal
What You Should Not See:
- The implant post
- Any metal components
- Open wounds exposing the implant
Two-Stage Approach: Stage 2
After the second surgery, a healing abutment is placed.
What You Should See:
- A small metal post (healing abutment) protruding through the gum
- Gum tissue healing around the abutment
- The abutment is temporary and will be replaced by the crown
What You Should Not See:
- The implant post itself (only the healing abutment should be visible)
- Significant gaps around the abutment
- Pus or signs of infection
One-Stage Approach
With the one-stage approach, the healing abutment is visible from the beginning.
What You Should See:
- A small metal post protruding through the gum
- Gum tissue healing around the abutment
- The abutment remains until the crown is placed
What You Should Not See:
- The implant post itself
- The abutment becoming loose
- Signs of infection
When Exposure Is Normal
In specific situations, seeing part of the implant is expected.
Healing Abutment Visibility
The healing abutment is designed to be visible.
Purpose of the Healing Abutment:
- Shapes the gum tissue for the final crown
- Allows access to the implant for restoration
- Protects the implant during healing
What It Looks Like:
- A small metal cylinder
- Sits flush with or slightly above the gum
- May feel smooth against your tongue
During Crown Placement
Between abutment placement and crown attachment, components may be visible temporarily.
Temporary Restorations
If you receive a temporary crown, it may not fit perfectly.
When Exposure Indicates a Problem
In some cases, implant exposure signals a complication.
1. Exposed Implant Post
If the implant post itself (not the healing abutment) becomes visible, this is abnormal.
What It Means:
- The gum tissue has receded or failed to heal properly
- The implant may be failing
- Infection may be present
2. Early Exposure in Two-Stage Approach
If the implant becomes exposed before the second surgery, this is a concern.
Why It Happens:
- The gum tissue breaks down over the implant
- The implant was placed too close to the surface
- Infection is present
What to Do:
Contact your dentist immediately.
3. Excessive Abutment Visibility
If more of the abutment is visible than expected, gum recession may be occurring.
4. Loose or Moving Abutment
A healing abutment that becomes loose is abnormal.
What It Means:
- The abutment screw has loosened
- The implant may be compromised
5. Signs of Infection
Redness, swelling, pus, or pain around the exposed area indicates infection.
Causes of Problematic Implant Exposure
Several factors cause abnormal exposure.
1. Gum Recession
The gum tissue pulls away from the implant.
Causes:
- Thin gum tissue
- Aggressive brushing
- Periodontal disease
- Poor healing
2. Bone Loss
Bone loss around the implant causes the gum to recede.
Causes:
- Peri-implantitis
- Overloading
- Failed osseointegration
3. Improper Implant Placement
If the implant is placed too shallow or at the wrong angle, it may become exposed.
4. Infection
Infection destroys tissue, exposing the implant.
5. Trauma
Injury to the surgical site can disrupt healing and cause exposure.
What to Do If Your Implant Is Exposed
If you notice unexpected exposure, take action.
1. Contact Your Dentist
Schedule an evaluation as soon as possible.
2. Keep the Area Clean
Gently rinse with warm salt water to prevent infection.
3. Avoid Disturbing the Area
Do not touch or wiggle the exposed components.
4. Eat Soft Foods
Avoid chewing on the affected side.
5. Document Changes
Take photos to track any changes.
Treatment for Problematic Exposure
Treatment depends on the cause and severity.
1. Observation
In some cases, mild exposure may be monitored without intervention.
2. Gum Grafting
Soft tissue grafts can cover exposed areas.
Cost: $500 to $1,500 per site
3. Bone Grafting
If bone loss is the cause, grafting may be necessary.
Cost: $500 to $3,000
4. Implant Removal
In severe cases, the implant may need removal.
Cost: $200 to $800
5. Implant Replacement
After healing, a new implant may be placed.
Cost: $2,300 to $6,700
Preventing Problematic Exposure
Several strategies reduce the risk of exposure.
1. Choose an Experienced Provider
Skillful placement reduces complications.
2. Follow Post-Operative Instructions
Proper aftercare promotes healing.
3. Maintain Good Oral Hygiene
Healthy gums are less likely to recede.
4. Avoid Smoking
Smoking impairs healing and increases complications.
5. Attend Follow-Up Appointments
Regular monitoring detects problems early.
The Healing Timeline
Understanding the normal timeline helps you know what to expect.
Two-Stage Approach Timeline
- Day 1-14: Gum tissue heals over the implant
- Months 3-6: Osseointegration occurs
- Month 6: Second surgery exposes implant
- Month 6-8: Healing abutment shapes gum
- Month 8-10: Crown placement
One-Stage Approach Timeline
- Day 1: Implant and healing abutment placed
- Months 3-6: Osseointegration with abutment visible
- Month 6-8: Crown placement
Conclusion
Whether your dental implant should be exposed depends on the stage of treatment and the technique used. In a two-stage approach, the implant is buried initially and exposed later. In a one-stage approach, a healing abutment is visible from the beginning. Unexpected exposure of the implant post or excessive abutment visibility may indicate complications. If you have concerns about implant exposure, contact your dentist for evaluation.
Frequently Asked Questions (FAQ)
Q: Should I be able to see my dental implant after surgery?
A: In a two-stage approach, the implant is buried and not visible. In a one-stage approach, a healing abutment is visible.
Q: What is the metal thing sticking out of my gum?
A: This is likely a healing abutment, which is intentionally visible to shape the gum for the final crown.
Q: Is it normal for the implant to become exposed before the second surgery?
A: No, early exposure in a two-stage approach is abnormal and should be evaluated by your dentist.
Q: What should I do if my healing abutment feels loose?
A: Contact your dentist promptly. A loose abutment requires professional attention.
Q: Can exposed implants be fixed?
A: Yes, treatment options include gum grafting, bone grafting, and in severe cases, implant replacement.
Q: How can I prevent my implant from becoming exposed?
A: Follow post-operative instructions, maintain good oral hygiene, avoid smoking, and attend regular checkups.
Additional Resource
For more information on dental implant healing and complications, visit the American Academy of Implant Dentistry (AAID) at www.aaid.com. They provide educational resources for patients.