Steps for Tooth Implant: A Friendly, Step-by-Step Guide
Losing a tooth can feel unsettling. You might worry about your smile, your ability to chew, or even your long-term oral health. The good news? Modern dentistry offers a remarkable solution: the dental implant.
If you are reading this, you are probably curious about what actually happens during the procedure. You want honest, clear, and realistic information. You do not want scary stories or overly complex medical jargon.
You have come to the right place.
This guide walks you through every single step of the tooth implant process. We will talk about what works, what to expect, and how to prepare. We will also cover the healing times, the costs, and the little things that make a big difference.
Remember: every mouth is different. Your journey will be unique. But by the end of this article, you will feel informed, confident, and ready to talk to your dentist.
What Is a Tooth Implant? A Simple Explanation
Before we dive into the steps, let us clarify what a dental implant actually is.
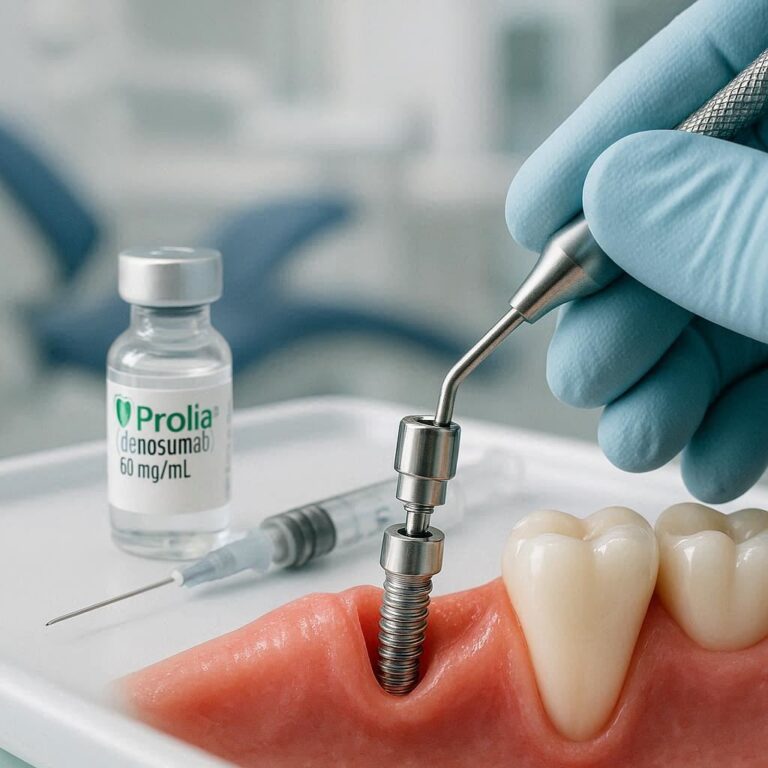
A tooth implant is not a fake tooth in the way a denture is. Instead, it is a small, screw-shaped post made of titanium. A dentist places this post into your jawbone. Over time, the bone grows around the post. This creates a rock-solid foundation.
Think of it like this: the implant acts as a new, artificial tooth root. On top of that root, we attach a crown. That crown looks, feels, and functions like a natural tooth.
A typical implant has three parts:
- The implant post (root): Titanium goes into the bone.
- The abutment: A small connector piece sits on top of the post.
- The crown: The visible, tooth-colored part you see when you smile.
Important note: A tooth implant requires surgery. But it is a routine, predictable, and safe procedure. Millions of people receive dental implants every year with excellent results.
Why Choose a Dental Implant? (The Real Benefits)
You might wonder: why go through all these steps? Why not get a bridge or a partial denture?
Here is the honest truth. Implants offer unique advantages that other options cannot match.
- Preserves your jawbone. When you lose a tooth, the bone underneath starts to shrink. An implant stimulates the bone, just like a natural root. This keeps your jaw strong and your face shape intact.
- No damage to neighboring teeth. A traditional bridge requires shaving down the adjacent healthy teeth. An implant stands alone. It does not touch or harm your other teeth.
- Long-lasting solution. With good care, an implant can last 20, 30, or even 40 years. Some last a lifetime. Bridges and dentures often need replacement every 5 to 10 years.
- Comfort and stability. You cannot feel an implant moving. It is fixed in your bone. You eat, speak, and laugh without worry.
- Natural appearance. Modern crowns are works of art. They reflect light, match your gum color, and blend seamlessly.
Of course, implants are not for everyone. You need healthy gums and enough bone density. But for most adults in good health, they are the gold standard.
The Complete Timeline: At a Glance
Let us look at the big picture first. The entire implant process is not a single appointment. It is a journey that takes several months.
Why so long? Because your body needs time to heal. And rushing the process can lead to failure.
Here is a typical timeline:
| Step | What Happens | Typical Duration |
|---|---|---|
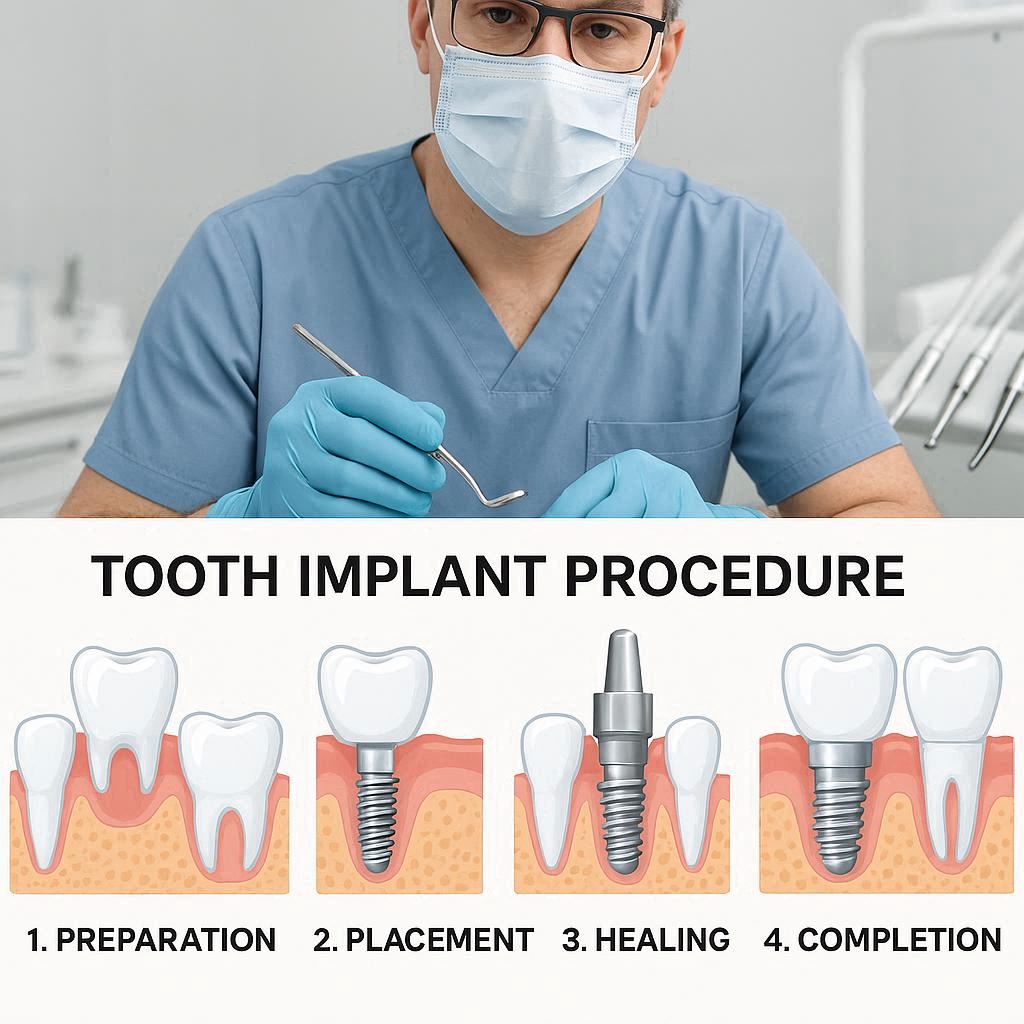
| 1. Consultation | Exams, X-rays, and treatment plan | 1–2 hours |
| 2. Preparations | Extractions, bone graft (if needed) | 1–2 months healing |
| 3. Implant placement | Surgery to place the titanium post | 1–2 hours |
| 4. Osseointegration | Bone grows around the implant | 3–6 months |
| 5. Abutment placement | Small connector attached | 30 minutes |
| 6. Crown fabrication | Impressions and lab work | 2–3 weeks |
| 7. Final placement | Crown attached to abutment | 1 hour |
Important note: This timeline can change. Some dentists offer same-day implants. That is possible in specific cases, but not for everyone. We will discuss that later.
Step 1: The Initial Consultation (Your First Visit)
Everything starts with a conversation.
Your dentist needs to understand your health history, examine your mouth, and take detailed images. This is not just a quick look. It is a comprehensive evaluation.
What to expect during this visit:
- Medical history review: Tell your dentist about any medications, allergies, or conditions like diabetes or heart disease.
- Oral exam: The dentist checks your gums, remaining teeth, and the empty space.
- X-rays and CT scan: A standard X-ray shows the roots. A 3D CT scan reveals the bone volume, density, and the location of nerves and sinuses.
- Discussion of goals: You talk about what you want. A single tooth? Multiple teeth? A full arch?
At the end of this visit, your dentist will tell you two critical things:
- Are you a candidate?
- What is the estimated timeline and cost?
Who Is a Good Candidate?
Most healthy adults are candidates. But there are some requirements.
| Good Candidate | Not an Ideal Candidate (Yet) |
|---|---|
| Healthy gums (no active gum disease) | Active, untreated gum disease |
| Enough bone density in the jaw | Significant bone loss |
| Non-smoker or willing to quit temporarily | Heavy smoker |
| Good general health | Uncontrolled diabetes or autoimmune disorders |
| Committed to good oral hygiene | Unwilling to maintain regular cleanings |
The good news: many “not ideal” issues are fixable. You can treat gum disease. You can add bone grafts. You can quit smoking for the healing period.
Step 2: Preparatory Procedures (Getting Your Mouth Ready)
Sometimes, your mouth is not quite ready for an implant. That is normal.
In this step, we prepare the foundation. Think of it like preparing the soil before planting a tree.
Tooth Extraction (If the Damaged Tooth Is Still There)
If you still have the broken or infected tooth, it must come out. An oral surgeon or dentist performs an extraction.
- Simple extraction: The tooth is visible and comes out in one piece.
- Surgical extraction: The tooth is broken below the gum line or impacted.
After extraction, you wait. The socket needs time to heal. This usually takes 4 to 8 weeks.
Bone Grafting (When Your Jawbone Is Too Thin)
This sounds scary, but it is very common.
When you lose a tooth, the bone resorbs (melts away). If too much bone is gone, an implant has nothing to hold onto. A bone graft rebuilds that lost bone.
How it works:
- The dentist places bone grafting material into the empty socket.
- The material can come from your own body, a donor, or a synthetic source.
- Over several months, your body replaces the graft with your own natural bone.
Healing time: 3 to 9 months depending on the size of the graft.
Important note: Do not skip the bone graft if your dentist recommends it. An implant placed in insufficient bone will fail. Patience here saves money and heartache later.
Sinus Lift (For Upper Back Molars)
The upper jaw has air-filled spaces called sinuses above the back teeth roots. If the sinuses are too large or too low, there is no room for an implant.
A sinus lift is a special type of bone graft. The surgeon lifts the sinus membrane and places bone graft material underneath. This creates height.
Healing time: 4 to 12 months before implant placement.
Treating Gum Disease
Active gum disease is a deal-breaker. The bacteria that cause gum disease also attack the bone around an implant. This condition is called peri-implantitis, and it can cause implant failure.
Before any surgery, you will undergo scaling and root planing (a deep clean). In severe cases, you might need gum surgery.
Healing time: 4 to 6 weeks after the infection is under control.
Step 3: The Implant Placement Surgery (The Big Day)
Finally, the main event.
This is a surgical procedure, but do not panic. Most implant placements happen right in the dentist’s chair with local anesthesia. You are awake but feel nothing.
For anxious patients: Ask about sedation options. Nitrous oxide (laughing gas), oral sedatives, or IV sedation are available.
What Happens During Surgery?
Here is a minute-by-minute look:
- Anesthesia: The dentist numbs the area completely. You might feel a small pinch from the injection. Then, nothing.
- Incision: The dentist makes a small cut in your gum tissue. This exposes the bone underneath.
- Drilling (osteotomy): Using a series of precision drills, the dentist creates a hole in the bone. The hole is exactly the size and shape of the implant.
- Placing the implant: The titanium post is screwed into the hole. The dentist uses a torque wrench to ensure it is tight and stable.
- Closing up: A healing cap or a cover screw is placed on top of the implant. Then, the dentist stitches the gum tissue closed.
Duration: 1 to 2 hours for a single implant. Multiple implants take longer.
What Does It Feel Like?
You will feel pressure and vibrations. You will hear the drill and maybe some tapping. But you should not feel sharp pain.
If you do, raise your hand immediately. The dentist can add more anesthesia.
After Surgery: Immediate Post-Op
Right after the surgery, the anesthesia will wear off over a few hours.
You can expect:
- Mild to moderate swelling (peaks at 48 hours)
- Minor bleeding (pink saliva for 24 hours)
- Bruising around the site (not common, but possible)
- Soreness when opening your mouth wide
Your dentist will give you a list of post-op instructions. Follow them carefully.
Step 4: Osseointegration (The Magic Healing Phase)
This is the most important step. And it requires patience.
Osseointegration is a fancy word for “bone fusing to the implant.” Your jawbone grows right into the microscopic pores of the titanium surface. The implant becomes part of you.
How long does this take?
- Lower jaw: 3 to 4 months
- Upper jaw: 4 to 6 months
Why the difference? The upper jaw has softer, less dense bone. It takes longer to heal.
What Happens During This Time?
- You wear a temporary tooth if necessary. For front teeth, the dentist might give you a flipper (removable partial denture) or a temporary bridge.
- You eat soft foods for the first few weeks.
- You avoid chewing directly on the implant site.
Signs of Successful Osseointegration
| Good Sign | Concerning Sign |
|---|---|
| No pain or movement of the implant | Implant feels loose or wiggles |
| Gums are pink and firm | Persistent redness or bleeding |
| No visible swelling | Pus or discharge near the implant |
| Normal sensation | Unexplained pain when biting |
Important note: Smoking significantly slows osseointegration. It reduces blood flow to the bone. If you smoke, talk to your dentist. Many require patients to stop smoking for at least 2 weeks before and 2 months after surgery.
What If Osseointegration Fails?
It happens in about 2% to 5% of cases. Causes include infection, smoking, grinding teeth (bruxism), or poor bone quality.
If the implant fails:
- The dentist removes it (usually a simple procedure).
- The area heals for another 2 to 3 months.
- You can try again, often with a wider or longer implant.
Failure is disappointing, but not the end of the road. Most patients succeed on the second attempt.
Step 5: Abutment Placement (Connecting the Pieces)
Once osseointegration is complete, it is time to expose the implant and attach the abutment.
The abutment is the small metal (or ceramic) connector that sticks up above the gum line. It holds the crown.
The Procedure
This is a minor procedure. Much smaller than the implant placement.
- No anesthesia? Sometimes yes, sometimes no. It depends on whether the implant is buried under gum tissue.
- If the implant is buried: The dentist numbs the area, makes a small incision to expose the implant, and screws on the abutment.
- If the healing cap is already visible: The dentist simply removes the cap and screws on the abutment.
Duration: 30 to 60 minutes.
Healing After Abutment Placement
Your gums need about 2 weeks to heal around the abutment. During this time, the gum tissue forms a nice collar around the metal post. This creates a natural-looking emergence profile for the final crown.
You will wear a temporary crown or healing abutment during these two weeks.
Step 6: Impressions and Crown Fabrication (The Art Part)
Now we get artistic. The dentist takes impressions of your abutment and surrounding teeth. A dental lab uses these impressions to craft your custom crown.
Taking the Impressions
- Traditional method: Goopy impression material in a tray. You bite down for 2 to 3 minutes. (Not painful, but a bit messy.)
- Digital method: A small intraoral camera scans your mouth. It creates a 3D model on a computer screen. Faster, more comfortable, and very accurate.
Creating the Crown
A skilled dental technician handcrafts your crown.
Materials for the crown:
| Material | Pros | Cons |
|---|---|---|
| Porcelain fused to metal (PFM) | Strong, less expensive | Metal can show at the gum line |
| Zirconia (solid) | Extremely strong, white, no metal | Slightly less natural translucency |
| Lithium disilicate (E-max) | Most lifelike, beautiful | Slightly less strong than zirconia |
Your dentist will help you choose based on the tooth’s location. Molars (back teeth) need strength. Front teeth need beauty.
Time in the lab: 2 to 3 weeks.
During this time, you wear a temporary crown. It protects the abutment and looks acceptable, but it is not the final masterpiece.
Step 7: Final Crown Placement (The Reveal)
The day has arrived.
This appointment is purely restorative. No surgery. No needles (usually). Just pure satisfaction.
What Happens:
- Remove temporary crown: The dentist unscrews or removes the temporary.
- Try-in the final crown: Your dentist places the new crown on the abutment. You look in a mirror. You check the color, shape, and fit.
- Adjustments: The dentist may trim or polish the crown slightly for perfect bite alignment. You bite on a colored paper to check high spots.
- Cementation or screwing: The dentist permanently attaches the crown. It is either cemented or screwed onto the abutment. Screw-retained crowns are easier to repair later.
- Final bite check: One last check to ensure your bite feels natural.
Duration: 45 to 90 minutes.
How Does It Feel?
At first, it feels strange. It might feel slightly bigger than your other teeth. That is normal. Your tongue and cheek need about a week to adjust.
After a few days, you should forget it is even there. That is the magic of a good implant.
Step 8: Recovery, Aftercare, and Long-Term Maintenance
Your implant is in place. But the story does not end here. Long-term success depends on you.
The First Week After Final Crown
- Eat soft foods for 24 to 48 hours.
- Avoid sticky or hard foods (caramels, nuts, ice) for the first week.
- Be gentle when flossing around the crown.
Daily Home Care
An implant cannot get a cavity. But it can get gum disease. And gum disease around an implant is more dangerous than around a natural tooth.
Your new hygiene routine:
- Brush twice daily with a soft toothbrush. Pay extra attention to the gum line around the implant.
- Floss daily using special implant floss or superfloss. It has a stiff end to thread under the crown.
- Water flosser: Highly recommended. It cleans the hard-to-reach areas around the abutment.
- No metal tools: Do not use metal scrapers or picks on your crown. It can scratch the porcelain.
Professional Maintenance
You need to see your dentist or hygienist every 6 months.
During these visits, they will:
- Check the implant for mobility.
- Take periodic X-rays to check the bone level.
- Clean around the crown with special plastic or carbon instruments (metal scalers can scratch).
How Long Does an Implant Last?
With excellent care:
| Care Level | Expected Lifespan |
|---|---|
| Poor hygiene, no checkups | 5 years or less (high failure risk) |
| Average home care, regular checkups | 15 to 20 years |
| Excellent home care, perfect checkups | 30+ years to lifetime |
Important note: An implant crown can wear out or chip after 10 to 15 years. That is normal. But the titanium post itself often lasts a lifetime. You can replace just the crown without redoing the surgery.
Same-Day Implants: What Is the Truth?
You have probably seen ads for “Teeth in a Day” or “Same-Day Implants.” It sounds amazing. Walk in with a missing tooth, walk out with a new one.
Is that real?
Yes and no.
True same-day implants exist, but only under strict conditions.
The process is called immediate placement and immediate loading.
Requirements for Same-Day Implants
- Excellent bone quality (dense, thick bone).
- No active infection in the extraction site.
- Front tooth (lower chewing forces).
- Non-smoker in perfect health.
- Patient agrees to soft-food diet for several months.
What Really Happens in Same-Day Implants?
- The dentist extracts the tooth.
- Places the implant immediately.
- Attaches a temporary crown that very same day.
- You leave with a tooth.
The catch: The temporary crown is not fully functional. You cannot bite into an apple. It is mostly for aesthetics. You still need 3 to 6 months of osseointegration before receiving a permanent crown.
Who Should Avoid Same-Day Implants?
- Back molars (too much chewing force).
- Heavy grinders (bruxism).
- Anyone needing a bone graft.
- Smokers.
- Patients with thin bone.
My honest advice: Same-day implants sound great, but traditional staged implants have a higher success rate. Do not let convenience push you into a less predictable procedure. Talk to your dentist about what is best for your specific mouth.
Cost Breakdown: What Will You Really Pay?
Let us talk money. Implants are an investment. But understanding the costs helps you plan.
Prices vary widely based on location, dentist expertise, and materials. The following are average ranges in the United States (without insurance).
| Procedure | Average Cost (USD) |
|---|---|
| Initial consultation + CT scan | 150–500 |
| Simple tooth extraction | 150–400 |
| Surgical extraction (complicated) | 300–800 |
| Bone graft (small, single site) | 300–1,000 |
| Sinus lift (upper back) | 1,500–3,000 |
| Implant post placement (surgery) | 1,500–3,000 |
| Abutment | 300–800 |
| Porcelain crown (custom) | 1,000–3,000 |
| Total for one implant (without bone graft) | 3,000–3,000–7,000 |
| Total with bone graft or sinus lift | 4,500–4,500–12,000 |
Does Insurance Cover Implants?
It depends.
- Many medical plans: No. They consider implants cosmetic.
- Some dental PPO plans: Cover a portion (often 30% to 50%) of the crown, but not the implant post.
- Medicare (original): No.
- Medicare Advantage (Part C): Some plans offer implant coverage. Check your specific plan.
Ways to Make Implants Affordable
- Dental schools: Supervised students perform procedures at 50% to 70% less cost.
- In-house membership plans: Some dentists offer annual plans with discounts.
- CareCredit or financing: Medical credit cards with 0% interest for 6 to 18 months.
- FSAs or HSAs: Use pre-tax dollars if you have these accounts.
Important note: Be very cautious with overseas “implant vacations.” While cheaper, follow-up care is difficult. If the implant fails, no local dentist wants to fix someone else’s work. Cheap can become very expensive.
Risks and Complications (Being Honest)
No surgery is risk-free. You deserve to know what can go wrong.
Common (mild):
- Swelling and bruising (normal)
- Minor bleeding
- Temporary numbness in lip or chin (resolves in weeks)
Less common (moderate):
- Infection at the implant site (treatable with antibiotics)
- Damage to adjacent teeth during drilling
- Sinus perforation (upper implants only)
Rare (serious):
- Nerve damage causing permanent lip numbness (0.5% to 1% of lower implants)
- Implant rejection (actually an allergy; titanium allergy is extremely rare)
- Fracture of the jawbone (very rare)
The best way to minimize risk: choose an experienced dentist or oral surgeon. Ask how many implants they place per year. A high-volume provider has better outcomes.
Implants vs. Alternatives: A Comparison Table
Still unsure? Here is how implants stack up against the other options.
| Feature | Dental Implant | Fixed Bridge | Removable Partial Denture |
|---|---|---|---|
| Preserves jawbone | Yes | No | No |
| Requires work on adjacent teeth | No | Yes (shaving down) | No |
| Comfort | Excellent (feels like natural) | Good | Poor (may move) |
| Lifespan | 20+ years | 7–15 years | 5–8 years |
| Cost (initial) | High | Medium | Low |
| Cost over 20 years | Low (one-time) | Medium (replacement) | High (constant replacement) |
| Eating restrictions | None | Avoid very sticky foods | Many restrictions |
| Aesthetics | Excellent | Very good | Poor to fair |
A patient’s perspective: “I wore a partial denture for three years. I was always aware of it. It clicked when I talked. I stopped laughing openly. My implant changed my life. I forgot I had a fake tooth after two weeks.” — Sarah, 52
Frequently Asked Questions (FAQ)
1. Does getting a tooth implant hurt?
During the surgery: No. You are completely numb. After surgery: Mild to moderate soreness for 2 to 5 days. Most patients say it is less painful than a tooth extraction.
2. How long does the whole process take from start to finish?
Typically 5 to 9 months. This includes healing times. Complex cases with bone grafts can take 12 to 18 months.
3. Can I get an implant if I have gum disease?
Not until the gum disease is treated. Active gum disease must be resolved first. Then, you can proceed.
4. Is age a limiting factor?
No. Healthy seniors in their 80s and 90s receive implants successfully. The key is overall health, not age.
5. Can I smoke with an implant?
You can, but you should not. Smoking doubles or triples the failure rate. If you smoke, quitting for 2 months before and after surgery dramatically improves success.
6. What happens if the implant fails?
The dentist removes it (simple procedure). The area heals. You try again, often with a different size implant or a bone graft. Most second attempts succeed.
7. Will my insurance cover any part of this?
Some dental plans cover the crown portion. Few cover the implant post. Call your insurance and ask for the “implant benefit rider” if available.
8. Can I have an MRI with a dental implant?
Yes. Titanium is non-magnetic. It is completely safe for MRI and CT scans.
9. Do implants require special cleaning?
Not special, just thorough. You need to floss and brush meticulously. Many dentists recommend a water flosser.
10. Can implants be done for all my missing teeth at once?
Yes. Techniques like All-on-4 use 4 implants to support a full arch of 12 teeth. This is a more complex but very successful procedure.
Additional Resources
For more trustworthy, evidence-based information on dental implants, visit:
🔗 American Academy of Implant Dentistry (AAID) Patient Education Center
Link: aaid-implant.org/patient-resources
This resource offers a dentist locator tool, patient testimonials, and detailed FAQs reviewed by implant experts.
A Quick Note Before You Go
The information in this article is for educational purposes only. It does not replace professional medical advice. Every surgical procedure carries risks. Always consult with a licensed dentist or oral surgeon who can evaluate your specific health situation. Do not delay necessary treatment based solely on something you read online.
Conclusion
A tooth implant involves eight clear steps: consultation, preparation, surgical placement, healing (osseointegration), abutment attachment, crown fabrication, final placement, and lifelong maintenance. The entire process takes 5 to 9 months on average, requires patience, but offers a permanent, natural-feeling solution that preserves your jawbone and lasts decades. With proper home care and regular checkups, your implant can serve you for 30 years or more.