What’s the Difference Between a Filling and a Crown?
When you feel that sharp twinge of pain in your tooth or your dentist delivers unexpected news during a checkup, the terminology can quickly become confusing. Two words often come up in conversation: filling and crown. While both restorations aim to save a damaged tooth and bring your smile back to full function, they serve dramatically different purposes. Understanding the distinction is not just academic; it directly impacts your comfort, your budget, and the long-term health of your mouth.
This guide cuts through the dental jargon. We explore the physical differences, the specific scenarios where one option triumphs over the other, the step-by-step procedures, the cost breakdown, and the durability you can expect. By the end, you will walk into your next dental appointment with absolute confidence, knowing exactly which questions to ask and why the dentist might steer you toward a specific treatment path.
Understanding the Basics: The Structural Philosophy
Before diving into materials and costs, we must grasp the fundamental philosophy that separates these two restorations. Many patients believe a crown is simply a “bigger filling.” This view, while common, misses the critical structural engineering that dictates success or failure in restorative dentistry.
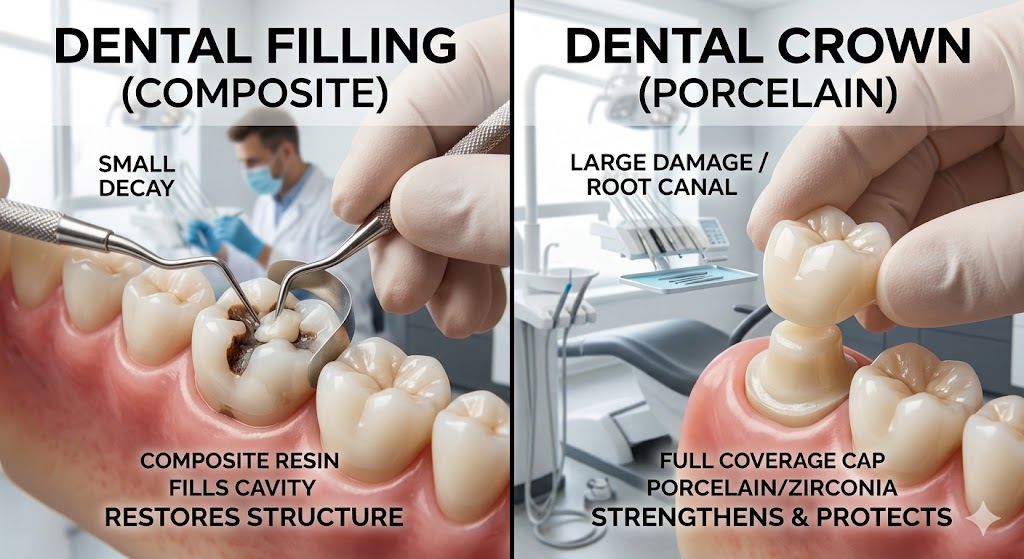
The Filling Concept: Patching the Interior
Think of a filling as a high-tech spackle for teeth. When decay (caries) attacks a tooth, it creates a cavity—a hole in the hard enamel and potentially the softer dentin beneath. The structural integrity of the tooth walls remains largely intact. The damage is localized.
A dentist performs a filling by removing the decayed, infected tissue and “filling” the resulting void. The restoration exists entirely inside the walls of the remaining tooth structure. The tooth itself provides the strength, the shape, and the resistance to biting forces. The filling merely occupies space. Because the filling relies completely on the remaining tooth walls for support, a specific limitation exists: if too much tooth is missing, the walls will eventually fracture under pressure.
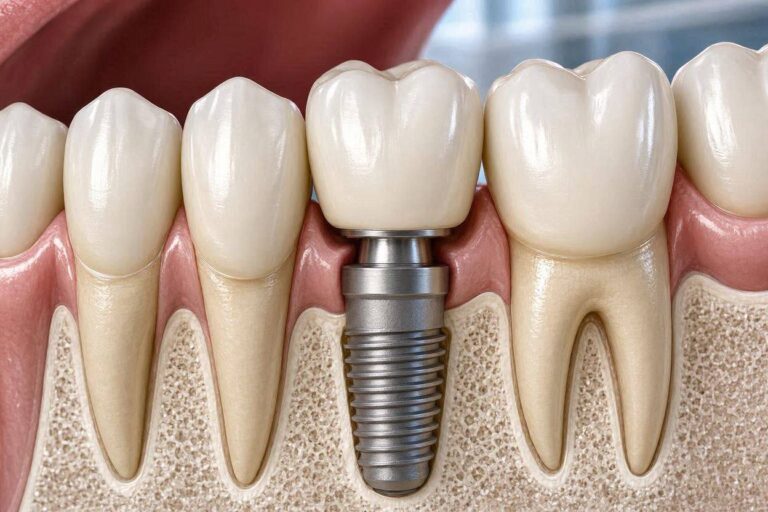
The Crown Concept: Replacing the Exterior
Now imagine a protective helmet, a cap that fits snugly over your entire visible tooth. That is the crown. Dentists often use the term “full coverage restoration” because a crown encircles the entire tooth structure above the gum line. This design fundamentally changes how chewing forces interact with the tooth.
When you bite down, a healthy tooth distributes the load down the root into the jawbone. A heavily filled tooth is prone to splitting because the filling acts as a wedge between the remaining walls. A crown acts as a bonded, rigid shell. It hugs the tooth tightly from the outside, holding all the internal components together. When you chew, the crown captures the tooth entirely and redirects the forces vertically, preventing the walls from flexing apart and cracking. This distinction is the single most important factor in the decision-making process: a filling fills a space inside a tooth, while a crown covers the outside to hold the tooth together.
The Decisive Factor: How Much Tooth Remains?
The dentist’s recommendation rarely comes down to a simple preference. Dental schools teach a quantifiable principle related to the remaining tooth structure. If you can understand this ratio, you can predict the treatment plan before the dentist even explains it.
The Golden Rule of Restorations
A tooth’s long-term survival depends less on the cavity’s depth and more on the width of the healthy walls. When decay occurs between teeth (interproximal decay), the dentist must drill through healthy enamel to reach the cavity. This access preparation, combined with the decayed area, removes a certain volume of tooth.
A crucial threshold exists. If the distance between the filling and the edge of the tooth (the cusp) remains wide and robust, a filling suffices. However, if the remaining wall thickness becomes thin—where the filling occupies more than one-third to one-half of the distance between the cusps—the risk of fracture skyrockets. These thin, unsupported cusps behave like glass shelves hanging off a wall. They might hold for months or even years, but one bite into an olive pit or a hard nut can shear them off completely, often requiring a root canal or an extraction.
Measuring the Missing Space
Dentists rarely guess this. They measure the distance between the cusps (intercuspal distance) and the width of the prepared cavity after cleaning out the decay. When the filling width exceeds 50 percent of the total tooth width, the tooth is considered structurally compromised. At this point, replacing the missing tooth volume with more filling material only worsens the wedge effect. The only biomechanically sound solution is to cap the entire unit with a crown, turning the external shell into the main structural support.
Materials Matter: Composition and Performance
Gone are the days when the only choices were silver or gold. Material science has revolutionized both fillings and crowns, offering options that balance aesthetics, strength, and biocompatibility. The materials you choose affect not only the final look but also how aggressively the dentist must prepare the tooth.
Direct Filling Materials: Placed and Shaped in One Visit
Direct fillings start as a soft, pliable substance pushed into the cavity. The dentist sculpts the anatomy, hardens the material inside the mouth, adjusts the bite, and polishes it. You walk out of the office with the restoration fully completed.
Composite Resin
This reigns as the most popular modern filling material. Composite consists of a mixture of acrylic resin and microscopic glass particles. The dentist applies an etching gel to micro-roughen the enamel, paints on a bonding agent that penetrates the microscopic pores, and then packs the tooth-colored resin in layers. A bright blue curing light hardens each layer instantly. This chemical bonding strengthens the remaining tooth by gluing the walls together, unlike older materials that simply plugged the hole. The beauty of composite lies in its ability to blend invisibly with natural tooth structure. However, composite does carry a vulnerability: it shrinks slightly during curing. If the dentist fails to layer it meticulously, this polymerization shrinkage creates microscopic gaps that invite new decay.
Glass Ionomer
Glass ionomer fills a special niche. Made from a reaction between glass powder and polyacrylic acid, this material releases fluoride actively into the surrounding tooth structure. The continual fluoride release helps remineralize adjacent enamel and fight recurrent decay. The material bonds chemically to dentin without requiring the complex etching and bonding steps of composite. However, glass ionomer exhibits lower wear resistance and a duller, more opaque appearance. Dentists typically reserve it for root surface cavities, pediatric dentistry, or high-risk decay patients where the fluoride benefit outweighs the cosmetic compromise.
Dental Amalgam
Silver amalgam has served dentistry for over 150 years, yet it generates more debate than any other material. Amalgam consists of a mixture of silver, tin, copper, and elemental mercury. The mercury binds the metals into a durable, self-sealing mass that withstands chewing forces remarkably well. Amalgam does not bond to tooth structure; it simply sits inside the cavity, mechanically locked by an undercut. Over time, corrosion products seal the microscopic gap between filling and tooth. Despite its longevity and low cost, amalgam usage continues declining for several reasons: the metallic color, the need to remove extra healthy tooth structure to create that mechanical lock, and patient concerns regarding mercury content—even though major health organizations deem it safe for most patients.
Direct Filling Material Comparison
| Material | Aesthetic Quality | Average Longevity | Relative Cost | Special Property |
|---|---|---|---|---|
| Composite Resin | Excellent (tooth-colored) | 5–7 years | $$ | Bonds to tooth, strengthens walls |
| Glass Ionomer | Fair (opaque white) | 3–5 years | $ | Releases fluoride |
| Dental Amalgam | Poor (silver) | 10–15 years | $ | Very durable, self-sealing |
Indirect Crown Materials: Custom-Fabricated Restorations
Crowns follow a fundamentally different fabrication process. The dentist shapes the tooth into a core (the abutment), captures a precise image—either with a digital scanner or physical impression material—and sends the design to a dental laboratory. A technician meticulously fabricates the crown to exact specifications. Because the crown forms outside the mouth, dentists call this an indirect restoration. This allows the use of materials that require high heat, intense pressure, or milling from solid blocks.
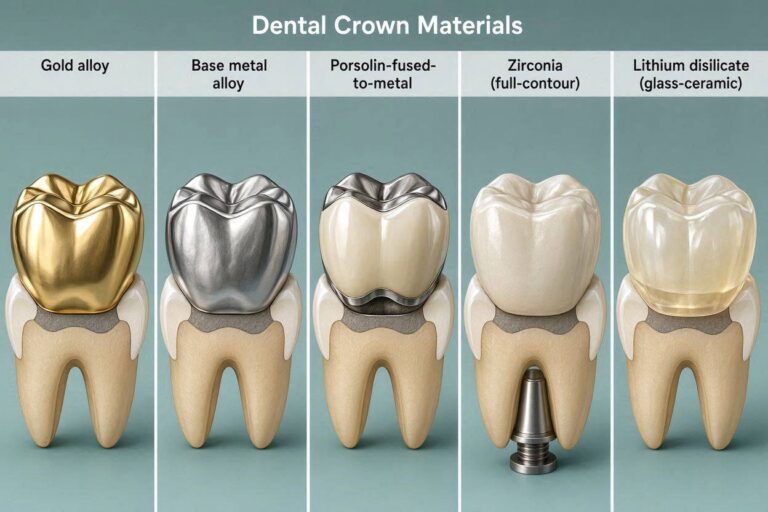
Porcelain-Fused-to-Metal (PFM)
For decades, PFM represented the standard of care. A metal alloy substructure provides incredible strength and a precise fit against the prepared tooth. The lab then bakes layers of feldspathic porcelain over the metal, mimicking the translucency and color of a natural tooth. This hybrid approach marries strength with acceptable aesthetics. However, the underlying metal blocks light transmission. A PFM crown can look slightly opaque, and a dark line sometimes appears near the gums if the gum tissue recedes slightly over time. For posterior molars subjected to massive grinding forces, PFM remains an excellent, battle-tested choice.
Full Porcelain and Ceramic
Modern dentistry leans heavily toward metal-free, all-ceramic restorations. These materials fall into two main categories: feldspathic porcelain and glass-ceramics like lithium disilicate (brand name IPS e.max). Lithium disilicate represents a breakthrough. The lab can either press the material into a lost-wax mold or mill it from a pre-crystallized block in a computer-aided design and manufacturing (CAD/CAM) machine. After milling, a firing cycle crystallizes the glass, creating interlocking crystals that give the material a flexural strength of approximately 400 megapascals—strong enough for any position in the mouth. The optical properties astound even the most discerning cosmetic dentists. Light enters the crown, bounces through the ceramic, and reflects back out, replicating the natural dentin-enamel complex.
Zirconia
Zirconia occupies the top tier of dental ceramics for strength. Yttria-stabilized zirconia polycrystal possesses a unique property called transformation toughening. When a crack begins to propagate, the crystal structure locally transforms, expanding in volume and actually squeezing the crack shut. This makes full-contour zirconia crowns nearly indestructible. Early zirconia suffered from an opaque, chalky-white appearance. Modern multi-layer, multi-chromatic zirconia blocks now incorporate varying shades and translucencies throughout the puck, allowing the lab to mill a crown that transitions from a dentin-like shade at the core to an enamel-like translucent incisal edge. For patients who grind their teeth severely (bruxism) or need full-arch rehabilitation, monolithic zirconia provides an unmatched safety factor.
Gold Alloy
Gold crowns remain the ultimate benchmark for conservative dentistry and longevity. A Type III gold alloy—composed of gold, platinum, palladium, and silver—exhibits a wear rate similar to natural enamel. It never chips, never fractures, and requires the least amount of tooth reduction because thin gold margins flex and burnish against the tooth during cementation, creating a bacterial seal that rivals any adhesive. The glaring downside, of course, is the metallic color. Gold crowns demand placement in areas invisible during smiling. For a second molar that bears enormous stress, a gold crown often outlasts every other option by decades.
Crown Material Comparison
| Material | Aesthetics | Strength (MPa) | Wear to Opposing Teeth | Tooth Removal Required | Best Application |
|---|---|---|---|---|---|
| Gold Alloy | Poor (yellow) | Moderate (high ductility) | Very enamel-friendly | Minimal | Posterior molars |
| PFM | Good | Very High | Can wear opposing enamel | Moderate | Posterior, bridges |
| Lithium Disilicate | Excellent | ~400 | Enamel-friendly | Moderate | Any position |
| Full Zirconia | Very Good | ~1000+ | Can be abrasive if rough | Moderate | Bruxers, posteriors |
The Clinical Decision Tree: When Does a Filling Become a Crown?
Understanding the theoretical difference helps, but real-world decay rarely presents as a neat textbook diagram. We need a clear, diagnostic flow that mirrors the clinical thinking process a dentist follows when you sit in the chair.
Diagnosis: Staining, Caries, and Fractures
The process begins with a visual inspection. A sharp explorer probe catches on soft, demineralized dentin. A brown or chalky-white lesion on the enamel signals active caries. Digital radiographs (bitewing X-rays) reveal the dark, radiolucent shadow of decay between teeth or under existing restorations. The dentist measures the depth and breadth of this shadow against the total width of the dentin.
A crucial diagnostic tool is transillumination. By shining a focused light through the tooth, the dentist can see fractures. A crack that terminates before reaching the pulp chamber differs drastically from a vertical root fracture extending down the root. A filling can seal a small crack confined to an old filling margin. A crack propagating down a cusp demands a full-coverage crown to splint the segment and prevent it from flexing open with each chew.
The Bad Filling Replacement
Many crowns originate from what seems like a straightforward filling replacement. You have an existing large silver amalgam filling that has served you for 15 years. Decay starts creeping around the margin, where the metal meets the tooth. The dentist removes the old filling and the decay, then stops to reassess. Often, the remaining tooth structure is a hollow shell with thin, undermined walls.
Placing another large filling here commits the patient to a cycle of failure. The dentist knows that cusps flex by approximately 18 microns during function. A large bonded composite can reduce this cuspal deflection, but a crown virtually eliminates it. If the dentist observes a crack running across the pulpal floor or a wall that deflects visibly under gentle pressure, the tooth has crossed the threshold. Informing the patient that the “simple filling” now requires a crown can be emotionally difficult, but it represents responsible, conservative care. Delaying the crown often leads to a catastrophic fracture, turning a restorable situation into a surgical extraction.
Root Canal Therapy: The Special Circumstance
A root canal-treated tooth represents a unique biological and structural scenario. The procedure removes the tooth’s nerve and blood supply (the pulp), eliminating the internal hydration source. While the tooth does not become “brittle” in the sense of spontaneous shattering, long-term research shows that endodontically treated posterior teeth lose structural integrity compared to vital teeth. More critically, creating the access cavity to perform the root canal removes the central roof of the pulp chamber, eliminating a critical cross-bracing arch of dentin.
For anterior teeth (incisors and canines) that receive root canals and have no large existing fillings, a crown is often unnecessary. The biting forces are shearing, not compressive, and the tooth thickness remains adequate. For premolars and molars, standard care dictates a crown following root canal treatment. The crown acts as a ferrule, encircling the tooth and preventing the splitting force of mastication from driving the remaining walls apart. A filling placed in a root-canaled molar functions as a cork in a bottle with a cracked neck; it holds position temporarily but offers no structural protection.
The Step-by-Step Journey: From Chair to Completion
Describing the difference theoretically lacks the visceral understanding that comes from walking through the actual appointment. Let us shadow two hypothetical patients: one who needs a moderate-sized filling and another who requires a full-coverage crown.
Patient A: The Direct Composite Filling
You arrive for your appointment knowing you have a small cavity between your premolars. The dentist reviews the X-ray and confirms the decay is limited, not approaching the nerve.
The procedure begins with local anesthesia. A topical gel numbs the surface gum, and a small injection delivers lidocaine, blocking the nerve signals to the area. Once the tooth tests completely numb—verified by cold spray or a gentle probe—the dentist isolates the tooth with a thin sheet of rubber (a dental dam) or a cotton roll system to keep the area dry and saliva-free.
Using a high-speed handpiece with water spray, the dentist enters the decayed area. The removed enamel and dentin are infected and softened. The dentist often uses a caries-detecting dye that stains only the demineralized, infected dentin, leaving healthy tissue untouched. This ensures conservative removal. The resulting cavity appears as a clean, hard-walled preparation.
Now the adhesive dance begins. The dentist applies a 37 percent phosphoric acid etchant gel to the enamel for 15 to 20 seconds. This dissolves the mineral component microscopically, creating tiny pores (resin tags). After rinsing and drying, a primer and bonding agent soak into these pores. The curing light activates the photoinitiator in the adhesive, locking it solid. This layer forms the crucial link between the hydrophobic filling and the hydrophilic tooth.
The dentist then places the composite resin in small increments of about 2 millimeters. Each layer receives its own curing cycle. The incremental technique counteracts polymerization shrinkage stress. A bulk-fill composite might allow 4-millimeter increments, but the principle remains. The dentist builds the cuspal inclines and the interproximal contact with neighboring teeth using a matrix band—a thin metal or clear plastic strip that wraps around the tooth.
Finally, the art of finishing begins. A series of carbide finishing burs, diamond-impregnated polishing discs, and rubber points shape the anatomy and create a glass-like luster. The dentist checks the bite with articulating paper, a thin carbon strip that marks where the teeth touch. A high spot on the filling can cause post-operative sensitivity and eventual fracture, so the dentist meticulously adjusts until the bite feels seamless. The entire process takes approximately 30 to 45 minutes.
Patient B: The Zirconia Crown (Two-Appointment Protocol)
You have a cracked molar. The dentist has confirmed the crack runs across the distal cusp, and a filling cannot reliably prevent propagation. The plan calls for a full-contour zirconia crown.
Appointment One: Preparation and Temporary
Anesthesia numbs the tooth completely. The dentist begins the reduction process using specific diamond burs with depth guides. For an all-ceramic crown, the dentist reduces the occlusal (biting) surface by approximately 1.5 to 2 millimeters and the axial (side) walls by 1.0 to 1.5 millimeters. These reductions create the space for the future crown material, ensuring it is not bulky or prone to fracture. A chamfer or shoulder margin is carved smoothly just at or slightly below the gumline. This margin defines the crown’s future edge, creating a seamless junction between the prosthetic and the natural root.
The dentist must also manage the gingiva. A retraction cord—a thin, braided string often impregnated with a hemostatic agent—is gently tucked into the sulcus (the crevice between tooth and gum) for a few minutes. This pushes the tissue away and stops any minor bleeding, exposing the prepared margin cleanly.
Now the scan. If the office uses a digital intraoral scanner, a small wand captures thousands of images per second, stitching them into a precise 3D virtual model of the prepared tooth, the opposing arch, and the bite registration. If the office uses traditional methods, a polyvinyl siloxane or polyether impression material fills a tray and captures the physical details. The scan or impression goes to the laboratory.
A temporary crown must protect the prepared tooth while the lab works. Using a pre-operative scan or a physical impression taken before the preparation, the dentist fabricates a provisional acrylic or composite crown right at the chairside. This temporary is cemented with a soft, temporary cement designed to hold the crown firmly but allow easy removal at the next visit. The dentist carefully checks the temporary’s bite and contours. An improperly shaped temporary can cause gum inflammation or tooth shifting that complicates the final delivery.
The Laboratory Phase
This part happens behind the scenes. A dental technician receives the digital file or stone model. Using CAD software, the technician meticulously designs the crown anatomy on the virtual tooth, ensuring tight interproximal contacts and proper occlusal contact. The computer sends the design to a five-axis milling machine. For a zirconia crown, the mill carves the shape from a partially sintered puck of zirconia about 20 to 25 percent larger than the final dimensions. This oversized state accounts for the sintering shrinkage.
The milled unit then enters a specialized furnace. Over several hours, the temperature ramps up to approximately 1500 degrees Celsius. The zirconia particles fuse, and the block shrinks homogeneously to its final, incredibly dense dimensions. For a high-aesthetic case, the technician may apply a layer of staining and glaze porcelain, firing the crown again. For full-contour monolithic zirconia, the surface receives a final polish with diamond-impregnated rubber wheels, creating a surface smooth enough to avoid abrading the opposing teeth.
Appointment Two: Delivery and Cementation
About two weeks later, you return. The dentist removes the temporary crown and cleans the prepared tooth with a pumice paste. A test fit, or try-in, follows. The dentist seats the crown and inspects the margins with an explorer. The fit must feel invisible—a smooth transition where the porcelain vanishes into the root. The interproximal contacts must allow floss to pass with a distinct snap but without catching. The bite is adjusted carefully. Because zirconia is so hard, this adjustment requires special fine-grit diamond burs used with copious water spray to prevent heat damage.
Once satisfied, the dentist prepares the tooth for cementation. The internal surface of the zirconia crown undergoes a specific protocol: airborne-particle abrasion with aluminum oxide at low pressure, followed by a special primer containing 10-methacryloyloxydecyl dihydrogen phosphate (10-MDP). This phosphate monomer chemically bonds to the zirconia surface. The tooth receives a resin bonding protocol similar to the filling process, with etching, priming, and bonding. A dual-cure or self-adhesive resin cement fills the crown, and the dentist seats it with firm pressure. Excess cement is cleaned meticulously, especially below the gumline, as residual cement acts as a plaque trap and causes peri-implant or periodontal inflammation. A final curing light activates the cement, and a radiograph confirms no cement fragments remain. The crown is now a permanent, load-bearing part of your oral anatomy.
The Head-to-Head Comparison
To crystallize the decision points, a direct side-by-side evaluation removes ambiguity. The following table serves as a quick reference guide for the major distinguishing features.
| Feature | Direct Filling | Indirect Crown |
|---|---|---|
| Philosophy | Fills a defect inside the tooth | Covers the entire tooth outside |
| Coverage Area | Partial defect | Circumferential; all cusps |
| Visits Required | Typically 1 | Typically 2 (except same-day CAD/CAM) |
| Anesthesia | Usually required | Always required |
| Tooth Shaping | Minimal; decay removal only | Aggressive; 1.5–2.0mm reduction all around |
| Fabrication Method | Direct; hand-sculpted in mouth | Indirect; lab-fabricated outside mouth |
| Temporary Needed | No | Yes |
| Primary Failure Mode | New decay at margin, bulk fracture | Cement washout, porcelain fracture, root decay |
| Patient Sensation | Short post-op sensitivity possible | Gum soreness; adaptation period |
The Economics of Saving a Tooth
Cost often becomes the elephant in the treatment room. Patients rarely ignore the financial dimension, and understanding the value proposition aids in accepting the recommended plan.
Average Cost Ranges
Dental fees vary wildly by geographic location, material costs, laboratory fees, and specialist involvement. The values below reflect typical ranges in private practice settings with fees higher than insurance fee schedules.
- Composite Filling (1–2 surfaces): $150 to $450 per tooth.
- Composite Filling (3+ surfaces): $300 to $650 per tooth.
- Amalgam Filling: $100 to $300 per tooth.
- Porcelain-Fused-to-Metal Crown: $900 to $1,400 per tooth (includes preparation, temporary, and insertion).
- Lithium Disilicate Crown: $1,200 to $1,800 per tooth.
- Full Zirconia Crown: $1,100 to $2,000 per tooth.
- Gold Alloy Crown: $1,300 to $2,500+ per tooth (fluctuating with precious metal prices).
The crown fee appears significantly higher, but it encompasses the laboratory bill, which can range from $200 to over $500 depending on the technician’s artistry and the material. A filling’s cost relies almost entirely on the dentist’s chair time and material cartridge expense.
Insurance and Co-Pay Realities
Most dental insurance plans categorize fillings as “Basic” services and crowns as “Major” services. Typical benefit structures cover basic services at 80 percent and major services at 50 percent, often with a missing tooth clause or waiting period. A patient requiring a crown might pay a co-pay of $600 to $1,200 out-of-pocket after insurance. A filling co-pay might range from $30 to $150.
However, the insurance lens distorts clinical reality. A tooth that receives a massive filling covered at 80 percent today might fracture catastrophically in two years, now requiring a root canal, a post, a core buildup, and a crown—a sequence that costs triple the original crown fee and often leads to extraction if the fracture extends too far. The initial “saving” proves illusory. Treating the tooth definitively with a crown at the appropriate time, even at a higher initial out-of-pocket expense, often represents the cheaper long-term path.
Longevity and the Survival Curve
Published research provides clear survival probability curves. Understanding these curves sets realistic expectations.
Filling Longevity
A meta-analysis by the Journal of Dental Research found that the median survival time of a direct posterior composite restoration is approximately 7 to 10 years. A significant variable is the size of the filling. Small, single-surface fillings can last 15 years or more. Large, multi-surface fillings with cuspal coverage attempts see a sharp drop-off, often failing within 3 to 5 years due to fracture. Patient risk factors heavily influence outcomes: high sugar intake, acidic oral environment, heavy bruxism, and poor oral hygiene accelerate marginal degradation.
Crown Longevity
Systematic reviews report that the survival rate for all-ceramic crowns ranges from 92 to 96 percent at 5 years and 85 to 90 percent at 10 years. Gold crowns demonstrate an enviable 95 percent survival at 10 years and 85 percent at 25 years. The main threat to a crowned tooth is not the crown material failing, but rather decay developing on the root surface at the margin. This underscores a critical point: a crown protects the covered portion perfectly, but the gumline margin remains vulnerable to bacterial plaque. Exquisite home care around a crown—flossing meticulously, using an electric toothbrush at the gumline, and possibly a water flosser—determines whether the restoration reaches its third decade.
A poignant quote, often attributed in restorative dentistry circles, captures this dynamic perfectly:
“A crown does not grant immortality to a tooth. It simply moves the battleground from the crown of the tooth to the margin at the gumline. The war against bacteria continues daily.”
Common Questions That Arise in the Chair
Patients often harbor very specific anxieties or curiosities that surface during the consultation. Addressing these head-on builds trust and aids informed consent.
“Why Can’t You Just Drill Out the Crack and Fill It?”
A crack is not a cavitated void. It is a split within the solid structure, often invisible to the naked eye until it stains. Drilling out a crack requires following its path, which often extends down the root unpredictably. A filling cannot join the two fractured pieces back together; it only fills the space created by removing them. The act of chewing causes the crack to flex open and closed, pumping fluids and bacteria deeper into the dentinal tubules. A crown acts as a splint, compressing the segments together from the outside and preventing this flexion. If the crack extends into the pulp or beyond the gum line, even a crown cannot save the tooth, and extraction becomes necessary.
“Why Do I Feel Sensitivity After a Filling?”
Post-operative sensitivity remains one of the most common patient concerns. Several factors contribute. The bonding process creates microscopic gaps if the dentist allows moisture contamination. The composite shrinks during curing, pulling on the dentinal tubules and triggering fluid movement that nerve endings interpret as pain. The bite may remain fractionally high, causing the tooth to feel traumatized. A deep filling conducts thermal changes closer to the nerve. Usually, this sensitivity subsides within a few days to two weeks as the tooth recovers and the smear layer re-occludes the tubules. Persistent, throbbing pain or sensitivity to heat indicates potential nerve inflammation (pulpitis) that may require root canal therapy.
Special Scenarios: Fillings That Act Like Crowns
The line between filling and crown occasionally blurs with hybrid restorations. These conservative options bridge the gap.
Inlays and Onlays: The Middle Ground
An inlay is an indirect restoration that fits within the cusps of a tooth, much like a filling. An onlay covers one or more cusps, acting as a partial crown. Both are fabricated in a lab or by a chairside CAD/CAM machine from ceramic, composite, or gold. They bond adhesively to the prepared tooth, preserving more healthy structure than a full crown.
The preparation for an onlay removes a specific cusp, reducing it and creating a butt-joint margin, while leaving the remaining intact cusps untouched. The onlay then bonds over the missing cusp, splinting and replacing it. This represents the most conservative restoration when one cusp is compromised but the opposite side remains healthy and thick. The long-term data shows onlays perform comparably to crowns in appropriately selected cases, with a 90 percent survival rate at 9 years. The decision hinges entirely on the remaining wall thickness and the risk of future fracture of the untouched cusps.
Important Note for Patients
If your dentist recommends an onlay rather than a full crown, this reflects a dedication to minimally invasive dentistry. Ask to see the intraoral photos or scan. When a healthy cusp remains robust, sparing it from the drill preserves the biological apex of the tooth’s strength. Never pressure your dentist to “just crown it” if an onlay preserves natural structure.
The Home Care Distinction
The long-term maintenance of a filling versus a crown diverges subtly but importantly.
Caring for Fillings:
The margin where composite meets tooth enamel is a microscopic battleground. Plaque biofilm accumulates in this interface. Over time, acids produced by bacteria can de-mineralize the enamel margin, creating a faint white line (marginal staining) that progresses to a brown, active cavity if not cleaned. Flossing a filling contact requires sliding the floss against the tooth surface past the contact and then gliding it up and down against the restoration margin. Simply popping the floss in and out of the contact misses this critical cleaning surface. Fluoride toothpaste, fluoride mouth rinse at a separate time of day, and possibly a prescription high-concentration fluoride gel applied to the margins with a cotton swab can remineralize early white-line lesions and extend the filling’s life.
Caring for Crowns:
Crown care focuses on the gumline. The crown material itself will not decay, but the natural root surface below the crown margin consists of dentin and cementum, which decay more readily than enamel. Floss must wrap around the crown and slide below the gumline gently, wiping the crown margin and the root surface. A water flosser with a pik pocket tip can irrigate below the margin, flushing out bacterial colonies. For patients with a history of decay, a nightly application of a neutralizing oral gel containing xylitol and calcium phosphates can shift the oral biofilm toward a less cariogenic state.
Understanding CAD/CAM Same-Day Crowns
Technology now allows dentists to combine the preparation and delivery phases into a single appointment, disrupting the traditional two-visit model. Understanding this workflow clarifies the filling-versus-crown time dynamics.
The dentist prepares the tooth identically to the traditional method. Instead of taking a physical impression or sending a digital scan to a lab, the dentist uses a chairside CAD/CAM system. The intraoral camera captures the optical impression. The dentist then designs the crown on the software, a process taking 5 to 10 minutes. The design file feeds directly into an in-office milling machine. A solid block of lithium disilicate or a composite resin ceramic is milled into the exact shape. After milling, the crown may require sintering in a special rapid-cycle furnace for crystallization (about 15 to 20 minutes). The dentist then stains and glazes the crown, fires it, and cements it.
The entire workflow takes approximately 90 to 150 minutes. The advantage is immediate gratification—no temporaries, no second anesthesia appointment, no waiting. The limitations include a more monochromatic final shade (since a lab ceramist’s artistic layering is absent) and potential limitations in milling the ultra-fine margin detail. For posterior teeth in functional areas, same-day CAD/CAM crowns perform excellently and represent a valid, convenient alternative.
The Biological Price: Tooth Substance Removal
Every time a dentist cuts into a tooth, that structure is lost forever. The body cannot regrow enamel. This creates a hierarchy of biological cost.
Filling: Removes diseased tissue and a minimal amount of healthy enamel for access. The biological cost is low. The tooth remains essentially whole.
Crown: Removes all undercuts and reduces the entire visible tooth circumferentially by 1.5 to 2 millimeters. The biological cost is high. A crown preparation reduces the tooth’s diameter significantly. This irreversible reduction commits the tooth to lifelong prosthetic coverage. If the crown later fails due to root decay, the small remaining core often leaves few options besides extraction.
This biological reality dictates that dentists should never default to a crown for a small defect. The dental oath of “do no harm” translates here to preserving maximum healthy structure. Conversely, placing a massive filling in a structurally doomed tooth also causes harm by inviting an unrestorable fracture that consigns the tooth to extraction. The ethical calculus weighs the biological cost of the crown prep against the risk of catastrophic failure with a lesser restoration.
Pain and Anxiety: What to Expect
The psychological barrier often dwarfs the clinical reality. Accurate, calm information lowers cortisol levels.
During the Filling:
The injection of local anesthetic stings for a few seconds as the solution expands the tissue. After that, the procedure typically produces no sharp pain. You feel the vibration of the drill, hear the pitch changes, and feel the water spray, but pain signals are blocked. Some patients experience a sensation of pressure as the dentist pushes the composite against the walls, but this remains mild. The sound and vibration often trigger more anxiety than the actual sensation warrants.
During the Crown Preparation:
The crown preparation involves more extended drilling time. The multiple instrument changes, the packing of retraction cord, and the impression can feel uncomfortable but not acutely painful if anesthesia is profound. For patients with a strong gag reflex, the impression or scanning process requires breathing strategies. Nitrous oxide (laughing gas) or oral conscious sedation can help manage this.
After the Appointment:
A filled tooth may exhibit brief cold sensitivity. A crowned tooth, particularly with a temporary, may cause gum tenderness from the retraction cord or the temporary’s marginal fit. Over-the-counter anti-inflammatories like ibuprofen typically resolve this within 24 to 48 hours. A crown that feels high in the bite after the numbness wears off requires an adjustment visit; this is not uncommon and does not indicate a complication.
Common Myths and Misconceptions
Myth: Crowns always require root canals.
Reality: The vast majority of crowned teeth are vital. The crown preparation itself, if performed with adequate water cooling and care, does not cause the nerve to die. The pre-existing deep decay or crack is what endangers the pulp. A crown placed on a healthy, vital tooth does not necessitate a root canal.
Myth: White fillings are toxic because of BPA.
Reality: Some dental composites release trace, non-detectable amounts of bisphenol-A, a byproduct of certain resin monomers. The duration of exposure is a few seconds during placement until cured, and the released amount is exponentially lower than environmental BPA exposure from receipts or food containers. No epidemiological evidence links dental composites to systemic disease. The benefit of removing active decay outweighs any theoretical risk.
Myth: A crown protects the tooth from ever getting a cavity again.
Reality: A crown eliminates the possibility of decay on the covered crown portion. However, the margin at the gumline is still natural tooth. Neglecting this margin invites root decay that can undermine the crown entirely. Many crowns fail at the 15-year mark specifically because of root surface caries. The crown remains perfect while the tooth inside rots.
The Dentist’s Decision Framework
To encapsulate the clinical reasoning, consider this simplified algorithm that a trained dentist subconsciously runs through:
- Is the nerve dying? If irreversible pulpitis or necrosis is present, a root canal is necessary before any restoration.
- How many walls are intact? If all cusps are thick and supported, a direct filling is appropriate.
- Does the cavity extend beyond 50 percent of intercuspal width? If yes, the tooth requires cuspal coverage (onlay or crown).
- Is a crack present that splits a cusp? If the crack extends vertically and the segment flexes, full coverage is mandatory.
- Has the tooth had root canal treatment? If posterior and structurally weakened, a crown with ferrule effect is indicated.
- What is the patient’s functional risk? In a heavy bruxer, a crown should be the default for any moderate to large restoration to prevent catastrophic failure.
The Value Proposition: Short-Term vs. Long-Term
Choosing between a filling and a crown often distills into a value decision. A composite filling on a deeply compromised tooth costs $300 today. The crown costs $1,500 today. The filling feels like the economical choice. However, actuarial dental reasoning considers the probability-weighted outcome.
If the tooth has a 70 percent probability of fracturing within three years with a filling, and fracture treatment involves a root canal ($1,200), a post and core buildup ($300), a crown ($1,500), or an extraction and implant ($4,000+), the expected cost of the “saving” route exceeds the definitive crown route. The thoughtful dentist communicates not as a salesperson but as a risk manager. The patient who understands these probabilities almost always opts for the definitive, tooth-preserving crown.
A Note on Pediatric Dentistry
The decision tree shifts significantly for primary (baby) teeth. A baby tooth has a finite lifespan—it is programmed to exfoliate. Placing a full ceramic crown on a primary molar that will fall out in four years overtreats the tooth and represents poor value. Pediatric dentists often use stainless steel crowns, which are pre-formed, inexpensive, and quickly adapted and cemented. These crowns cover the entire tooth and prevent decay from progressing, but they are considered temporary by nature. For small cavities in baby teeth, composite or glass ionomer fillings remain the workhorse materials.
Choosing the Right Dentist for the Decision
The trustworthiness of the recommendation hinges on the dentist’s philosophy. A fee-for-service dentist who allocates an hour for a large composite filling, employing meticulous isolation and incremental layering, may save teeth that a high-volume insurance-mill dentist would crown purely for speed. Conversely, some biologically conservative dentists push bonded onlays to their limits, successfully restoring a borderline tooth with minimal prep.
Ask your dentist to show you the intraoral photograph or the digital scan. A transparent dentist will walk you through the measurement: “Look here, see this thin wall? The light shines through it. If I only fill this, this wall will snap off within a year. I want to cover it to keep your tooth whole.” When you see the evidence on the screen, the decision ceases to be an abstract up-sell and becomes a collaborative, evidence-based choice.
Conclusion
Understanding the difference between a filling and a crown moves you from a passive recipient of dental care to an informed partner in your own health. A filling patches a localized cavity from within, preserving maximum natural structure and serving as the gold standard for small to moderate decay. A crown completely encapsulates a weakened tooth, redistributing chewing forces to prevent catastrophic fracture when the structure falls below a critical threshold. The decision hinges not on patient whim or dentist convenience, but on measurable parameters of remaining wall thickness, the presence of cracks, and the history of the tooth. By selecting the appropriate restoration at the correct time, you preserve your natural dentition, avoid emergency pain and extractions, and invest wisely in a functional smile that endures for decades.
Frequently Asked Questions
Can a large filling be replaced with a crown later?
Yes. Many crowns begin as large fillings that have served their lifespan. The dentist removes the old filling, any new decay, and then prepares the remaining tooth structure for a crown. This is a standard sequence. The timing matters: replacing the filling before a fracture occurs preserves more of your natural tooth.
How do I know if my filling is failing?
Common signs include food trapping between the teeth, a rough or jagged edge your tongue feels, intermittent cold sensitivity that lingers, or a dark shadow visible at the margin. A failing filling often does not hurt until the decay reaches the nerve, so visual inspection and radiographs are essential.
Does getting a crown hurt more than a filling?
The anesthesia protocol is identical. The crown procedure requires more drilling time, but with adequate numbness, you should feel no sharp pain during either procedure. Post-operative gum tenderness is slightly more common with crowns due to the retraction cord and temporary cement.
Is a same-day CAD/CAM crown as good as a lab-made crown?
For posterior, functional teeth, yes. In-office milled lithium disilicate or composite resin ceramic crowns demonstrate comparable strength and fit. For anterior, highly aesthetic teeth where intricate color layering and incisal translucency matter, a skilled lab ceramist still provides superior artistry.
Why is a crown so expensive if it only covers the tooth?
The fee covers the dentist’s skill in precise tooth reduction and margin design, the digital scanning system, the laboratory technician’s custom-fabricated work (often involving multiple firing cycles and hand-painting), and the high-quality materials like pressed ceramic or milled zirconia. You are paying for a custom, medical-grade device designed to last decades.
Additional Resource
For a deeper, evidence-based exploration of the longevity and survival rates of dental crowns versus fillings, refer to this systematic review and meta-analysis from the Journal of Dentistry: https://www.sciencedirect.com/journal/journal-of-dentistry. Searching within this journal for “survival rates of full coverage crowns” will provide the scientific foundation supporting the clinical guidelines discussed in this article.
Disclaimer: This article is intended for informational and educational purposes only and does not constitute medical or dental advice. Dental conditions vary widely, and only a thorough clinical examination by a licensed dentist can determine the appropriate treatment for your specific situation. Always consult with your healthcare provider regarding any questions about your dental health.