How To Loosen Dental Implants?
The question itself reveals a fundamental misunderstanding of what a dental implant is. A correctly executed dental implant is the most stable, permanent tooth replacement in modern medicine. It is not a removable device that you take in and out. It is a titanium post biologically fused to your jawbone. Asking how to loosen it is like asking how to loosen a healthy, natural tooth anchored by its root. The short, direct answer is: you do not, and you should never try.
However, the fact that someone asks this question points to underlying issues. Sometimes, a patient believes their implant is loose when it is actually a different component that has failed. Other times, an implant has genuinely failed and needs professional removal. This article will provide a completely honest, medically accurate guide. You will learn why you must never attempt to loosen an implant yourself, what it actually means if something feels loose, the clinical process for professional removal, and why the entire goal of implant dentistry is a lifetime of non-loosening stability.
The Critical Misconception: Implants Are Not Dentures
The most dangerous confusion is between a dental implant and a removable denture or a removable flipper. A traditional denture rests on your gums. You take it out each night. You actively loosen it from your mouth with your fingers. A dental implant is the complete opposite. The titanium fixture is surgically embedded and then biologically fused to the bone through a process called osseointegration.
There is no clasp to unhook. There is no button to press. There is no normal, at-home method to “loosen” it because it is designed to be a permanent anatomical part of you. Any internet advice suggesting you can loosen a dental implant with home tools or remedies is dangerously wrong and will result in severe damage to your jawbone.
“A successfully integrated dental implant has no mobility. Period. It is as firm as a natural, healthy tooth root. If you perceive movement, something is wrong, and you need an immediate professional evaluation, not a DIY removal strategy.”
Understanding the Different Components and Why They Fail
When a patient says, “My implant feels loose,” they are almost always experiencing one of two very different clinical scenarios. Understanding which part of the system is failing is the key.
Scenario A: A Loose Abutment or Crown (The Prosthetic Failure)
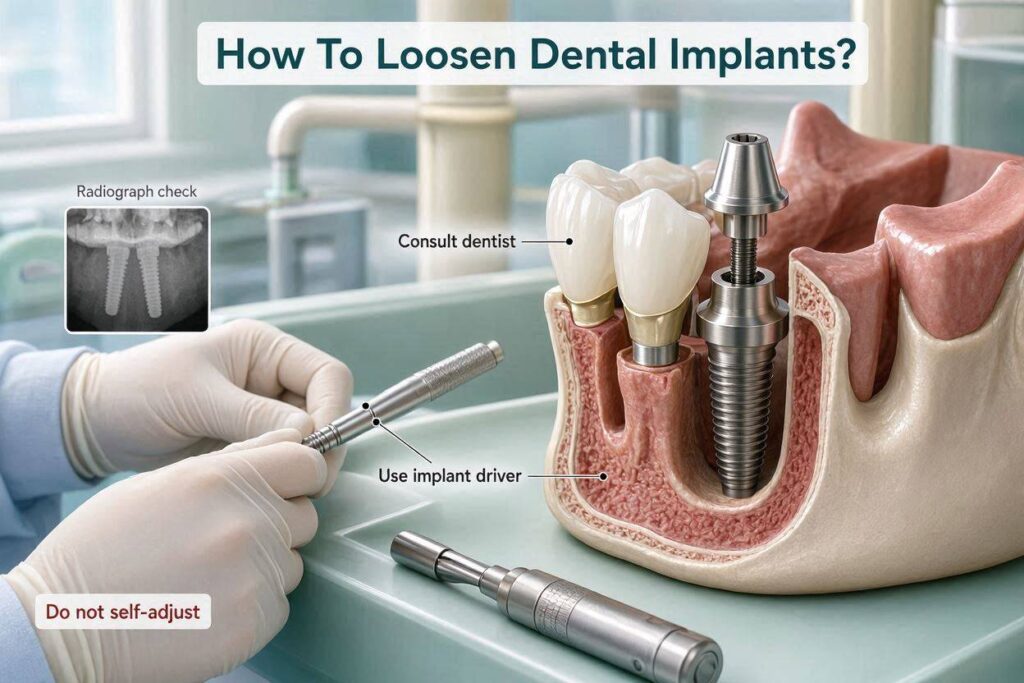
This is the most common and least serious reason for a “loose implant” sensation. The dental implant system has three parts: the titanium fixture (root), the abutment (connector), and the crown (tooth). The fixture may be perfectly solid in the bone, but the small screw connecting the abutment to the fixture, or the cement holding the crown to the abutment, has failed.
Signs of this scenario include a feeling of a slight wiggle or rotation in the tooth, but no pain from the gum area around the implant. You might feel the crown shift slightly when you chew. This is not a loose implant. This is a loose restoration. This is a quick, non-surgical fix. A dentist will remove the crown, tighten or replace the connecting screw, and resecure the crown. Do not ignore this sensation. If you continue to chew on a loose abutment screw, you can fracture the internal components of the implant fixture itself, turning a simple fix into a complex failure.
Scenario B: A Failed Implant Fixture (The Biological Failure)
This is the true “loose implant.” It means the process of osseointegration has been lost. The living bone that once fused to the titanium surface has broken down, and the implant is now mobile in the bone. This is a serious medical situation. You cannot tighten it back up. The implant, as a functional device, has failed.
Signs of a failing implant fixture are unmistakable. The implant has a perceptible, wobbly movement when you touch it with your tongue or finger. There is typically pain, swelling, or bleeding from the gum around the implant. You may notice pus or a bad taste. On an X-ray, the dentist will see a dark, saucer-shaped area of bone loss around the implant, a pattern called peri-implantitis, which is the implant equivalent of advanced gum disease.
Why You Must Never Try to Loosen an Implant Yourself
Attempting to forcibly loosen a dental implant at home is an act of self-inflicted surgical trauma. You must understand the catastrophic damage this would cause.
First, if the implant is truly integrated with the bone, you cannot loosen it. The force required to break a solid bone-to-titanium fusion is massive. If you apply extreme twisting or pulling force, you will not unscrew the implant. You will fracture your jawbone. You will break the buccal plate of bone, the thin outer wall of the jaw. This is a surgical emergency that requires immediate hospitalization and a complex bone graft to reconstruct your face.
Second, you will destroy any remaining healthy bone. Even if the implant is failing and partially mobile, the remaining bone fibers are still attached. Ripping the implant out at home will tear away chunks of precious, irreplaceable bone along with the implant. A dentist can atraumatically remove a failed implant using specialized instruments to preserve every millimeter of bone for a future regraft. You cannot do this.
Third, you risk catastrophic nerve injury. The nerves in the lower jaw (inferior alveolar nerve) and the sinuses in the upper jaw are in very close proximity to implant sites. A violent, uncontrolled removal attempt can permanently sever the nerve, leaving you with lifelong numbness of your lip and chin, or create a hole into your sinus cavity that requires another surgery to fix.
The Only Legitimate “Loosening”: Professional Explantation
There is only one safe, medically valid way to separate a dental implant from a patient’s body. It is called explantation, and it is a surgical procedure performed by a licensed dentist or oral surgeon.
Clinical Indications for Implant Removal
A professional will only recommend removal for a specific clinical reason.
- Failed Osseointegration (Early Failure): The implant never fused to the bone.
- Peri-implantitis (Late Failure): A bacterial infection has destroyed the supporting bone, and the defect is too large to regenerate predictably.
- Implant Fracture: The titanium fixture itself has cracked or broken, a rare but possible outcome with older, narrower implant designs or severe trauma.
- Malposition: The implant was placed in the wrong position and cannot be restored with a functional or aesthetic crown.
The Professional Removal Procedure
The surgeon does not want to “loosen” the implant as much as they want to carefully release the microscopic bone attachment with minimal trauma. The process is called an osteotomy. Under local anesthesia, the surgeon makes a small incision and uses a hollow, cylindrical cutting instrument called a trephine bur. This bur cuts a small, precise core of bone around the circumference of the implant. It releases the bone-to-implant interface. The implant can then be gently unscrewed out.
The goal is to remove the implant while preserving the maximum amount of healthy surrounding bone. After removal, the surgeon thoroughly debrides and cleans the socket, removing all infected granulation tissue. The site is then often grafted with bone material to preserve the ridge for a potential future implant attempt. This entire procedure is controlled, precise, and performed under sterile conditions.
The Preventive Truth: How to Ensure Your Implant Never Loosens
The entire philosophy of modern implant dentistry is built around a single, non-negotiable outcome: the implant must never loosen. The best way to avoid ever worrying about a loose implant is to prevent failure from the start and maintain it diligently.
Meticulous Home Care
A dental implant cannot get a cavity, but it can get gum disease. The condition is called peri-implant mucositis (inflammation of the soft tissue only) and, if left untreated, peri-implantitis (bone loss). The bacteria that cause this disease are the same ones that cause periodontitis on natural teeth. Your home care must be flawless. You must brush around the implant crown at least twice a day with a soft-bristled toothbrush. You must clean under the gumline around the implant crown daily. Specific tools are essential for this: implant-specific floss with a fuzzy middle section and a thin threader, interdental brushes, or a water flosser with a non-metallic tip. The goal is to disrupt the bacterial biofilm every single day.
Professional Periodontal Maintenance
You must see your dentist or periodontist for professional maintenance, typically every 3 to 4 months for an implant patient, or as directed. These visits are not basic cleanings. The hygienist uses special non-metallic, plastic, or titanium scalers to clean around the implant without scratching its delicate surface. They probe the gum pocket around the implant to measure its depth and check for bleeding, which are the earliest warning signs of inflammation. They remove the crown and clean the abutment if it is screw-retained. This professional surveillance is your best defense against a slowly progressing, silent failure.
Managing Parafunctional Forces
Excessive force is an enemy of implant longevity. If you clench or grind your teeth (bruxism), you can overload the implant and its components, leading to screw loosening, porcelain fracture, or even bone loss. A custom-fabricated occlusal night guard, worn while you sleep, is mandatory for any implant patient with a bruxism habit. This guard protects the implant from destructive lateral forces.
Conclusion
A properly integrated dental implant is designed to be a permanent, non-mobile part of your body. The only safe way to separate it from the jaw is through a professional surgical explantation procedure performed by a dentist using precise trephine instruments. Patients must never attempt to loosen or remove an implant at home, as the force required to break the bone-to-titanium bond will result in jaw fracture, bone loss, and permanent nerve damage. If you feel a “loose” sensation, the cause is either a simple loose screw needing professional tightening or a biological failure requiring expert evaluation and treatment, not a DIY solution.
FAQ
1. Can I unscrew my own dental implant?
No. A healed implant is fused to the bone. You cannot unscrew it. You would only cause severe bone fracture and tissue damage by trying. Only a dentist can surgically remove it.
2. What should I do if my implant crown feels wobbly?
Do not chew on it. Call your dentist immediately. This is likely a loose abutment screw, a simple in-office fix, but ignoring it can damage the implant internally.
3. Can a permanent cement-retained crown be loosened and removed at home?
Absolutely not. Permanent dental cement requires professional instruments and specific techniques to break the cement seal without damaging the underlying tooth or implant abutment. You will break the porcelain crown if you try.
4. What is the surgical tool used to remove a failed implant?
A trephine bur is the most common instrument. It is a hollow, cylindrical drill that cuts a small core of bone around the implant to release it with minimal trauma.
5. How can I prevent my dental implant from ever becoming loose?
Follow a strict daily hygiene routine using implant-specific floss or a water flosser, attend professional maintenance cleanings every 3-4 months, and wear a night guard if you grind your teeth.
Additional Resource
For an authoritative guide on the long-term care and maintenance required to prevent implant failure, review the detailed patient resources provided by the American Academy of Periodontology (AAP).