All You Want to Know About the 3 Stages of Dental Implant
A dental implant is not a single procedure. It is a journey, a carefully choreographed sequence of distinct phases, each with its own goals, timeline, and biological events. Patients who understand these stages before they begin are more relaxed, more compliant with instructions, and more satisfied with the final result. They know that the months between surgery and a new smile are not a delay but a construction project. The entire dental implant process can be clearly divided into three main stages: the surgical placement of the implant fixture, the healing and osseointegration phase, and the restorative phase that delivers the final prosthesis. This article is a comprehensive walk-through of each stage. You will learn what happens at every appointment, what you will feel, how long each stage takes, and the critical decisions that are made along the way. This is your roadmap from tooth loss to a fully restored, functional, and beautiful smile.
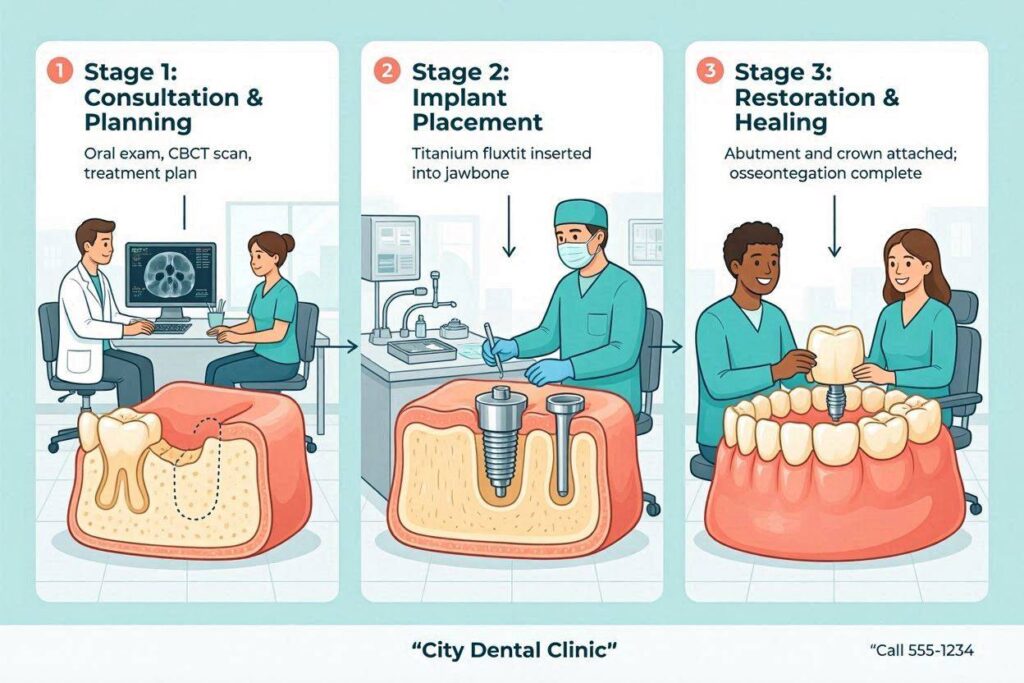
Stage 1: Surgical Placement of the Implant Fixture
The first stage is the surgical insertion of the implant fixture into your jawbone. This is the day of your surgery. It is the most invasive step and the one that causes the most anxiety, but it is also the most meticulously planned and controlled. This stage encompasses the pre-operative planning, the surgery itself, and the immediate post-operative period.
Pre-Operative Planning: The Blueprint
Surgery without a plan is malpractice. The first stage begins long before you enter the surgical suite. It starts with a comprehensive examination, which always includes a Cone Beam Computed Tomography (CBCT) 3D X-ray. This scan allows your dentist to visualize your jawbone in three dimensions—its height, width, density, and the exact location of the inferior alveolar nerve (in the lower jaw) and the maxillary sinuses (in the upper jaw). For complex or multiple implant cases, a digital intraoral scan of your teeth is merged with the CBCT data. The implant is virtually placed in the ideal position, determined by the final crown’s required location—a principle called prosthetically-driven implant placement. A 3D-printed surgical guide is often fabricated. This guide fits over your teeth and has metal sleeves that direct the surgical drills with sub-millimeter precision. This is the blueprint for a safe, predictable surgery.
The Surgical Procedure: Step-by-Step
On the day of the surgery, the area is profoundly numbed with local anesthetic. If it is a complex case, sedation or general anesthesia may be used. The surgeon follows the plan.
- Incision and Flap: A small incision is made in the gum to expose the underlying bone. A flap of tissue is gently lifted.
- Osteotomy Preparation: Using the surgical guide and a sequence of precisely calibrated drills under a stream of cold sterile saline, a hole is prepared in the bone to the exact diameter, depth, and angulation of the planned implant. The strict drilling protocol and irrigation are critical to prevent overheating the bone.
- Implant Placement: The sterile implant fixture is removed from its packaging and threaded into the osteotomy using a surgical motor with controlled torque. The surgeon confirms high primary stability, typically an insertion torque of 30-50 Ncm.
- Closure or Healing Abutment: Depending on the protocol, either a cover screw is placed, and the gum is sutured completely closed over the implant (a two-stage submerged approach), or a taller healing abutment is attached that protrudes through the gum, and the tissue is sutured around it (a one-stage non-submerged approach).
- Immediate Post-Op: You bite on a gauze pack to control bleeding. You are given specific instructions: ice packs on the face, a soft diet, no spitting or straws, and prescriptions for pain relief and an antimicrobial mouthwash.
Stage 2: Healing and Osseointegration
This is the silent, invisible stage. It is the longest phase, measured in months, not days. The surgical wound heals, and the biological miracle of osseointegration occurs. For the patient, this stage requires patience and meticulous, gentle care. Nothing dramatic seems to be happening, but at a cellular level, it is the most critical construction phase.
The Biological Process
As detailed in previous articles, osseointegration is the direct fusion of living bone to the implant surface. The blood clot around the implant is replaced by woven bone, which is then remodeled into strong, mature lamellar bone. This process takes 3 to 4 months in the dense lower jaw and 4 to 6 months in the softer upper jaw. If a bone graft was placed at the same time, this stage extends to 6-9 months to allow the graft to consolidate. During this period, the implant must be protected from any chewing force. Micro-motion causes the bone to heal as a fibrous scar instead of fusing, which is a failure. You will eat a soft diet, avoid the surgical site, and maintain oral hygiene with the prescribed gentle rinses and ultra-soft brushes.
The Uncovery Appointment (For Two-Stage Implants)
If your implant was buried under the gum, a brief, minor second-stage surgery is scheduled at the end of the osseointegration period. The dentist numbs the gum tissue, makes a tiny incision to expose the cover screw, removes it, and replaces it with a healing abutment. The healing abutment protrudes through the gum and shapes it, creating a perfect circular access to the implant. This gum shaping takes about 2 weeks.
Confirming Fusion
At the end of this stage, the dentist does not just assume the bone is fused. They confirm it objectively. They test for any mobility (the implant must be absolutely rigid), tap it to listen for a clear, high-pitched ringing sound, and take a periapical X-ray to confirm intimate bone-to-implant contact with no radiolucent line. Often, a Resonance Frequency Analysis device is used to measure an ISQ stability value above 65. Only when all these tests are passed does the implant move to the third stage.
Stage 3: The Restorative Phase – The Final Prosthesis
This is the stage you have been waiting for. The biological foundation is solid, and now the artistry and engineering of the visible tooth take center stage. The goal of this phase is to design, fabricate, and deliver a custom prosthesis that is perfectly integrated with your bite, your smile, and your facial aesthetics.
Impression Taking and Digital Scanning
The healing abutment is removed. A scan body, a small geometric piece, is screwed into the implant. A digital intraoral scanner is used to capture the precise 3D position of the implant, the contour of the surrounding gum, and the shape of the opposing and adjacent teeth. This digital file, or a traditional physical impression with a polyether material, is sent to the dental laboratory.
Abutment and Crown Fabrication
The laboratory technician uses the digital model to design and fabricate the final abutment and crown. For a screw-retained crown, a custom zirconia abutment or a titanium base is designed with an emergence profile that perfectly supports the gum. The crown—made of lithium disilicate, monolithic zirconia, or layered porcelain—is fabricated to match the patient’s tooth shade and shape. For a full-arch bridge, a titanium or zirconia framework is milled and the teeth are bonded on.
The Delivery Appointment
This is the day you leave with a tooth. The final abutment is torqued into the implant to the manufacturer’s exact specification, usually 30-35 Ncm. The crown is tried in. The contacts with the adjacent teeth are checked with floss. The occlusion, your bite, is meticulously checked with articulating paper in every jaw movement: biting down, sliding forward, and side-to-side. The implant crown must not carry heavy, premature contact. Once the fit is perfect, the crown is cemented with a minimal amount of special cement, or the screw access hole is sealed with PTFE tape and tooth-colored composite. You are given specific, lifelong cleaning instructions for your new implant. This is the end of the treatment and the beginning of a lifetime of maintenance.
The Extended Timeline: When Pre-Treatment is Required
The classic 3-stage model assumes a healed, healthy bone site. In reality, many patients need a preparatory stage before implant placement. This is the Pre-Surgical Stage, or Stage Zero.
- Extractions and Socket Grafting: A failing tooth is removed, and the socket is grafted with bone material. This must heal for 3-4 months before an implant can be placed.
- Major Bone Grafting: A large ridge augmentation or a sinus lift is a major surgical procedure that requires 6-9 months of healing before implants are placed. This is a separate stage, adding many months to the total timeline.
- Periodontal Therapy: Any active gum disease must be treated and stabilized. Placing an implant into an infected mouth is a recipe for peri-implantitis and failure.
A patient needing extractions, grafting, and then an implant has a total treatment time that can easily stretch to 12-18 months. This is the reality of complex oral reconstruction. It is a staged, sequential biological process, not a quick fix.
Conclusion
The dental implant process unfolds in three essential stages: the surgical placement of the biocompatible fixture into the jawbone, a healing period of 3-6 months for osseointegration where the bone fuses to the implant, and the restorative phase where the custom abutment and final crown or bridge are designed and delivered to complete the smile. Each stage is governed by its own biological and technical demands, and any preparatory extractions or bone grafting add a pre-surgical stage, extending the total timeline. Understanding this structured journey transforms an anxious waiting period into an informed partnership in creating a lifelong, functional restoration.
FAQ
1. How many appointments are there in total for a dental implant?
For a routine single implant without grafting, expect the surgical placement appointment, possibly one post-operative check, a brief uncovery appointment (if it was submerged), an impression appointment, and a final delivery appointment. This is typically 4-5 visits over 4-7 months.
2. Is there any pain during these stages?
The surgical stage is performed under profound local anesthesia and is painless during the procedure, with manageable post-operative soreness. The healing stage is painless. The restorative stage is entirely non-invasive and requires no anesthetic.
3. What is the failure rate at each stage?
The overwhelming majority of failures occur during Stage 2, the osseointegration phase, usually due to early micro-motion or infection. Early surgical failures (failure to achieve primary stability) are rare with good planning. Late restorative failures are typically due to a poorly fitting prosthesis or chronic peri-implantitis years later.
Additional Resource
For a patient-friendly guide to the implant journey and finding a qualified clinician, visit the American Academy of Implant Dentistry: https://www.aaid.com/