Dental Implants All Parts Diagram
If you’ve ever felt nervous about dental implants, you are not alone. Many people hear the word “implant” and imagine something complicated or painful. But here is the truth: once you understand the different parts, everything becomes much less scary.
Think of a dental implant like a simple machine. Each piece has a specific job. And when they work together, they create a replacement tooth that looks, feels, and functions like a natural one.
In this guide, we will walk through every single component. You will learn names, materials, functions, and even see how they fit together. No confusing jargon. No unnecessary fluff. Just clear, honest information.
What Exactly Is a Dental Implant?
A dental implant is not just one object. It is a small system of parts that replaces a missing tooth from root to crown. The magic lies in how these parts connect.
Unlike a bridge or denture, an implant goes into your jawbone. That gives it stability. You do not need to remove it at night. You do not need special glue. It becomes part of your mouth.
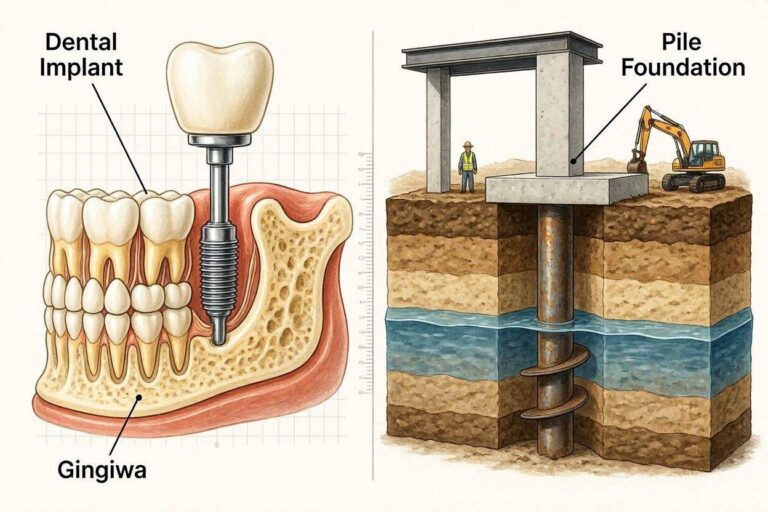
Most modern implants are made of medical-grade titanium or zirconia. Both materials are safe and well accepted by the human body. In fact, your bone actually grows around the titanium surface. This process is called osseointegration, and it is what makes implants so strong.
But to understand the whole picture, you need to look at each layer.
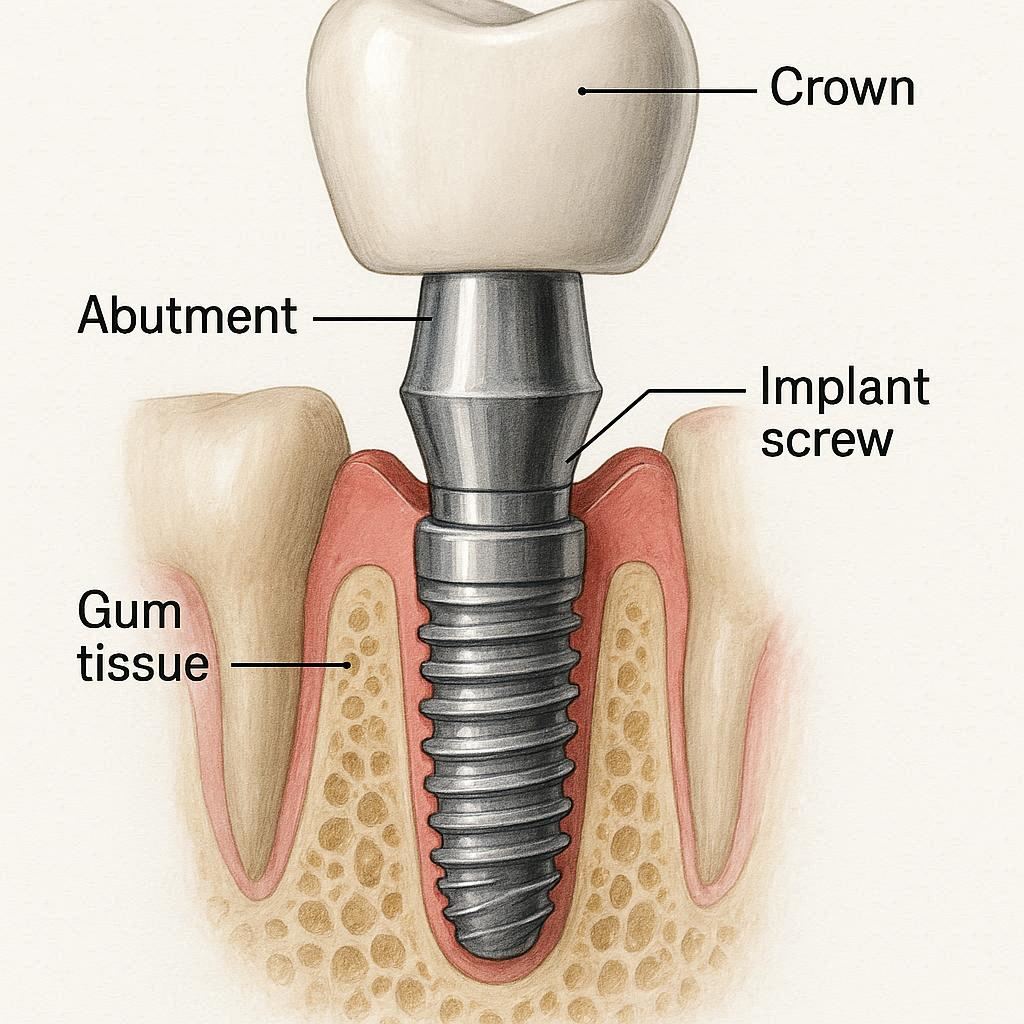
The Three Main Sections of a Dental Implant
Every dental implant can be broken down into three major sections. You can remember them from bottom to top:
- The implant fixture – goes into the bone
- The abutment – connects the fixture to the crown
- The dental crown – the visible tooth part
Important note for readers: Some diagrams also show a fourth component called the “healing cap” or “screw.” That is temporary. For a final, finished implant, these three parts are the core.
Below is a simple table to help you compare them at a glance.
| Part | Location | Main Job | Material |
|---|---|---|---|
| Implant fixture | Inside jawbone | Anchor the implant | Titanium or zirconia |
| Abutment | Above gumline | Connect fixture to crown | Titanium, gold, or zirconia |
| Dental crown | Visible above gum | Chew and smile | Porcelain, ceramic, or zirconia |
Now let’s explore each part in detail.
The Implant Fixture – The Hidden Anchor
This is the part that most people never see. The implant fixture looks like a small screw. It has threads, just like a wood screw or a bolt. Those threads help it grip the bone tightly.
How the Fixture Works
A dentist surgically places the fixture into your jawbone. Over several months, your bone cells grow into the microscopic pores on the titanium surface. This creates a permanent lock. No cement. No adhesives. Just biology.
Most fixtures are between 3mm and 6mm wide. The length varies depending on how much bone you have. Some are as short as 6mm. Others can reach 16mm or more.
Materials and Safety
- Titanium alloy (grade 4 or 5) – most common, proven over decades
- Zirconia – metal-free, white in color, good for people with metal sensitivities
Both materials are biocompatible. That means your body does not reject them. In fact, the immune system treats titanium almost like a natural part of the body.
Types of Fixtures
Not all fixtures are the same. Here are the main types you might see in a diagram:
- External hex – older design, hexagon-shaped connection
- Internal hex – hexagon inside the fixture, more common today
- Internal octagon – eight-sided, very stable
- Cone Morse – tapered internal connection, excellent seal against bacteria
Each type changes how the abutment attaches. But for a patient, the main difference is long-term reliability. Your dentist will choose based on your bone quality and the location in your mouth.
“The implant fixture is like the foundation of a house. If it is strong and stable, everything above it will last for decades.” – Dr. Elena Marchetti, implant specialist.
The Abutment – The Silent Connector
If the fixture is the foundation, the abutment is the hallway between the foundation and the roof. It screws into the top of the fixture and pokes just above the gumline. The crown then attaches to the abutment.
Why Do You Need an Abutment?
Without an abutment, you would have to glue the crown directly into the fixture. That would be messy and hard to repair. The abutment creates a clean, precise connection. If your crown cracks years later, the dentist simply unscrews it from the abutment. The fixture stays untouched.
Stock vs. Custom Abutments
There are two main flavors of abutments.
| Type | Pros | Cons |
|---|---|---|
| Stock (prefabricated) | Cheaper, available immediately | May not fit perfectly, can leave gaps |
| Custom (CAD/CAM milled) | Perfect fit, better gum health | More expensive, takes extra time |
Many dentists prefer custom abutments for front teeth. They allow the gum tissue to heal in a natural shape. For back molars, a stock abutment often works just fine.
Materials and Height
Abutments come in different heights and angles. Sometimes the implant is placed at a slight tilt. In that case, you might need a 15° or 25° angled abutment to bring the crown back into a straight line.
Common abutment materials:
- Titanium (strong, slightly gray)
- Gold-plated (very biocompatible, soft on opposing teeth)
- Zirconia (white, metal-free, best for aesthetics)
The Dental Crown – The Part You See and Use
Now we reach the star of the show. The crown is the visible tooth. It looks, feels, and chews like a natural tooth. A good crown should match the color, shape, and translucency of your neighboring teeth.
How the Crown Attaches
There are two main ways to attach a crown:
- Screw-retained – a small screw goes through the crown and into the abutment. Very secure and retrievable.
- Cement-retained – the crown is glued onto the abutment. Feels more natural, but excess cement can sometimes irritate gums.
Both methods work well. Screw-retained is becoming more popular because it is easier to repair.
Crown Materials
Here is a quick breakdown of what your crown might be made of.
| Material | Looks Like | Strength | Best For |
|---|---|---|---|
| Porcelain fused to metal | Natural with a metal line | Very strong | Back teeth |
| Full zirconia | White, slightly opaque | Extremely strong | Molars, grinders |
| Lithium disilicate (E-max) | Glass-like, translucent | Good | Front teeth |
| Layered ceramic | Most natural | Moderate | Aesthetic cases |
If you grind your teeth at night, your dentist will likely recommend zirconia. If you need a single front tooth, lithium disilicate is often the top choice.
The Biting Surface Matters Too
The top of the crown has grooves and bumps called “occlusal anatomy.” These are not random. They are designed to match your bite. A good crown lets you chew without hitting too hard or too soft.
Additional Parts You Might See in a Diagram
While the three main parts do the heavy lifting, a complete diagram of dental implants often includes temporary or specialized pieces. These are worth knowing about.
Healing Abutment (Gingival Former)
Right after implant placement, the dentist may screw a small mushroom-shaped cap onto the fixture. This is called a healing abutment. It shapes the gum tissue during the healing phase. After a few months, the dentist removes it and places the final abutment.
Cover Screw
A cover screw is even simpler. It is a flat screw that seals the top of the fixture when the implant is buried under the gum. This is used in a two-stage surgery. The implant heals completely hidden, then a second small surgery uncovers it.
Implant Analog (Laboratory Part)
This part never goes in your mouth. A dental lab uses an analog to copy your implant’s connection. It helps them build the crown on a model of your mouth.
Transfer Coping
Another lab tool. The dentist takes an impression of your implant, and the transfer coping captures the exact position and angle. This ensures your crown fits perfectly.
A Simple Diagram Description (For Those Who Can’t See the Image)
Not everyone can view images easily. So let’s describe a standard dental implants all parts diagram in words.
Imagine a vertical cross-section of a jawbone.
- At the very bottom, embedded in the bone, is a screw-like shape with threads. That is the implant fixture.
- Coming out of the top of the fixture, passing through the pink gum tissue, is a shorter, smooth post. That is the abutment.
- Sitting on top of the abutment, above the gum line, is a tooth-shaped cap. That is the dental crown.
- A tiny screw runs down through the center of the crown into the abutment. That is the retaining screw (screw-retained design).
- Surrounding the abutment, the gum tissue forms a snug collar for protection.
If the diagram shows a healing phase, you would see a round, smooth cap instead of the abutment and crown.
That is the entire system. Simple, right?
How All the Parts Work Together (Step by Step)
Let’s walk through a typical implant process from surgery to finished smile. This will help you see how each part plays its role.
Step 1 – Placement of the fixture
The dentist numbs the area. A small hole is drilled into the bone. The implant fixture is screwed into place. A cover screw is placed on top, and the gum is stitched closed.
Step 2 – Osseointegration (3 to 6 months)
You wait. Your bone grows onto the fixture. No crown yet. Just healing.
Step 3 – Uncovering (second stage)
The dentist makes a tiny incision to expose the fixture. The cover screw is removed. A healing abutment is placed. Over two weeks, your gum forms a nice collar around it.
Step 4 – Abutment placement
The healing abutment is removed. The final abutment is screwed into the fixture. Your dentist may take a scan or impression at this point.
Step 5 – Crown fabrication
A dental lab designs your crown. It takes 1 to 3 weeks. For same-day crowns, a milling machine carves it while you wait (CEREC technology).
Step 6 – Crown delivery
The crown is attached to the abutment. The dentist checks your bite. You walk out with a new tooth.
From start to finish, the process takes 4 to 9 months. That sounds long, but most of that time is just healing. Active appointment time is only a few hours.
Common Questions Patients Ask About Implant Parts
Let me answer some real questions that real people ask.
Will the metal implant cause any problems with MRIs or airport scanners?
No. Titanium is non-ferromagnetic. It will not set off a metal detector or heat up in an MRI. Airport scanners will see it, but security staff are used to it. Just mention it if asked.
Can I see the abutment through my gum?
Usually no. If your gum is very thin or receded, you might see a dark line (titanium) or a white line (zirconia). This is one reason why custom zirconia abutments are popular for front teeth.
Do the parts ever loosen over time?
Very rarely. But screws can sometimes loosen after many years. This is a simple fix. The dentist removes the crown, tightens the screw, and reattaches everything. It takes 15 minutes.
What happens if a part breaks?
The crown breaks most often (usually porcelain chipping). The abutment almost never breaks. The fixture almost never breaks. If a crown chips, you can replace just the crown. You do not need to touch the fixture.
Comparison Table – Implant Parts vs. Natural Tooth Parts
Sometimes it helps to compare the implant to what it replaces.
| Natural Tooth Part | Implant Equivalent | Difference |
|---|---|---|
| Root | Implant fixture | Fixture is metal/ceramic, root is organic |
| Periodontal ligament | None (direct bone contact) | Natural tooth has shock absorber, implant does not |
| Dentin + enamel | Dental crown | Crown is ceramic, natural tooth is living tissue |
| Cementum | Abutment interface | Abutment screws in, cementum is biological glue |
The main difference is the lack of a ligament. That is why implants feel slightly more rigid than natural teeth. Most people do not notice after a few weeks.
What to Look for on a High-Quality Diagram
If you search for “dental implants all parts diagram,” you will find many versions. Some are excellent. Others are confusing or even wrong.
Here is what a good diagram should include:
- Clear labels for fixture, abutment, and crown
- A cross-section view showing bone, gum, and the connection inside
- Arrows pointing to the retaining screw (if screw-retained)
- A callout for the healing abutment or cover screw in a separate panel
- Realistic proportions (not cartoonishly large threads)
Avoid diagrams that combine parts incorrectly. For example, some show the crown and abutment as one solid piece. That is not accurate for most modern implants.
Costs and Materials – What Different Parts Cost
You are probably wondering about money. Let’s break down approximate costs for each part in the United States. These are averages before insurance.
| Part | Material | Average Cost (part only) |
|---|---|---|
| Implant fixture | Titanium | $300 – $600 |
| Implant fixture | Zirconia | $500 – $800 |
| Stock abutment | Titanium | $150 – $300 |
| Custom abutment | Zirconia | $400 – $800 |
| Crown | Porcelain fused to metal | $500 – $900 |
| Crown | Full zirconia | $600 – $1,200 |
| Crown | Lithium disilicate | $700 – $1,500 |
Keep in mind: these are just part costs. The total bill includes surgery, imaging, lab work, and dentist time. A full single-tooth implant typically ranges from $3,000 to $6,000.
But here is the honest truth: quality parts matter. A cheap off-brand fixture from an unknown manufacturer may fail. Reputable brands like Straumann, Nobel Biocare, and Zimmer Biomet cost more but have decades of research behind them.
Maintenance Tips for Each Part
Your implant can last 20, 30, or even 50 years if you take care of it. Here is how to maintain each component.
For the Crown
- Brush twice a day like a natural tooth
- Floss around it daily (use superfloss or implant-specific floss)
- Avoid chewing ice, hard candy, or pens
For the Abutment
- Keep the gumline clean
- Use a water flosser to remove plaque around the abutment-gum junction
- See your dentist every 6 months for a check of the screw tightness
For the Fixture
- The fixture itself needs no direct care
- But you must prevent gum disease (peri-implantitis)
- Do not smoke – smoking dramatically increases failure risk
Important note for readers: Peri-implantitis is inflammation around the implant. It can destroy bone and loosen the fixture. The best prevention is excellent oral hygiene and regular dental visits.
Signs a Part Might Need Replacement
Even with good care, parts can wear out. Here is what to watch for.
Crown issues:
- Chipped or cracked porcelain
- The crown feels loose when you bite
- Food gets stuck between crown and gum
Abutment issues:
- A clicking sound when you chew
- Gum swelling around only one area
- A metallic taste (rare, but possible)
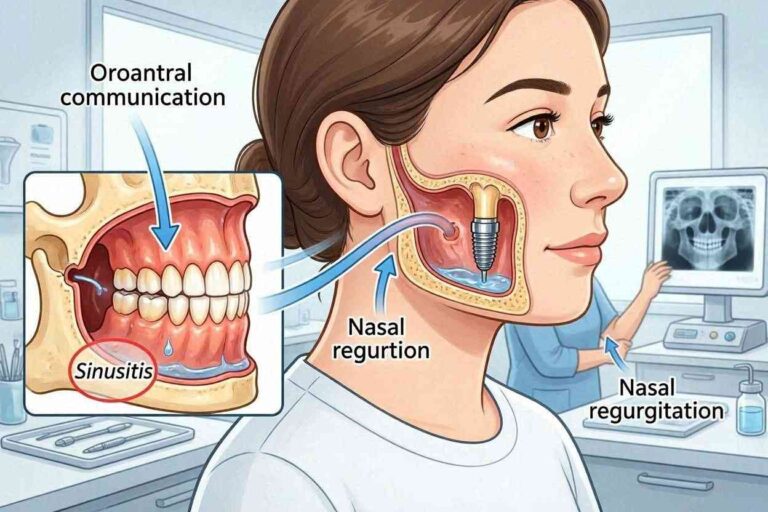
Fixture issues (very rare):
- The implant feels mobile (this is an emergency)
- Pus coming from the gum
- Progressive bone loss seen on X-rays
If you notice any of these, call your dentist. Do not wait. Early intervention can save the implant.
Future Innovations in Implant Parts
The basic design of implants has not changed much in 40 years. But new developments are coming.
One-piece implants – fixture and abutment as a single unit. Fewer parts, less risk of screw loosening. The downside? Less flexibility for angled crowns.
3D-printed titanium – porous surfaces that mimic bone better than machined titanium. Some studies show faster healing.
Smart abutments – experimental abutments with tiny sensors. They could measure bite force or detect early infection.
Resorbable materials – temporary implants that dissolve after guiding bone growth. Still in research.
For now, the three-part system remains the gold standard. Simple, proven, and reliable.
Conclusion – Three Key Takeaways
Let’s wrap up what we have learned.
First, a dental implant has only three permanent parts: the fixture inside the bone, the abutment connecting through the gum, and the crown above the gum. Each has a distinct job, and they work together like a well-designed machine.
Second, understanding these parts helps you make better decisions. You can ask your dentist about materials, attachment types, and repair options. You are no longer a passive patient.
Third, long-term success depends on keeping each part clean and checking connections regularly. With proper care, most implants last for decades without major issues.
You now know more about dental implant parts than most people who already have them. That is powerful. And if you ever need an implant yourself, you will walk into that dentist’s office with confidence.
Frequently Asked Questions (FAQ)
1. How many parts are in a typical dental implant?
A permanent implant has three main parts: fixture, abutment, and crown. Temporary parts like healing abutments and cover screws are also used during treatment.
2. Can I see the abutment in my mouth?
Usually not. The abutment sits at or slightly below the gumline. If your gum is very thin, you might see a shadow or line, but not the abutment itself.
3. What is the most common part to break?
The porcelain on the crown chips most often. The abutment and fixture rarely break unless there is trauma or severe grinding.
4. Do all implants use the same parts?
No. Different brands have different connections. A Straumann abutment will not fit a Nobel Biocare fixture. Always use matching parts from the same system.
5. How do I clean between the crown and the gum?
Use floss threaders, superfloss, or a water flosser on a low setting. Your dentist may also recommend interdental brushes.
6. Can an abutment be reused if the crown breaks?
Yes, in most cases. The abutment stays in place. The dentist simply makes a new crown that fits the existing abutment.
7. What is the smallest part of a dental implant?
The retaining screw (if screw-retained). It is often less than 2mm wide and 4mm long.
8. Is zirconia better than titanium for the fixture?
It depends. Titanium has a longer track record. Zirconia is metal-free and looks better, but it is more brittle. For most patients, titanium is still the first choice.
Additional Resource
For a deeper dive into implant brands and their specific parts compatibility, visit the American Academy of Implant Dentistry’s patient education page:
https://www.aaid.com/patient-resources/
This link leads to unbiased, professional information about implant types, surgical guides, and finding a qualified implant dentist near you.