Dental Supply Organization: A Practical Guide for a Tidy and Efficient Office
A disorganized dental office wastes time and money. Staff search for gloves that are buried in a closet. Anesthetic expires because no one tracks dates. The office manager orders duplicates of items already in stock. These small problems add up. They slow down patient care. They frustrate your team.
Dental supply organization is not glamorous. But it is essential. A well-organized office runs smoothly. Staff find what they need in seconds. Inventory stays lean. Waste drops. This guide will show you how to build a supply system that works for your practice.
Why Supply Organization Matters
You might think organization is a minor concern. It is not. Consider the real costs of a messy supply room.
- Time waste: Staff spend minutes every day searching for items. Over a year, this adds up to hours of lost productivity.
- Financial waste: Expired products get thrown away. Overordering ties up cash. Duplicate purchases drain your budget.
- Safety risks: Expired anesthetic or contaminated supplies can harm patients. Poor organization increases this risk.
- Staff frustration: A chaotic environment stresses your team. High turnover often follows.
“We used to spend 20 minutes every morning looking for basic supplies. After we reorganized, we found everything in under a minute. It changed the mood of the whole team.” — Jessica Moore, Dental Office Manager
Assess Your Current Situation
Before you buy shelves or bins, understand what you have. Do a full audit.
Step 1: Empty Everything
Take everything out of your supply closets and drawers. Yes, everything. Put it on a large table or the floor. This gives you a clear picture of what you own.
Step 2: Sort into Categories
Group items by type. Common dental supply categories include:
- PPE (gloves, masks, gowns, eyewear)
- Anesthetics and medications
- Restorative materials (fillings, bonding agents)
- Impression materials
- Sterilization supplies
- Disposables (cups, bibs, suction tips)
- Office supplies (paper, pens, printer ink)
- Cleaning supplies
Step 3: Check Expiration Dates
Go through every item. Pull anything expired. Set aside items expiring within three months. These should be used first.
Step 4: Count What You Have
Create a simple list. Note quantities. This becomes your baseline. You will use it to set par levels later.
Building a Storage System
Now that you know what you have, create a system to keep it organized.
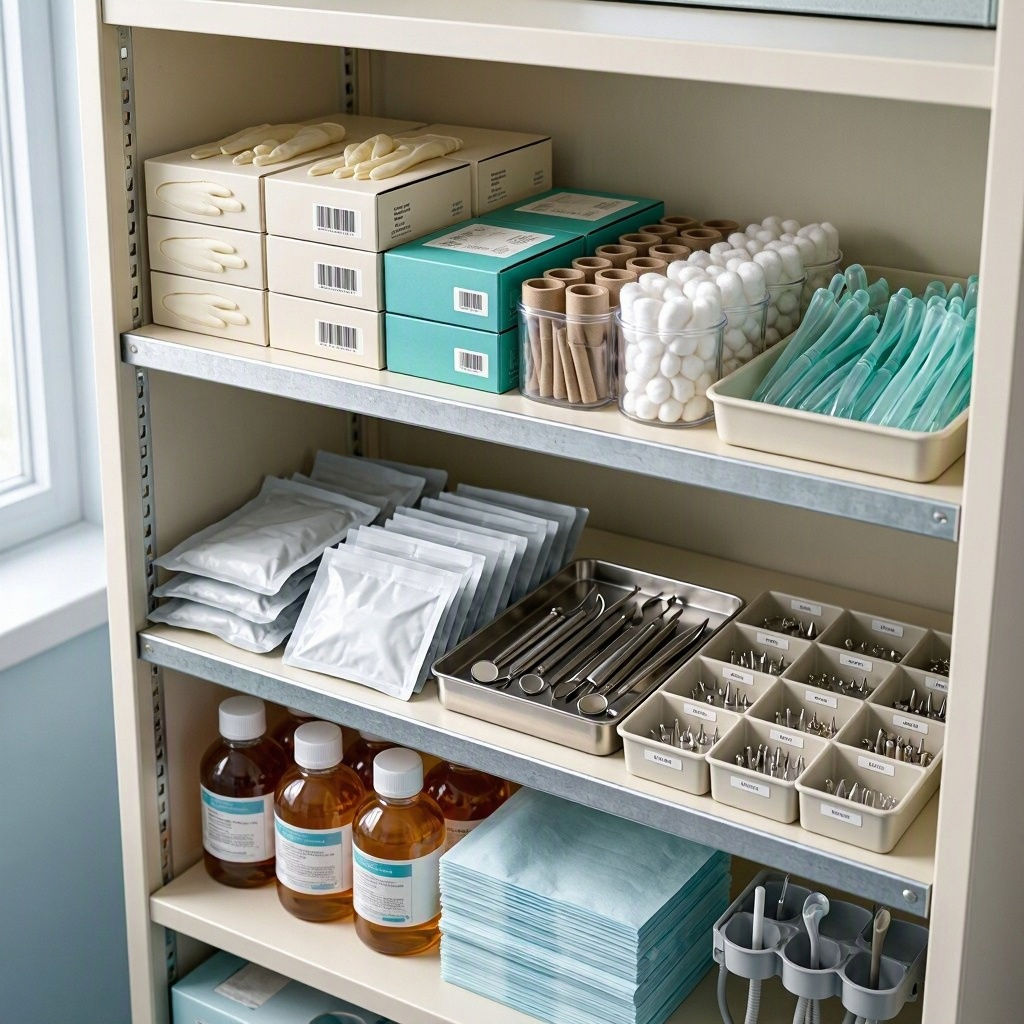
Use Clear Bins and Labels
Clear bins let you see what is inside without opening them. Label every bin clearly. Use large, readable text. Include the item name and the par level.
Example label:
NITRILE GLOVES – SIZE M
Par Level: 10 boxes
Reorder at: 4 boxes
Organize by Frequency of Use
Items used daily should be closest to the treatment rooms. Items used rarely can go on higher shelves or in a back storage area.
- Daily use: Gloves, masks, suction tips, bibs. Store these in or near each operatory.
- Weekly use: Impression materials, restorative supplies. Store these in a central supply room.
- Monthly or rare use: Specialized instruments, backup equipment. Store these on top shelves or in a separate closet.
Use Vertical Space
Shelves that reach the ceiling use space efficiently. Use a step stool for higher shelves. Keep heavy items at waist height for safety.
Designate a “Par Level” System
A par level is the minimum quantity you should have on hand. When stock drops to this level, it is time to reorder.
| Item | Par Level | Reorder Point | Storage Location |
|---|---|---|---|
| Nitrile gloves (M) | 10 boxes | 4 boxes | Operatory closet |
| Surgical masks | 8 boxes | 3 boxes | Operatory closet |
| Anesthetic cartridges | 6 boxes | 2 boxes | Locked cabinet |
| Suction tips | 5 bags | 2 bags | Supply room shelf A |
| Bibs | 4 packs | 1 pack | Supply room shelf B |
| Composite resin | 12 syringes | 4 syringes | Refrigerator (if required) |
Comparative Table: Storage Options for Dental Supplies
| Storage Type | Cost | Durability | Visibility | Best For |
|---|---|---|---|---|
| Clear plastic bins | Low | Medium | High | Small items, disposables |
| Wire shelving | Low | High | High | Bulk items, boxes |
| Closed cabinets | Medium | High | Low | Medications, valuable items |
| Drawer dividers | Low | Medium | Medium | Small instruments, burs |
| Labeled totes | Low | Medium | Low | Backstock, seasonal items |
Inventory Tracking Methods
You need a way to track what you have and what you need to order. Choose a method that fits your team’s habits.
Method 1: The Paper Checklist
Print a simple list of all supplies. Tape it inside the supply closet door. Staff check off items as they use the last one. The office manager reviews the list weekly and places orders.
Pros: Simple, no training needed.
Cons: Easy to forget, list gets lost.
Method 2: The Kanban Card System
Attach a card to each bin. When you open the last box, you move the card to a “reorder” board. The office manager collects cards and orders.
Pros: Visual, intuitive.
Cons: Cards fall off, requires initial setup.
Method 3: Digital Inventory Software
Use apps like Sortly, NetSuite, or dedicated dental inventory systems. Scan barcodes, track usage, and get automatic reorder alerts.
Pros: Accurate, automated.
Cons: Monthly cost, requires training.
“We switched to a digital system last year. It took a week to set up. Now we never run out of anything. The software sends an alert when stock is low.” — David Chen, Practice Administrator
Important Notes for Readers
Note on Expiration Dates: Always rotate stock. Place newer items behind older ones. Use the FIFO method: First In, First Out. Check dates monthly.
Note on Temperature Control: Some materials, like composite resin and certain anesthetics, require refrigeration. Store them at the correct temperature. Keep a thermometer in the fridge.
Note on Security: Lock cabinets that contain controlled substances or expensive items. Restrict access to authorized staff only.
Note on Safety Data Sheets: Keep Safety Data Sheets (SDS) for all chemicals and hazardous materials. Store them in a binder or digitally. OSHA requires this.
Note on Cleaning: Wipe down shelves monthly. Dust and debris can contaminate supplies.
Maintaining Your System
A good system requires upkeep. Follow these habits.
- Weekly check: The office manager reviews par levels every Monday.
- Monthly audit: Do a quick count of high-value items.
- Quarterly deep clean: Empty shelves, wipe them down, and reorganize.
- Annual full inventory: Count everything once a year. Reconcile with your budget.
Conclusion
Dental supply organization saves time, money, and stress. Start with a full audit. Sort by category. Use clear bins and labels. Set par levels. Choose a tracking method that works for your team. Maintain the system with regular checks. A tidy supply room is not just about looks. It is about running a professional, efficient practice.
Frequently Asked Questions (FAQ)
Q: How often should I check expiration dates?
A: Check dates monthly. Rotate stock using FIFO. Remove anything expired immediately.
Q: What is the best way to organize gloves and masks?
A: Keep them in or near each operatory. Use clear dispensers or bins. Restock daily.
Q: Should I use a digital inventory system?
A: Yes, if your practice is busy. Digital systems reduce errors and save time. For small practices, a paper system can work.
Q: How do I prevent overordering?
A: Set clear par levels. Train staff to check the list before ordering. Review usage monthly.
Q: Where should I store hazardous materials?
A: Store them in a locked cabinet away from patient areas. Keep SDS sheets accessible.
Additional Resource:
For more guidance on dental office safety and compliance, visit the OSHA Dentistry Safety Guidelines.