How Are Dental Implants Installed?
The decision to get a dental implant is significant. You are choosing to invest time, money, and trust in a procedure that will change how you eat, speak, and smile. Yet for many people, the process itself remains mysterious. What actually happens during those appointments? How does the implant get into the bone? Does it hurt? How long does it take? This guide walks you through every stage of dental implant installation with clarity and detail. By the end, you will understand exactly what happens in the dental chair and during the months that follow.
The Big Picture: It Is a Process, Not a Single Event
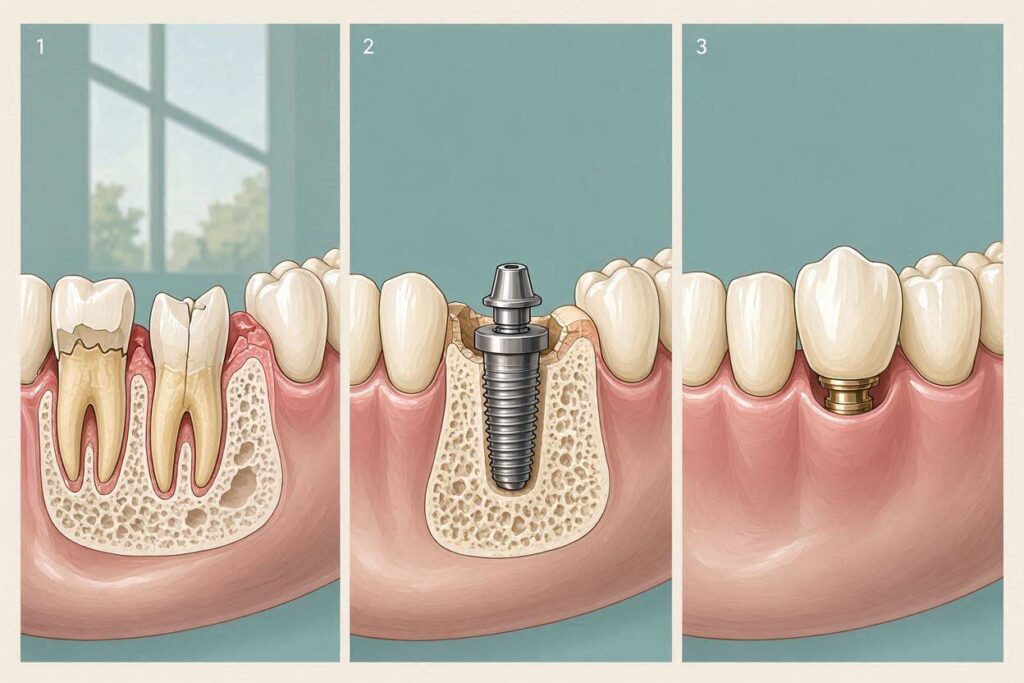
The first thing to understand is that dental implant treatment is not a one-day procedure. It unfolds over several months, sometimes longer. The surgical placement of the implant fixture is a critical step, but it is just one step in a carefully choreographed sequence. Healing time is built into the process. The body needs months to accept and integrate the implant before the final tooth can be attached. A patient who understands this timeline from the beginning is better prepared emotionally and logistically.
The process generally has four major phases: assessment and planning, surgical placement, healing and osseointegration, and final restoration. Each phase contains multiple steps, and each step exists for a reason.
Phase One: Assessment and Planning
Nothing happens until the dentist thoroughly understands your mouth. This phase may involve one or two appointments and is arguably the most important part of the entire process. A poorly planned implant is a failing implant waiting to happen.
Medical and Dental History Review
The dentist begins by reviewing your complete medical history. They will ask about chronic conditions like diabetes, heart disease, and osteoporosis. They will document every medication you take, including prescription drugs, over-the-counter products, and supplements. This matters because certain conditions and medications affect surgical healing and implant success.
Your dental history is equally important. The dentist wants to know why you lost the tooth, how long ago, and what dental work you have had since. They will ask about your oral hygiene habits, smoking, and any history of gum disease. Be honest. A dentist can only plan safely with accurate information.
Clinical Examination
The dentist examines your mouth carefully. They look at the gap where the implant will go. They evaluate the adjacent teeth for decay or instability. They check the opposing teeth to see if the missing tooth’s counterpart has drifted down or up into the gap. They assess your bite and look for signs of grinding or clenching. They examine your gums for signs of active periodontal disease. They palpate the jawbone to feel the contours of the underlying ridge.
Imaging: The Critical Step
A simple dental X-ray cannot provide enough information for implant planning. The standard of care today is three-dimensional imaging using Cone Beam Computed Tomography, or CBCT. This machine rotates around your head and generates a detailed 3D model of your jaws, teeth, nerves, sinuses, and bone.
The CBCT scan reveals the exact height and width of the available bone. It shows the precise position of the inferior alveolar nerve canal in the lower jaw, which must be avoided during drilling. It shows the floor of the maxillary sinus in the upper jaw, which limits how far an implant can extend. It reveals bone density and any hidden pathology.
The dentist or a radiologist analyzes this scan. Measurements are taken. The ideal implant position is determined virtually. In many cases, the dentist uses implant planning software to place a virtual implant into the 3D model of your jaw. This digital simulation allows for precise, prosthetically driven planning. The implant is positioned where it will best support the final tooth, not merely where the bone happens to be.
Treatment Plan Presentation
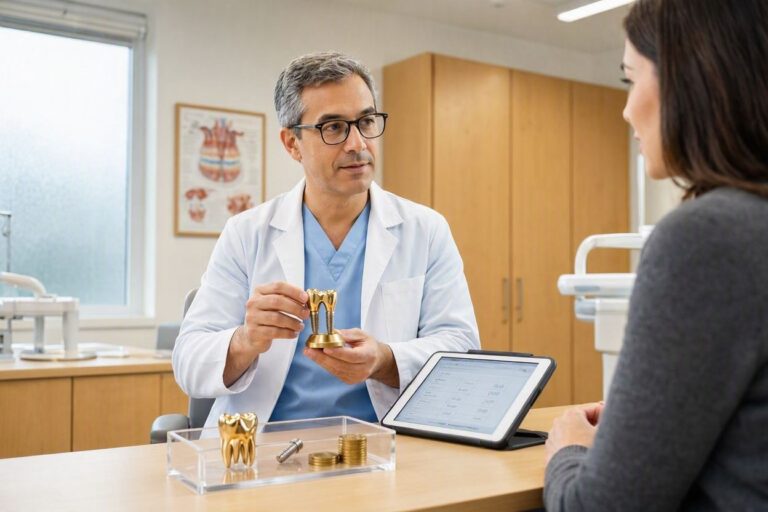
After gathering all this information, the dentist presents a treatment plan. This document should include the number and type of implants planned, the need for any preparatory procedures such as extractions or bone grafting, the type of final restoration planned, the timeline for the entire process, an itemized breakdown of fees, and a discussion of risks and alternatives.
This is your opportunity to ask questions. A good dentist encourages them. You should leave this appointment understanding exactly what will happen, why, when, and what it will cost.
Phase Two: Preparatory Procedures (If Needed)
Not every patient proceeds directly to implant placement. Some mouths require preparation. These procedures add time to the overall process but are essential for long-term success.
Tooth Extraction and Site Preservation
If the tooth to be replaced is still present but hopeless, it must be extracted. A straightforward extraction heals in a matter of weeks, but the bone begins to resorb immediately. To minimize this bone loss and prepare the site for a future implant, the dentist may perform a socket preservation graft at the time of extraction. This involves placing bone graft material into the empty socket immediately after the tooth is removed. The graft acts as a scaffold, maintaining the ridge dimensions while new bone forms. The extraction site is then allowed to heal for three to six months before implant placement.
Bone Grafting: Rebuilding the Foundation
If the CBCT reveals insufficient bone volume, a grafting procedure is planned. This can take several forms.
A minor ridge augmentation can be performed in the dental office under local anesthesia. The gum is reflected, bone graft material is placed against the deficient ridge, and a barrier membrane is secured over the graft. The gum is sutured closed. The graft heals and incorporates over four to six months.
A sinus lift or sinus elevation is required when the posterior upper jaw has insufficient bone height below the sinus floor. The sinus membrane is gently elevated through a small window in the bone, and graft material is placed into the space created. This procedure can be performed at the same time as implant placement if enough native bone exists for initial implant stability, or it can be done as a separate procedure with implant placement delayed by six to nine months.
Major bone grafting, such as block grafts harvested from the patient’s own chin or ramus, is used for severe deficiencies. These are more invasive procedures, sometimes performed by an oral surgeon under intravenous sedation.
Periodontal Therapy
If you have active gum disease, it must be treated and stabilized before implants are placed. This may involve scaling and root planing, possible surgical periodontal treatment, and a demonstrated commitment to improved home care and maintenance. Placing implants into an infected mouth invites failure.
Phase Three: Surgical Placement of the Implant
This is the day most patients think of as “getting the implant.” You arrive at the office, and the surgical procedure begins. Here is what happens, step by step.
Anesthesia
The procedure is performed under local anesthesia. The dentist injects a local anesthetic, typically lidocaine or articaine with epinephrine, to numb the surgical site completely. You will feel pressure and vibration during the procedure, but you should feel no sharp pain. If you feel pain at any point, you signal the dentist immediately, and more anesthetic is administered.
For anxious patients, additional sedation options may be available. Nitrous oxide, or laughing gas, provides mild relaxation. Oral conscious sedation, a pill taken before the appointment, produces deeper relaxation. Intravenous sedation, administered by a trained dentist or anesthetist, can provide deep sedation or general anesthesia. The choice depends on the complexity of the procedure, your anxiety level, and your medical history.
Incision and Flap Reflection
Once you are fully numb, the dentist makes an incision along the crest of the ridge where the implant will be placed. The gum tissue is reflected, meaning it is gently lifted away from the underlying bone to expose the surgical site. This creates a clean, visible field for the drilling sequence.
Osteotomy Preparation: The Drilling Sequence
This is the core of the surgical procedure. The dentist uses a series of precisely sized drills to prepare the bone for the implant. The sequence begins with a small pilot drill that establishes the position and angle of the implant. Progressively larger drills widen the osteotomy, or bone hole, to the final diameter.
The drilling is performed at controlled speeds with copious irrigation using sterile saline or water. The irrigation serves three purposes: it keeps the bone cool, preventing thermal damage that could kill bone cells and prevent osseointegration. It flushes away bone debris. And it lubricates the drill.
The dentist uses a surgical guide or stent, often fabricated from the digital plan, to ensure the implant is placed at exactly the planned position, angle, and depth. Depth-limiting drill stops prevent over-preparation. The drilling is deliberate and controlled. Rushing this step compromises the outcome.
Implant Placement
The implant fixture, in its sterile packaging, is opened and placed into the prepared osteotomy. It may be self-threading, meaning the threads cut into the bone as it is screwed in, or it may be placed into a pre-tapped hole. The dentist uses a torque wrench to achieve the desired insertion torque. Adequate insertion torque indicates good primary stability, meaning the implant is mechanically locked in the bone even before healing begins. If primary stability cannot be achieved, the implant may be removed, and the site grafted for a delayed attempt.
Cover Screw or Healing Abutment Placement
Once the implant is seated, the dentist places either a cover screw or a healing abutment. A cover screw is a small, flat screw that seals the top of the implant. The gum is sutured closed over it, and the implant is left completely buried under the tissue to heal undisturbed. This is a two-stage approach. A healing abutment is a small metal cylinder that screws into the implant and projects through the gum. The gum is sutured around it. This is a one-stage approach and eliminates the need for a second surgery to uncover the implant. The choice depends on the clinical situation and the dentist’s preference.
Closure
The gum tissue is repositioned and sutured closed. The sutures may be dissolvable or may require removal in one to two weeks. Gauze is placed over the site, and you are asked to bite down gently to apply pressure and control any minor bleeding.
Immediate Post-Operative Period
You are given written and verbal post-operative instructions. These typically include applying ice packs to the face in twenty-minute intervals to minimize swelling, taking prescribed or over-the-counter pain medication, avoiding hard, hot, or spicy foods, not disturbing the surgical site with your tongue or fingers, avoiding strenuous exercise for several days, and not smoking under any circumstances.
Some swelling, bruising, and mild discomfort are normal for several days after surgery. Severe or worsening pain after the first few days is not normal and should prompt a call to the dentist.
Phase Four: Osseointegration and Healing
The surgery is complete, but the most critical phase is just beginning. The body must now accept the implant and build new bone against its surface.
The Biological Process
Osseointegration is the direct structural and functional connection between living bone and the surface of the implant. It is a biological miracle that unfolds over weeks and months. Immediately after placement, blood fills the microscopic gaps between the implant surface and the prepared bone. Platelets adhere to the titanium oxide surface and release growth factors. These signaling molecules attract osteoprogenitor cells. The cells differentiate into osteoblasts, the bone-building cells. The osteoblasts deposit an organic matrix and mineralize it. New woven bone forms, interlocking with the micro-roughness of the implant surface.
Over time, this woven bone remodels into mature lamellar bone. The implant becomes mechanically locked in place. This process requires time. Bone is a living tissue that remodels slowly.
Healing Timeframes
For a standard implant in the lower jaw, osseointegration typically requires three to four months. The lower jaw bone, the mandible, is denser and heals faster. For the upper jaw, the maxilla, four to six months is typical. The bone is less dense, and healing is slower. If bone grafting was performed simultaneously, healing time may extend to six to nine months.
During this period, the implant must remain undisturbed. No chewing force is applied to it. If a healing abutment is in place, you can clean around it gently. If the implant is buried under the gum, you simply wait.
The Temporary Restoration
You will not be without a tooth during the healing period if the missing tooth is visible. The dentist may provide a temporary removable partial denture, called a flipper, that clips onto adjacent teeth. This is for aesthetics only and must be worn carefully so it does not put pressure on the healing implant. Alternatively, a temporary fixed bridge can be bonded to the backs of adjacent teeth. In some cases, if primary stability is excellent, a temporary crown can be placed on the implant immediately. This is called immediate loading and is only appropriate in carefully selected cases.
Phase Five: Uncovering and Impressions
Once the healing period is complete and the dentist has confirmed that osseointegration is successful, the restorative phase begins.
Implant Uncovering (If Two-Stage)
If the implant was buried, a brief surgical appointment is needed to uncover it. Under local anesthesia, a small incision is made over the implant, the cover screw is removed, and a healing abutment is placed. The gum is sutured around the healing abutment. This procedure is minor compared to the initial surgery. The gum is allowed to heal around the healing abutment for two to four weeks, creating a natural emergence profile for the future crown.
Impression Taking
An impression must be taken to fabricate the final crown. This can be done with traditional impression material or with a digital intraoral scanner. The impression captures the exact position, angle, and depth of the implant, as well as the relationship to adjacent and opposing teeth.
For a traditional implant impression, an impression coping is screwed into the implant. The impression material is syringed around the coping and a tray is seated. When the material sets, the coping remains embedded in the impression and is sent to the laboratory. For a digital impression, a scan body is screwed into the implant, and the scanner captures its position.
Shade Selection and Laboratory Prescription
The dentist selects the shade of the final crown to match your adjacent teeth. Photographs may be taken to communicate subtle characteristics like translucency, surface texture, and color variations to the technician. A detailed laboratory prescription is written, specifying the implant system, the abutment type, the crown material, and any specific aesthetic or functional requirements.
Phase Six: Final Restoration Delivery
The laboratory has fabricated the custom abutment and crown. You return for the delivery appointment.
Abutment Placement
The healing abutment is removed. The final abutment, custom or stock, is seated onto the implant. A radiograph is taken to confirm that the abutment is fully seated. The abutment screw is torqued to the manufacturer’s specified value using a torque wrench. This precise tightening prevents screw loosening over time.
Crown Try-In and Cementation or Screw Retention
The crown is tried in. The dentist checks several parameters: the contact with the adjacent teeth, which should allow floss to pass with light resistance. The occlusion, or bite, which should have light contact or slight separation in heavy biting. The aesthetics, including shape, shade, and contour. The emergence profile, the way the crown appears to emerge from the gum.
Adjustments are made as needed. Once everything is satisfactory, the crown is secured. There are two methods. A cement-retained crown is cemented onto the abutment with a specific type of dental cement. A screw-retained crown has a small access hole on the chewing surface or back of the crown through which a screw secures the crown directly to the implant. The access hole is filled with a tooth-colored composite. Each method has advantages and is selected based on the clinical situation.
Final Instructions
The dentist provides home care instructions specific to the implant. You will be shown how to clean around the implant crown, with particular attention to the gumline. Specialized floss, interdental brushes, or water flossers may be recommended. A follow-up maintenance schedule is established.
Immediate Implant Placement and Immediate Loading
Some protocols compress the timeline. These are not appropriate for every patient.
Immediate Implant Placement
When a tooth is extracted, the implant can be placed immediately into the fresh extraction socket. This is appropriate only when the socket is free of active infection, the surrounding bone is intact, and there is sufficient bone beyond the socket apex to stabilize the implant. Immediate placement reduces the number of surgeries and the total treatment time. A bone graft is often placed simultaneously to fill any gaps between the implant and the socket walls.
Immediate Loading
In select cases, a temporary crown can be placed on the implant at the time of surgery or shortly thereafter. This is called immediate loading or same-day teeth. The implant must have excellent primary stability. The temporary crown must be adjusted so it has no contact in the bite during the healing period. The patient must be compliant with a soft diet and meticulous hygiene. Immediate loading is more predictable in the lower front jaw, where bone density is high, and in full-arch cases where multiple implants are splinted together.
The Role of Digital Technology
Modern implant dentistry increasingly uses digital workflows. A digital scan replaces the physical impression. The abutment and crown are designed on a computer and milled from a block of ceramic. A surgical guide, 3D-printed from the digital plan, fits over the teeth and directs the drills with precision.
Digital workflows can improve accuracy, reduce chair time, and enhance patient comfort. The core biological process, however, remains unchanged. The implant still requires osseointegration. The body still needs time to heal.
Potential Complications During the Process
Most implant procedures proceed smoothly, but complications can occur.
Surgical Complications
Bleeding, swelling, and bruising are expected and self-limiting. Infection is uncommon but possible. Nerve injury, particularly to the inferior alveolar nerve in the lower jaw, can cause temporary or, rarely, permanent numbness. Careful pre-operative planning with CBCT imaging dramatically reduces this risk. Sinus perforation in the upper jaw may occur and may require additional management.
Post-Surgical Complications
Implant failure to osseointegrate is the most significant complication. The implant may simply not heal to the bone. It may be found to be mobile at the uncovering appointment. Risk factors include smoking, poor bone quality, surgical technique errors, and infection. A failed implant is removed, the site is allowed to heal, and the procedure can often be reattempted after a healing period and possibly grafting.
Restorative Complications
Screw loosening, abutment fracture, and ceramic chipping are mechanical complications that can occur over the lifespan of the restoration. These are generally manageable without loss of the implant fixture.
Conclusion
The installation of a dental implant is a carefully orchestrated process that respects biology. It begins with thorough assessment and planning, proceeds through precise surgical placement, allows months for the body to heal and integrate the implant, and concludes with the fabrication and delivery of a custom restoration. The process takes time because bone takes time. Rushing the biology invites failure. A patient who understands each phase, who prepares for the waiting periods, and who commits to the maintenance requirements is investing wisely in a tooth replacement that can last a lifetime.
Frequently Asked Questions
How long does the entire dental implant process take?
For a straightforward single implant without grafting, expect four to eight months from surgery to final crown. If bone grafting or sinus elevation is required, the timeline may extend to nine to twelve months or longer.
Is the implant surgery painful?
The procedure is performed under local anesthesia and should not be painful. Post-operative discomfort, similar to a tooth extraction, is managed with over-the-counter or prescribed pain medication and typically resolves within a few days.
Can the implant be placed on the same day as the tooth extraction?
In selected cases, immediate implant placement is possible. The extraction site must be free of infection and have sufficient bone for primary stability. Your dentist will advise if you are a candidate.
What happens if my implant fails to heal?
A failed implant is removed, the site is allowed to heal for several months, and the procedure can often be reattempted, possibly with bone grafting. Implant failure is uncommon in healthy patients.
Can I have a temporary tooth during the healing period?
Yes. A temporary removable partial denture or a bonded temporary bridge can be provided for aesthetic purposes. The temporary must not place pressure on the healing implant.
How do I care for my implant during the healing phase?
Follow your dentist’s instructions precisely. Keep the area clean as directed. Avoid chewing on the site. Do not smoke. Attend all scheduled follow-up appointments.
Additional Resource:
American Academy of Implant Dentistry – What to Expect
https://www.aaid.com/patient_education/what_to_expect.html