How to Floss Dental Implants
Flossing is the most neglected yet most critical act of oral hygiene. For a patient with a dental implant, the stakes are higher. A natural tooth can decay. An implant crown cannot. But the gum and bone around an implant are exquisitely sensitive to the bacterial plaque that flossing removes. The junction where the titanium abutment meets the gum is a weak point in the body’s defense. It is a circular scar, a seal of parallel collagen fibers with a limited blood supply. If a biofilm of bacteria is allowed to mature undisturbed in the sulcus, the inflammatory response begins, and the bone supporting the implant is at risk. Flossing an implant is not the same as flossing a tooth. The technique is different, the tools are specialized, and the goal is the decontamination of a prosthetic surface, not a living root. This guide is a purely technical manual. It breaks down the exact flossing methods for a single implant crown, an implant bridge, and a full-arch restoration. It explains the tool selection, the motion, and the verification that you have done it correctly.
The Biological Reason Implant Flossing Is Unique
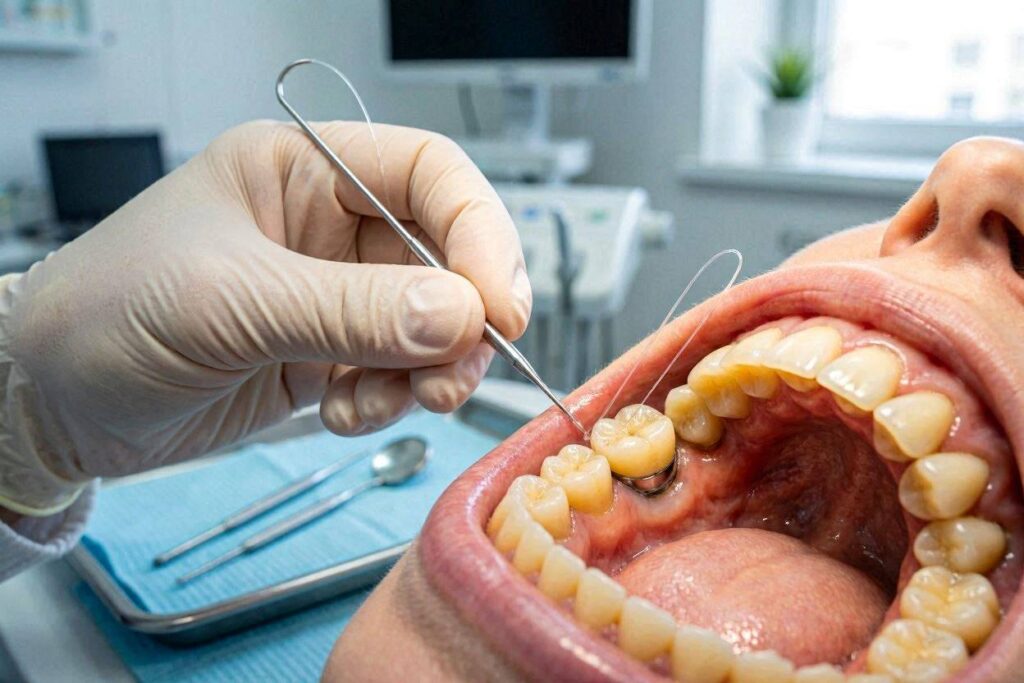
On a natural tooth, you floss to scrape the biofilm from the root surface and to disturb the bacterial colony in the gingival sulcus. The floss glides against enamel and cementum, which are hard, mineralized tissues. On an implant, the floss contacts a highly polished titanium or zirconia abutment. This surface is smooth, but it is not biologically active. It does not shed cells like a living root surface. Any bacteria that adhere to it are in direct, undisturbed contact with the soft tissue. The floss’s job is to mechanically wipe this abutment surface clean and to disrupt the biofilm at the very base of the sulcus. The motion must be controlled and deliberate. Aggressive, snapping floss can lacerate the gum cuff, creating a wound that is an open door for bacteria. The technique is a gentle, methodical wiping.
Essential Flossing Tools for Implant Patients
The standard string floss in your bathroom cabinet is not adequate for implant care. You need a dedicated implant hygiene kit.
- Implant-Specific Floss: This floss has two distinct sections. It has a thin, stiff, plastic threader tip for passing under bridges, and a thicker, fuzzy, woven portion. The fuzzy portion is the cleaning engine. It wraps around the abutment and acts like a soft brush, scrubbing the convex surface of the titanium.
- PTFE (Teflon) Floss Tape: A monofilament, non-shredding tape. It is ultra-thin and glides easily through tight contacts without tearing. It is excellent for single implant crowns with a very tight contact to the adjacent tooth. It does not have the scrubbing fuzz of implant floss, so it is more of a wiping than a polishing tool.
- Interdental Brushes with a Plastic-Coated Wire: These are the workhorses for implant bridges. The tiny bristles sweep the undersurface of the bridge and the abutment contours. The wire must be plastic-coated to prevent scratching the titanium. You must use the correct diameter.
- Soft Rubber Tip Stimulator: A cone-shaped rubber tip on a handle. It is used to trace the gum line and gently deliver a small amount of antimicrobial gel into the sulcus.
- Water Flosser with a Non-Metal Tip: A lavage device. It is an adjunct, not a replacement. It flushes out the loose debris and bacteria that the floss has loosened.
The Technique for a Single Implant Crown
This is the daily ritual for a single posterior or anterior implant. It takes approximately 30 seconds of focused attention.
Step 1: Thread and Position
Take a length of implant-specific floss or PTFE tape. Gently work it through the contact point between the implant crown and the adjacent tooth. Use a back-and-forth sawing motion to slide through, but do not snap it through with force. Snapping through delivers a sudden, traumatic impact to the gum papilla.
Step 2: Form the C-Shape
Once the floss is through the contact, do not simply move it up and down in a straight line. You must wrap the floss around the implant crown. Form a C-shape with the floss against the mesial (front-facing) side of the implant. The floss should hug the convex curve of the crown and its underlying abutment.
Step 3: The Controlled Wipe
With the floss wrapped in a C-shape, gently slide it down under the gum line until you feel resistance. This is the depth of the sulcus, usually 2-3mm in a healthy implant. You do not want to push deeper and detach the tissue. With the floss at this depth, apply lateral pressure against the abutment surface and pull the floss up, wiping the biofilm up and out of the sulcus. Repeat this wiping motion three or four times on the mesial surface. Then, remove the floss, re-insert it, form a C-shape on the distal (back-facing) side of the implant, and repeat the wiping motion. You have now cleaned the two critical surfaces where the floss rests: the interproximal sides of the abutment. The buccal (cheek) and lingual (tongue) surfaces are cleaned by the toothbrush and the water flosser.
The Critical Rule: The floss must never rest passively against the implant. The physical wiping motion is the whole purpose.
The Technique for an Implant-Supported Bridge
An implant bridge has a heavy, bulky underside, called the intaglio surface, which rests on the gum. This area is a complex, sheltered harbor for bacteria. You cannot access it with a toothbrush.
The Super Floss Method
Use a specialized super floss with a stiff threader end. Guide the threader under the bridge, between the implants, from the cheek side to the tongue side. Pull the floss through until the fuzzy, thick portion is centered under the bridge. Now, hold one end of the floss in each hand. Press the fuzzy portion up against the underside of the bridge. Using a shoeshine motion, pull the floss back and forth horizontally. The fuzzy fibers scrub the entire intaglio surface and the abutment contours. Then, wrap the floss around each implant abutment individually and perform the same vertical wiping motion described for the single crown. This two-step process—horizontal polishing of the bridge underside, followed by vertical wiping of each abutment—is the complete bridge flossing routine.
The Cuff and Sulcus Maintenance Ritual
Once a week, add a targeted sulcus decontamination step. Take a soft rubber tip stimulator. Dip the tip into a non-alcohol antimicrobial gel or a chlorhexidine gel (if prescribed). Gently insert the tip into the sulcus around the implant crown, just 1-2mm, and trace the complete circumference of the implant. This delivers the antimicrobial agent directly into the space where the bacteria live and physically disrupts the biofilm lining the gum cuff. Rinse with a gentle stream of water from the water flosser. This weekly deep-clean ritual adds a layer of chemical and physical protection to the daily mechanical wiping.
The Water Flosser: Sequence and Settings
The water flosser is the final rinse, not the primary cleaner. Use it after string flossing and brushing. Set it to a low or medium-low pressure setting. High pressure can force bacteria deeper into the sulcus or dissect the soft tissue attachment. Use the non-metal, soft plastic tip. Point the tip at a 90-degree angle to the gum line, directly at the space between the implant and the gum. Trace slowly around the implant, pausing between each implant crown. The pulsing water will flush out the dislodged biofilm, food particles, and leave the sulcus clean. You will see the debris in the sink. This is your evidence that the floss and the water flosser are working together.
Common Flossing Mistakes That Cause Damage
- The Sawing Motion: Using a back-and-forth sawing motion in the vertical plane. This cuts a groove into the soft gum papilla, causing recession and stripping the tissue down the abutment. The motion is a controlled wipe, not a saw.
- Flossing Too Infrequently: Flossing once a week allows a mature, toxic biofilm to form. For an implant, you must floss once every 24 hours.
- Using the Wrong Tool: A standard wooden toothpick. Never use a wooden toothpick around an implant. It splinters, leaves behind cellulose fibers that attract more bacteria, and the wood is abrasive to the titanium surface.
- Ignoring Bleeding: If your gums bleed around the implant every time you floss, this is not a sign to stop flossing. It is the definitive diagnostic sign of peri-implant mucositis. You are flushing out an established infection. Continue the meticulous, gentle flossing routine, and the bleeding should stop within seven to ten days as the tissue heals. If it persists for two weeks, see your dentist.
The Professional Verification Visit
Once every six months, during your implant maintenance appointment, ask the hygienist to watch you floss your implant. Say, “Can you watch my technique and correct me if I am doing anything wrong?” This single, humble request is one of the most powerful things you can do for the longevity of your implant. The hygienist will see if you are missing a surface, applying too much pressure, or using the wrong tool.
Conclusion
Flossing a dental implant correctly is a specific technical procedure that involves wrapping specialized, non-shredding floss in a C-shape around the abutment and performing a controlled, vertical wiping motion to remove biofilm from the interproximal surfaces, rather than the simple up-and-down sawing motion used on natural teeth. For implant bridges, a stiff-threaded super floss must be used to access and scrub the underside of the bridge with a shoeshine motion before wiping each individual abutment. This daily, methodical decontamination of the abutment surface is the single most effective defense against peri-implant disease.
Frequently Asked Questions
Can I use a regular string floss if it is all I have?
It is better than not flossing at all, but it is suboptimal. Regular string floss does not have the textured, fuzzy portion that effectively scrubs the smooth, polished titanium abutment. It also shreds on the implant crown margin. Over time, shredded floss leaves behind a nest of fibers. Invest in implant-specific floss.
My floss smells bad after flossing my implant. Is this normal?
No. A foul, rotten smell on the floss after cleaning an implant is a classic sign of anaerobic bacterial overgrowth in the sulcus, indicating peri-implant mucositis or early peri-implantitis. The site is infected. You need a professional implant cleaning and possibly a course of locally delivered antibiotics. Do not ignore a smelly implant.
How deep should the floss go under the gum?
The floss should gently slide until you feel the natural resistance of the soft tissue attachment at the base of the healthy sulcus, which is typically 2-3mm deep. You should not force it deeper. The goal is to clean the abutment surface within the sulcus, not to traumatize the biological seal at its base.
Is a water flosser alone enough for implant flossing?
No. A water flosser is a valuable adjunct but it is not a replacement for the mechanical wiping action of string floss or an interdental brush on the abutment surface. A biofilm is a sticky, adherent, organized colony. A water jet partially disrupts it. A physical wipe removes it. They work in sequence, not in substitution.
Additional Resource:
For visual demonstrations of correct implant flossing technique, visit the patient education video library on the American College of Prosthodontists’ website at www.gotoapro.org.
Disclaimer: This guide provides standardized flossing protocols for dental implant care. Your specific implant type, restoration design, and individual gum anatomy require a personalized hygiene plan prescribed by your dentist or dental hygienist. Always follow their professional guidance.
continue
Which Is the Best Dental Implant?
Meta Description: A comprehensive, unbiased analysis of the top dental implant brands. Compare Straumann, Nobel Biocare, Osstem, and more on surface technology, research, warranty, and price to find the best implant for your clinical case.
The question seems simple, but it is fundamentally a trick. Asking “Which is the best dental implant?” is like asking “Which is the best car?” The answer depends entirely on the driver, the terrain, and the mission. A formula one car is a marvel of engineering, but it is useless on a muddy farm road. The same principle applies to dental implants. The “best” implant is not a single, universally superior product. It is the implant system that is the best match for your specific bone anatomy, your medical history, the position of the tooth being replaced, and the restoration your dentist plans to attach to it. The global implant market is dominated by a handful of giant manufacturers who invest hundreds of millions of dollars in surface technology, clinical research, and long-term follow-up. There are also highly respected, more affordable value brands that deliver excellent, well-documented clinical results. This guide is not a sales pitch for one company. It is a dispassionate, evidence-based comparison of the leading implant systems, their unique technological philosophies, their clinical track records, and the scenarios where each one shines.
The Hierarchy of Implant Tiers
The dental implant industry can be divided into three clear tiers, not of quality, but of market position and research investment.
The premium tier comprises the Swiss and Swedish pioneers. These companies—Straumann, Nobel Biocare, and to a large extent, Dentsply Sirona (Astra Tech)—invented and perfected the science of osseointegration. They have the longest independent clinical follow-up studies, often spanning 20 years or more. They invest massively in surface technology, producing moderately rough, highly hydrophilic surfaces that accelerate bone healing. These are the implants used in the most complex, demanding clinical cases and in university residency training programs. They command the highest price.
The value tier is dominated by South Korean and Israeli manufacturers. Osstem, Dentium, MIS Implants, and Dio are the giants of this space. They are not inferior products. They are modern, well-researched implants that often follow the design principles of the premium tier, once patents have expired. They hold a significant share of the global volume market. Their surface technologies are excellent, and their clinical success rates in straightforward cases are comparable to premium brands. They offer an outstanding balance of performance and cost. They dominate the affordable implant market in countries like India, Mexico, and Turkey, and they are increasingly used by cost-conscious private practitioners in the West.
The generic or copycat tier consists of unbranded, locally manufactured implants with no peer-reviewed research, no traceable quality control, and no international regulatory approval. These are the implants offered at the dangerously low price points. They are a risk to your bone and your health. This guide will not discuss them further, except to say: avoid them absolutely.
The Premium Contenders: A Deep Profile
Straumann (Switzerland)
Straumann, a spin-off from the Swiss watchmaking and metallurgy precision industry, is widely considered the gold standard in implant dentistry. Its flagship implant is the Straumann BLX and the classic Bone Level Tapered (BLT) implant. The core of Straumann’s identity is its surface technology, called SLActive. This is a chemically modified, highly hydrophilic titanium surface. In standard implants, the surface is moderately rough, encouraging bone cell attachment. The SLActive surface goes further. It actively attracts blood and serum proteins, literally pulling the healing cascade into the implant surface. The clinical consequence is a reduced healing time. Straumann documents a 3- to 4-week healing protocol for early loading in suitable cases, compared to the traditional 6- to 8-week wait. The Roxolid material is a high-strength titanium-zirconium alloy, allowing for narrower implants that can be placed in thin bone without compromising strength. A Straumann implant is a precision instrument. It is the implant of choice for the aesthetically critical anterior zone, where the color of the peri-implant gum and the stability of the marginal bone are paramount. The warranty is a lifetime replacement guarantee.
Nobel Biocare (Sweden / USA)
Nobel Biocare is the company founded by Professor Per-Ingvar Brånemark, the Swedish orthopedic surgeon who discovered osseointegration by accident in the 1950s. The name carries the historical weight of the entire field. The flagship Nobel implant is the NobelActive and the NobelParallel CC. Nobel’s signature technology is the TiUnite surface, a moderately rough, highly crystalline titanium oxide surface with a 20-year plus documented track record. Nobel implants are known for their aggressive, self-tapping thread design, which provides exceptionally high primary stability, the mechanical grip the implant achieves the moment it is placed. This high insertion torque makes Nobel a dominant force in the All-on-4 full-arch immediate loading protocol. The NobelActive implant is designed to be steered; the surgeon can change its angle slightly during placement to avoid an anatomical obstacle. Nobel Biocare implants are a top choice for complex, full-mouth rehabilitations and for cases requiring immediate function.
Dentsply Sirona (Astra Tech Implant System)
The Astra Tech implant system, now under the Dentsply Sirona umbrella, is a Swedish design known for one thing above all: marginal bone preservation. The implant-abutment connection is a unique conical seal design that shifts the micro-gap, where bacteria could colonize, away from the bone crest and toward the center of the implant. The surface, called OsseoSpeed, is a fluoride-modified titanium oxide surface. Fluoride is known to stimulate bone formation. The clinical literature consistently shows Astra Tech implants with the least amount of marginal bone loss over time. This is the implant a specialist prosthodontist often chooses for a young, healthy patient with high aesthetic demands, where every fraction of a millimeter of papilla and bone is precious.
The Value Contenders: Proven Workhorses
Osstem (South Korea)
Osstem is the largest implant manufacturer in the Asia-Pacific region and a global volume leader. Its flagship system is the TSIII and the newer Osstem K3. The surface technology, called SA (Sandblasted and Acid-etched), is a well-proven, moderately rough surface with excellent osseointegration results. Osstem’s philosophy is to provide a reliable, straightforward, and affordable implant system for the vast majority of standard clinical cases. The surgical kit is intuitive. The implant design is modern and tapered. The success rates are documented in large, multinational studies and are entirely on par with premium brands in straightforward bone. For a single molar replacement in a healthy, non-smoking patient with good bone, an Osstem implant is a clinically excellent, rational choice at a significantly lower cost than a Straumann.
MIS Implants (Israel)
MIS, now part of the Dentsply Sirona group, is an Israeli company that produces a high-quality, well-engineered implant. The flagship C1 implant has a conical connection and a surface treatment similar in philosophy to the premium brands. MIS is known for its focus on prosthetic simplicity, making the restorative phase easier for the general dentist. It is a reliable value-tier implant with solid European and Asian clinical data.
Comparative Analysis Table
| Feature | Straumann (BLX/BLT) | Nobel Biocare (Active) | Astra Tech (Dentsply) | Osstem (TSIII) |
|---|---|---|---|---|
| Origin | Switzerland | Sweden / USA | Sweden / Germany | South Korea |
| Key Surface | SLActive (Hydrophilic) | TiUnite (Rough) | OsseoSpeed (Fluoride) | SA (Rough) |
| Material Option | Roxolid (Ti-Zr Alloy) | Commercially Pure Ti | Commercially Pure Ti | Commercially Pure Ti |
| Best For | Speed, thin bone, aesthetics | Immediate load, full-arch | Bone preservation, aesthetics | Standard cases, value |
| Connection | CrossFit (Conical) | Internal Conical | Conical Seal Design | Internal Hex/Conical |
| Healing Claim | 3-4 weeks (SLActive) | Immediate function | Standard (6-8 weeks) | Standard (6-8 weeks) |
| Price Tier | Premium | Premium | Premium | Value |
| Warranty | Lifetime | Lifetime | Lifetime | Limited / Varies |
The Clinical Factors That Choose the Implant, Not the Brand
The skill of the surgeon in selecting the right implant for the specific bone is more important than the logo on the package. A wide-diameter, standard bone-level implant from Osstem placed in abundant, dense bone will succeed. A poorly planned, narrow Straumann placed in thin, grafted bone by an inexperienced surgeon will fail. The “best” implant is the one that fits the three-dimensional bone volume precisely and is placed with an atraumatic, heat-controlled surgical protocol. The implant system must be one that the surgeon knows intimately. An expert surgeon with a value-tier implant will achieve a better result than a novice with a premium implant. The implant does not heal by magic. It heals by the surgeon’s skill.
The Crown and Abutment Factor
The implant is only the submerged foundation. The abutment and the crown, the visible parts, determine the final aesthetics and the long-term mechanical integrity. A premium implant with a poorly fabricated, poorly contoured crown will trap food, inflame the gum, and fail prosthetically. The best implant in the world cannot compensate for a bad laboratory. The total restorative system—implant, custom abutment, and a well-designed, well-polished crown—is the “best” result. Ask your dentist not only about the implant brand but about the abutment material (custom titanium or zirconia) and the dental laboratory that will craft your crown.
Conclusion
There is no single “best” dental implant brand; the optimal choice depends on the clinical scenario, with Straumann excelling in demanding aesthetics and thin bone with its hydrophilic SLActive surface, Nobel Biocare dominating in immediate-load full-arch cases due to its high primary stability, and Astra Tech preserving marginal bone with its unique conical seal connection. For a straightforward, standard single-tooth case in a healthy patient, value-tier brands like Osstem offer clinically comparable success rates with a significantly lower investment. The surgeon’s skill, the prosthetic planning, and the quality of the crown are the decisive factors in a lifelong outcome.
Frequently Asked Questions
Can my dentist just use the cheapest implant on me?
Your dentist can use a well-researched, value-tier implant like Osstem, Dentium, or MIS, and in a standard case, the result will be excellent. The risk is if your dentist uses an unbranded, non-certified generic implant. Always ask for the implant brand name, verify it is an FDA-cleared or CE-marked system, and ensure the surgeon has specific training in that system.
Is it worth paying extra for a premium brand for a front tooth?
For a single upper central incisor in a patient with a thin gum type and a high smile line, the premium implant’s advantages—the fine threads for crestal bone preservation, the slightly less visible titanium color through the gum with a special collar—can be worth the investment. The stakes are higher in the aesthetic zone.
Do all implant brands offer a lifetime warranty?
The major premium brands, Straumann and Nobel Biocare, offer a lifetime replacement warranty for the implant fixture if it fails to integrate or fractures. The warranty covers the titanium post, not the crown or the surgical fee. Value brands may offer a limited warranty or none. Ask your dentist what warranty comes with your specific implant.
Can I have an MRI with a dental implant?
Yes. All modern dental implants, regardless of brand, are made of non-magnetic, biocompatible titanium alloy or zirconia. They are completely safe in an MRI scanner. They may cause a small artifact, a dark spot, on the MRI image of the head and neck region, which the radiologist can account for.
Additional Resource:
For deeper scientific comparisons, explore the independent research database of the Academy of Osseointegration at www.osseo.org.
Disclaimer: This article compares dental implant systems based on published research and clinical practice. It does not endorse a specific product for your individual medical needs. A comprehensive examination and consultation with your implant surgeon is the only basis for implant selection.