How Do They Put a Dental Implant In?
The placement of a dental implant is one of the most meticulously choreographed procedures in all of surgery. It is not a single dramatic moment but a calm, sequential, and technologically guided process. The dentist or oral surgeon is not drilling a hole in the dark. They are executing a pre-planned, three-dimensional path with tolerances measured in fractions of a millimeter. The goal is to insert a sterile titanium post into the living bone of your jaw with such precision that the bone cells will, over the following months, migrate to its surface, attach, and lock it in place permanently. This biological fusion, osseointegration, is the miracle that makes an implant a root. Understanding exactly how the implant is put in dissolves the fear of the unknown. This guide walks you through the complete sequence, from the moment you sit in the chair to the placement of the final suture. It is a technical, honest, and unadorned account of a modern surgical masterpiece.
Phase Zero: The Digital Blueprint (Days Before Surgery)
The surgery does not begin with a scalpel. It begins with a diagnosis and a digital blueprint. The essential imaging tool is the Cone Beam Computed Tomography (CBCT) scan. You sit or stand while a machine rotates around your head, capturing hundreds of X-ray slices. The computer assembles these into a three-dimensional model of your jaw. The surgeon rotates this virtual jaw on a screen, measuring the height, width, and density of the available bone. The most critical measurement is the exact location of the inferior alveolar nerve in the lower jaw or the maxillary sinus floor in the upper jaw. Damaging the nerve causes permanent lip numbness. Piercing the sinus membrane without a plan causes infection. The CBCT scan eliminates these risks.
In many modern cases, the surgeon will use this 3D data to plan the implant’s position digitally. They select the exact implant length and diameter from a virtual library and place it in the ideal restorative position on the screen. This plan is then exported and a surgical guide is 3D-printed. This guide is a clear, rigid plastic stent that fits over your teeth or your gum. It has a metal sleeve, a cylinder that will direct the surgeon’s drills with absolute geometric precision. With a guide, the surgery is guided surgery. Without a guide, it is freehand surgery, relying entirely on the surgeon’s experience and spatial awareness. Both are valid, but guided surgery is the gold standard for complex or multiple implant cases.
The Day of Surgery: Preparation and Sterility
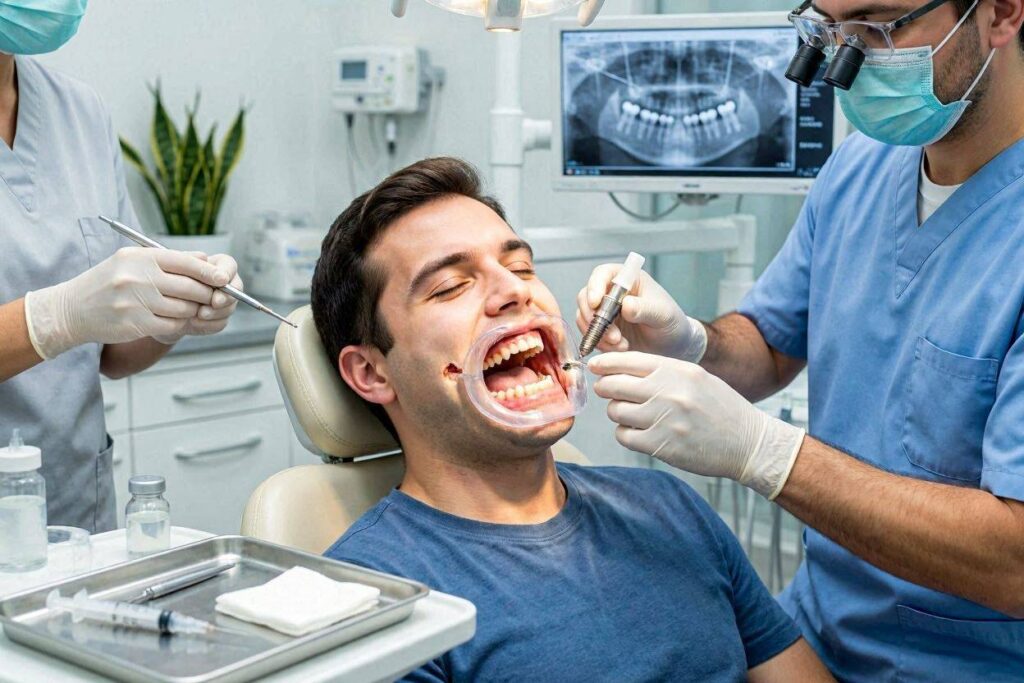
You arrive at the clinic. The surgical suite is prepared with the sterile field. The implant motor, a precise, computer-controlled handpiece, is calibrated. The surgical kit, a cassette of highly organized, sequence-specific drills, has been autoclaved. The implant itself, in its sealed, sterile vial, is placed on the sterile tray. The surgeon will scrub their hands and don a sterile surgical gown, mask, and gloves. This is not a “clean” procedure like a filling. It is a sterile surgical procedure. You will be asked to rinse with an antimicrobial mouthwash, typically chlorhexidine, for one minute to reduce the bacterial load in your mouth. Your face around the surgical site is swabbed with an antiseptic solution. A sterile drape is placed over your chest, and a smaller drape may isolate your mouth. The light is adjusted. The surgery is ready to begin.
Step 1: Profound Anesthesia
The most important step for your comfort. The surgeon will dry the gum tissue with a small piece of gauze and apply a topical anesthetic gel for one to two minutes. This numbs the surface so the subsequent injection is not felt. Then, a local anesthetic, typically lidocaine or articaine with a small amount of epinephrine, is injected very slowly. The epinephrine is not for your heart; it is a vasoconstrictor. It constricts the local blood vessels, keeping the anesthetic in the area longer and dramatically reducing bleeding during the procedure, giving the surgeon a clear, dry surgical field. The surgeon will test for profound anesthesia by touching the gum with a sharp instrument and asking if you feel it. You should feel deep pressure but absolutely no sharp pain. If you feel anything sharp, you say so immediately, and more anesthetic is administered. No surgery proceeds until the site is completely numb.
Step 2: The Incision and Flap Reflection
With anesthesia confirmed, the surgeon begins the surgical access. Using a fine scalpel blade, often a 15c blade, they make a precise incision along the crest of the alveolar ridge, the bony gum where the tooth was. This crestal incision is clean and straight. If the surgeon needs better visualization, they will make one or two small vertical releasing incisions at the front corners of the site. The blade cuts through the gum epithelium and the connective tissue, down to the surface of the bone.
Now, the surgeon uses a delicate instrument called a periosteal elevator. The periosteum is a thin, fibrous membrane that covers the bone, rich with blood vessels. The elevator is slipped under the gum flap, and with a gentle, controlled pushing and prying motion, the surgeon peels the full-thickness flap away from the bone. “Full-thickness” means the entire gum tissue, including the periosteum, is elevated off the bone as one unit. The flap is reflected, folded back like a book cover, and held in place with a suture or a retractor. The smooth, white or slightly bleeding surface of the jawbone is now clearly visible. This access is essential to see the contours, avoid hidden concavities, and place the implant precisely into the center of the bony ridge.
Step 3: The Precision Drilling Sequence
This is the heart of the surgery. The implant is not simply screwed in. A precisely graduated sequence of drills creates the osteotomy, the surgically prepared channel in the bone. The implant motor has a pump that delivers a constant stream of chilled, sterile saline irrigation to the drill tip. The irrigation is not optional. It is the critical factor that prevents the bone from overheating. If bone exceeds 47 degrees Celsius (116.6 degrees Fahrenheit) for more than a minute, the osteocytes, the bone cells, die. This thermal necrosis causes early implant failure. The copious saline flow prevents this.
The drilling sequence follows a strict protocol.
- The Round Bur or Pilot Drill: The first drill is a small, round bur. The surgeon marks the exact entry point on the bone and makes a small, shallow indentation, breaking through the dense cortical plate. This prevents the next drill from skating or wandering.
- The Twist Drills (2.0mm, then 2.8mm, then 3.2mm, etc.): The sequence of progressively wider, precisely calibrated twist drills begins. Each drill has depth markings, rings etched into the metal at specific millimeter increments. The surgeon drills to the pre-planned depth, using a pumping motion—drilling down a few millimeters, then pulling up to let the saline flush the debris. This keeps the osteotomy clean and cool. The drills are used in strict order, gradually widening the channel. A surgical guide directs each drill through its metal sleeve, guaranteeing the angle and the depth.
- The Final Drill and Countersink: The last drill in the sequence matches the diameter of the implant, slightly narrower to allow the implant threads to engage the bone walls. For a bone-level implant, a countersink drill may be used to create a small shelf at the crest of the bone for the implant collar to sit flush.
Step 4: Implant Placement
The drilling is complete. The osteotomy is a clean, cylindrical, blood-filled socket in the bone. The surgeon opens the sterile vial containing the implant. The implant is mounted on a special holder or directly on the surgical motor handpiece. The surgeon carries the implant to the prepared site. Using the implant motor at a low speed and high torque setting, the surgeon gently engages the tip of the implant into the osteotomy and begins to rotate it in. The threads bite into the bone. The implant is screwed down slowly. The motor displays the insertion torque in Newton centimeters (Ncm). The goal is to reach a final insertion torque of 30 to 50 Ncm. This value indicates good primary stability, the mechanical lock that holds the implant absolutely still during the critical first weeks of healing. If the torque is too low, the implant may be at risk of micro-movement and failure to integrate.
The surgeon drives the implant until its platform is flush with the bone crest or slightly below it, depending on the restorative plan. The implant is now fully seated.
Step 5: Cover Screw Placement and Suturing
With the implant seated, the surgeon removes the implant driver. A small, flat cover screw is then placed onto the top of the implant and tightened. This cover screw protects the internal connection of the implant from bone and gum tissue ingrowth during the submerged healing phase. If the implant is to be buried, the gum flap is now repositioned over the implant. The surgeon uses a fine, curved suture needle and a resorbable or non-resorbable suture material. The sutures are placed to achieve primary closure, meaning the gum edges are perfectly approximated, covering the implant and bone completely. The knots are tied and trimmed. If a healing abutment is placed for a non-submerged technique, it protrudes through the gum, and no cover screw is used.
A final post-operative X-ray, often a small periapical film, is taken to confirm the implant’s position relative to the adjacent teeth and vital structures. The surgery is complete. The entire procedure for a single straightforward implant typically takes 30 to 60 minutes from incision to final suture.
The Immediate Post-Operative Phase
You bite on a sterile gauze sponge for about 30 to 60 minutes to apply pressure and stop any minor oozing. The surgeon reviews the post-operative instructions: ice packs on the face for the first 24 hours, no rinsing or spitting for 24 hours, soft diet, and the prescribed medication. You leave the office with a new, sterile titanium root silently beginning its biological journey.
Conclusion
The placement of a dental implant is a precisely sequenced surgical procedure that begins with a 3D CBCT digital blueprint, followed by profound local anesthesia and a full-thickness flap to expose the jawbone. A graduated series of drills, under constant saline cooling, creates a perfectly sized osteotomy, into which the sterile titanium implant is screwed with a controlled torque to achieve primary stability. The gum is then sutured closed over a cover screw, and a post-operative X-ray confirms the final position.
Frequently Asked Questions
Can I feel pain during the implant surgery?
No. Profound local anesthesia ensures the surgical site is completely numb. You will feel significant pressure and vibration, particularly during the drilling and implant tightening, but you should not feel any sharp, cutting pain. If you do, you signal the surgeon, and more anesthesia is given immediately.
What is the difference between a one-stage and a two-stage implant surgery?
A two-stage surgery buries the implant under the gum with a cover screw. After healing, a second small surgery exposes it to place a healing abutment. A one-stage surgery places the implant and a healing abutment that protrudes through the gum, eliminating the second exposure surgery. The choice depends on the bone quality and the surgeon’s preference for the specific case.
How long does the actual drilling take?
The active drilling sequence for a single implant is remarkably short, typically lasting only a few minutes. The majority of the surgical time is spent on anesthesia, flap reflection, precise measuring, implant placement, and suturing. The drilling is swift but controlled.
Why do I need a surgical guide?
A surgical guide transfers the 3D digital plan directly into your mouth. It reduces the risk of hitting a nerve, perforating the sinus, or placing the implant at an angle that cannot be restored. It increases safety and precision, especially in cases with limited bone or multiple implants.
Additional Resource:
For a visual, patient-oriented overview of the implant placement process, visit the American Academy of Implant Dentistry’s page at www.aaid.com.
Disclaimer: This surgical description is for educational understanding. Your individual procedure will be tailored to your specific anatomy and clinical needs by your dental surgeon. Always rely on the personal consultation and plan provided by your licensed professional.
continue
What is Dental Implant Abutment?
Meta Description: A complete guide to the dental implant abutment. Learn what this crucial connector piece is, the different materials and types, how it is placed, and its vital role in the success of your implant crown.
A dental implant is often described as having three parts. The implant fixture, the titanium post buried in the bone, is the root. The crown, the visible white tooth, is the part you see and chew with. But between these two lies a small, unsung, exquisitely engineered component that bridges the worlds of biology and dentistry. This is the abutment. It is a connector, a precision-machined cylinder or custom-sculpted piece that is screwed into the implant body and protrudes through the gum. The crown is then cemented or screwed onto this abutment. The abutment’s role is far more than a simple intermediary. It shapes the gum tissue, seals the internal implant connection, and manages the immense mechanical forces of your bite. The choice of abutment material, its design, and the accuracy of its fit are decisive factors in the long-term health of the bone and the aesthetics of your smile. This guide dissects the dental implant abutment in complete technical detail, clarifying a component that patients rarely see but whose quality determines the life of their restoration.
The Definition and Core Functions of an Abutment
An abutment is a machined post, usually made of titanium or zirconia, that is connected to the implant fixture via a screw. The primary function is to provide a platform for the final crown, bridge, or denture. However, this definition understates its biological and mechanical responsibilities.
- The Transgingival Pathway: The abutment traverses the thickness of the gum tissue, from the implant platform deep in the bone, up through the soft tissue, emerging into the visible mouth. This is the transgingival zone. The contour, smoothness, and material of the abutment in this zone directly influence the health of the peri-implant gum cuff. A well-designed abutment supports the gum papilla and creates a tight, biologically resistant seal.
- The Implant-Abutment Connection: This is a microscopic mechanical interface. The abutment has a precisely machined male component that fits into the internal female connection of the implant. This connection is either an internal hexagon, an internal octagon, or a conical Morse taper. The accuracy of this fit is everything. A gap larger than 10 microns allows bacteria and fluid to seep in, causing micro-leakage, inflammation, and eventual bone loss. The abutment screw, a tiny titanium or gold-plated screw, torques this connection down to a specific force, typically 25-35 Ncm, clamping the two components together into a single, sealed unit.
- The Prosthetic Platform: The upper portion of the abutment is the platform onto which the crown is fabricated. It can be a simple, cylindrical stock shape, or a custom-milled, anatomically contoured base that mimics the cross-section of a natural tooth root.
The Material Decision: Titanium vs. Zirconia
The choice of abutment material is a clinical decision based on the implant location, the gum thickness, and the aesthetic demands of the case.
Titanium Abutments
Titanium is the original and still the most widely used abutment material. Its advantages are profound. It is incredibly strong and ductile, meaning it can withstand the highest chewing forces without fracturing. The titanium abutment screw, when torqued into a titanium implant, creates a cold-welded, homogenous metal connection of extreme stability. The mechanical reliability of a titanium-to-titanium connection is unmatched. The disadvantage is purely aesthetic. Titanium is a dark gray metal. If the patient has thin, translucent gum tissue, the gray hue of the abutment can show through the gum, creating a bluish, unnatural discoloration at the neck of the crown. For this reason, titanium abutments are the standard for posterior molars, where forces are highest and aesthetics are least visible.
Zirconia Abutments
Zirconia is a high-strength ceramic, specifically yttria-stabilized tetragonal zirconia polycrystal (Y-TZP). It is white, tooth-colored, and has a degree of translucency. The primary advantage of a zirconia abutment is its aesthetic performance under thin gum tissue. The white abutment reflects light similarly to a natural tooth root, eliminating the gray shadow effect. Modern zirconia is strong, but it is a ceramic, and it behaves like one. It is more brittle than titanium. Under extreme bending forces, a zirconia abutment can fracture. The connection is a zirconia abutment on a titanium implant, with a titanium screw. This is a hybrid interface. The abutment screw must be carefully torqued. The aesthetic gain is real, but the mechanical risk is higher than a solid titanium connection. For a single upper central incisor in a patient with a high smile line and thin gums, a zirconia abutment is often the best choice, provided the bite forces are well-controlled.
The Stock Abutment vs. the Custom Abutment
Abutments come in two manufacturing categories.
Stock Abutments
These are pre-manufactured, off-the-shelf components provided by the implant company. They come in standard diameters, angulations, and cuff heights. The dentist selects the closest anatomical fit. A stock abutment is less expensive and can be prepared by the dentist chairside, just like a tooth is drilled for a crown. The disadvantage is that it is a generic shape. It may not perfectly support the gum or conform to the natural emergence profile of the tooth. A stock abutment is a perfectly functional and economical choice for a posterior molar where the gum is thick and the aesthetic demand is low.
Custom CAD/CAM Abutments
This is the modern gold standard for anterior and aesthetic cases. The dentist takes an impression of the implant position and the surrounding gum. A dental laboratory technician scans this model and digitally designs an abutment that is a miniature, root-shaped sculpture. The design is milled from a solid block of titanium or zirconia by a computer-controlled milling machine. A custom abutment is uniquely yours. It has an emergence profile that perfectly supports the gum papilla, creating the optical illusion that the crown is growing out of the gum. The margin, where the crown meets the abutment, is placed at a depth that is hygienic and invisible. A custom abutment is more expensive, but it is a work of prosthetic art that enhances the long-term soft tissue health and the final aesthetic result.
The Angulated Abutment: Solving a Spatial Problem
An implant is placed in the available bone. The bone might not be ideally aligned with the desired path of the crown. If an implant is angled, a standard straight abutment would result in a crown that is off-axis, with a screw access hole in an unsightly position, such as the front face of an incisor. An angulated abutment solves this. It has a deliberate angle, typically 15, 20, or 25 degrees, built into its body. The internal screw channel is engineered to accept a screwdriver at this angle. The surgeon places the angled abutment, and the prosthetic platform is now re-oriented to the ideal path of insertion for the crown. This is routinely used in the All-on-4 technique, where the posterior implants are deliberately tilted up to 45 degrees to avoid the sinus and the nerve, and multi-unit angulated abutments correct the restorative angle.
The Clinical Procedure of Abutment Placement
The abutment is placed in a separate, minor procedure after the implant has osseointegrated, typically three to six months after the initial surgery. The dentist makes a small punch incision in the gum over the implant, or a small flap is raised to expose the cover screw. The cover screw is unscrewed and removed. The dentist then selects the correct abutment. A healing abutment, a temporary, wide, domed component, is often placed first for two to four weeks to shape the gum into a perfect, natural emergence profile. After the gum is beautifully contoured, the healing abutment is removed, and the final abutment is placed. The abutment screw is tightened with a torque wrench to the exact manufacturer-specified Newton centimeters. This torque is critical. Under-torquing risks screw loosening and fracture. Over-torquing risks stripping the screw threads or fracturing the abutment. The crown is then either cemented onto the abutment or screwed into it, depending on the retention method chosen.
The Screw-Retained vs. Cemented Debate
The abutment and crown can be attached as a single, screw-retained unit, where the crown has a hole through it that is covered with composite. This hole allows the dentist to screw the entire restoration directly into the implant with no cement. The advantage is that no cement is left under the gum to cause peri-implantitis. It is also retrievable. The disadvantage is the screw access hole, which can compromise aesthetics in an anterior crown. A cemented crown is cemented onto the abutment just like a crown on a natural tooth. The aesthetics are superior because there is no hole. The risk is that excess cement can be squeezed under the gum, causing cement-induced peri-implantitis, a devastating, slowly progressing infection. If a cemented crown is used, the dentist must use a minimal amount of resin cement and meticulously remove every microscopic particle.
Conclusion
A dental implant abutment is the precision-engineered connector that screws into the implant fixture, traverses the gum tissue, and serves as the platform for the final crown, playing a pivotal role in sealing the implant from bacteria, supporting the gum architecture, and transmitting chewing forces. It can be made of biocompatible titanium for maximum strength or tooth-colored zirconia for optimal aesthetics, and it is fabricated either as a standard stock component or a custom CAD/CAM-milled part for the perfect emergence profile. The accuracy of its fit, the correct torque of its retaining screw, and the choice between a screw-retained or cemented connection are critical decisions that directly dictate the long-term health of the underlying bone.
Frequently Asked Questions
Can my abutment become loose over time?
Yes, a late abutment screw loosening is a known mechanical complication, occurring in a small percentage of cases. It is not a failure of the implant. It is a failure of the screw joint. The dentist can simply re-tighten the screw through the crown access hole or replace the screw. A loose abutment feels like a clicking or a very slight movement and must be addressed immediately to prevent screw fracture.
Does the abutment ever need to be replaced?
An abutment is designed to be a permanent component. It would only be replaced if the crown is being remade with a new design, if the abutment is damaged, or if the aesthetic outcome of an old stock abutment is no longer satisfactory and the patient desires an upgrade to a custom abutment.
Why is my abutment so much more expensive than I expected?
A custom CAD/CAM abutment involves digital scanning, virtual design by a skilled laboratory technician, and precision milling from a solid block of medical-grade titanium or zirconia. It is a bespoke, one-off medical device. The cost reflects the labor, technology, and biomaterials that produce a perfect, patient-specific fit.
Can I be allergic to my abutment?
Titanium is the most biocompatible metal known. True titanium allergy is exceedingly rare, and diagnostic testing for it is not routinely performed. Zirconia is a ceramic and is chemically inert, with no reported allergic reactions. If you have a known severe metal allergy, a zirconia abutment provides a completely metal-free prosthetic connection.
Additional Resource:
For more technical detail on implant prosthetic components, visit the patient education section of the International Congress of Oral Implantologists at www.icoi.org.
Disclaimer: This article explains the general nature and function of a dental implant abutment. The specific abutment selection for your implant case is a professional decision made by your restorative dentist based on a clinical evaluation of your individual oral anatomy and prosthetic needs.