How To Probe Dental Implants?
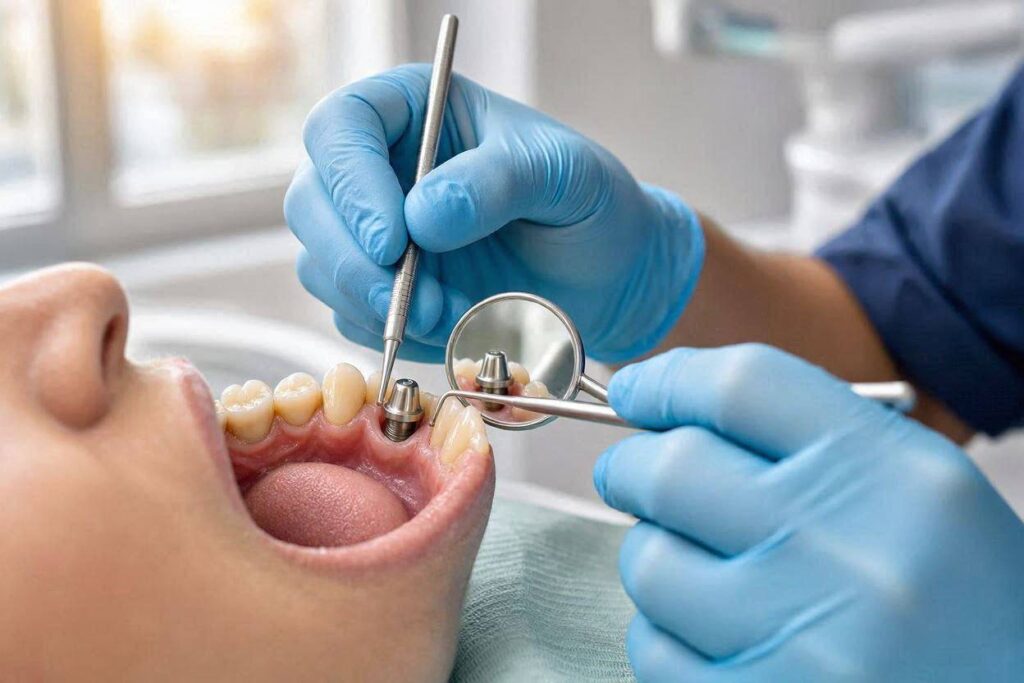
Periodontal probing is a fundamental skill in dentistry. Every dental patient has experienced the sensation of a thin metal instrument gently sliding between the gum and the tooth while the clinician calls out numbers to an assistant. Those numbers measure the depth of the sulcus, the shallow crevice where the gum meets the tooth. They are a diagnostic tool, an early warning system for gum disease. But when the “tooth” is actually a dental implant, the rules change. The anatomy is different. The tissue attachment is different. The consequences of improper technique are different. This article explains, in clear detail, how to probe dental implants correctly, why the technique matters, and what the results mean.
Why Implant Probing Is Different from Tooth Probing
A natural tooth and a dental implant are anchored in the jaw in fundamentally different ways. Understanding this difference is the key to understanding the probing technique.
A natural tooth connects to the surrounding bone through the periodontal ligament. This ligament is a network of collagen fibers that runs from the cementum covering the root into the alveolar bone. The ligament acts as a shock absorber. It also provides a biological seal, with connective tissue fibers inserting perpendicularly into the root surface. The gum tissue above the bone attaches to the tooth through a junctional epithelium and a connective tissue attachment. This attachment creates a cuff that resists bacterial invasion.
A dental implant has none of these structures. There is no periodontal ligament. The implant fixture is in direct contact with the bone through osseointegration. There is no cementum. The soft tissue above the bone does not insert perpendicularly into the implant surface as it does into a natural root. Instead, the collagen fibers in the connective tissue run parallel to the implant surface, creating a weaker, circumferential cuff. The attachment is fundamentally less robust than the natural dentogingival complex.
This anatomical difference has profound implications for probing. A probe around a natural tooth encounters resistance from the connective tissue fibers. The probe tip stops at the junctional epithelium, and the measurement reflects the histologic sulcus depth. A probe around an implant encounters less resistance. The probe tip can easily pass beyond the soft tissue margin and penetrate closer to the bone. The probing depth around an implant, therefore, measures not just the sulcus depth but also reflects the ease with which the probe penetrates the weak connective tissue interface.
The Probing Force: Gentler Than a Natural Tooth
Because the implant-tissue interface is weaker, the probing force must be lighter. For natural teeth, a probing force of approximately 0.25 Newtons, or about 25 grams, is standard. For implants, a lighter force of 0.15 to 0.20 Newtons is recommended. This is a subtle but important difference. A heavy-handed probing around an implant will overestimate the probing depth, cause unnecessary bleeding, and potentially damage the fragile soft tissue seal.
Achieving this light force consistently requires a calibrated, pressure-sensitive periodontal probe. The clinician must be consciously gentle. The probe should be inserted until light resistance is felt, not forced. The habit of “walking” the probe around the tooth with firm pressure, which many clinicians develop for natural teeth, must be consciously suppressed around implants.
The Probe Type: Plastic or Metal?
The choice of probe material is a subject of clinical debate, but a clear consensus exists in the direction of caution.
Titanium implant surfaces and titanium abutments are hard. They are harder than the metal of a stainless steel periodontal probe. Probing with a metal probe can theoretically scratch the titanium surface. Scratches create surface roughness, which can harbor bacterial plaque and increase the risk of peri-implant mucositis and peri-implantitis. For this reason, many implantologists recommend the use of plastic periodontal probes around implants. Plastic probes are softer than titanium and will not scratch the surface.
However, plastic probes have limitations. They are less durable. The markings wear off with repeated sterilization. They can be less tactile, making it more difficult for the clinician to feel the subtle transition from the sulcus to the attached tissue. Some clinicians argue that with a sufficiently light touch, a metal probe can be used without causing clinically significant surface damage.
A practical recommendation is to use a flexible plastic probe when available and appropriate. If a metal probe is used, the clinician must be exceptionally light-handed. In either case, the probe tip should be rounded and smooth. Sharp, worn probe tips are contraindicated in all periodontal probing but are especially dangerous around implants.
The Technique: Step by Step
Probing dental implants is a systematic process that should be performed at every implant maintenance visit. Here is the recommended technique.
Establish a Baseline
The first probing should occur after the final restoration is delivered and the tissues have healed. This establishes the baseline probing depths against which future measurements are compared. Without a baseline, a single measurement is just a number. With a baseline, trends become visible.
Use a Calibrated Probe
A pressure-sensitive probe, either plastic or metal, with clear millimeter markings is essential. The probe should be examined before use to ensure the markings are legible and the tip is not worn or sharp.
Approach from Six Sites
The implant should be probed at six sites: mesiofacial, midfacial, distofacial, mesiolingual, midlingual, and distolingual. This provides a complete map of the peri-implant soft tissue.
Insert Gently and Parallel to the Implant Axis
The probe is inserted into the sulcus with a light, consistent force. The probe should be oriented as parallel as possible to the long axis of the implant. Angled probing overestimates pocket depth.
Walk the Probe Around the Implant
The probe is moved gently around the circumference of the implant, maintaining light contact with the abutment or crown surface. The clinician feels for the subtle resistance that indicates the base of the sulcus.
Record the Deepest Reading at Each Site
For each of the six sites, the deepest penetration is recorded. Bleeding on probing should also be noted, as should the presence of suppuration, or pus.
Do Not Force Through Resistance
If firm resistance is encountered, the clinician stops. Forcing the probe deeper causes trauma, bleeding, and unreliable measurements.
Interpreting the Numbers: What Probing Depths Mean
Peri-implant probing depths must be interpreted differently than periodontal probing depths around natural teeth.
Healthy peri-implant tissue typically has a probing depth of 2 to 4 millimeters. Depths greater than 5 millimeters are considered deep and may indicate peri-implant disease, particularly if accompanied by bleeding on probing or suppuration. However, a single deep reading is less significant than a trend of increasing depth over time. The baseline measurement is the reference point.
A probing depth of 4 millimeters at delivery that remains stable at 4 millimeters over years is less concerning than a probing depth that increases from 3 millimeters to 6 millimeters over eighteen months. The trend reveals the disease process.
Bleeding on Probing
Bleeding is a critical diagnostic sign. In natural teeth, bleeding on probing is a reliable indicator of gingival inflammation. Around implants, bleeding has similar significance but with a caveat. Because the implant-tissue interface is weaker, healthy implants may exhibit slight bleeding on probing more readily than healthy teeth. However, the absence of bleeding is a strong indicator of peri-implant health. The presence of profuse bleeding, or bleeding that worsens over time, is a warning sign.
Suppuration
Pus expressed from the sulcus on probing is never normal. It indicates active infection and bone loss. Suppuration demands immediate diagnostic imaging and intervention.
The Difference Between Mucositis and Peri-Implantitis
Probing plays a central role in distinguishing between the two major forms of peri-implant disease.
Peri-implant mucositis is inflammation confined to the soft tissue around the implant. There is bleeding on probing, and probing depths may be slightly increased, but there is no bone loss beyond the initial remodeling expected after implant placement. Mucositis is reversible with improved oral hygiene and professional debridement.
Peri-implantitis is a destructive inflammatory process affecting both the soft tissue and the supporting bone. There is bleeding on probing, increased probing depths, and radiographic evidence of bone loss beyond normal remodeling. Suppuration may be present. Peri-implantitis is progressive and requires active treatment to arrest.
The transition from mucositis to peri-implantitis is detected by comparing current probing depths to baseline and by comparing current radiographs to baseline radiographs. The clinical examination and the radiographic examination are complementary. Neither is sufficient alone.
Radiographic Correlation
Probing provides information about the soft tissue attachment. Radiographs provide information about the bone. Both are needed for a complete assessment.
Bitewing radiographs and periapical radiographs taken with a paralleling technique are standard for implant follow-up. A new implant should have a baseline radiograph taken at the time of restoration delivery. Subsequent radiographs are taken at maintenance intervals and compared to the baseline. Bone loss is measured from a fixed reference point, typically the implant-abutment junction or the implant shoulder.
Early peri-implant bone loss can be subtle. A 0.5-millimeter loss over a year may be within normal remodeling. A 2-millimeter loss over a year, particularly when accompanied by increased probing depths and bleeding, is a clear signal of peri-implantitis.
When to Refer to a Specialist
A general dentist performing implant maintenance should know when to refer. Indicators for specialist referral include rapidly increasing probing depths, suppuration, radiographic bone loss exceeding 2 millimeters, and peri-implantitis that does not respond to initial non-surgical therapy. A periodontist or an experienced implant surgeon has access to advanced diagnostic tools and surgical treatment modalities for managing peri-implant disease. Early referral offers the best chance of saving the implant.
The Patient’s Role in Implant Probing
Patients should understand why probing is performed and what the numbers mean. A patient who knows their baseline probing depths can be a partner in monitoring their implant health. Patients should ask their dental professional to explain the probing results at maintenance visits. “What are my numbers today? Have they changed since last time? Is there any bleeding?” These are reasonable questions that engaged patients should ask. An implant is a partnership between the patient’s daily care, the dentist’s professional maintenance, and the body’s healing response. The patient who understands the monitoring process is more likely to be diligent in home care.
Conclusion
Probing dental implants is a delicate, essential procedure that differs fundamentally from probing natural teeth. The implant-tissue interface is weaker, requiring a lighter force and often a plastic probe to avoid surface scratching. Probing depths must be interpreted relative to a baseline established after restoration, with trends over time more clinically significant than a single measurement. Bleeding on probing and suppuration are key diagnostic signs. Probing combined with radiographic assessment allows early detection of peri-implant disease, which is critical for successful intervention and implant survival.
Frequently Asked Questions
Does probing a dental implant hurt?
Probing with a light, controlled force should not be painful. The patient may feel the sensation of the probe against the gum, but it should not cause sharp pain.
How often should dental implants be probed?
Probing should be performed at every implant maintenance visit, typically every three to six months, as part of a comprehensive clinical examination.
Can probing damage a dental implant?
Probing with a heavy force or a metal probe can scratch the implant surface. A light force and a plastic probe minimize this risk.
What is a normal probing depth around an implant?
Healthy peri-implant probing depths are typically 2 to 4 millimeters. The absolute number is less important than stability over time compared to baseline.
What does bleeding on probing around an implant mean?
Bleeding can indicate inflammation. Absence of bleeding is a strong indicator of health. Persistent or worsening bleeding should be investigated.
Can I probe my own dental implant at home?
No. Probing requires a calibrated instrument and professional training. Home care involves brushing, flossing, and using interdental aids, not probing.
Additional Resource:
European Federation of Periodontology – Peri-Implant Diseases Guidelines
https://www.efp.org/for-patients/gum-disease/