How To Whiten Dental Implants At Home
You have invested time, money, and energy into your smile. Dental implants are a fantastic solution for missing teeth. They look natural, feel strong, and can last a lifetime.
But here is a reality check that many people discover too late. Your natural teeth are getting whiter from your at-home kits, but your implant crown is not changing color. In fact, it might even look darker or yellower compared to your newly bleached natural teeth.
So, what do you do? You came here searching for “How To Whiten Dental Implants At Home.” Let me give you the honest, professional answer right away.
You cannot chemically whiten a dental implant crown.
I know that might be disappointing news. But do not close this tab. There is a lot you can do. You can remove surface stains, prevent future discoloration, and create the illusion of a whiter smile. You just need the right techniques.
This guide will walk you through every single option available. We will cover why implants are different from real teeth, which home remedies work, and which ones will destroy your restoration.
Why Your Dental Implant Won’t Respond to Bleach
Before you buy another whitening strip or tray, you need to understand the science. It is simple, and it will save you a lot of frustration.
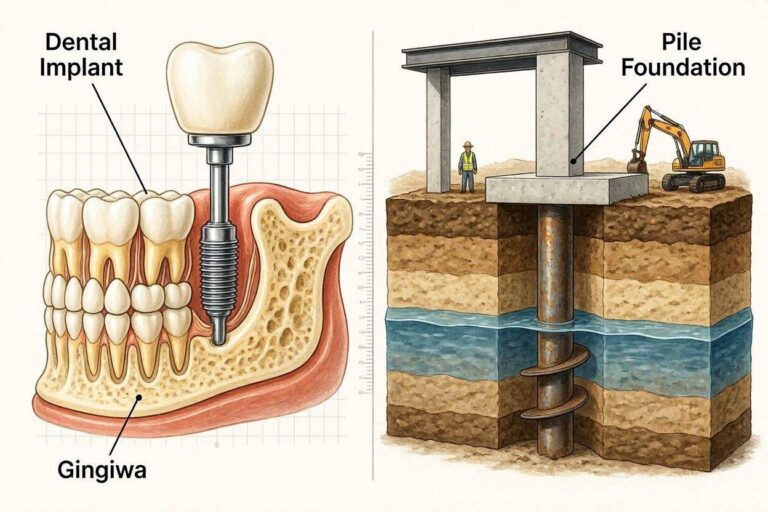
The Material Difference: Porcelain vs. Enamel
Your natural teeth are made of enamel and dentin. Enamel is porous. Think of it like a dry sponge. When you apply hydrogen peroxide or carbamide peroxide, the bleach seeps into those tiny pores. It breaks down stain molecules deep inside the tooth structure. That is how whitening works.
Now, look at your dental implant crown. Most implant crowns are made from one of two materials:
- Porcelain (Ceramic): This is the most common choice. Porcelain is incredibly hard and stain-resistant. But it is also non-porous. It does not have those tiny holes for the bleach to enter. The whitening gel just sits on top of the crown like water on a glass window.
- Zirconia: This is another very strong ceramic. Like porcelain, it is non-porous and will not absorb bleaching agents.
Important Note: Some older or budget implant crowns use acrylic or resin materials. These materials might absorb a tiny amount of bleach, but they will whiten unevenly. You will end up with a splotchy, unnatural look. Do not risk it.
The Real Problem: Your Natural Teeth Change, Implants Do Not
Imagine you get a beautiful white implant crown today. It matches your neighboring teeth perfectly. Fast forward two or three years. You drink coffee, red wine, and tea. You might smoke. Your natural teeth slowly darken.
Your implant crown? It stays exactly the same color as the day it was placed.
Now your natural teeth are shade A3 (a yellowish color), and your implant is still shade A1 (bright white). The implant looks gray or dirty simply by comparison. People do not see a bright smile. They see one bright tooth that stands out.
The Hard Truth: At-Home Whitening Kits Are Useless for Implants
I want to be perfectly clear so you do not waste your money. Do not use whitening strips, LED lights, charcoal powder, or bleaching trays on your implant crowns.
Here is a quick look at why these popular products fail.
| Product Type | Why It Fails on Implants | Potential Damage |
|---|---|---|
| Whitening Strips | Bleach cannot penetrate porcelain | No damage, but zero results. Wasted money. |
| LED Light Kits | Light activation does not work on non-porous ceramics | None, but completely ineffective. |
| Charcoal Powder | Abrasive grit scratches porcelain | High risk. Scratches trap bacteria and stains. |
| Baking Soda Pastes | Too abrasive for glaze on crowns | High risk. Dulls the shiny surface. |
| Lemon Juice / Strawberries | Acid erodes the cement holding the crown | Very high risk. Can loosen the implant crown. |
“I tell all my patients the same thing: Never try to whiten an implant crown at home with chemicals. You are not cleaning it; you are ignoring the real issue. The real solution is professional cleaning and managing your natural teeth’s color.” — Dr. Sarah Jenkins, DDS, Prosthodontist.
The Right Goal: Remove Surface Stains, Not Whiten
Since you cannot change the color of the crown itself, you need to change your goal. Your mission is to remove extrinsic stains (stains on the surface) and manage the color of your natural teeth.
Think of your implant crown like a white shirt. You cannot dye a white t-shirt to make it whiter. But you can wash off the dirt and grass stains so it looks clean and bright again.
That is exactly what we will do.
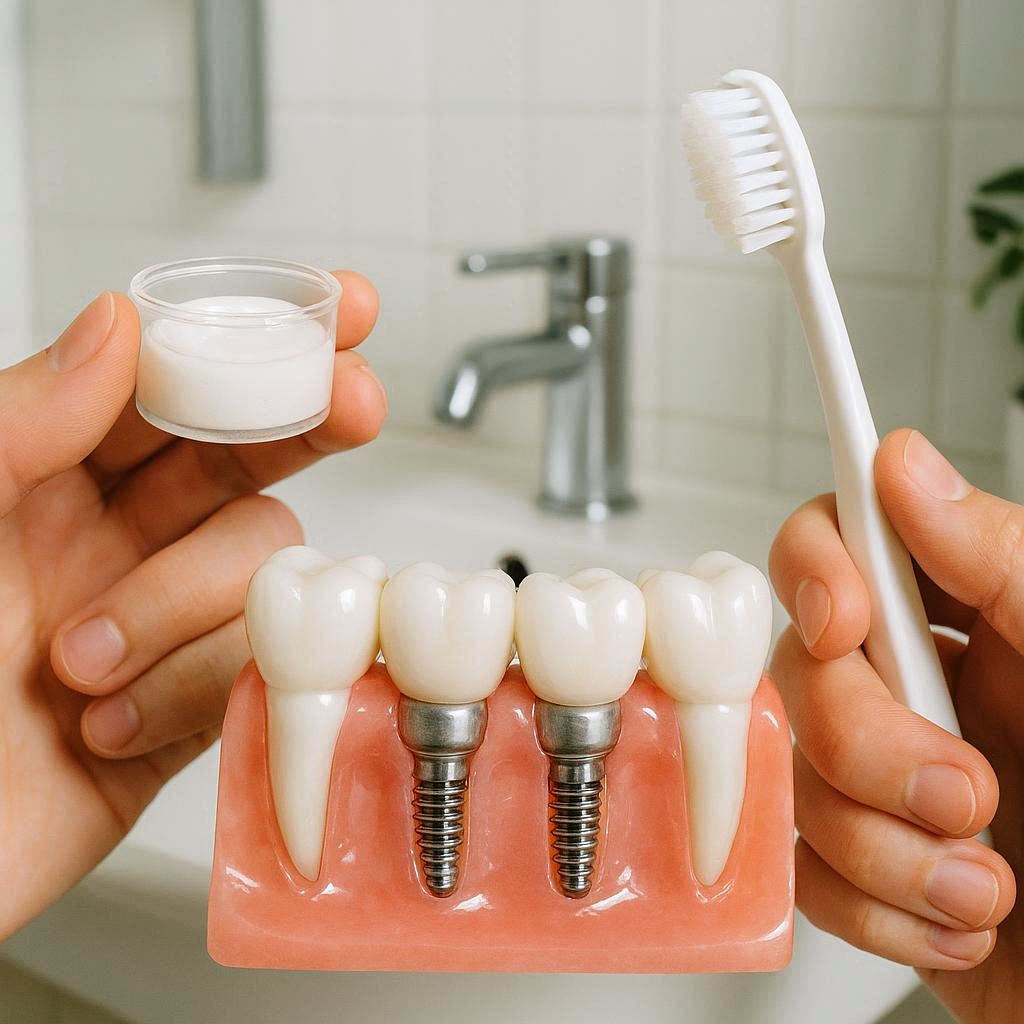
5 Safe Methods To Clean and Brighten Your Dental Implants At Home
Here are the only five methods that professionals recommend for cleaning dental implant crowns at home. These techniques will remove plaque, food debris, and surface stains. They will make your implant look as clean and bright as possible.
Method 1: The Ultra-Soft Cleaning Routine (Daily)
This is your baseline. If you do nothing else, do this. A clean crown is a bright crown.
What you need:
- An ultra-soft toothbrush (look for “extra soft” or “ultra-soft” on the label)
- Non-abrasive toothpaste (avoid whitening toothpastes with silica)
Step-by-step:
- Wet the toothbrush with warm water.
- Apply a pea-sized amount of non-abrasive toothpaste.
- Gently brush the implant crown using small, circular motions. Do not scrub hard.
- Pay special attention to the gumline where the crown meets the gum. This area collects the most plaque.
- Brush for a full two minutes.
Why this works: Gentle brushing removes biofilm (the sticky layer of bacteria) and surface stains from coffee, tea, or food. A smooth, clean surface reflects light better. That creates the appearance of brightness.
Method 2: Professional-Grade Low-Abrasion Polishing Paste
You cannot buy this at the grocery store, but you can order it online. Look for a low-abrasion polishing paste designed for porcelain. These are often labeled for “dental restorations” or “ceramic crowns.”
How to use it (once per week only):
- Brush your teeth normally first.
- Put a small amount of the polishing paste on a soft, damp cloth or an ultra-soft brush.
- Gently polish the implant crown for 30 seconds.
- Rinse thoroughly.
Note: Do not use this paste on your natural teeth. It is too mild to whiten enamel but perfect for gently buffing a ceramic crown.
Method 3: The Water Flosser Trick (For Hidden Stains)
Stains often hide where your toothbrush cannot reach: right around the gumline of the implant. A water flosser (like Waterpik) is your best friend.
How to use a water flosser on an implant crown:
- Set the flosser to a low or medium pressure. High pressure can damage the gum tissue around the implant.
- Aim the tip at a 90-degree angle directly at the gumline surrounding the crown.
- Trace the gumline slowly. You want to flush out debris and surface stains.
Pro tip: Add a capful of non-alcoholic mouthwash to the water reservoir. This helps kill bacteria that cause yellow biofilm. Avoid alcohol-based mouthwashes, as they can dry out the gum tissue.
Method 4: The Gentle Baking Soda RINSE (Not Paste)
I told you earlier not to use baking soda paste. That is because the gritty particles scratch porcelain. However, a baking soda rinse is completely safe.
A rinse dissolves the baking soda completely, leaving no abrasive particles.
Recipe for a safe rinse:
- 1 cup of warm water
- 1 teaspoon of baking soda
Instructions:
- Stir until the baking soda is fully dissolved. You should not see any grit at the bottom.
- Swish the solution in your mouth for 60 seconds.
- Spit it out.
- Rinse with plain water.
Why this helps: Baking soda is alkaline. It neutralizes acids from food and bacteria. This prevents the formation of pellicle, the sticky film that attracts stains. It also gently lifts superficial food stains without scratching.
Method 5: Coconut Oil “Pulling” (For Gum Health, Not Whitening)
Let me be honest. Coconut oil will not whiten your implant crown. There is zero chemical reaction between oil and porcelain. But here is why I include it.
Healthy gums make a crown look better. Inflamed, red, or puffy gums make even the whitest crown look bad. Oil pulling reduces gum inflammation and bacteria.
How to do it:
- Take one tablespoon of coconut oil.
- Swish it around your mouth for 10-15 minutes. Do not swallow it.
- Spit it into a trash can (not the sink, as it can clog pipes).
- Brush your teeth as usual.
Do this 3-4 times per week. Your gums will look healthier and pinker. That frames your implant crown in a healthy, attractive way.
What If My Implant Crown Is Actually Changing Color?
Let us address a common concern. Some people swear their implant crown has turned yellow or gray over time. If that is happening, one of three things is going on.
Scenario 1: The Crown Is Stained on the Surface
This is the most common and easiest to fix. Porcelain is stain-resistant, but not stain-proof. Heavy smokers or people who drink a lot of coffee and black tea can develop surface stains.
Solution: A professional dental cleaning (scaling and polishing) will remove these surface stains instantly. Your hygienist has special polishers for porcelain.
Scenario 2: You Have an Acrylic or Resin Crown
If your implant was placed many years ago (10+ years) or if you chose a budget option, your crown might be made of acrylic or composite resin. These materials can absorb stains and discolor from the inside out.
What to do about it:
- You cannot whiten this at home effectively.
- You have two options: professional polishing (temporary fix) or replacing the crown with a new porcelain or zirconia crown (permanent fix).
Scenario 3: The Crown Is Damaged
A cracked, chipped, or scratched crown will trap stains in those tiny crevices. No amount of cleaning will fix a damaged crown.
Signs of damage:
- You feel a rough edge with your tongue.
- You see a visible crack or chip.
- Food gets stuck around the same area every time.
Solution: See your dentist. They may need to repair or replace the crown.
How To Keep Your Natural Teeth White (Without Ruining Your Implant)
Here is the strategy that most people ignore. Instead of trying to whiten the implant, you should whiten your natural teeth carefully and then maintain that shade.
But you must protect the implant crown during the whitening process.
The “Custom Tray” Method (Recommended)
Ask your dentist for a custom-fitted whitening tray. This tray is made from a mold of your mouth. It has individual reservoirs for each tooth.
How to protect your implant:
- Use a small pair of scissors to cut out the reservoir section that sits over your implant crown.
- Now the tray has a hole over the implant.
- Fill the tray with whitening gel only in the sections for your natural teeth.
- Wear the tray as directed.
The implant crown is never exposed to the bleach. Your natural teeth get whiter. The implant stays the same color. But in this case, staying the same color is good because now your natural teeth will catch up to the implant’s original whiteness.
The “Whitening Pen” Method
Whitening pens apply gel directly to individual teeth. These are perfect for people with one or two implant crowns.
How to use:
- Apply the pen only to your natural teeth.
- Keep the gel at least 1-2mm away from the implant crown.
- Wipe away any gel that accidentally touches the crown immediately.
Whitening Strips (Modified)
You can use whitening strips, but you must be careful.
- Cut the strip in half.
- Apply the half-strip to your natural teeth only.
- Avoid covering the implant crown at all.
- If the strip touches the crown, remove it and cut a smaller piece.
Warning: Never use whitening strips that require an LED light. The light can heat up the metal post inside your implant, causing discomfort or micro-damage to the surrounding bone.
The Top 5 Products You Should NEVER Use on Implants
I want to save you from making an expensive mistake. Replacing an implant crown costs between $500 and $3,000. Do not risk that to save $10 on a DIY remedy.
| Dangerous Product | Why Avoid | Safe Alternative |
|---|---|---|
| Lemon juice | Acid erodes dental cement | Dissolved baking soda rinse |
| Apple cider vinegar | Acidic; softens the crown’s glaze | Non-alcoholic mouthwash |
| Hydrogen peroxide (full strength) | Can damage the titanium post over time | Professional 10% carbamide peroxide (natural teeth only) |
| Electric toothbrush with a round head | Oscillating action can loosen the crown | Sonic toothbrush with a soft head |
| Toothpaste with “microbeads” | Plastic beads scratch porcelain | Non-abrasive gel toothpaste |
A Realistic Long-Term Plan For A Bright Smile With Implants
You need a schedule. Random cleaning will not work. Follow this weekly and monthly plan for the best results.
Daily Routine (5 minutes)
- Morning: Brush all teeth (including the implant) with an ultra-soft brush and non-abrasive toothpaste.
- After coffee/tea: Rinse your mouth with plain water.
- Evening: Floss around the implant crown. Use either traditional floss with a floss threader or a water flosser. Then brush again.
Weekly Routine (15 minutes)
- Saturday: Use the low-abrasion polishing paste on the implant crown only.
- Saturday: Do one oil pulling session with coconut oil.
- Saturday: Use the baking soda rinse.
Monthly Routine (30 minutes)
- First of the month: Take a “progress photo” of your smile. Compare it to last month. Are your natural teeth darkening? Adjust your whitening routine for your natural teeth only.
- Check for damage: Run your tongue over the implant crown. Does it feel smooth? If you feel any rough spots, call your dentist.
Yearly Professionally (60 minutes at the dentist)
- Professional cleaning: Your hygienist will polish the implant crown with special rubber cups and non-abrasive paste. This removes stains you cannot get at home.
- Check the cement: Your dentist will check to make sure the crown is still firmly attached to the implant abutment.
The $0 Solution: Change Your Habits
You do not have to buy any products to keep your implant looking bright. You can change what you put in your mouth.
Foods and Drinks That Stain Implants (and Natural Teeth)
- Coffee and black tea: The biggest culprits. Use a straw to bypass your front teeth.
- Red wine: High in chromogens (color compounds). Rinse with water after drinking.
- Soy sauce, balsamic vinegar, tomato sauce: Dark pigments stick to plaque.
- Berries (blueberries, blackberries, acai): Natural but potent stains.
- Curry and turmeric: These yellow pigments are hard to remove.
The “Straw Method”
Use a reusable metal or glass straw for all dark beverages. This directs the liquid to the back of your mouth. It never touches your front implant crown. This single habit can reduce surface staining by 80%.
The “Water Rinse” Rule
For every sip of coffee, wine, or soda, take a sip of water immediately afterward. The water dilutes the staining agents and washes them away before they can settle on your crown.
When You MUST See a Dentist (Do Not DIY This)
I am a big fan of home care. But some problems require a professional. Please see your dentist immediately if you notice any of these signs.
- The crown feels loose. If you can wiggle it even slightly, do not try to glue it yourself. You will trap bacteria and cause decay on the underlying tooth stump (if you have a crown on a natural tooth) or ruin the abutment screw (for an implant).
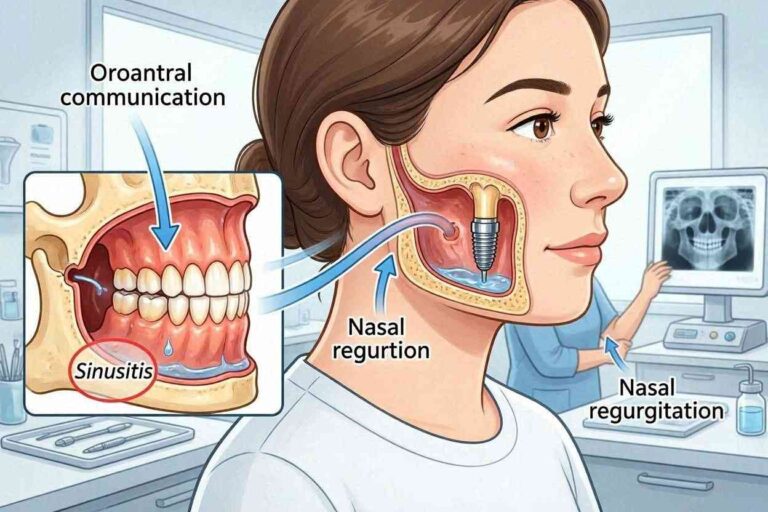
- The gum around the implant is bleeding or swollen. This could be peri-implantitis (an infection around the implant). This is serious and can cause bone loss.
- You see a dark line at the gumline. This can happen with older metal-ceramic crowns. The metal shows through. You cannot fix this at home. The crown needs replacement.
- Your natural teeth are significantly whiter than the implant. In this case, stop whitening your natural teeth. Let them return to their natural shade. If you still want a perfect match, your dentist can re-do the implant crown to match your new, whiter natural teeth.
Frequently Asked Questions (FAQ)
Q1: Can I use a whitening toothpaste on my dental implant?
No. Whitening toothpastes are abrasive. They contain silica, baking soda, or charcoal to physically scrub off stains. These abrasives will scratch the glossy surface of your porcelain crown. Scratched porcelain traps more bacteria and stains over time. Use only non-abrasive, gel-based toothpaste.
Q2: How often should I professionally clean my implant crowns?
Every six months, just like your natural teeth. However, if you are a smoker or heavy coffee drinker, consider professional cleanings every four months. The hygienist uses special instruments (plastic or titanium scalers) that will not scratch your crown. Never let a hygienist use a metal scaler on your implant crown.
Q3: My implant crown is 10 years old and looks yellow. Can I replace it with a whiter one?
Yes, absolutely. Implant crowns are not permanent forever. The crown itself is a separate piece that screws or cements onto the implant post (which is in your bone). Your dentist can remove the old crown and fabricate a brand new, whiter one. This is a simple procedure that takes two or three appointments.
Q4: Does smoking affect dental implant crowns?
Yes, significantly. Tar and nicotine create stubborn yellow-brown stains on porcelain. While the crown itself is not absorbing the smoke, the surface becomes coated. Additionally, smoking reduces blood flow to your gums, increasing your risk of implant failure. If you smoke, you need to clean your implant crown twice as often.
Q5: Can I use denture cleaners like Polident or Efferdent on my implant crown?
No, do not do this. Denture cleaners are designed for soft acrylic dentures, not hard ceramic crowns. The chemicals (often sodium hypochlorite or persulfates) can corrode the surface of the porcelain and damage the bonding cement. Some patients have reported their crowns feeling “rough” or “chalky” after using denture tablets.
Q6: Is there any permanent whitening solution for dental implants?
The only “permanent” solution is replacement. You cannot change the color of an existing porcelain crown without destroying it. If you want a whiter implant crown, you must have your dentist remove the old crown and send it to the lab. The lab technician will match your new, whiter natural teeth and create a brand new crown.
Q7: What is the best toothpaste for dental implants?
Look for a toothpaste with these three qualities:
- Non-abrasive (RDA value of 70 or lower)
- Fluoride-containing (prevents decay on natural teeth)
- Gel-based (not paste)
Specific brands include Supersmile, Prevident 5000 (prescription only), or any children’s fluoride gel (kids’ gels are less abrasive).
Q8: Can the implant post itself (the metal part in my bone) become stained?
No. The titanium or zirconia implant post is completely hidden under your gum tissue and inside your jawbone. Nothing you eat, drink, or smoke will ever touch it. You cannot stain the implant post. Only the visible crown can discolor.
Additional Resource: Where To Learn More
If you want to dive deeper into the science of dental implant care, I highly recommend this free resource from the International Congress of Oral Implantologists (ICOI).
Resource Link: ICOI Patient Education Library – Caring for Your Implants (Copy and paste this link into your browser. Look for the “Maintenance” or “Home Care” section.)
This guide is written by actual implant surgeons, not marketers. It covers flossing techniques, recommended cleaning tools, and how to spot the early signs of implant failure. It is one of the most trustworthy sources online.
Conclusion
Line 1: You cannot chemically whiten a dental implant crown at home because porcelain and zirconia are non-porous and will not absorb bleach.
Line 2: Instead, focus on removing surface stains with gentle polishing pastes, baking soda rinses, and water flossers, while protecting the crown during natural teeth whitening.
Line 3: For persistent discoloration, see your dentist for professional polishing or consider replacing the crown entirely for a long-term solution.
Disclaimer: This article is for informational purposes only and does not constitute medical advice. Dental implants are complex medical devices. Always consult with a licensed dentist or prosthodontist before starting any home care routine, using any new product, or making decisions about your dental health. The author and publisher are not responsible for any adverse effects or damages resulting from the use or misuse of the information provided in this article. Your specific situation may require a different approach.