What Are the Steps Required for Dental Implantation?
Losing a tooth changes more than your smile. It shifts how you eat, speak, and feel about yourself in social settings. You might have spent months or even years hiding your mouth, avoiding certain foods, and feeling that empty space with your tongue. Dental implants offer a permanent solution that looks, feels, and functions like natural teeth. But walking into the process blind creates unnecessary anxiety. Understanding each step transforms fear into confidence. This guide walks you through the complete dental implant journey, from the first consultation to the final crown placement, with honest timelines, real expectations, and practical advice gathered from dental professionals and patient experiences.
The Initial Consultation and Treatment Planning
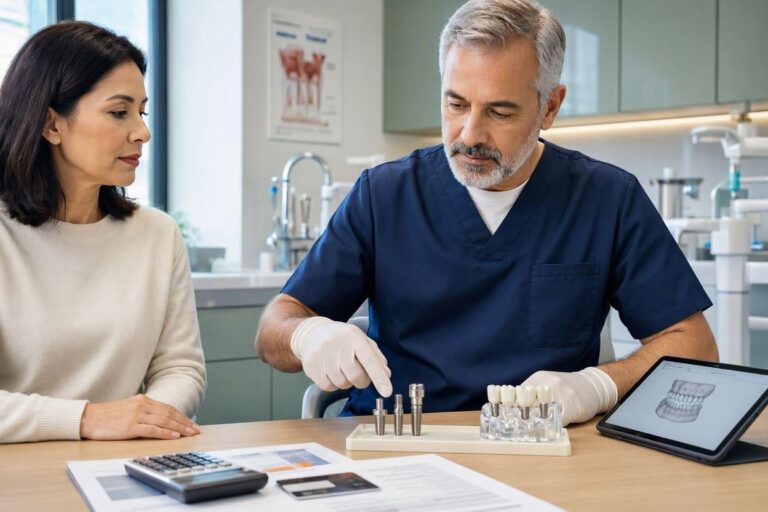
The journey begins long before any surgical instrument touches your mouth. The initial consultation establishes whether you qualify as a candidate and builds the roadmap for your entire treatment. This appointment typically lasts between 60 and 90 minutes, and you should prepare for a thorough examination.
Medical History Review and Risk Assessment
Your dentist starts with a comprehensive medical history review. This conversation covers more than just your teeth. The dental team needs to understand your full health picture because systemic conditions directly affect implant success rates. Uncontrolled diabetes, autoimmune disorders, and certain blood conditions can compromise healing. Smoking status matters significantly, as tobacco use reduces implant success rates by up to 20 percent according to clinical studies.
Be completely honest during this phase. Omitting a medication or health condition might seem harmless, but it can lead to implant failure or serious complications. Blood thinners, bisphosphonates for osteoporosis, and certain cancer treatments directly impact surgical planning. Your dentist needs this information to keep you safe.
Clinical Examination and Diagnostic Imaging
After the medical review, the clinical examination begins. The dentist evaluates the condition of your remaining teeth, gum health, bite alignment, and jawbone structure. They measure the space where the implant will go, checking that adequate room exists without crowding adjacent teeth.
Diagnostic imaging provides the detailed view that visual examination cannot offer. Most dental practices now use cone beam computed tomography, commonly called CBCT scanning. This three-dimensional imaging technology reveals your jawbone’s exact height, width, and density. It maps the location of nerves, sinuses, and blood vessels that must be avoided during surgery. A standard panoramic X-ray offers a two-dimensional view and serves as a starting point, but CBCT scans have become the gold standard for implant planning.
Treatment Plan Development and Financial Discussion
With all diagnostic information collected, the dentist develops your personalized treatment plan. This document outlines every procedure needed, the timeline, the number of implants, whether bone grafting is necessary, the type of restoration, and the total cost. Some patients qualify for same-day implant placement after extraction. Others require months of preparatory procedures before implant surgery can begin.
The financial discussion happens during this appointment. Dental implant treatment represents a significant investment, and transparency matters. Your treatment coordinator should explain what your insurance covers, what out-of-pocket costs to expect, available payment plans, and whether third-party financing options exist. Never leave this appointment with unanswered financial questions.
Setting Realistic Expectations
A responsible dentist sets realistic expectations during this consultation. Implants have success rates above 95 percent in healthy candidates, but they are not indestructible. They require the same care as natural teeth. They can fail if oral hygiene deteriorates. They can develop complications if placed poorly. Your dentist should discuss both the benefits and the risks openly. If a provider promises perfection without mentioning potential complications, consider seeking a second opinion.
Pre-Surgical Preparatory Procedures
Not every patient moves directly from consultation to implant surgery. Many require preparatory procedures that create the foundation for successful implant placement. These steps extend the overall timeline but dramatically improve long-term outcomes.
Tooth Extraction and Site Preservation
When the damaged tooth remains in your mouth, extraction comes first. The technique used during extraction significantly impacts future implant success. Atraumatic extraction preserves as much bone as possible. The dentist uses specialized instruments to gently loosen the tooth without crushing the surrounding bone socket. After removing the tooth, they thoroughly clean the socket to remove any infection or diseased tissue.
Socket preservation often happens immediately after extraction. The dentist places bone graft material directly into the empty socket. This step prevents the natural bone resorption that occurs after tooth loss. Without this intervention, the jawbone begins shrinking within weeks. A collagen membrane typically covers the graft material, protecting it while new bone forms. Sutures close the site, and healing begins. This procedure reduces the need for more extensive bone grafting later.
Bone Grafting Procedures
Insufficient bone volume remains the most common obstacle to implant placement. Bone grafting rebuilds the foundation so an implant can anchor securely. Several types of bone graft procedures address different deficiencies.
Socket grafting, as mentioned above, fills an extraction site immediately after tooth removal. Ridge augmentation rebuilds bone width when the jaw ridge has narrowed due to long-term tooth loss. Sinus lifts raise the sinus floor to create adequate bone height in the upper back jaw, where bone loss commonly occurs due to sinus expansion. Block bone grafts use a small section of bone harvested from another area, typically the back of the jaw or chin, secured with tiny screws to rebuild significant defects.
Bone graft materials come from several sources. Autografts use your own bone, harvested from another site in your mouth or body. Allografts use processed human donor bone from a tissue bank. Xenografts use bovine bone that has been specially treated. Alloplastic grafts use synthetic materials that stimulate natural bone growth. Your surgeon selects the appropriate material based on the defect size, location, and your medical history.
Healing after bone grafting takes time. Small grafts may mature in three to four months. Larger grafts, particularly sinus lifts and block grafts, often require six to nine months before the site can support an implant. Rushing this process leads to implant failure, as the unhealed graft cannot provide primary stability.
Sinus Lift Procedures
Upper back jaw implants frequently require sinus augmentation. The maxillary sinuses sit above the upper molars and premolars. When these teeth are lost, the sinus cavity often expands downward, leaving insufficient bone height for implant placement. A sinus lift raises the sinus membrane and fills the created space with bone graft material.
Two approaches exist for this procedure. The lateral window technique accesses the sinus through a small opening created in the side of the upper jaw. This approach suits cases requiring significant bone height increase. The osteotome technique accesses the sinus from below through the implant site itself. This less invasive approach works for cases needing only a few millimeters of additional height.
Recovery from sinus lift surgery requires specific precautions. Patients must avoid blowing their nose, sneezing with a closed mouth, drinking through straws, and smoking for several weeks. These activities create pressure changes that can disrupt the graft and perforate the sinus membrane. Following these restrictions strictly prevents complications that would delay your implant timeline.
Periodontal Disease Treatment
Healthy gums provide the seal that protects the implant-bone interface from bacteria. Active periodontal disease introduces infection near the surgical site and significantly increases implant failure risk. Any existing gum disease must be treated before implant surgery proceeds.
Treatment may involve scaling and root planing, commonly called deep cleaning, to remove bacterial deposits from tooth roots and gum pockets. Advanced cases might require laser therapy or surgical pocket reduction. The goal is establishing a bacteria-free environment before placing the implant. Your dentist will confirm gum health through periodontal probing and evaluation of bleeding and inflammation before scheduling surgery.
The Implant Placement Surgery
Implant placement surgery marks the day the titanium post enters your jawbone. Understanding exactly what happens during this procedure reduces anxiety and helps you prepare properly.
Anesthesia and Sedation Options
Your comfort during surgery matters. Several anesthesia options exist, and your choice depends on the procedure’s complexity, your anxiety level, and your dentist’s recommendations.
Local anesthesia numbs the surgical site completely while you remain fully awake. This works well for single implant placement in cooperative patients with low anxiety. The dentist injects lidocaine or a similar anesthetic, and you feel pressure and movement but no pain. Nitrous oxide, often called laughing gas, adds relaxation to local anesthesia. You breathe it through a nasal mask throughout the procedure, and its effects dissipate quickly once the mask is removed.
Oral conscious sedation involves taking a prescribed pill, typically from the benzodiazepine family, about an hour before surgery. You remain conscious but deeply relaxed. Many patients remember little of the procedure afterward. You need someone to drive you home, as the medication impairs coordination and judgment for several hours.
Intravenous sedation delivers medication directly into your bloodstream for deeper sedation. You drift in and out of consciousness but can respond to commands. This option suits longer procedures, multiple implant placements, or patients with significant dental anxiety. General anesthesia renders you completely unconscious and requires an anesthesiologist’s presence. This level of sedation is rarely necessary for routine implant surgery but may be appropriate for complex full-arch cases or patients with special needs.
Surgical Flap Creation and Site Preparation
Once anesthesia takes effect, the surgeon creates a surgical flap. This involves making a precise incision along the gum ridge where the implant will go, then gently lifting the gum tissue to expose the underlying bone. The flap remains attached at its base, preserving blood supply for healing.
With the bone exposed, the surgeon marks the exact implant position using a small drill to create a pilot dimple. A surgical guide, created from the CBCT scan during planning, may be used to ensure precise positioning. This guide fits over your teeth or rests on the bone and directs the drills at pre-planned angles and depths, eliminating guesswork.
Sequential Drilling Protocol
Implant site preparation follows a specific sequence using progressively larger drills. This step-by-step approach prevents bone overheating and ensures precise implant fit. The surgical drill operates at controlled speeds with copious sterile saline irrigation to keep the bone temperature below the threshold where cell death occurs.
The initial pilot drill creates a narrow channel at the planned depth. Subsequent drills widen this channel incrementally. The final drill size matches the implant’s diameter, though the actual implant will engage the bone slightly tighter than the final drill for primary stability. Throughout this process, the surgeon checks angulation and depth against the surgical plan. Any deviation at this stage affects the final restoration’s appearance and function.
Implant Placement and Primary Stability
The dental implant, a titanium or zirconia screw-shaped post, is removed from its sterile packaging and inserted into the prepared site. The surgeon drives it into position either by hand with a ratchet device or using the surgical drill at controlled torque. The implant advances slowly, engaging the bone threads until it reaches the planned depth.
Primary stability describes how firmly the implant sits in the bone immediately after placement. Achieving high primary stability ranks among the strongest predictors of successful osseointegration. The surgeon tests this stability by attempting to wiggle the implant. A stable implant feels like it is locked in stone. If stability proves inadequate, the surgeon may choose a slightly larger implant, place the implant deeper to engage better-quality bone, or place a healing cap and allow a longer healing period.
Healing Cap or Cover Screw Placement
After implant placement, the surgeon must decide whether to close the implant completely under the gum or place a healing cap that protrudes through the gum. A cover screw sits flush with the implant top and the gums are sutured closed over it. This approach requires a second minor surgery months later to expose the implant. A healing cap extends through the gum, eliminating the need for a second exposure surgery. This single-stage approach saves time but requires the implant to have sufficient stability for the healing cap to remain undisturbed.
The choice between these approaches depends on primary stability achieved, bone quality, and whether bone grafting occurred simultaneously. The surgeon sutures the gum tissue closed, either completely covering the implant or snugly around the healing cap. Surgical time for a single implant typically ranges from 30 to 90 minutes from incision to final suture.
Osseointegration: The Healing Phase
The period following implant placement may seem inactive, but remarkable biological processes transform the implant from a foreign object into an integrated part of your body.
Understanding the Biological Process
Osseointegration describes the direct structural and functional connection between living bone and the implant surface. This process was discovered accidentally by Swedish orthopedic surgeon Per-Ingvar Brånemark in the 1950s when he found titanium chambers had fused to rabbit bone and could not be removed. This discovery revolutionized dentistry and gave the world modern dental implants.
At the cellular level, osseointegration proceeds through several phases. Immediately after placement, blood cells contact the implant surface and a fibrin clot forms. Platelets release growth factors that attract bone-forming cells. Osteoblasts, the cells responsible for bone formation, migrate to the implant surface and begin depositing new bone matrix directly onto the titanium oxide layer. This new bone, called woven bone, is initially disorganized. Over subsequent weeks, it remodels into mature lamellar bone with organized collagen fibers and full strength.
The implant surface micro-topography dramatically influences this process. Modern implants feature roughened surfaces created through sandblasting, acid etching, or anodization. These microscopic textures increase surface area and provide mechanical interlocking that stimulates osteoblast activity. Some surfaces incorporate calcium phosphate coatings or fluoride treatments that actively promote bone formation.
Typical Healing Timelines
Traditional protocols allow three to six months for osseointegration in the lower jaw and four to six months in the upper jaw. This difference exists because mandibular bone is denser and heals faster than maxillary bone. These timelines assume uneventful healing and good bone quality.
Shorter healing periods have become possible with implant surface advances and improved surgical techniques. Some protocols now allow loading at eight weeks in the lower jaw under specific conditions. Immediate loading, where a temporary crown is placed the same day as the implant, works in carefully selected cases with excellent primary stability and controlled forces.
Factors That Influence Healing Speed
Multiple factors affect how quickly and completely osseointegration occurs. Bone quality at the implant site plays a dominant role. Dense cortical bone in the front lower jaw heals predictably and quickly. Softer bone in the back upper jaw requires longer healing and carries higher failure risk if loaded prematurely.
Systemic health factors exert significant influence. Well-controlled blood sugar in diabetic patients supports normal healing, while poorly controlled diabetes impairs bone formation and increases infection risk. Smokers experience delayed healing and higher failure rates because nicotine constricts blood vessels and carbon monoxide reduces oxygen delivery to healing tissues.
Surgical technique contributes substantially. Atraumatic preparation without bone overheating preserves osteoblast viability. Achieving high primary stability eliminates micromovement that disrupts the delicate cellular processes of osseointegration. Post-operative infection control through proper sterile technique and appropriate antibiotic protocols protects the healing site.
What Patients Experience During Healing
The first week after surgery brings the most noticeable symptoms. Swelling peaks around day three and then gradually subsides. Bruising may appear on the cheek or under the eye for upper jaw implants. Discomfort typically remains manageable with over-the-counter pain relievers and ice application during the first 24 to 48 hours.
After the first week, most patients feel essentially normal. The surgical site may remain slightly tender to touch. Sutures dissolve or are removed at the one to two-week post-operative appointment. The implant itself causes no sensation, as it sits within bone which lacks sensory nerve endings.
The waiting period challenges patients psychologically more than physically. Nothing seems to be happening, and the temptation to rush the process grows. Patience during osseointegration protects the investment you have made. Loading an implant before osseointegration completes risks fibrous encapsulation instead of bone fusion, which requires implant removal and restarting the entire process.
Abutment Placement
The abutment serves as the connector between the implant buried in your bone and the visible crown. This component plays a critical mechanical role in the final restoration.
Second-Stage Surgery for Two-Stage Implants
If your implant was placed using the two-stage approach with a cover screw buried under the gum, you need a minor procedure to expose it. This second-stage surgery typically occurs three to six months after implant placement, once osseointegration has completed.
The procedure requires only local anesthesia. The surgeon makes a small incision over the implant location to expose the cover screw. The overlying gum tissue or any bone that grew over the implant is removed. The cover screw comes out, and a healing abutment screws into the implant. This healing abutment extends through the gum, shaping the soft tissue into a natural emergence profile. Sutures may or may not be needed depending on the tissue handling. The entire procedure often takes less than 30 minutes.
Healing Abutment Function and Duration
The healing abutment serves two purposes. It maintains the implant’s opening above the gum line, eliminating the need to make a new incision when the final crown is placed. More importantly, it molds the gum tissue into an ideal shape for the final restoration. A well-formed emergence profile creates the illusion that the crown emerges naturally from the gum, indistinguishable from adjacent natural teeth.
The healing abutment remains in place for two to four weeks while the gum tissue matures around it. During this time, the tissue collar develops a keratinized seal similar to the gingival cuff around natural teeth. This seal provides the first line of defense against bacterial invasion. Temporary soreness resolves within days. You clean the healing abutment with gentle brushing and possibly a chlorhexidine rinse prescribed by your dentist.
Custom vs. Stock Abutments
The final abutment connecting implant to crown can be either stock or custom-fabricated. Stock abutments come in standard shapes and sizes from the implant manufacturer. They cost less and work adequately in straightforward cases where the implant angle and tissue contour fall within normal parameters. However, they may create compromises in emergence profile or crown support.
Custom abutments are milled from a solid block of titanium or zirconia based on a digital scan of your implant position and surrounding tissue. A dental laboratory designs the abutment to emerge at the ideal angle, support the crown optimally, and create a natural tissue contour. Custom abutments cost more but provide superior esthetic outcomes, especially in the front of the mouth where appearance matters most. The choice between stock and custom abutments should be discussed with your restorative dentist based on your specific situation.
Impression Taking and Crown Fabrication
Once the gum tissue has matured around the healing abutment, the restorative phase begins. This phase transforms the implant from a hidden anchor into a visible, functional tooth.
Traditional vs. Digital Impressions
Capturing the exact implant position, angulation, and surrounding tissue contour represents a critical step. Errors at this stage propagate through the entire restoration and can result in an ill-fitting crown that causes complications.
Traditional impressions use a coping that snaps onto the implant or abutment, held in place while impression material sets around it. The coping transfers the implant position to the stone model poured in the dental laboratory. This technique works reliably when performed correctly but introduces potential errors at multiple steps. Moisture contamination, coping misfit, or material distortion can compromise accuracy.
Digital impressions use intraoral scanning technology to capture the implant position and surrounding tissues directly. A scan body screws into the implant, and the scanner records its three-dimensional position along with the entire dental arch. The resulting digital file transmits directly to the dental laboratory, eliminating physical impression errors. Digital scanning typically takes less time, causes less patient discomfort, and produces highly accurate results. Many practices now use digital impressions exclusively for implant restorations.
Shade Selection and Customization
Creating a crown that matches your natural teeth requires careful shade selection. This process ideally occurs before the tooth is prepared or at a separate appointment when your eyes are not fatigued from dental work. Natural light provides the best conditions for shade matching. The dentist or assistant uses a shade guide to compare standard tooth colors against your adjacent teeth.
Single central incisor replacements present the greatest esthetic challenge. The human eye is remarkably sensitive to slight shade differences between front teeth. Ceramists, the technicians who create dental ceramics, can incorporate multiple shades within a single crown to replicate the natural color variations of real teeth. They can add subtle translucency at the incisal edge, slight chroma variations, and surface texture that mimics natural enamel. This level of customization requires skill and communication between dentist and ceramist, often supplemented by photographs of your natural teeth under different lighting conditions.
Temporary Crown Phase
During the two to three weeks required for final crown fabrication, you typically wear a temporary crown. For implant cases, this temporary restoration serves several purposes beyond simple space maintenance. It shapes and conditions the gum tissue, creating an ideal emergence profile. It allows you to test the esthetics and provide feedback before the final crown is fabricated. For front tooth replacements, it restores your smile during the fabrication period.
Temporary crowns for implants must be fabricated carefully to avoid loading the implant prematurely. Screw-retained temporaries attach directly to the implant, providing secure retention without cement. They must avoid any contact with opposing teeth during biting to protect the implant-bone interface that is still maturing.
Final Crown Delivery
Crown delivery day represents the culmination of months of treatment. The final restoration, fabricated in the dental laboratory, arrives ready for insertion.
Try-In and Verification
Before cementing or screwing the crown permanently, the dentist verifies every aspect of fit and appearance. You examine the crown in a hand mirror under natural light. Evaluate the shade, shape, and size honestly. Adjustments can still be made at this stage, though major modifications may require returning the crown to the laboratory.
The dentist checks the contact points between the crown and adjacent teeth using dental floss. Contacts should be firm enough to prevent food impaction but not so tight that floss shreds or catches. The bite is verified with articulating paper to ensure the crown does not hit prematurely or create interferences during chewing movements. These occlusal adjustments protect the implant from excessive forces that could lead to mechanical failure or bone loss.
Cemented vs. Screw-Retained Restorations
The method of attaching the crown to the implant or abutment carries clinical implications. Screw-retained crowns fasten directly to the implant or abutment using a small screw accessed through a hole in the crown’s biting surface or back surface. The access hole is then filled with composite material. This approach allows future retrieval if the crown needs repair, adjustment, or if the implant requires examination. No cement enters the gum, eliminating the risk of cement-induced peri-implantitis. However, the screw access hole may compromise esthetics on front teeth.
Cement-retained crowns use dental cement to bond the crown to the abutment, similar to how traditional crowns are attached to natural teeth. This approach provides superior esthetics on front teeth, easier fabrication for angled implants, and potentially lower cost. The significant disadvantage involves cement cleanup. Excess cement that extrudes below the gum line causes peri-implant inflammation and bone loss. Meticulous cement removal technique is essential, and some dentists avoid cement-retained restorations for this reason altogether.
Final Adjustments and Home Care Instructions
Once the crown is fully seated and secured, final occlusal adjustments ensure harmonious function. The crown should feel comfortable and natural. Your bite should feel even with all teeth contacting simultaneously. Any high spots that cause the implant crown to bear excessive force must be eliminated.
The dentist or hygienist provides specific home care instructions for your new implant. Cleaning around an implant requires slightly different technique than natural teeth. Interproximal brushes, water flossers, and specialized implant floss help clean the area where the crown meets the gum. An annual radiographic examination monitors bone levels around the implant. Professional cleanings should use non-metal instruments to avoid scratching the implant abutment surface. With proper care, a well-placed and well-restored dental implant can last decades, potentially a lifetime.
Key Factors That Determine Implant Success
The Importance of Bone Quality and Quantity
| Bone Type | Location | Density | Healing Time | Success Rate |
|---|---|---|---|---|
| Type I | Anterior mandible | Dense cortical | 3-4 months | 97-99% |
| Type II | Posterior mandible | Thick cortical with porous core | 3-4 months | 96-98% |
| Type III | Anterior maxilla | Thin cortical with porous core | 4-6 months | 94-96% |
| Type IV | Posterior maxilla | Minimal cortical, mostly porous | 6 months | 90-93% |
Bone classification, originally described by Lekholm and Zarb, helps clinicians predict healing times and success rates. Dense bone provides excellent primary stability and predictable healing. Soft bone requires longer healing, careful surgical technique, and sometimes wider or longer implants to compensate for reduced density. The posterior maxilla presents the most challenging environment for implant placement due to thin cortical bone, porous medullary bone, and proximity to the maxillary sinus.
The Role of Surgical Precision
Implant placement tolerates very little error. Positioning an implant too close to an adjacent tooth root can damage that tooth. Angling it too far toward the cheek or tongue creates prosthetic challenges and potential bone dehiscence. Placing it too deep risks nerve injury in the lower jaw or sinus perforation in the upper jaw.
Surgical guides fabricated from CBCT data improve precision significantly. These guides translate the digital plan directly to the surgical site, controlling drill position, angulation, and depth. Studies demonstrate that guided surgery reduces positioning errors compared to freehand placement, particularly for less experienced surgeons. However, even the best guide cannot compensate for poor surgical judgment. The surgeon must still evaluate bone quality intraoperatively and adjust the plan if unexpected conditions arise.
Patient Commitment to Oral Hygiene
The finest implant placed by the most skilled surgeon will fail if oral hygiene deteriorates. Peri-implant diseases, mirroring gingivitis and periodontitis around natural teeth, represent the leading cause of late implant failure. Bacterial plaque accumulates on implant surfaces just as it does on teeth. The inflammatory response to this plaque causes peri-implant mucositis, the reversible precursor to peri-implantitis.
Peri-implant mucositis involves inflammation of the soft tissue surrounding the implant without bone loss. It manifests as redness, swelling, and bleeding on probing. Prompt treatment with professional cleaning and improved home care reverses this condition. Untreated, it progresses to peri-implantitis, where inflammation extends to the bone, causing progressive bone loss. Peri-implantitis lesions often progress faster than periodontitis around natural teeth and can be more difficult to treat effectively.
Daily implant care requires commitment. Brushing twice daily with attention to the implant crown margins, interdental cleaning with appropriate tools, and possibly antimicrobial mouth rinses maintain the peri-implant health. Professional maintenance visits every three to six months allow early detection of problems before they become serious.
Potential Risks and How to Minimize Them
Surgical Complications
Every surgical procedure carries risks. Bleeding during or after implant surgery typically remains minimal and stops with pressure. More significant bleeding can occur if a blood vessel is inadvertently damaged, though this remains rare with proper imaging and planning. Infection at the surgical site presents as increasing pain, swelling, and possibly pus discharge several days after surgery. Antibiotics and drainage usually resolve the infection, though severe cases may threaten the implant.
Nerve injury represents one of the most serious implant complications. The inferior alveolar nerve runs through the lower jaw and provides sensation to the lower lip and chin. Damage to this nerve causes numbness, tingling, or pain that may be temporary or permanent. Meticulous planning with CBCT imaging and careful surgical technique virtually eliminate this risk. The mental nerve, branching from the inferior alveolar nerve, exits the lower jaw near the premolars and requires similar protection.
Sinus perforation during upper jaw implant placement creates a communication between the mouth and the sinus cavity. Small perforations often heal spontaneously with precautions against pressure changes. Larger perforations may require surgical repair and delay implant placement. The sinus membrane can be visualized on CBCT, and the surgical plan should account for its position.
Post-Operative Issues and Solutions
| Issue | Typical Onset | Management | When to Contact Your Dentist |
|---|---|---|---|
| Swelling | 24-72 hours post-op | Ice for 48 hours, then heat | If worsening after day 4 |
| Pain | First 3-5 days | Prescribed or OTC analgesics | If severe or increasing after day 3 |
| Bleeding | First 24 hours | Bite on gauze for 30 minutes | If bright red and persistent |
| Bruising | Days 2-7 | Resolves spontaneously | If expanding significantly |
| Suture loosening | Days 5-10 | Usually normal, leave alone | If wound gapes open |
| Numbness | Immediately post-op | Monitor, most resolves | Any numbness after 24 hours |
Post-operative care significantly influences healing comfort and complication risk. Apply ice packs to the cheek in 20-minute cycles for the first 48 hours to minimize swelling. Sleep with your head elevated on multiple pillows the first few nights. Avoid spitting, rinsing vigorously, or drinking through straws, as these actions can dislodge the blood clot and cause a painful dry socket. Stick to soft, cool foods for the first few days. Maintain oral hygiene carefully, avoiding the surgical site with your toothbrush for the first week.
Long-Term Complication Prevention
Late implant complications typically involve either mechanical problems with the restoration or biological problems with the supporting tissues. Screw loosening represents the most common mechanical complication. The retaining screw that holds the abutment or crown can gradually loosen under functional forces. Regular professional examinations include checking screw torque. A loose screw that goes undetected can fracture.
Porcelain fracture on the implant crown occurs occasionally, particularly in patients who grind or clench their teeth. A night guard protects against these destructive forces. Fractured porcelain can sometimes be polished, but replacement is often necessary if the damage is extensive.
Peri-implantitis prevention centers on meticulous oral hygiene and regular professional maintenance. Patients with a history of periodontitis face higher peri-implantitis risk and require more frequent recall intervals. Smoking cessation dramatically reduces risk. Controlling systemic conditions like diabetes supports long-term implant health.
The Complete Timeline: From Consultation to Final Crown
Overview of the Entire Process
The dental implant journey extends over several months for most patients. Understanding this timeline before starting helps align expectations and facilitates planning around work, travel, and life events.
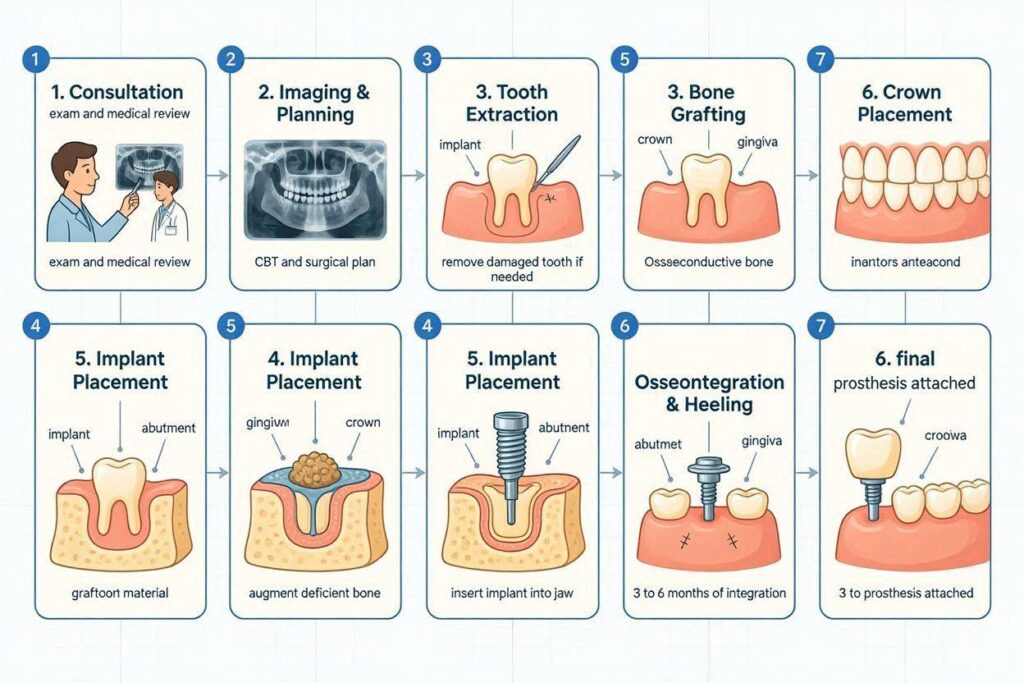
A straightforward single implant in a healthy patient with adequate bone typically follows this schedule. Initial consultation and planning: one to two appointments over two weeks. Any necessary extractions: one appointment with three to six months healing if grafting is performed. Implant surgery: one appointment lasting one to two hours. Osseointegration: three to six months of waiting. Abutment placement: one appointment, possibly requiring two to four weeks tissue healing. Impressions and crown fabrication: two to three appointments over three to four weeks. Crown delivery: one appointment.
The total timeline from start to finish typically spans four to eight months for uncomplicated cases. Bone grafting extends this to eight to twelve months. Complex full-arch cases can extend to twelve to eighteen months.
Variables That Extend or Shorten the Timeline
Several factors modify these standard timelines. Immediate implant placement, where the implant is inserted into the extraction socket at the same appointment as tooth removal, eliminates the separate extraction healing period. This approach works when no infection exists and adequate bone remains after extraction. Immediate loading, where a temporary crown attaches to the implant immediately, eliminates the waiting period for the restoration phase. This requires excellent primary stability and careful case selection.
Conversely, complications extend timelines. Failed osseointegration requires implant removal, site healing for several months, and then reimplantation. Post-operative infection may delay healing and require additional treatment. Uncovering inadequate bone at surgery may necessitate grafting that was not planned, adding months to the process.
Milestone Appointments and Expectations
The initial consultation establishes the roadmap. The surgical appointment delivers the anchor. The healing period builds the foundation. The restorative appointments create the visible result. Understanding each milestone’s purpose and typical duration helps patients navigate the process patiently.
Between surgical and restorative phases, many patients feel a psychological dip. The implant is in place but invisible, and the waiting feels interminable. Recognizing this as a normal part of the journey helps. This period represents active biological healing, not wasted time. The bone is literally fusing to the titanium surface at a microscopic level.
Crown delivery day brings the emotional payoff. Months of appointments, healing, and waiting culminate in a functional, esthetic tooth that feels remarkably like what nature originally provided. Most patients report that the result was worth the wait.
Comparative Cost Analysis
Cost Breakdown by Procedure Component
Dental implant treatment involves multiple procedures, each contributing to the total cost. Understanding this breakdown helps you evaluate treatment plans and insurance coverage.
| Component | Cost Range (USD) | Factors Affecting Cost |
|---|---|---|
| Consultation and imaging | $150 – $600 | CBCT vs. panoramic, specialist vs. general dentist |
| Tooth extraction | $150 – $600 | Simple vs. surgical, location |
| Bone grafting | $400 – $3,000 | Material type, defect size, sinus lift complexity |
| Implant placement | $1,200 – $3,000 | Specialist fees, guided surgery, implant brand |
| Abutment | $300 – $800 | Stock vs. custom, material |
| Crown | $800 – $2,500 | Material, customization, dentist vs. specialist |
| Complete single implant | $3,000 – $6,500 | All-inclusive average |
These ranges reflect United States market prices as of current data. Geographic location significantly impacts cost, with urban coastal areas commanding higher fees than rural regions. Specialist surgeons typically charge more than general dentists performing implant placement. Premium implant brands cost more but offer extensive research backing and long-term warranty programs.
Insurance Coverage Realities
Dental insurance typically classifies implants as a major procedure. Most plans cover a percentage, often 50 percent, up to an annual maximum that may be $1,500 to $2,000. This leaves significant out-of-pocket cost for the patient. Medical insurance may cover portions of implant treatment when tooth loss results from an accident, cancer, or congenital conditions. Coverage varies widely by policy.
Flexible spending accounts and health savings accounts allow pre-tax dollars to pay for implant treatment. Many dental practices offer in-house payment plans or work with third-party financing companies. Some patients choose to travel to dental schools, where supervised students provide treatment at reduced fees, though this extends timelines significantly.
Value Proposition Compared to Alternatives
Dental implants cost more initially than bridges or dentures. A three-unit bridge typically costs $2,500 to $5,000, comparable to a single implant in some cases. However, bridges require preparing adjacent healthy teeth, potentially compromising their long-term health. Bridges also fail over time, with average lifespans of ten to fifteen years before replacement becomes necessary.
Partial dentures cost less, typically $700 to $1,800, but offer inferior function, can damage abutment teeth, and accelerate bone loss in the edentulous area. Full dentures initially cost less than implant-supported prostheses but require periodic relining or replacement as bone resorbs, and they provide significantly reduced chewing function.
When evaluated over decades, implants often prove cost-effective. They preserve bone, protect adjacent teeth, and rarely need replacement when properly maintained. The initial investment purchases a solution designed to be permanent.
“I spent years going from one failing tooth to another. The bridge that replaced my first lost tooth eventually damaged the teeth holding it. Those teeth failed, and I needed more work. Getting implants stopped this destructive cycle. Was it expensive? Yes. But I haven’t had a new dental problem in the area since, and that’s worth everything.” — Margaret, dental implant patient since 2014
Choosing Your Implant Team
Credentials and Experience to Look For
The skill of your implant team influences outcomes more than any other variable. Dental implant placement is not a recognized specialty in general dentistry, though oral surgeons, periodontists, and prosthodontists receive extensive implant training during their residencies.
Oral and maxillofacial surgeons complete four to six years of hospital-based surgical residency after dental school. They manage complex bone grafting, nerve repositioning, and full-mouth reconstruction cases. Periodontists specialize in the supporting structures of teeth and implants, completing three years of residency focused on gum and bone surgery. Prosthodontists specialize in restoring teeth and implants, completing three years of training focused on complex restorative cases.
General dentists can and do place implants successfully. Many pursue extensive continuing education and obtain fellowship credentials from organizations like the International Congress of Oral Implantologists. When evaluating a general dentist for implant surgery, ask about their specific training, number of implants placed annually, and complication rates.
The ideal implant team often involves collaboration between a surgical specialist who places the implant and a restorative dentist who designs and delivers the crown. This team approach leverages each provider’s specific expertise for optimal outcomes.
Questions to Ask During Consultations
Preparing questions before your consultation ensures you gather the information needed to make an informed decision. Ask how many implant procedures the provider performs annually. Inquire about their complication rates and how they manage failures. Request to see before and after photographs of similar cases they have treated.
Ask about the implant system they use and why they chose it. Reputable manufacturers invest heavily in research and provide long-term warranties. Beware of off-brand or generic implant systems that may lack documentation of long-term success. Ask about the laboratory that will fabricate your crown. A skilled ceramist makes a visible difference in the final esthetic result.
Discuss the plan for complications. No honest provider claims zero failures. The important factor is how complications are handled. Will a failed implant be replaced at reduced or no cost? What is the warranty on the implant and crown? Clear answers to these questions build trust.
Red Flags and Warning Signs
Certain practices should raise concern. Beware of providers who pressure you to decide immediately or offer significant discounts for same-day commitment. Quality implant treatment requires thoughtful planning, not impulse decisions. Extremely low fees compared to other local providers may indicate corners being cut in materials, laboratory quality, or sterilization protocols.
Providers who dismiss your questions or rush through consultations may not provide the attention your case deserves. Implant treatment requires ongoing communication over many months. Choose a team you feel comfortable with and who communicates clearly.
Offices that cannot show you their own before and after cases may lack experience. While new practitioners must build their portfolios, you deserve transparency about their experience level. Teaching institutions offer an alternative where supervised residents provide lower-cost treatment, with the trade-off of longer appointments and extended timelines.
Conclusion
Dental implantation follows a structured sequence: comprehensive evaluation and planning, any necessary preparatory procedures like bone grafting, surgical placement of the titanium implant into the jawbone, a multi-month healing period for osseointegration, abutment connection, and finally delivery of the custom-fabricated crown. The complete timeline typically spans four to eight months for straightforward cases, extending to over a year when significant bone reconstruction is required. Success depends on proper patient selection, precise surgical technique, adequate healing time, quality restorative work, and committed long-term maintenance. When these elements align, dental implants provide the most functional and esthetic tooth replacement option available, with documented success rates exceeding 95 percent and the potential to last a lifetime with proper care.
Frequently Asked Questions
How painful is dental implant surgery?
Most patients report less discomfort than expected. The procedure itself is painless due to local anesthesia. Post-operative soreness peaks around day two or three and typically responds well to over-the-counter pain relievers. Many patients return to normal activities the day after surgery.
Can anyone get dental implants?
Most healthy adults qualify, but certain conditions increase risk. Uncontrolled diabetes, active periodontal disease, heavy smoking, and certain medications affect candidacy. Adequate bone volume is essential. A thorough evaluation determines individual suitability.
How long do dental implants last?
Studies document success rates above 90 percent at 15 to 20 years. With excellent oral hygiene and regular professional maintenance, many implants last decades or a lifetime. The crown may need replacement due to wear over time while the implant remains functional.
Is the implant visible once the crown is placed?
No. The implant sits entirely within the jawbone. Only the crown, designed to match your natural teeth, remains visible above the gum line. No one can tell you have an implant.
What happens if the implant fails?
Failed implants are removed, typically with minimal trauma. The site is allowed to heal for several months, often with bone grafting. A new implant can usually be placed successfully. Many providers offer warranties covering implant replacement under certain conditions.
Can I fly after implant surgery?
Most dentists recommend waiting 24 to 48 hours before flying. Cabin pressure changes do not affect the implant itself. The concern involves post-operative swelling and discomfort management during travel. Consult your surgeon for case-specific guidance.
How do I clean my dental implant?
Brush twice daily with a soft toothbrush, paying attention to the crown margins. Use interdental brushes, implant-specific floss, or water flossers to clean around the abutment. Attend professional cleanings every three to six months where non-metal instruments prevent abutment scratching.
Are dental implants safe?
Modern dental implants have an extensive safety record spanning decades. Titanium and zirconia, the materials used, demonstrate excellent biocompatibility. Allergic reactions to titanium are extremely rare. The surgical procedure carries standard surgical risks, all manageable with proper planning and technique.
Additional Resource
American Academy of Implant Dentistry Patient Education
https://www.aaid.com/patient_education/