How Is a Bone Graft Done for Dental Implants?
If you have been told you need a bone graft before getting a dental implant, you might feel a little nervous. That is completely normal. The phrase “bone graft” sounds intense, like something from a medical drama. But in reality, this is a very common, routine procedure that happens in dental offices every single day.
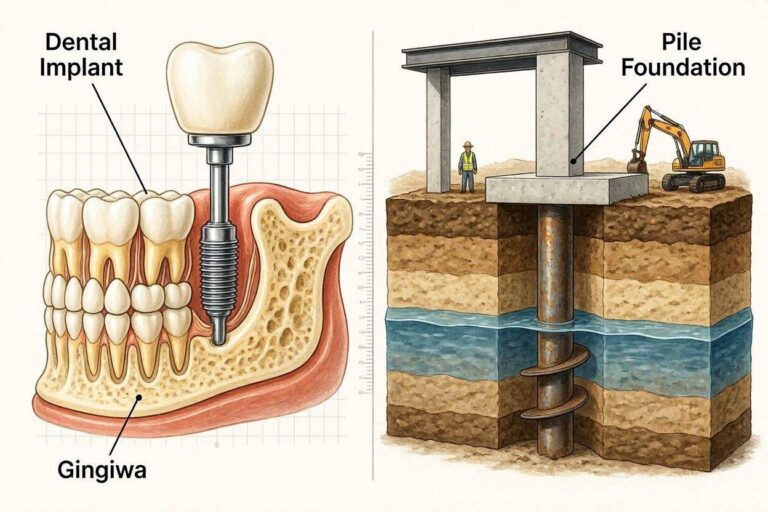
So, how is a bone graft done for dental implants? Simply put, it is a way to rebuild your jawbone so it becomes strong and thick enough to hold an implant securely. Think of it like preparing the soil before planting a tree. Without enough healthy bone, the implant cannot fuse properly. The graft gives your body a scaffold to regrow its own bone over time.
This guide will walk you through everything. No complicated medical terms. No scary stories. Just a realistic, friendly, and detailed look at what happens before, during, and after the procedure. By the end, you will feel confident and informed.
Why Your Jawbone Might Need a Graft First
Before we dive into the actual steps, it helps to understand why healthy bone matters. Dental implants need a certain amount of bone width, height, and density to stay secure. When that bone is missing, the implant would poke through the gum or fail to integrate.
Here are the most common reasons people lose jawbone density:
- Tooth loss. When a tooth is missing for a while, the bone that used to support it starts to shrink. Your body resorbs the tissue because it is no longer needed.
- Periodontal disease. Advanced gum disease eats away at both gum tissue and the underlying bone.
- Injury or trauma. A broken jaw or facial injury can damage bone structure.
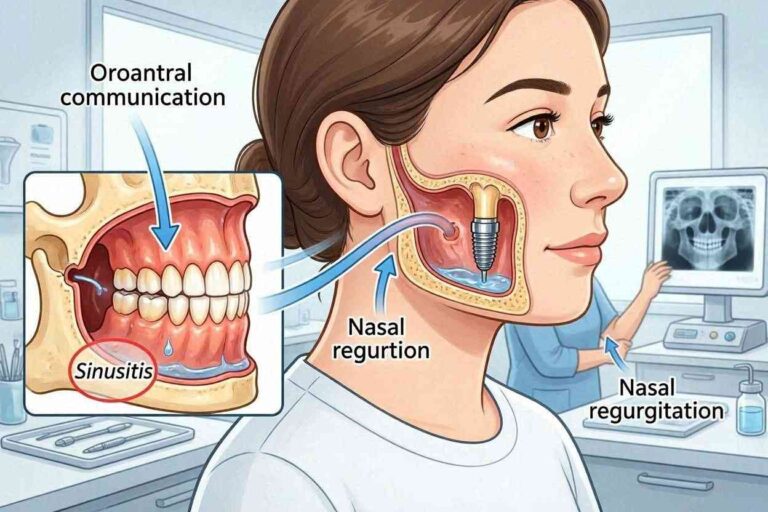
- Sinus growth. In the upper back jaw, the sinus cavity can enlarge over time, leaving very little bone height for implants.
- Long-term denture wear. Dentures resting on the gum line can accelerate bone loss in the ridge below.
Important note: Not everyone needs a bone graft. Many people have enough natural bone for an implant right away. Your dentist will take a 3D scan (CBCT) to measure exactly what you have.
The Main Types of Bone Grafting Materials
To understand how a bone graft is done for dental implants, you first need to know what goes into the graft. The material is not always “bone” in the way you might think. Dentists have several excellent options today.
Here is a quick comparison table to help you see the differences:
| Type of Graft Material | Source | Pros | Cons |
|---|---|---|---|
| Autograft | Your own bone (often from chin or hip) | Natural, fastest healing, very reliable | Requires second surgery site, more discomfort |
| Allograft | Donor human bone (sterilized) | No second surgery, safe, widely available | Slower resorption than autograft |
| Xenograft | Animal bone (usually cow) | Excellent structure, very predictable | Takes longer to remodel into human bone |
| Alloplast | Synthetic lab-made material | No disease risk, unlimited supply, very consistent | Purely synthetic, no natural growth factors |
Most dentists today use a combination of allograft or xenograft with a membrane. It is rare to take bone from your hip for a routine dental implant. That is usually reserved for very large defects.
Realistic perspective: More than 90% of dental bone grafts use donor or animal bone. It is safe, effective, and avoids a second surgical wound.
How Is a Bone Graft Done for Dental Implants? The Step-by-Step Breakdown
Now, let us walk through the actual procedure. Keep in mind that every case is unique. But generally, the surgery follows a predictable flow.
Step 1: The Initial Consultation and Imaging
Before any surgery, your dentist needs a map. You will get a CBCT scan (cone beam computed tomography). This is a special type of X-ray that spins around your head to create a 3D model of your jaw. It shows exactly how much bone you have, where it is missing, and where critical nerves or sinus cavities sit.
During this visit, you will also discuss:
- Your medical history (diabetes, smoking, medications).
- Whether you want sedation or just local anesthesia.
- The timeline for your implant (graft first, then wait, then implant).
Step 2: Anesthesia and Numbing
On the day of the graft, the dentist starts by numbing the area completely. You will receive a local anesthetic like lidocaine. If you feel anxious, you can also ask for oral sedation (a pill) or nitrous oxide (laughing gas). For larger grafts, IV sedation might be an option.
Once you are numb, you should feel pressure but not pain. Many patients say the worst part is the sound of instruments, not the sensation.
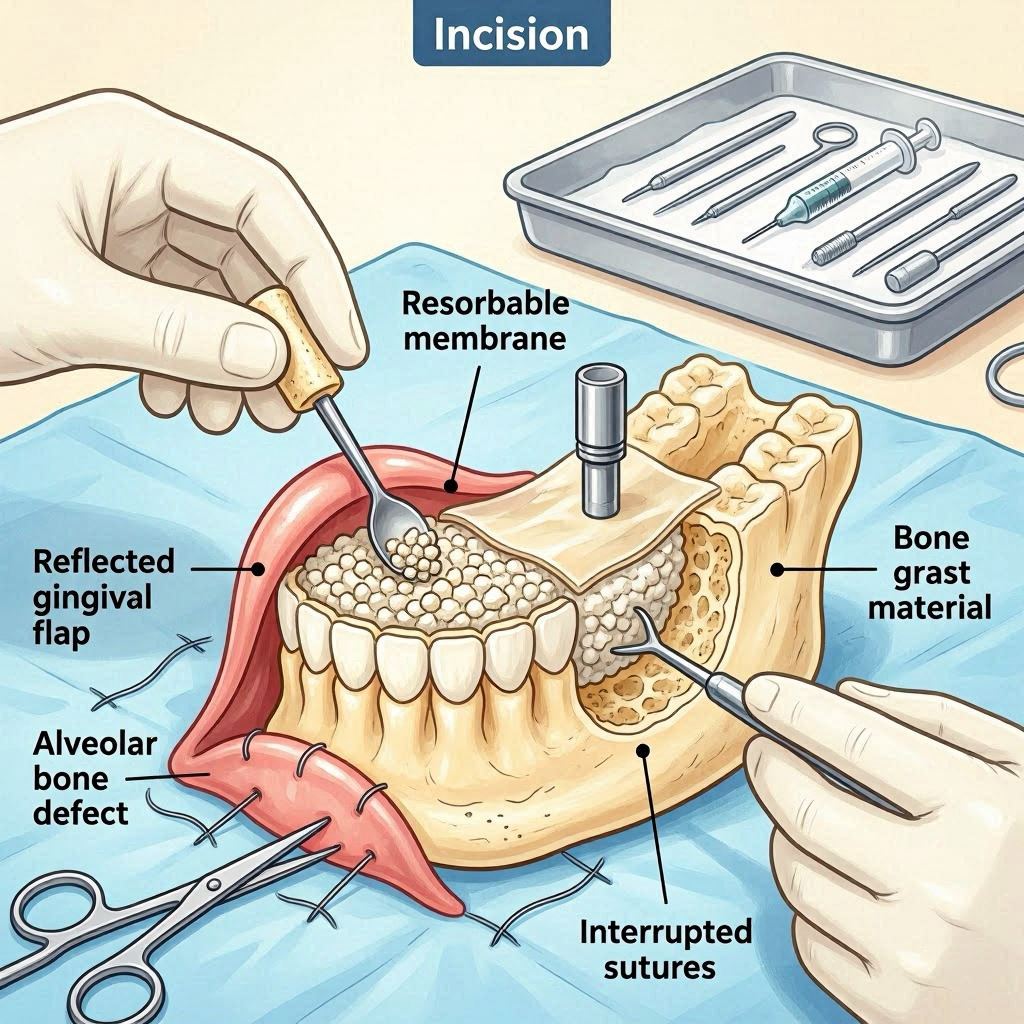
Step 3: Making an Incision in the Gum
The dentist uses a small scalpel to create an incision in your gum tissue. They gently peel back a flap of gum to expose the bare bone underneath. This is called a full-thickness flap. It allows full access to the deficient area.
Step 4: Preparing the Bone Site
Next, the dentist cleans the exposed bone with sterile saline. They may use a small surgical drill or hand scaler to create tiny perforations in the existing bone. Why? Those small holes allow blood and healing cells to flow into the graft material. Think of it like scratching the surface of a seed to help it sprout.
If there is any infected tissue or granulation tissue from an old extraction site, the dentist removes it completely.
Step 5: Placing the Graft Material
Now for the main event. The dentist packs the graft material into the bone defect. Depending on the type of graft, it might look like:
- Granules (small sand-like particles).
- Putty (soft and moldable).
- Block (a solid piece for larger gaps).
They moisten the material with saline or blood from the site to activate it. Then, they press it firmly into place. In many cases, the dentist overfills the area slightly because some material will compact or resorb over time.
Step 6: Covering with a Barrier Membrane
This is a critical step that many people do not know about. A collagen membrane (like a thin, dissolvable sheet) is placed over the graft. The membrane does two things:
- It keeps the graft particles together.
- It prevents fast-growing gum tissue from invading the graft before bone can form.
Without this membrane, the gum would heal over the graft too quickly, and the bone would not regenerate properly.
Step 7: Closing the Incision
The dentist brings the gum flap back over the membrane and graft. They suture it closed with small stitches. Most modern sutures are dissolvable, meaning they break down on their own in 7 to 14 days. Non-dissolvable sutures may need a quick follow-up visit for removal.
Step 8: Immediate Post-Operative Care
Before you leave, the dentist will place gauze over the site to control bleeding. You will receive:
- Written aftercare instructions.
- A prescription for antibiotics (sometimes).
- A recommendation for over-the-counter pain relievers or a stronger prescription.
What you actually feel: Most people describe the first 24 hours as a dull ache, similar to a tooth extraction. Swelling peaks around day two or three. You can manage this with ice packs and ibuprofen.
A Visual Timeline of the Entire Bone Graft Process
To help you see the big picture, here is a simple flowchart timeline. Note that the waiting period is the longest phase.
Day 1: Surgery (45–90 minutes) → Days 2–7: Swelling, soft foods, rest → Days 7–14: Stitches dissolve or removed → Month 1: Graft begins to fuse → Month 3–4: New bone is forming → Month 6–9 (often 6): Graft is mature → Implant placement → Wait another 3–6 months → Final crown
Total journey: 9 to 12 months on average.
Different Types of Bone Grafts for Implants (Not All Are the Same)
When people ask “how is a bone graft done for dental implants,” they often assume there is one standard method. In reality, the technique changes based on where the bone is missing. Here are the four main scenarios.
Socket Graft (Ridge Preservation)
This is the most common and simplest type. It happens right after a tooth extraction. The dentist places graft material directly into the empty socket. This prevents the socket from collapsing and preserves the ridge shape. If you are planning an implant, always ask for a socket graft at the time of extraction. It saves months of healing later.
Block Graft
For larger defects, granules or putty are not enough. The dentist may use a solid block of bone (usually donor bone) and fix it to your existing jaw with titanium screws. Over time, your bone grows into the block and replaces it. The small screws are either removed later or left in place.
Sinus Lift (Sinus Augmentation)
This is a specialized graft for the upper back jaw (molar area). The maxillary sinus sits just above your premolar and molar roots. If that sinus is too low, there is zero room for an implant. During a sinus lift, the dentist accesses the sinus membrane from the side of your jaw, gently lifts it up, and packs graft material into the space below. This creates new bone height.
Ridge Expansion
Sometimes the jawbone is wide enough in height but too narrow in width. The dentist uses special tools to split the ridge slightly apart and packs graft material into the gap. This expands the ridge horizontally.
What the Healing Process Really Looks Like (Week by Week)
Healing is where most people have unrealistic expectations. They think the graft works overnight. It does not. Bone regeneration is slow, and patience is your best friend.
Week 1: The Inflammatory Phase
Your body sends blood and immune cells to the graft site. You will have swelling, redness, and some discomfort. Small pieces of graft material might escape from the incision (this is normal but call your dentist if it is a lot). Stick to a cold soft food diet: yogurt, smoothies, mashed potatoes, scrambled eggs.
Weeks 2 to 4: The Proliferative Phase
New blood vessels grow into the graft. The swelling is gone. You can start eating slightly firmer foods, but avoid chewing directly on the graft site. The graft feels hard to your tongue, but that is the material, not new bone yet.
Months 2 to 4: The Remodeling Phase
Your body’s osteoclasts (bone-eating cells) break down the graft particles slowly. At the same time, osteoblasts (bone-building cells) lay down new living bone. This is a silent, invisible process. You will not feel anything happening.
Months 4 to 6 (or longer): Maturation
The graft now looks and acts like natural bone on a CT scan. Your dentist can place the implant directly into the grafted area. The new bone will continue to strengthen for up to a year.
Important reality check: Smoking dramatically slows this timeline. If you smoke, your graft may take twice as long to heal, or it may fail completely. Many surgeons will not perform a graft on active smokers.
Success Rates, Risks, and Honest Complications
No surgery is 100% risk-free. But dental bone grafts have a very high success rate when done correctly.
| Factor | Success Rate / Risk Level |
|---|---|
| Small socket graft (non-smoker) | 95–98% |
| Larger block graft or sinus lift | 85–92% |
| Graft failure due to infection | 3–5% |
| Graft failure due to smoking | 15–30% higher risk |
| Nerve injury (very rare with CBCT planning) | <1% |
Common but minor issues:
- Granule loss: A few grains of graft material come through the stitches. Usually harmless.
- Membrane exposure: The collagen membrane pokes through the gum. Often heals on its own.
- Prolonged swelling: A small reaction that resolves with time.
Serious but rare issues:
- Infection requiring graft removal. This happens in less than 2% of cases.
- Complete graft resorption. Your body breaks down the graft faster than it lays new bone.
- Sinus complications (for sinus lifts). Usually minor sinus congestion.
How Much Does a Bone Graft Cost in Real Terms?
Let us talk numbers. Grafting adds a significant cost to an implant. But not getting a graft when you need one is a waste of money because the implant will fail.
Here are typical US private practice ranges (without insurance):
| Type of Graft | Typical Cost (per site) |
|---|---|
| Socket graft (simple) | 300–800 |
| Small particulate graft + membrane | 600–1,200 |
| Sinus lift (one side) | 1,500–3,000 |
| Block graft | 1,200–2,500 |
| Ridge expansion | 800–1,800 |
Most dental insurance does not cover bone grafts for implants because they consider it a surgical preparatory step. However, if the graft is needed due to trauma or tumor removal, insurance may help. Always ask your dentist for a pretreatment estimate.
Money-saving tip: Some dentists include the socket graft in the extraction fee if you commit to the implant. Ask politely.
Bone Graft vs. Implant Placement: Two Separate Surgeries
This is the most misunderstood part of the entire process. A bone graft and an implant are never the same procedure (except in rare, advanced “immediate implant with graft” cases). Usually, you will have:
- Surgery #1: Bone graft. Heal 4–9 months.
- Surgery #2: Implant placement. Heal 3–6 months (osseointegration).
- Surgery #3 (optional): Uncover the implant and place a healing abutment.
- Final step: Attach the crown.
That means three visits for surgery, plus checkups. Do not let this scare you. The discomfort is mild for each one, and you are not bedridden. Most people go back to work the next day after a graft or implant.
Preparing for Your Bone Graft Surgery: A Checklist
Good preparation makes healing smoother. Here is a practical list:
- Arrange a ride if you are having IV sedation.
- Fill your prescriptions for antibiotics and pain meds before surgery day.
- Buy soft foods for the first week (soup, pudding, protein shakes, applesauce).
- Get ice packs (two so you can rotate them).
- Stop smoking at least two weeks before (ideally longer).
- Tell your dentist about any bisphosphonate medications (osteoporosis drugs like Fosamax).
- Wash your mouth with a prescribed chlorhexidine rinse the night before.
Day of Surgery: What to Expect at the Dental Office
Let us paint a realistic picture. You arrive at the dental office. You sign a consent form. A dental assistant takes you to a treatment room and places a blood pressure cuff on your arm. The dentist reviews your scan one last time. You get your anesthesia. Then:
- You hear the high-pitched sound of a surgical drill (this is normal).
- You feel pushing and pressure, like someone pressing firmly on your jaw.
- You smell a faint burnt odor if a drill is used (this is bone dust and harmless).
- The entire procedure lasts 45 minutes to 1.5 hours depending on complexity.
- You walk out with a gauze pad in your mouth.
Direct quote from a real patient (paraphrased for privacy): “I was terrified before my sinus lift. But honestly, getting a filling is more annoying because you have to keep your mouth open. The graft was over before I knew it.”
Post-Operative Instructions That Actually Matter
Following these instructions doubles your chance of success. Ignoring them triples your risk of failure.
Do’s (First 7 days)
- Apply ice 20 minutes on, 20 minutes off for the first 24 hours.
- Sleep with your head elevated (use two pillows).
- Rinse very gently with warm salt water after 24 hours (no spitting, let it fall out).
- Take all antibiotics as prescribed even if you feel fine.
- Brush your other teeth normally but avoid the graft site.
Don’ts
- No spitting, sucking through a straw, or blowing your nose (for sinus lifts) for 2 weeks. The pressure can dislodge the graft.
- No crunchy, spicy, or hot foods for the first week.
- No touching the area with your finger or tongue.
- No vigorous exercise for 3 to 5 days (elevated blood pressure causes bleeding).
- No smoking or vaping for at least 2 weeks (but ideally until the implant is done).
When to Call Your Dentist Immediately
- Bleeding that does not stop with firm gauze pressure for 30 minutes.
- Severe pain that medication does not touch.
- Swelling that gets worse after day 3 instead of better.
- A fever over 101°F (38.3°C).
- A bad taste or pus coming from the site (sign of infection).
How Do You Know If Your Bone Graft Is Working?
You cannot see the graft. You cannot feel it healing. So how do you know? The answer is time and imaging. At the 4 to 6 month mark, your dentist will take a new CBCT scan. The radiologist compares it to your pre-op scan. They look for:
- Increased bone density (brighter white on the scan).
- Integration of graft particles into the original bone.
- No radiolucency (dark spots that would indicate a non-union).
If the scan looks good, you proceed to implant placement. If the graft is partially successful, you may need a second, smaller graft.
Frequently Asked Questions (FAQ)
1. Does a bone graft hurt more than an extraction?
Most people say no. The discomfort is very similar. The first 48 hours are the most uncomfortable, but over-the-counter painkillers usually manage it well.
2. Can I get a bone graft and an implant on the same day?
Rarely. This is called an “immediate implant with simultaneous grafting.” It works only when you have at least 50% of your natural bone left. Most patients are not candidates.
3. How long after a bone graft can I get the implant?
Typically 4 to 9 months. Front teeth may heal faster (4 months). Back teeth and sinus lifts often need 6 to 9 months.
4. What happens if a bone graft fails?
The graft material either gets infected and removed, or your body resorbs it without forming new bone. You would then need a second graft using a different material or technique.
5. Is a bone graft worth the extra time and money?
Absolutely—if you truly need it. Placing an implant into insufficient bone guarantees failure. A failed implant is much more expensive and traumatic than a successful graft.
6. Can my body reject a bone graft?
No, because most graft materials are not living tissue. Your body does not “reject” them like an organ transplant. It either remodels them or fails to remodel them. True allergy is extraordinarily rare.
Additional Helpful Resource
For a deeper dive into the science of bone healing and to see real CBCT scan comparisons before and after grafting, visit the American Association of Oral and Maxillofacial Surgeons patient education section.
👉 AAOMS Patient Resources – Bone Grafting for Implants (Replace with actual live link on your site)
Conclusion
So, how is a bone graft done for dental implants? It is a predictable, step-by-step surgical process where a dentist adds bone-like material to a deficient jaw, covers it with a membrane, and waits for your body to transform it into living bone. The procedure itself is less intimidating than most people imagine, but the healing requires patience. If you need a graft, do not skip it. A successful graft leads to a successful implant, and a successful implant can last a lifetime.
Final Summary
A dental bone graft rebuilds lost jawbone using donor, animal, or synthetic material placed under your gum. The surgery takes about an hour, followed by 4–9 months of healing before your implant can be placed. With proper aftercare, success rates exceed 90%, making this a safe and worthwhile step toward a permanent tooth replacement.
Disclaimer: This article is for informational purposes only and does not constitute medical advice. Always consult with a licensed dentist or oral surgeon to discuss your specific case. Every patient’s anatomy, healing capacity, and medical history are unique.